JSX記法
import React from "react";
import ReactDom from "react-dom";
が必要です。
JavaScriptの中でHTMLのタグを書いていく記法です。
import React from "react";
import ReactDom from "react-dom";

const App = () => {
  return (
    //<React.Fragment>
    <>
      <h1>Hello</h1>
      <p>You</p>
    </>
    //</React.Fragment>
  );
};
returnしていくHTMLの内容は、1つのタグで囲わなければいけません。
<React.Fragment>は、画面に何もレンダリングされません。エラー回避のためだけに
タグが欲しい時はうってつけです。
さらに<React.Fragment>を省略して、<>でも大丈夫です。
コンポーネント化
component = 成分、部品、構成要素
import = 輸入、入力
export = 輸出、移出
HTMLをindex.jsファイルに全て書いてしまうと、コードがカオス化するので、
コンポーネントとして切り分ける。
jsxファイルに「〜をexportする」というように書き、
index.jsファイルで「〜から〜をimportする」という記述をする。
import React from "react";

const App = () => {
  return (
    <>
      <h1>Hello</h1>
      <p>You</p>
    </>
  );
};

export default App;
import React from "react";
import ReactDom from "react-dom";
import App from "./App";

ReactDom.render(<App />, document.getElementById("root"));
コンポーネントの命名規則はパスカルケースで書くことです。
先頭が大文字で始まり、単語の区切りを大文字とする変数名の付け方を
「パスカルケース」と呼びます。
イベントやstyle
イベント
onClick={ }部分はJavaScriptとして認識されます。
その中に関数名を書きます。
import React from "react";
const App = () => {
const onClickBtn = () => alert("こんにちは");
return (
<>
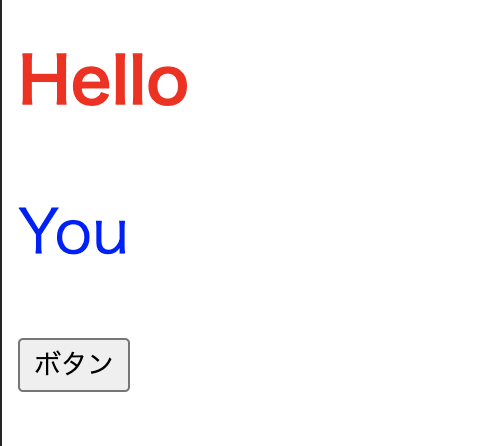
<h1>Hello</h1>
<p>You</p>
<button onClick={onClickBtn}>ボタン</button>
</>
);
};
export default App;
style
<h1 style={{ color: "red" }}>Hello</h1>
のように直接オブジェクトを書くか、
const contentStyle = {
color: "blue",
fontSize: "30px"
};
<p style={contentStyle}>You</p>
のようにオブジェクトの変数を定義してそれを使う。
import React from "react";

const App = () => {
  const onClickBtn = () => alert();
  const contentStyle = {
    color: "blue",
    fontSize: "30px"
  };
  return (
    <>
      <h1 style={{ color: "red" }}>Hello</h1>
      <p style={contentStyle}>You</p>
      <button onClick={onClickBtn}>ボタン</button>
    </>
  );
};

export default App;
Props
Propsとは、コンポーネントに渡す引数のようなものです。
コンポーネントに対して、動的に変更したい部分をPropsとして受け取ることで、
コンポーネントを使い回して効率よく書けます。
特定の名詞を付けて渡す
import React from "react";
import ColorfulMessage from "./components/ColorfulMessage";

const App = () => {
  const onClickBtn = () => alert();
  return (
    <>
      <h1 style={{ color: "red" }}>Hello</h1>
      <ColorfulMessage color="blue" message="You" />
      <ColorfulMessage color="pink" message="Are" />
      <button onClick={onClickBtn}>ボタン</button>
    </>
  );
};

export default App;
import React from "react";

const ColorfulMessage = (props) => {
  const contentStyle = {
    color: props.color,
    fontSize: "30px"
  };
  return <p style={contentStyle}>{props.message}</p>;
};

export default ColorfulMessage;

タグで囲った中身をchildrenとして渡す
出力結果は一緒です。
import React from "react";
import ColorfulMessage from "./components/ColorfulMessage";

const App = () => {
  const onClickBtn = () => alert();
  return (
    <>
      <h1 style={{ color: "red" }}>Hello</h1>
      <ColorfulMessage color="blue">You</ColorfulMessage>
      <ColorfulMessage color="pink">Are</ColorfulMessage>
      <button onClick={onClickBtn}>ボタン</button>
    </>
  );
};

export default App;
import React from "react";

const ColorfulMessage = (props) => {
  const contentStyle = {
    color: props.color,
    fontSize: "30px"
  };
  return <p style={contentStyle}>{props.children}</p>;
};

export default ColorfulMessage;
分割代入でスッキリさせる
import React from "react";

const ColorfulMessage = (props) => {
  const { color, children } = props;
  const contentStyle = {
    color,
    fontSize: "30px"
  };
  return <p style={contentStyle}>{children}</p>;
};

export default ColorfulMessage;
JavaScriptでは、color: color;のように、オブジェクトでプロパティ名とその値の名前が
一緒の場合、color,と省略できます。
State
Stateは、各コンポーネントが持っている可変の状態のことを指します。
条件によって動的に変わる部分をStateとして定義することで、
様々な状態の画面を表示していくことができるようになります。
↓const [num, setNum] = useState(0);
[ ]
1つ目にStateの変数名、2つ目にStateを更新していく関数名を書きます。
( )
初期値を設定できます。
import React, { useState } from "react";
import ColorfulMessage from "./components/ColorfulMessage";

const App = () => {
  const onClickCountUp = () => {
    setNum(num + 1);
  };
  const [num, setNum] = useState(0);
  return (
    <>
      <button onClick={onClickCountUp}>カウントアップ</button>
      <p>{num}</p>
    </>
  );
};

export default App;

このように、コンポーネント内で動的に変わる部分は、
useStateで定義して、変数・更新関数・初期値を設定していきます。
再レンダリングの副作用解決
useEffect
useEffectの第2引数に、[変数]を渡すと、
その変数が変化したときだけ、関数内の処理を走らせる、といったことができます。
  const [faceShowFlag, setFaceShowFlag] = useState(false);
  const onClickCountUp = () => {
    setNum(num + 1);
  };

  const onClickSwitchShowFlag = () => {
    setFaceShowFlag(!faceShowFlag);
  };

  useEffect(() => {
    if (num > 0) {
      if (num % 3 === 0) {
        faceShowFlag || setFaceShowFlag(true);
      } else {
        faceShowFlag && setFaceShowFlag(false);
      }
    }
  }, [num]);