サマリ
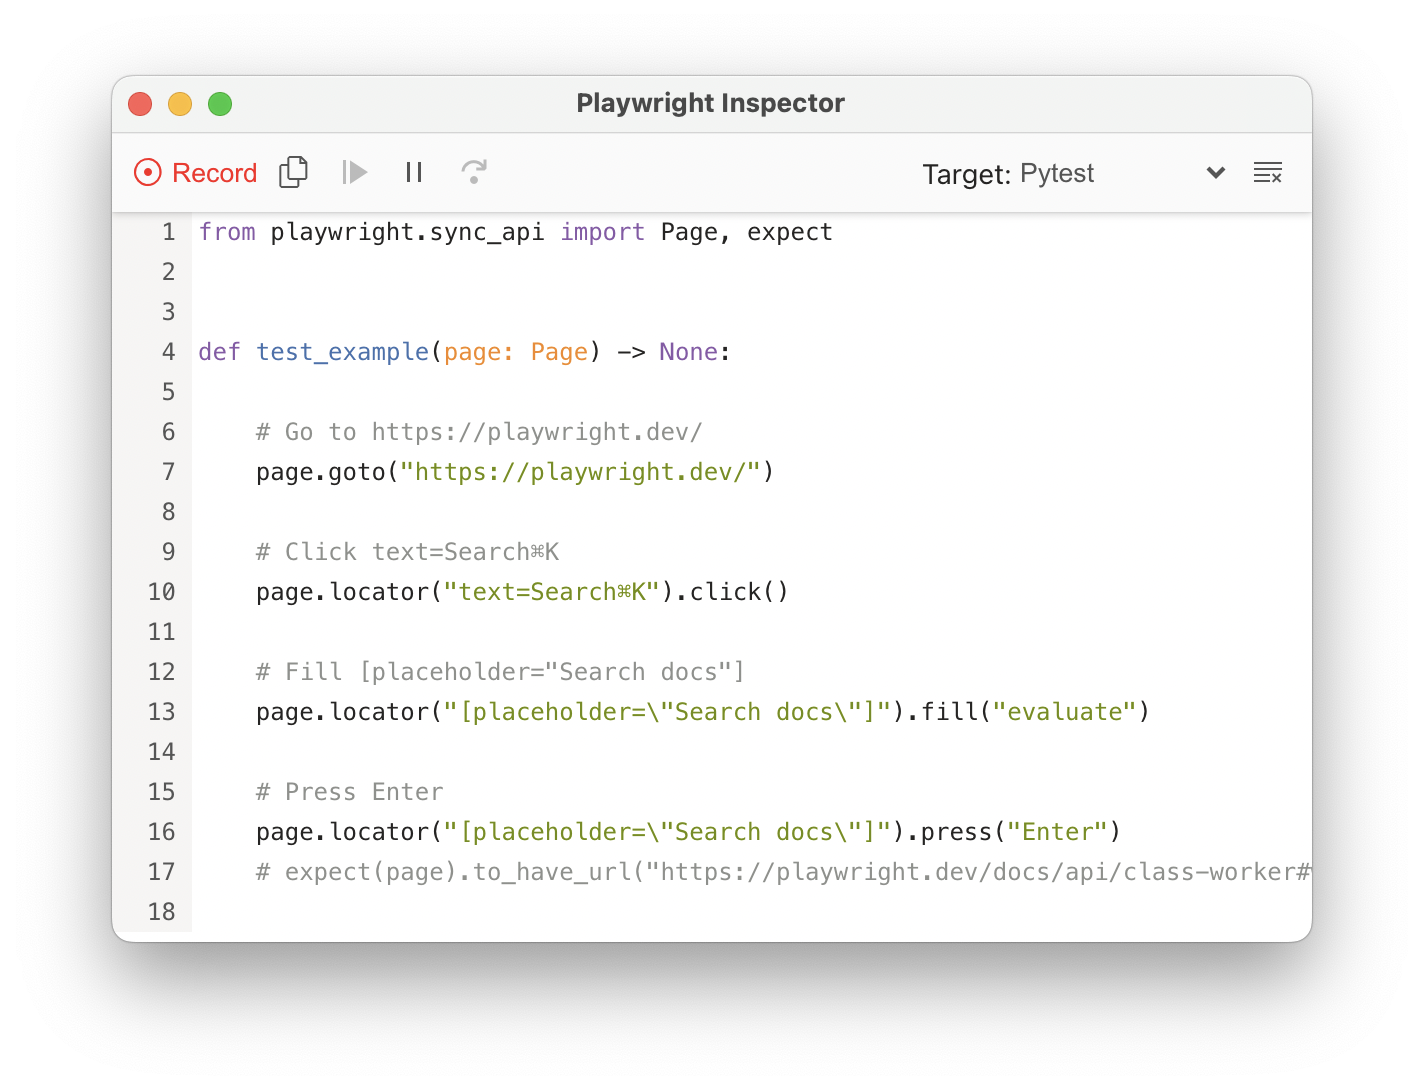
Playwright for PythonのVer.1.22からPytestコードが生成(codegen)できるようになっています。
本記事ではPlaywrightのインストールからPytestコードの生成までを試します。
インストール
pip install playwright pytest-playwright
playwright install
クイックスタート
シェル上で下記コマンドを実行してください。
playwright codegen -o <file name> --target pytest [browser-options] [url]
ヘルプは以下になります。(--targetの説明に関してはアップデートされていない模様)
> playwright codegen --help
Usage: playwright codegen [options] [url]

open page and generate code for user actions

Options:
  -o, --output <file name>     saves the generated script to a file
  --target <language>          language to generate, one of javascript, test,
                               python, python-async, csharp (default: "python")
  -b, --browser <browserType>  browser to use, one of cr, chromium, ff, firefox, wk,
                               webkit (default: "chromium")
  --channel <channel>          Chromium distribution channel, "chrome",
                               "chrome-beta", "msedge-dev", etc
  --color-scheme <scheme>      emulate preferred color scheme, "light" or "dark"
  --device <deviceName>        emulate device, for example  "iPhone 11"
  --geolocation <coordinates>  specify geolocation coordinates, for example
                               "37.819722,-122.478611"
  --ignore-https-errors        ignore https errors
  --load-storage <filename>    load context storage state from the file, previously
                               saved with --save-storage
  --lang <language>            specify language / locale, for example "en-GB"
  --proxy-server <proxy>       specify proxy server, for example
                               "http://myproxy:3128" or "socks5://myproxy:8080"
  --proxy-bypass <bypass>      comma-separated domains to bypass proxy, for example
                               ".com,chromium.org,.domain.com"
  --save-storage <filename>    save context storage state at the end, for later use
                               with --load-storage
  --save-trace <filename>      record a trace for the session and save it to a file
  --timezone <time zone>       time zone to emulate, for example "Europe/Rome"
  --timeout <timeout>          timeout for Playwright actions in milliseconds
                               (default: "10000")
  --user-agent <ua string>     specify user agent string
  --viewport-size <size>       specify browser viewport size in pixels, for example
                               "1280, 720"
  -h, --help                   display help for command

Examples:

  $ codegen
  $ codegen --target=python
  $ codegen -b webkit https://example.com
使い方詳説
まずはデフォルトのChromiumで実行してみます。
テスト対象はテスト自動化練習サイト「HOTEL PLANISPHERE」です。
下記コマンドを実行するとブラウザとPlaywright Inspectorが起動します。
playwright codegen -o tests/test_chromium.py --target pytest https://hotel.testplanisphere.dev/
Recordボタンが赤になった状態でブラウザ操作をすると自動でPytestのコードが記載されていきます。
Recordを停止するとファイルが自動で保存されます。
またRecordを停止するとInspector機能が使えます。
Exploreボタンを押してブラウザ上の要素クリックをするとセレクターが取得できます。
使い方はこれだけ。終了したいときは起動したブラウザを閉じてください。
ブラウザを変更したいとき
Chromium以外にも、Webkit(Safari), Firefox, Chrome, Edgeでも一応起動できます。
ブラウザを変えたいときは以下のようにオプションを指定してください。
※なお、codegen用途においてはchromiumで実施すれば十分かと思います。
playwright codegen -b webkit -o tests/test_safari.py --target pytest https://hotel.testplanisphere.dev/
playwright codegen -b firefox -o tests/test_firefox.py --target pytest https://hotel.testplanisphere.dev/
playwright codegen --channel chrome -o tests/test_chrome.py --target pytest https://hotel.testplanisphere.dev/
playwright codegen --channel msedge -o tests/test_edge.py --target pytest https://hotel.testplanisphere.dev/
おまけ: デバッガとしての利用
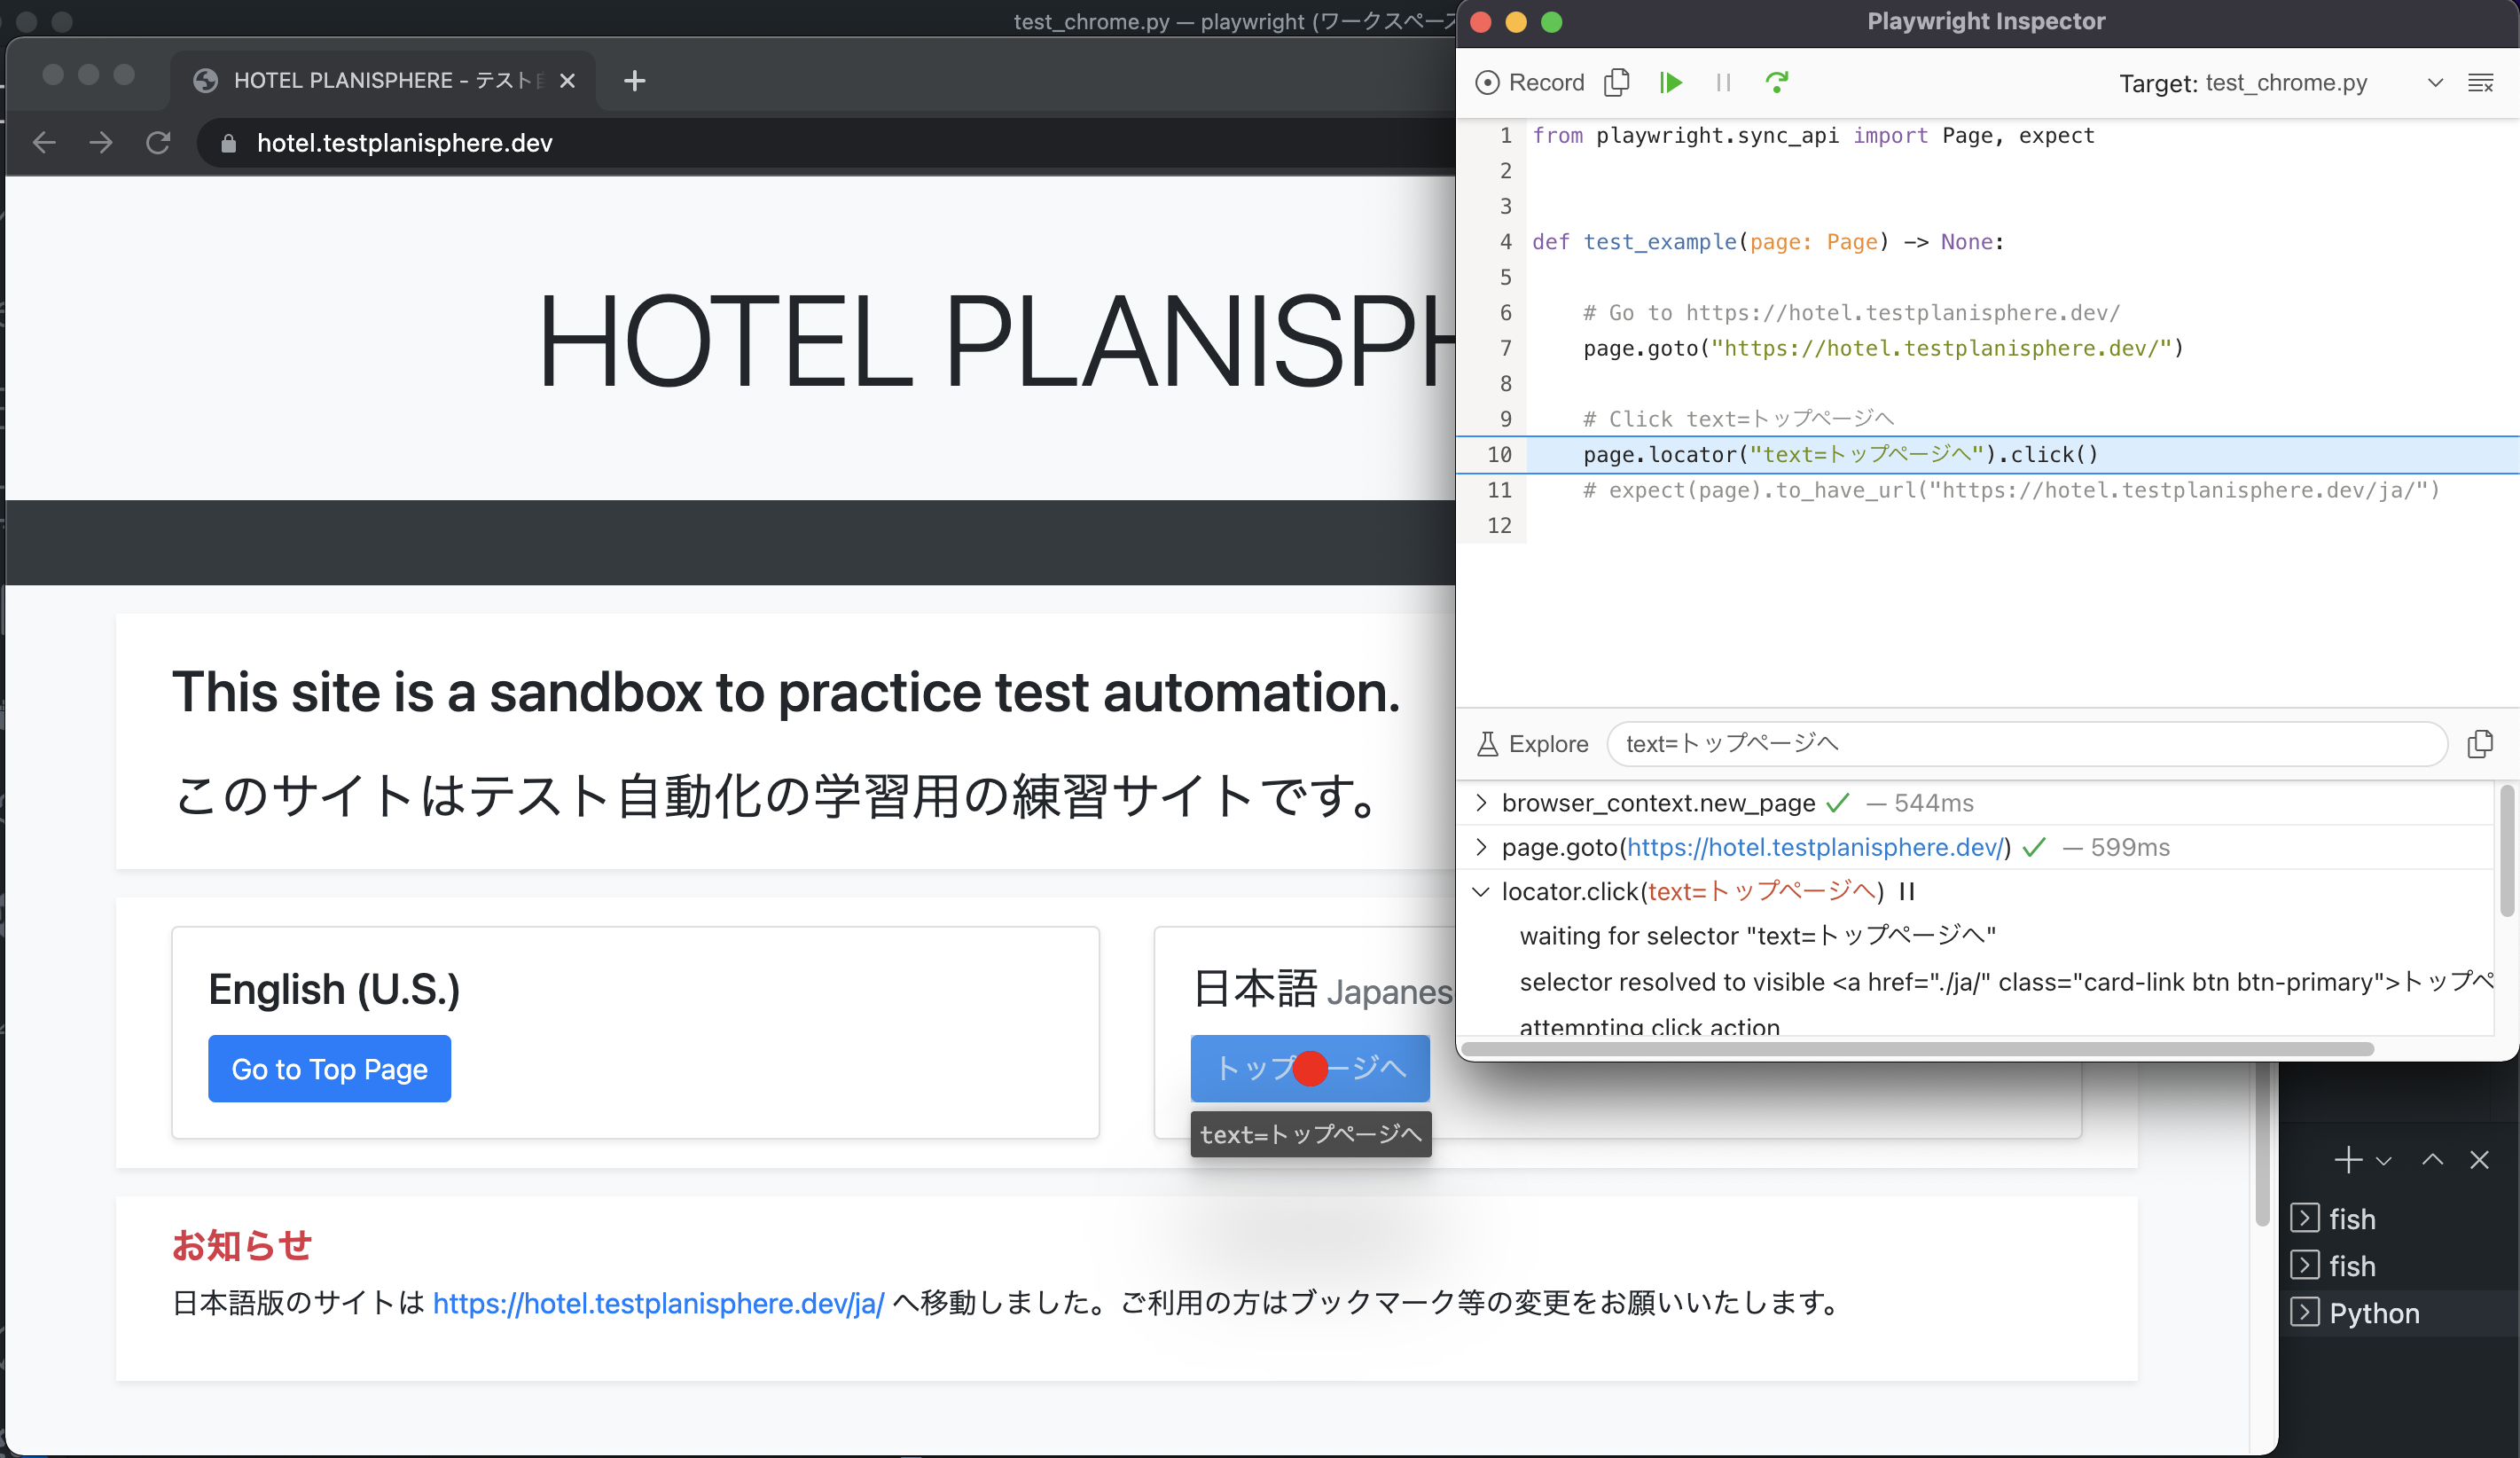
今回はPlaywright Inspectorをcodegenモードで起動しましたが、デバッガとして起動することもできます。
Playwright Inspectorをデバッガとして起動する場合は、環境変数PWDEBUGに1をセットした状態でスクリプトを実行してください。
PWDEBUG=1 pytest tests/test_chromium.py
上記を実行するとブラウザとInspectorが開きます。
codegenモードではロックされていた最上部のステップ実行機能が開放されていますので、これを使いながらデバッグをしてください。
操作対象の要素が赤丸等で見やすく表示されます。
まとめ
自分でコード書くよりも早くてキレイでした。みんなPlaywright使おう(布教)


