Pythonを使用してモザイクアートを作成する方法
モザイクアートは、小さな画像を組み合わせて画像を構築する技術です。今回はPythonを使用してモザイクアートを作成する方法について説明します。小さな画像の収集、類似度スコアの計算、最終的なモザイク出力の生成プロセスをカバーします。
はじめに
以前、ぺろりん先生のブログから画像を抽出する方法を紹介しました。
https://qiita.com/yaanai/items/f24e95f4e82df86b597b
そこで、今回はここで集めた画像を使ってモザイクアートを作ります。
コードとその解説はchatGPTで作成しました。
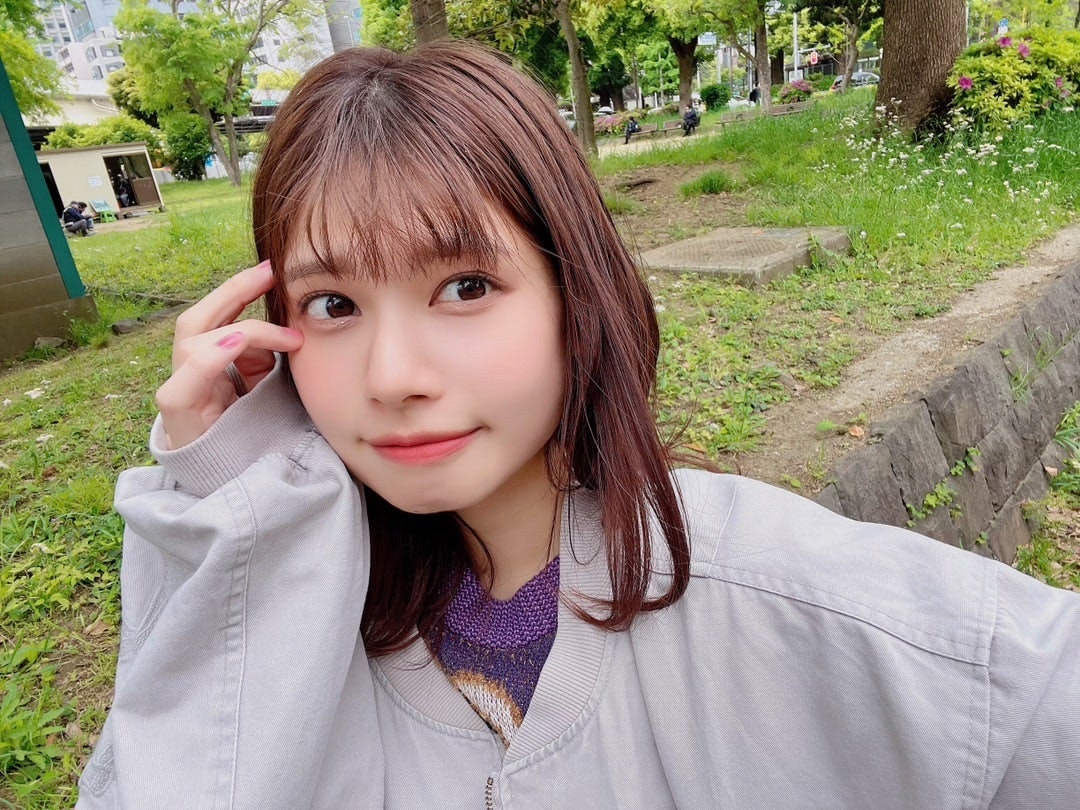
オリジナルの画像はこちらです。
前提条件
始める前に、次のものが必要です:
- コンピュータにインストールされたPython
- Pythonライブラリ:PIL、NumPy、OpenCV(pipを使用してインストール:
pip install pillow numpy opencv-python)
小さな画像の収集
モザイクを作成するためには、建築ブロックとして使用する小さな画像のコレクションが必要です。これらの画像をコンピュータ上の特定のフォルダに保存してください。今回はぺろりん先生のブログから収集した4700枚の画像を使用しています。
コードの理解
モザイクアートの作成には、次のステップがあります:
-
メイン画像の読み込み:まず、モザイクを作成するためのメイン画像を読み込みます。画像は、写真やアートワークなど、どんなものでも構いません。
-
メイン画像のリサイズ:出力サイズに応じて、メイン画像のサイズを最終的なモザイクの寸法に合わせてリサイズします。
-
小さな画像の収集:指定したフォルダから小さな画像を収集します。これらの画像がモザイクの構築に使用されます。
-
類似度スコアの計算:メイン画像の各ブロックと利用可能な小さな画像の間の類似度スコアを計算します。これにより、各ブロックの最適なマッチング画像を見つけることができます。
-
最適なマッチング画像の選択:類似度スコアに基づいて、各ブロックに対して上位N個のマッチング画像を選択します。このサブセットから、最適なマッチング画像としてランダムに選択します。
-
モザイクの作成:最適なマッチング画像を対応するブロックに貼り付け、徐々にモザイクを構築します。
-
出力画像の保存:最終的に生成されたモザイク画像を指定した出力パスに保存します。
パラメータの調整
モザイク生成プロセスをカスタマイズするために、以下のパラメータをコードで調整できます:
-
block_size:モザイクの各ブロックのサイズを決定します。必要な詳細レベルを達成するために調整してください。 -
num_images_per_block:各ブロックに考慮する小さな画像の数を制御します。この値を増やすと、モザイクにバラエティが追加されます。 -
output_size:最終的なモザイクの幅と高さを指定します。より大きなまたは小さなモザイクを作成するために調整してください。
import os
from PIL import Image
import random
import numpy as np
import cv2

def compute_image_similarity(img1, img2):
    # Compute image similarity metric (e.g., Mean Squared Error, Structural Similarity Index, etc.)
    # You can use libraries like scikit-image or OpenCV to compute image similarity metrics
    # Here's an example using Mean Squared Error (MSE)
    mse = np.mean((np.array(img1) - np.array(img2)) ** 2)
    return mse

def create_mosaic(input_folder, output_path, block_size, num_images_per_block, output_size):
    # Load the main image
    main_image = Image.open('path/to/main/image.jpg')

    # Resize the main image to the desired output size
    main_image = main_image.resize(output_size)

    # Calculate the number of blocks in both dimensions
    num_blocks_horizontal = int(main_image.width / block_size)
    num_blocks_vertical = int(main_image.height / block_size)

    # Create a new blank image for the output mosaic
    output_image = Image.new('RGB', (main_image.width, main_image.height))

    # Get a list of image files in the input folder
    image_files = [f for f in os.listdir(input_folder) if f.endswith('.jpg') or f.endswith('.png')]

    # Resize images to match the block size
    images = []
    for filename in image_files:
        image_path = os.path.join(input_folder, filename)
        image = Image.open(image_path)
        image = image.resize((block_size, block_size))
        images.append(image)

    for i in range(num_blocks_vertical):
        for j in range(num_blocks_horizontal):
            # Calculate the coordinates of the current block
            left = j * block_size
            upper = i * block_size
            right = left + block_size
            lower = upper + block_size

            # Get the corresponding block from the main image
            main_block = main_image.crop((left, upper, right, lower))

            # Calculate similarity scores between the main block and all smaller images
            similarity_scores = []
            for small_image in images:
                similarity = compute_image_similarity(main_block, small_image)
                similarity_scores.append(similarity)

            # Sort the similarity scores and select the top N indices
            top_indices = np.argsort(similarity_scores)[:num_images_per_block]

            # Select the top matching smaller images for the block
            best_match_images = [images[idx] for idx in top_indices]

            # Choose a random smaller image from the top matches
            best_match_image = random.choice(best_match_images)

            # Paste the best matching smaller image onto the output image
            output_image.paste(best_match_image, (left, upper, right, lower))

    # Resize the output image to the desired output size
    output_image = output_image.resize(output_size)

    # Save the output image
    output_image.save(output_path)

# Example usage
input_folder = 'path/to/input/folder'  # Folder containing smaller images
output_path = 'path/to/output/mosaic.jpg'
block_size = 30
num_images_per_block = 5  # Number of images to consider per block
output_size = (2160,1620)  # Output mosaic size (width, height)

create_mosaic(input_folder, output_path, block_size, num_images_per_block, output_size)
コードの実行
-
このチュートリアルで提供されたコードをコピーし、Pythonファイルに保存します(例:
mosaic.py)。 -
必要に応じて、入力フォルダ、出力パス、パラメータを変更します。
-
コマンドを使用してコードを実行します:
python mosaic.py。 -
生成されたモザイク画像は、指定した出力パスに保存されます。
結果
まずはnum_images_per_blockを15に固定して、block_sizeを振り細かく分割しました。
結果が以下の通り。
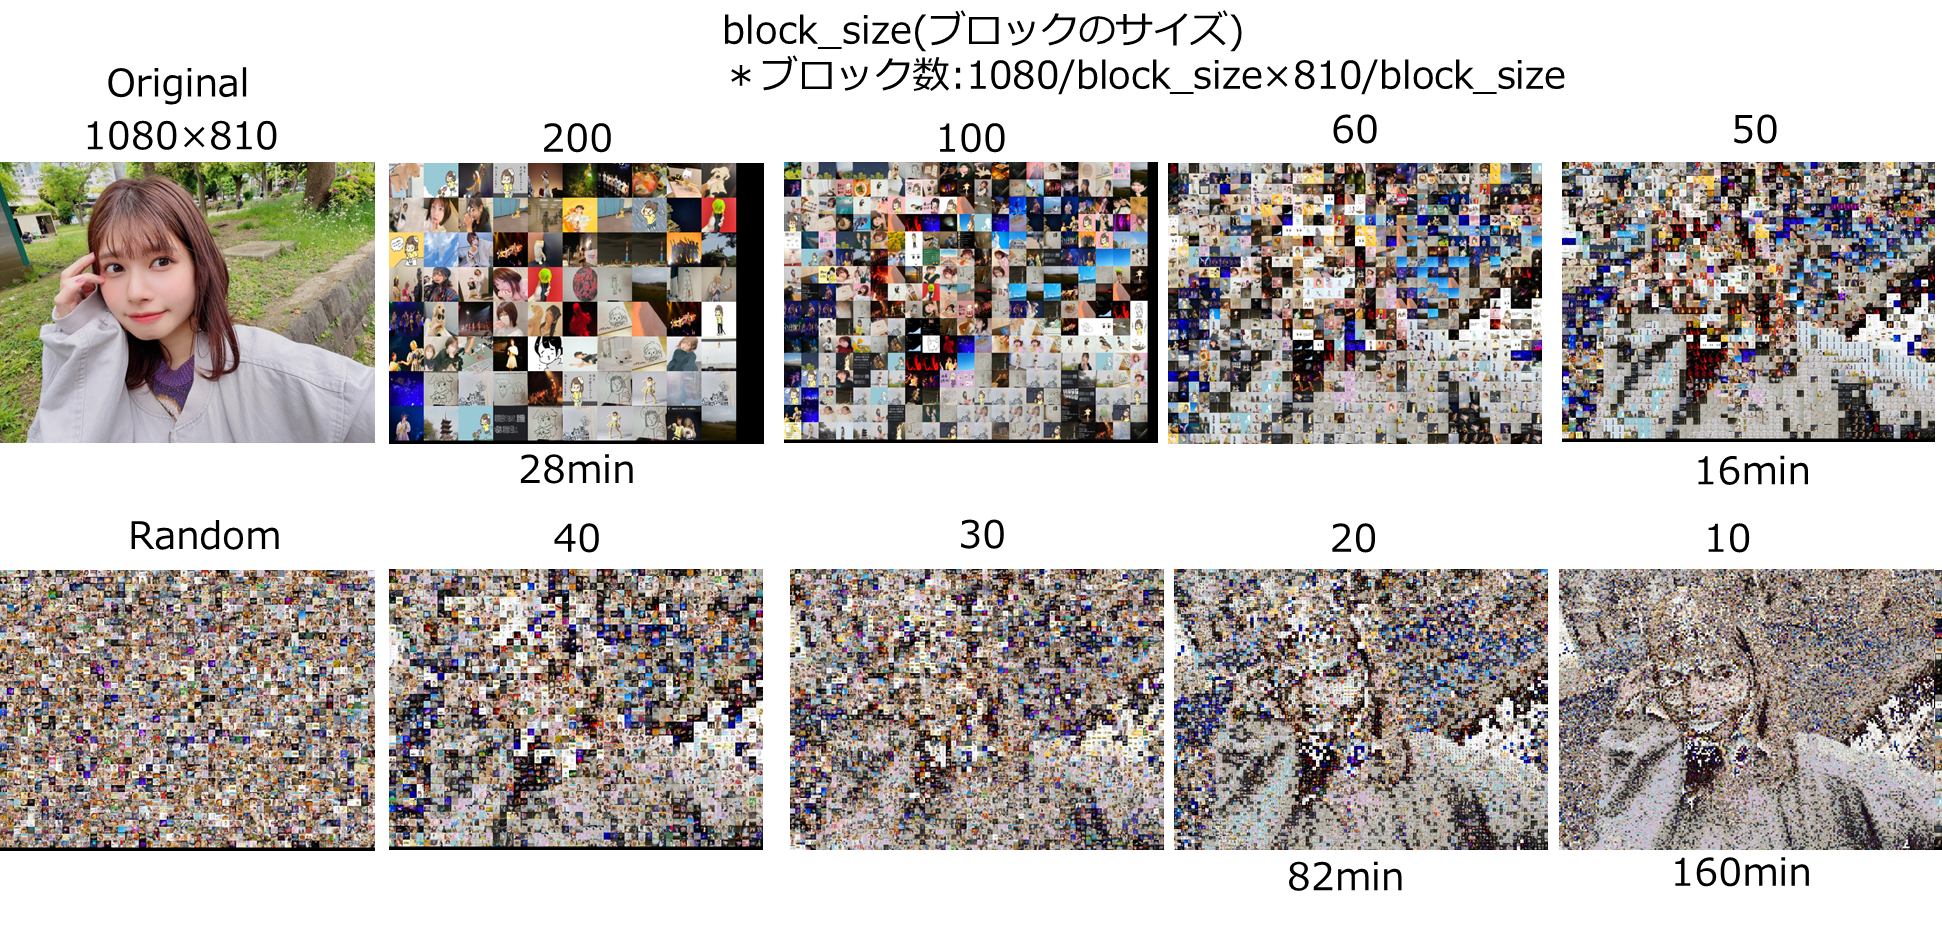
上の数字がブロックサイズ、下の数字が画像を作成するのにかかった時間。
10よりも下げると計算が終わらないので断念。
分割していくほど元の画像に近づいているけど、これじゃない感がすごい。
特に顔の部分が難しい。やはり、推しの顔面は奇跡の産物なのかもしれない。
次にblock_sizeを50に固定して、num_images_per_blockを振っていった。
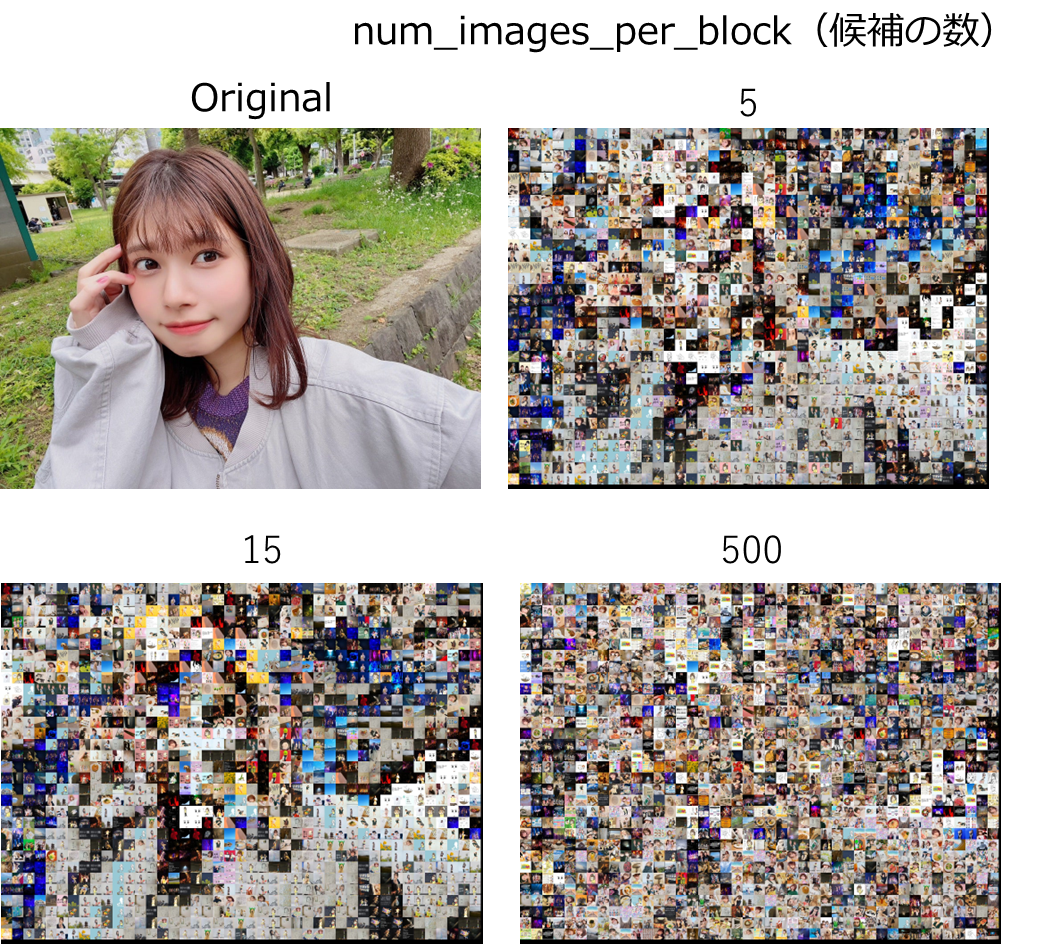
各セルに対して類似度の高い上位num_images_per_blockの中からランダムに選ぶ。
5でも15でもそんなに変わらないけど、500だと結構ランダムになる。
収集したのがブログの写真だったので、似た構図で何枚か挙げているケースがあるので、
5~15くらいでランダムにしたほうがバリエーションあってよさそう。
1とかにしちゃうと同じ色に同じ写真になって、モザイク感がなくなりそう。
コード解析 - Big O 記法
計算量(≒画像を作るのにどのくらい時間がかかるか)
画像が4000枚(n,m)あるので、block_sizeを10にすると1.4×10^8の計算量。
確かに数時間はかかりそうな感じする。
- メイン画像の読み込みとリサイズ: O(1)
- ブロック数の計算: O(1)
- 出力画像の作成: O(1)
- 画像ファイルリストの取得: O(n)
- 小さな画像のリサイズ: O(m)
- メイン画像のブロックを繰り返し処理: O(num_blocks_horizontal * num_blocks_vertical)
- 類似度スコアの計算: O(num_blocks_horizontal * num_blocks_vertical * m)
- 類似度スコアのソートと上位Nの選択: O(m log m)
- 最適なマッチ画像の貼り付け: O(num_blocks_horizontal * num_blocks_vertical)
- 出力画像のリサイズ: O(1)
- 出力画像の保存: O(1)
全体的に、このコードの時間計算量は、O(n + m + num_blocks_horizontal * num_blocks_vertical * m + m log m) と近似されます。ここで、n は入力フォルダ内のファイル数、m は小さな画像の数です。
類似度計算の仕組み
提供されたコードでは、Mean Squared Error(MSE)がcompute_image_similarity関数で計算されます。以下に、MSEの計算方法とその仕組みについて説明します:
-
compute_image_similarity関数は、img1とimg2の2つの画像を入力として受け取ります。 - 画像は
np.arrayを使用してnumpy配列に変換されます。 -
img1とimg2のピクセル値を要素ごとに引いて、2つの画像の差を求めます。 - 差の配列の各要素を二乗して、二乗差を計算します。
-
np.meanを使用して二乗差の平均値を計算し、MSEが得られます。 - MSEの値が画像間の類似性の指標として返されます。
MSEは、2つの画像の対応するピクセルの強度の平均二乗差を測る一般的な類似性指標です。MSE値が低いほど、画像間の類似性が高くなります。つまり、ピクセル値がより近いか類似していることを意味します。
提供されたコードでは、メイン画像のメインブロックとすべての小さな画像の間のMSEを計算することで、各小さな画像のメインブロックへの類似性を評価しています。これにより、類似性スコアに基づいて最適な一致する小さな画像を見つけ、最適なマッチング画像を出力画像に貼り付けてモザイクを作成することができます。
全体的に、MSEはピクセルの強度を比較することで画像の類似性を定量化する指標であり、提供されたコードではメインブロックと小さな画像の類似性を評価するための仕組みとして使用されています。
さいごに
オリジナルの画像をどんな画像にするかが結構重要な気がして、人間の表情をどう表現するかが腕の問われるところかもしれない。今回は単純に1セルごとのRGB値で見ていったけど、次はCNNみたいな機械学習手法でも試してみたい。