Vue.js + Vuex + FirebaseでSPAを組んでみた
近年、AngularJSやReact.jsと並んで人気の呼び声が高く
また、社内での開発実績の多いVue.jsを使用してSPAを作る手順をメモ
今回バックエンドはこれまた人気でGoogleさんのFirebaseを採用
Vue.jsとは
Evan Youさんという方が2014年に作ったJSフレームワーク
日本語のドキュメントが充実しており、とっつきやすい
※Evan YouさんはGoogleでAngularJSを使用した開発に携わっていた方
「AngularJSの良い部分を抽出し、更に軽いもの作る」という思想で
開発されている
Vuexとは
Vueの状態(state)管理のためのストア
ストアに保存したデータは、どのコンポーネントから参照しても
同じ値として受け取れる
また、ストアのデータが変わったことをトリガーとした処理が書けたり
データ加工等のロジックをVuexに寄せることもできる
Vuexを使用しない場合は各コンポーネント間で共通のデータを扱いたい場合、
コンポーネント間でデータの受け渡し(バケツリレー)が必要になる
システムの規模が大きくなるとVuexを使用した場合の恩恵が大きいとされている
Firebaseとは
MBaas(Mobile Backend as a Service)と呼ばれるクラウドサービス
オンライン上にデプロイできるホスティングや、NoSQL&データ変更を即座に
クライアントに通知するPUSH型のリアルタイムデータベース、ストレージ
認証周りといったバックエンドで必要となる機構を提供してくれる神ツール
しかも無料!
※有料だとDBの使用上限が解放されたり、定期バックアップを取ってくれるようになったりする
試すだけなら無料で十分
環境
今回検証した環境はこちら
- Windows10 Pro
- node.js v8.11.2
- Firebase
6.0.0
それではいきます!
Vue CLI3をインストール
(Vue CLI3を使用するためにはNode.js8.9以上がインストールされている必要があります)
npm install -g @vue/cli
バージョンを確認
vue --version
3.2.1
新しいプロジェクトを作成
cd path/to/workspace
vue create test-app
# 今回はtest-appという名前で作ります
下記の対話が始まる
Vue CLI v3.2.1
? Please pick a preset: (Use arrow keys)
  default (babel, eslint)
> Manually select features
# デフォルト設定にするか手動で設定を行うか(今回は手動)

? Check the features needed for your project:
 (*) Babel
 ( ) TypeScript
 ( ) Progressive Web App (PWA) Support
 (*) Router
 (*) Vuex
 ( ) CSS Pre-processors
 (*) Linter / Formatter
>(*) Unit Testing
 ( ) E2E Testing
# 何を使うか(今回は上記)

? Use history mode for router? (Requires proper server setup for index fallback in production) (Y/n)
# VueRouterでhistoryモードを使うかどうか(今回はYes)

? Pick a linter / formatter config: (Use arrow keys)
  ESLint with error prevention only
  ESLint + Airbnb config
> ESLint + Standard config
  ESLint + Prettier
# ESLintのルールをどうするか(今回はスタンダード)

? Pick additional lint features: (Press <space> to select, <a> to toggle all, <i> to invert selection)
>(*) Lint on save
 ( ) Lint and fix on commit
# ESLintをいつ走らせるか(今回は保存時)

? Pick a unit testing solution: (Use arrow keys)
> Mocha + Chai
  Jest
# テストツールに何を使うか(今回はMocha + Chai)

? Where do you prefer placing config for Babel, PostCSS, ESLint, etc.? (Use arrow keys)
> In dedicated config files
  In package.json
# Babel, PostCSS, ESLintの設定を個別のファイルで行うか、package.jsonで行うか(今回は個別)

? Save this as a preset for future projects? (y/N)
# 上記の設定を保存するか(今回はしない)
上記までの設定を行い、Enterを押下するとアプリケーションの構築が始まる
無事に終わると下記みたいな感じになる
Vue CLI v3.2.1
✨  Creating project in C:\Users\t-naoi\Documents\test-app\test-app.
🗃  Initializing git repository...
⚙  Installing CLI plugins. This might take a while...


> nodent-runtime@3.2.1 install C:\Users\t-naoi\Documents\test-app\test-app\node_modules\nodent-runtime
> node build.js

## Built C:\Users\t-naoi\Documents\test-app\test-app\node_modules\nodent-runtime/dist/index.js

> yorkie@2.0.0 install C:\Users\t-naoi\Documents\test-app\test-app\node_modules\yorkie
> node bin/install.js

setting up Git hooks
done

added 1171 packages in 46.502s
🚀  Invoking generators...
📦  Installing additional dependencies...

added 65 packages, updated 2 packages and moved 5 packages in 17.796s
⚓  Running completion hooks...

📄  Generating README.md...

🎉  Successfully created project test-app.
👉  Get started with the following commands:

 $ cd test-app
 $ npm run serve
出来上がったVueのアプリケーションを起動!
cd test-app
npm run serve
ブラウザで http://localhost:8080/ にアクセスすると下記が表示されるはず

test-appの中を見るとこうなっているはず

| ファイルORディレクトリ | 概要 |
|---|---|
| assets | 画像、scss等のファイルを置く |
| components | 画面を構成するコンポーネントを置く ※部品 |
| views | 画面用のコンポーネントを置く ※Router.jsの中でimportされるファイル |
| App.vue | 大元のコンポ―ネント URLによって画面切り換え等を行う |
| main.js | 全体の設定 システムで使用するライブラリ等はここで読み込む |
| router.js | SPAの根幹 ルーティングの設定を記述する |
| store.js | Vuexの処理を記述する |
Firebaseの設定
Firebaseのコンソールへ移動し、今回用のアプリを作成
https://firebase.google.com/?hl=ja

firebase-toolsをインストール
※firebaseコマンドが使えるようになる
npm install -g firebase-tools
Firebaseにログイン
cd path/to/workspace/test-app
firebase login
# ブラウザが立ち上がるので、そこからログイン
Firebaseのアプリケーションを初期化
firebase init
# 下記の対話が始まる

C:\Users\XXX\Documents\test-app\test-app>firebase init

   ######## #### ########  ######## ########     ###     ######  ########
   ##        ##  ##     ## ##       ##     ##  ##   ##  ##       ##
   ######    ##  ########  ######   ########  #########  ######  ######
   ##        ##  ##    ##  ##       ##     ## ##     ##       ## ##
   ##       #### ##     ## ######## ########  ##     ##  ######  ########

You're about to initialize a Firebase project in this directory:

  C:\Users\XXX\Documents\test-app\test-app

? Are you ready to proceed? (Y/n)
# YesでOK

? Which Firebase CLI features do you want to setup for this folder? Press Space to select features, then Enter to confirm your choices.
 (*) Database: Deploy Firebase Realtime Database Rules
 ( ) Firestore: Deploy rules and create indexes for Firestore
 ( ) Functions: Configure and deploy Cloud Functions
>(*) Hosting: Configure and deploy Firebase Hosting sites
 ( ) Storage: Deploy Cloud Storage security rules

# 何を使うか(今回はDatabaseとHosting)


? Select a default Firebase project for this directory:
  [don't setup a default project]
  fir-app-14a9b (firebase-app)
  fir-test-6b3a6 (firebase-test)
> test-app-d6e4b (test-app)
  vue-app-daa6d (vue-app)
  [create a new project]
# 使用するアプリを指定(さっき作ったやつ)

# あとは流れ作業
? What file should be used for Database Rules? database.rules.json
+  Database Rules for test-app-d6e4b have been downloaded to database.rules.json.
Future modifications to database.rules.json will update Database Rules when you run
firebase deploy.

=== Hosting Setup

Your public directory is the folder (relative to your project directory) that
will contain Hosting assets to be uploaded with firebase deploy. If you
have a build process for your assets, use your build's output directory.

? What do you want to use as your public directory? public
? Configure as a single-page app (rewrite all urls to /index.html)? Yes
? File public/index.html already exists. Overwrite? No
i  Skipping write of public/index.html

i  Writing configuration info to firebase.json...
i  Writing project information to .firebaserc...

+  Firebase initialization complete!
main.jsにFirebaseを使う用設定
import Vue from 'vue'
import App from './App.vue'
import router from './router'
import store from './store'

//ここ↓
import firebase from 'firebase'

//とここ↓
const config = {
  apiKey: "AIzaSyBE39cguJcLpFJxmJSUfV2rQtfrcqE6qm0",
  authDomain: "test-app-d6e4b.firebaseapp.com",
  databaseURL: "https://test-app-d6e4b.firebaseio.com",
  projectId: "test-app-d6e4b",
  storageBucket: "test-app-d6e4b.appspot.com",
  messagingSenderId: "712383253433"
};
firebase.initializeApp(config)

Vue.config.productionTip = false

new Vue({
  router,
  store,
  render: h => h(App)
}).$mount('#app')
Firebaseのインストール
npm install firebase
Home.vueにFirebaseのデータベース疎通確認用のテストコードを記述
<template>
  <div class="home">
    <img alt="Vue logo" src="../assets/logo.png">
    <HelloWorld msg="Welcome to Your Vue.js App"/>
  </div>
</template>

<script>
// @ is an alias to /src
import HelloWorld from '@/components/HelloWorld.vue'

//ここ↓
import firebase from 'firebase'

export default {
  name: 'home',
  components: {
    HelloWorld
  },
  created(){
    //とここ↓
    firebase.database().ref('/')
      .once('value', function (snapshot) {
        console.log(snapshot.val())
      })
  }
}
</script>
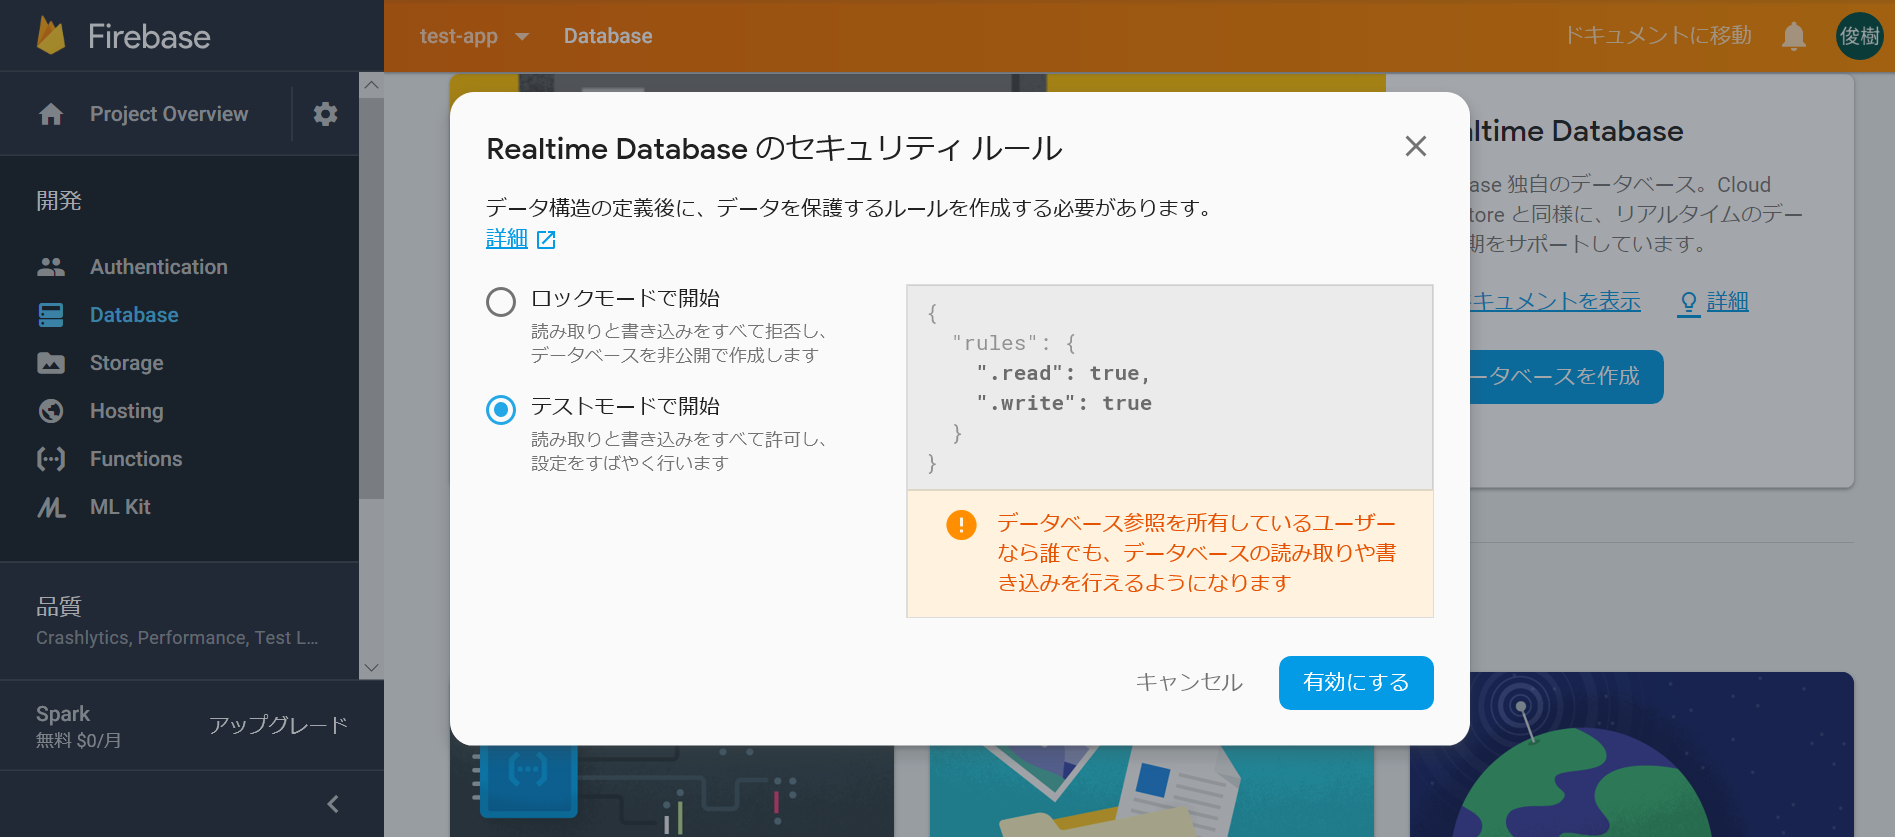
Firebaseのコンソールにてrealtime databaseの設定を行う
※テストモードで使用
再度起動し直し
npm run serve
Developer Toolで確認すると
コンソールのnullとかが吐かれているはず。
※データがあればそこに表示される
完成!!!
今後やってみたいこと
- PWAサポートを使用してみる
- ESLintのルールの精査
- Firebase Authenticationを使用しての認証やユーザ管理機能
- TypeScriptで書いてみる
- Weexを使用してのアプリ開発 ※発展途上かも、、
- ディレクトリ構成の検討
- Vuexのstoreファイルをモジュール分割する
etc.
と沢山ある
一つずつやってみることとする
以上!!