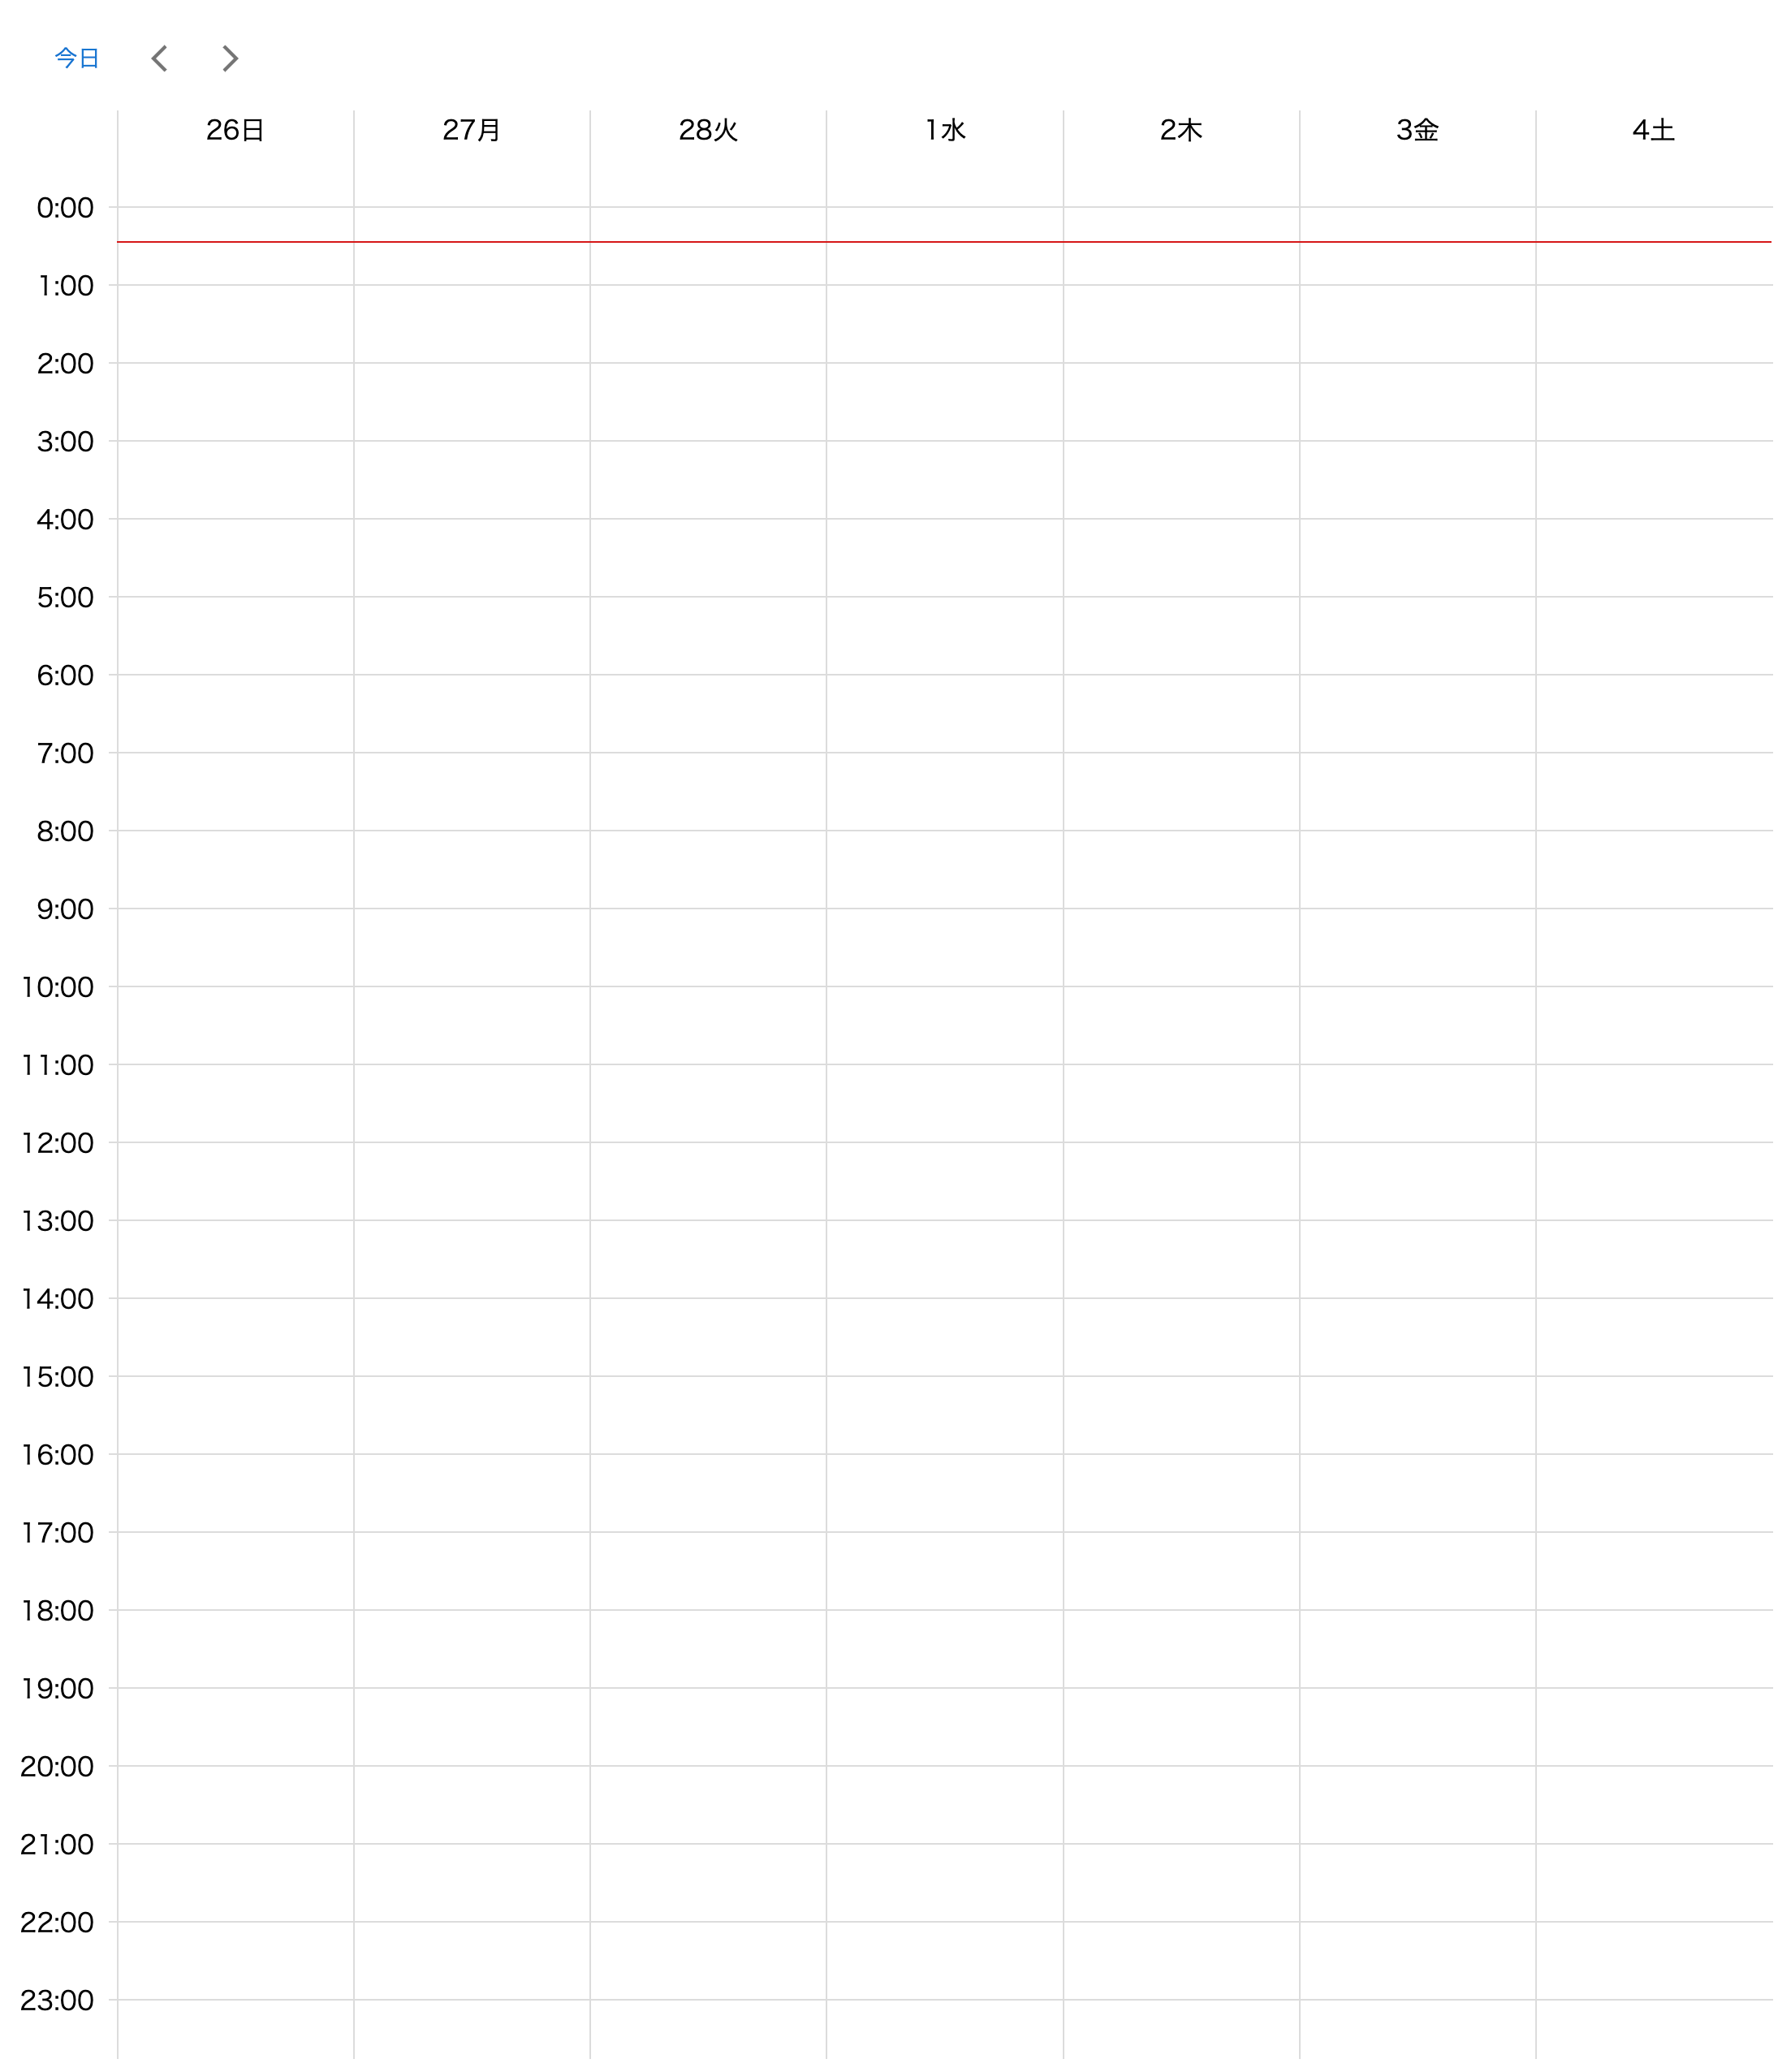
週間カレンダー作成
googleカレンダー風の週間カレンダーを作成してみます。
fullcalenderの利用も考えましたが、カスタマイズ性が微妙だったため
今回はライブラリなしで作成しました。
時間軸と曜日軸の作成
まずは週間カレンダーの縦軸である時間軸と横軸である曜日軸を作成していきます。
gridレイアウトを使用して、カレンダー形式にします。
レイアウトを当てる前の表示はこちら。
import { Box, styled } from '@mui/material';
import { hour } from '@/utils';

const days = ['日', '月', '火', '水', '木', '金', '土'];

export default function Home() {
  return (
    <>
      <Box>
        <Box>
          <Box>
            {hour(24).map((time) => (
              <div>{time}</div>
            ))}
          </Box>
          <Box>
            {days.map((day) => (
              <div>{day}</div>
            ))}
          </Box>
        </Box>
      </Box>
    </>
  );
}
export const hour = (keys: number) => [...Array(keys).keys()];
Box(div要素)の中に時間と曜日を入れただけなので縦一列に表示されています。
gridレイアウトを追加①
export default function Home() {
  return (
    <>
      <Wrapper> {/* スタイル追加 */}
        <FirstGrid> {/* スタイル追加 */}
          <Box>
            {hour(24).map((time) => (
              <div>{time}</div>
            ))}
          </Box>
          <Box>
            {days.map((day) => (
              <div>{day}</div>
            ))}
          </Box>
        </FirstGrid>
      </Wrapper>
    </>
  );
}

// 省略
const Wrapper = styled(Box)(({ theme }) => ({
  width: '100%',
  margin: 4,
}));

const FirstGrid = styled(Box)(({ theme }) => ({
  display: 'grid',
  gridTemplateColumns: '50px calc(100% - 50px)',
}));
一番外側のBox<Wrapper>には余白を設定していきます。
その内側の、時間と曜日が入っているBoxにはgridを当てて2分割していきます。
grid-template-culumsを使用することで横方向のレイアウトを決めていきます。
今回は時間軸(50px)と曜日軸(100% - 時間軸幅 )としました。

gridレイアウトを追加②
曜日が格納されているBoxにgridスタイルを適用していきます。
export default function Home() {
  return (
    <>
      <Wrapper>
        <FirstGrid>
          <Box>
            {hour(24).map((time) => (
              <div>{time}</div>
            ))}
          </Box>
          <DaysGrid> {/* スタイル追加 */}
            {days.map((day) => (
              <div>{day}</div>
            ))}
          </DaysGrid>
        </FirstGrid>
      </Wrapper>
    </>
  );
}

const DaysGrid = styled(Box)(() => ({
  display: 'grid',
  gridTemplateColumns: 'repeat(7, 1fr) ',
}));
曜日軸が横並びになりました。
曜日が格納されているBoxに対して、grid-template-culumsで横方向のレイアウトを作成することで曜日が等間隔に表示されています。
gridレイアウトを追加③
次は縦の時間軸の間隔を調整していきます。
export default function Home() {
  return (
    <>
      <Wrapper>
        <FirstGrid>
          <HourGrid> {/* スタイル追加 */}
            {hour(24).map((time) => (
              <div>{time}</div>
            ))}
          </HourGrid>
          <DaysGrid>
            {days.map((day) => (
              <div>{day}</div>
            ))}
          </DaysGrid>
        </FirstGrid>
      </Wrapper>
    </>
  );
}
// 省略
const HourGrid = styled(Box)(({ theme }) => ({
  marginTop: theme.spacing(6),
  display: 'grid',
  gridTemplateRows: `repeat(24, ${theme.spacing(6)})`,
}));
グリッドの縦方向のレイアウトを決定するのにはgrid-template-rowsを使用します。24時間表示にするので高さを指定24等分割にします。
## 罫線を追加
export default function Home() {
 return (
    <>
      <Wrapper>
        <FirstGrid>
          <HourGrid>
            {hour(24).map((time) => (
              <Hour>{time}:00</Hour>
            ))}
          </HourGrid>
          <DaysGrid>
            {days.map((day) => (
              <Day>{day}</Day>
            ))}
          </DaysGrid>
        </FirstGrid>
      </Wrapper>
    </>
  );
}
// 省略
const Day = styled(Box)(() => ({
  borderLeft: '1px solid #dcdcdc',
}));

const Hour = styled(Box)(({ theme }) => ({
  marginRight: theme.spacing(3),
  textAlign: 'right',

  position: 'relative',
  '&::before': {
    position: 'absolute',
    top: 11,
    left: 55,
    content: '""',
    width: 'calc(100vw - 70px)',
    borderTop: '1px solid #dcdcdc',
  },
}));
ボーダーの追加と要素の追加により罫線を追加することで一気にカレンダーっぽくなってきました!

日付の追加
日付操作ライブラリのdayjsを用いて表示する日付を生成していきます。
export function calcWeek(start?: string) {
  const date = start ? dayjs(start) : dayjs();
  const day = date.day();
  const startDay = date.subtract(day, 'd');
  const week = [];
  for (let day = 0; day < 7; day++) {
    week.push(startDay.add(day, 'day'));
  }

  return week;
}
calcWeekでは、デフォルトでは本日日付から本日の曜日(0:日曜〜7:土曜)分日付を減算することでその週の日曜日を算出します。
export default function Home() {
  const [week, setWeek] = useState(calcWeek()); {/* 追加 */}

  return (
    <>
      <Wrapper>
        <FirstGrid>
          <HourGrid>
            {hour(24).map((time) => (
              <Hour>{time}:00</Hour>
            ))}
          </HourGrid>
          <DaysGrid>
            {/* weekに変更 */}
            {week.map((day) => (
              <>
                <Day>
                  {day.format('D')}
                  {day.format('ddd')}
                </Day>
              </>
            ))}
          </DaysGrid>
        </FirstGrid>
      </Wrapper>
    </>
  );
}
曜日を表示していた箇所に今週の日付を格納します。
これで、アクセスした日の週の日曜日からの日付が表示できるようになりました。

前週・翌週移動
表示する日付の移動ができるようにします。
// 省略
 const moveWeek = (type: string) => {
    const startDay =
      type === 'add'
        ? week[0].add(7, 'd').format('YYYY-M-D')
        : week[0].subtract(7, 'd').format('YYYY-MM-DD');
    setWeek(calcWeek(startDay));
  };

 return (
    <>
      <Stack direction="row" padding={1}>
        <Button onClick={() => setWeek(calcWeek())}>今日</Button>
        <IconButton onClick={() => moveWeek('back')}>
          <ArrowBackIosNewIcon sx={{ width: 20 }} />
        </IconButton>
        <IconButton sx={{ ml: 1 }} onClick={() => moveWeek('add')}>
          <ArrowForwardIosIcon sx={{ width: 20 }} />
        </IconButton>
      </Stack>
      <Wrapper>
        <FirstGrid>
          // 省略
先ほど作成した、calcWeekに対して、1週間後の日付・1週間前の日付を渡し日付を再計算しweekにセットします。
現在時刻のラインを表示
現在時刻の位置を示すラインを作成していきます。
表示の流れは下記の通りです。
①現在時刻のラインのトップからの位置を計算
②上記の処理を1分ごとに行う
const HOUR_HEIGHT = 48;    {/* 1時間のラインの間隔 */}
const HEADER_HEIGHT = 71;  {/* ヘッダーの高さ */}

const calcHourLine = () => {
  const hourNow = dayjs().hour();
  const minutesNow = dayjs().minute();
  const linePosition =
    hourNow * HOUR_HEIGHT + HEADER_HEIGHT + (HOUR_HEIGHT / 60) * minutesNow;    {/* 現在時刻のトップからの高さ */}
  return linePosition;
};

export default function Home() {
  const [week, setWeek] = useState(calcWeek());
  const [line, setLine] = useState(calcHourLine);

   // 6000ミリ秒ごとに現在時刻のラインの高さを計算
  useEffect(() => {
    setInterval(() => setLine(calcHourLine), 60000);
  }, [line]);

  // 省略
        <HourLine fromtop={line} />
  // 省略

type HourLineProps = {
  fromtop: number;
};

const HourLine = styled(Box)<HourLineProps>(({ fromtop }) => ({
  borderTop: '1px solid #d71717',
  position: 'absolute',
  width: 'calc(100vw - 76px)',
  top: fromtop,
  right: 0,
}));
現在時刻のラインはトップからの位置(今回は<Wrapper>)からの位置を計算して表示しています。
HEADER_HEIGHTは トップから0:00の横罫線までの高さです。
setInterval()で1分ごとに呼び出すことで時刻に合わせて赤いラインが移動します。
スタイルを整えて完成
MUIを用いてスタイルを整えます。


