概要
私はgoogleでわからないことを検索するときはソースの信頼性を上げるために1つのサイトから調べるだけではなく、複数のサイトを渡り歩いて調べます。そのときに検索結果のページを一つ一つ開が面倒くさく感じたので、単語を調べたら一気に10個の検索のページを開いてくれるプログラムを作りました。それに追加して検索した履歴も残せると便利だと思い、検索結果のページのタイトルとURLも自動的にEXCELにまとめてくれるようにしました。
環境
CPU:Intel core i5 7200U dual core
OS:Winddows10 home
Python 3.8.2(Anaconda)
Chrome Driver 81.0.4044.92
Selenium
Openpyxl
本題
実行環境が整っている前提で書きます。
プログラム全体の流れ
GUIのテキストボックスに検索ワードと絞り込み条件を入力する
検索ボタンを押す
検索結果の上位10個のサイトが別タブで一気に開く
検索したサイトのURLとタイトルがExcelに書き込まれる
テキストボックスを作る
まずは、PySimpleGUIでテキストボックスを作り、入力した文字を表示させます。
こちらのサイトを参考にして作りました。
import PySimpleGUI as sg
sg.theme('Dark Blue 3')
layout = [[sg.Text('検索ワード', size=(15, 1)), sg.InputText(default_text='', key='-SEARCHWORD-')],
          [sg.Text('絞り込み条件', size=(15, 1)), sg.InputText(
              default_text='', key='-CONDITION-')],
          [sg.Submit('検索')]]
window = sg.Window('検索ワードを入力', layout)
while True:
    event, values = window.read()

    if event is None:
        print('exit')
        break

    if event == '検索':
        show_message = "検索ワード:" + values['-SEARCHWORD-'] + 'が入力されました。\n'
        show_message = "絞り込み条件:" + values['-CONDITION-'] + 'が入力されました。\n'
        sg.popup(show_message)

window.close()
ワード検索からタブを開くまで
selenium を使ってwebスクレイピングをしていきます。使い方はクイックリファレンスなどを参考にしました。
後のExcelにまとめるときに便利なように「タイトル」「URL」「概要」を表示してから新規タブで開きます。
from selenium import webdriver
import chromedriver_binary
from selenium.webdriver.common.by import By
search_word = 'python 使い方'
const = 'https://www.google.com/search?q='
getword = const+search_word
driver = webdriver.Chrome()

driver.get(getword)
url_list = []
for i, g in enumerate(driver.find_elements(By.CLASS_NAME, "g")):
    print("------ " + str(i+1) + " ------")
    r = g.find_element(By.CLASS_NAME, "r")
    print(r.find_element(By.TAG_NAME, "h3").text)
    url = r.find_element(By.TAG_NAME, "a").get_attribute("href")  # URLを抜き出し
    url_list.append(url)
    print("\t" + url)
    s = g.find_element(By.CLASS_NAME, "s")
    print("\t" + s.find_element(By.CLASS_NAME, "st").text)

for num in range(10):
    driver.execute_script("window.open()")  # 新規タブを開く
    driver.switch_to.window(driver.window_handles[num+1])  # 新規タブに切り替え
    driver.get(url_list[num])
しかし、このままだとページが表示されるのを待ってから次のタブを開くため、ものすごく時間がかかります。これでは手で入力したほうがマシです。ページが表示される前に次のページに遷移できるようにしたいです。そこで「CONTROL」+clickを使って新規タブでページを開くように変更します。
決まった場所にあるボタンやリンクをクリックするにはxpathが便利ですので積極的に使っていきます。
クイックリファレンスにあるようにコードを追加します。
web検索結果のタイトルのxpathを確認すると//*[@id = "rso"]/div[1]/div/div[1]/a/h3,//*[@id = "rso"]/div[2]/div/div[1]/a/h3...
左から1番目の/div[1]の引数が違うだけなのがわかります。これに変数を与えてfor文で回します。
from selenium import webdriver
import chromedriver_binary
from selenium.webdriver.common.by import By
from selenium.webdriver.common.keys import Keys
from selenium.webdriver.common.action_chains import ActionChains
search_word = 'python 使い方'
const = 'https://www.google.com/search?q='
getword = const+search_word
driver = webdriver.Chrome()

driver.get(getword)
url_list = []
for i, g in enumerate(driver.find_elements(By.CLASS_NAME, "g")):
    print("------ " + str(i+1) + " ------")
    r = g.find_element(By.CLASS_NAME, "r")
    print(r.find_element(By.TAG_NAME, "h3").text)
    url = r.find_element(By.TAG_NAME, "a").get_attribute("href")  # URLを抜き出し
    url_list.append(url)
    print("\t" + url)
    s = g.find_element(By.CLASS_NAME, "s")
    print("\t" + s.find_element(By.CLASS_NAME, "st").text)

xpath = '//*[@id = "rso"]/div[{}]/div/div[1]/a/h3'  # タイトルクリックのxpath
for num in range(10):
    element = driver.find_element_by_xpath(xpath.format(num+1))
    actions = ActionChains(driver)
    actions.key_down(Keys.CONTROL)
    actions.click(element)
    actions.perform()
web検索したものをExcelに書き込む
Excelファイルを保存するとカレントディレクトリに保存されます。
import openpyxl
from selenium import webdriver
import chromedriver_binary
from selenium.webdriver.common.by import By
from selenium.webdriver.common.keys import Keys
from selenium.webdriver.common.action_chains import ActionChains
import datetime
search_word = 'python openpyxl'
const = 'https://www.google.com/search?q='
getword = const+search_word
driver = webdriver.Chrome()

driver.get(getword)
url_list = []
title_list = []
Overview_list = []
for i, g in enumerate(driver.find_elements(By.CLASS_NAME, "g")):
    r = g.find_element(By.CLASS_NAME, "r")
    title_list.append(r.find_element(By.TAG_NAME, "h3").text)  # タイトルを抜き出し
    url_list.append(r.find_element(
        By.TAG_NAME, "a").get_attribute("href"))  # URLを抜き出し
    s = g.find_element(By.CLASS_NAME, "s")
    Overview_list.append(s.find_element(By.CLASS_NAME, "st").text)  # 概要分抜き出し

    xpath = '//*[@id = "rso"]/div[{}]/div/div[1]/a/h3'  # タイトルクリックのxpath
for num in range(10):
    element = driver.find_element_by_xpath(xpath.format(num+1))
    actions = ActionChains(driver)
    actions.key_down(Keys.CONTROL)
    actions.click(element)
    actions.perform()
wb = openpyxl.Workbook()  # 新規に空のWorkbookオブジェクトを生成する
ws = wb.active
ws.title = 'sheet1'
# ws = sheet.get_sheet_by_name('Sheet1')


ws['A1'] = '日付'
ws['B1'] = 'タイトル'
ws['C1'] = '概要'
ws['D1'] = 'URL'


def write_in_xlsx(column_num, list):
    num = 0
    for row in range(2, 11):
        ws.cell(row=row, column=column_num).value = list[num]
        num = num+1


for row in range(2, 11):
    ws.cell(row=row, column=1).value = datetime.datetime.today()

write_in_xlsx(2, title_list)
write_in_xlsx(3, Overview_list)
write_in_xlsx(4, url_list)
wb.save('test.xlsx')  # test.xlsxで保存
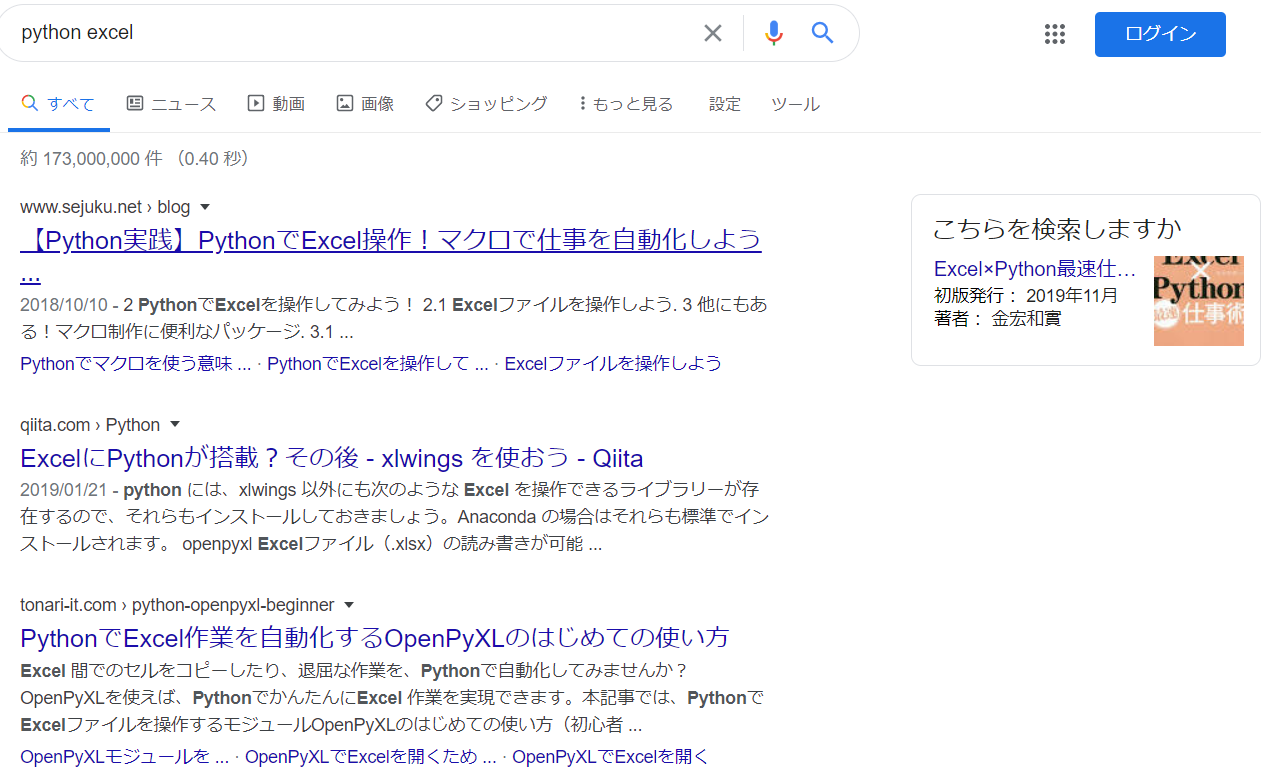
これでもまだ問題があります。Google検索をかけたときに例えばこの写真のように右側にも検索結果が出てきた場合にselenium.common.exceptions.NoSuchElementException: Message: no such element: Unable to locate element: {"method":"css selector","selector":".r"}と例外が発生してしまいます。

完成したプログラム
全機能を実装したコードが以下になります。class Websc ,class Excel ,class GUIWindow それぞれで各機能のもととなる設計図を作り、Application classでオブジェクトを組み合わせて今回実現したい機能を作成しています。ファイルを実行しテキストボックスに入力するとタブが一気に開きます。(絞り込み条件は未実装)
ちなみになぜがボタンを2回押さないと検索できません。原因が分かる人が居たらコメントをお願いします。

import PySimpleGUI as sg
import time
import openpyxl
from selenium import webdriver
import chromedriver_binary
from selenium.webdriver.common.by import By
from selenium.webdriver.common.keys import Keys
from selenium.webdriver.common.action_chains import ActionChains
import datetime


def main():
    app = Application()
    app.RUN()


class WebSc:
    def __init__(self,):
        self.search_word = ''
        self.const = 'https://www.google.com/search?q='
        self.url_list = []
        self.title_list = []
        self.Overview_list = []
        self.search_word = 0
        self.driver = 0

    def SetSearchWord(self, search_word):
        getword = self.const + search_word
        self.driver = webdriver.Chrome()
        self.driver.get(getword)

    def ExtractElement(self):
        for g in self.driver.find_elements(By.CLASS_NAME, "g"):
            try:
                r = g.find_element(By.CLASS_NAME, "r")
                self.title_list.append(r.find_element(
                    By.TAG_NAME, "h3").text)  # タイトルを抜き出し
                self.url_list.append(r.find_element(
                    By.TAG_NAME, "a").get_attribute("href"))  # URLを抜き出し
                s = g.find_element(By.CLASS_NAME, "s")
                self.Overview_list.append(s.find_element(
                    By.CLASS_NAME, "st").text)  # 概要分抜き出し
            except:
                continue

    def ClickElementAsNewTab(self, click_num):  # num:上位何個を取得するか
        xpath = '//*[@id = "rso"]/div[{}]/div/div[1]/a/h3'  # タイトルクリックのxpath
        for num in range(click_num):
            element = self.driver.find_element_by_xpath(xpath.format(num+1))
            actions = ActionChains(self.driver)
            actions.key_down(Keys.CONTROL)
            actions.click(element)
            actions.perform()


class Excel:

    def __init__(self, websc):
        self.wb = openpyxl.Workbook()  # 新規に空のWorkbookオブジェクトを生成する
        self.ws = self.wb.active
        self.ws.title = 'sheet1'
        self.cell_list = ['A1', 'B1', 'C1', 'D1']
        self.name_list = ['日付', 'タイトル', '概要', 'URL']
        self.url_list = []
        self.title_list = []
        self.Overview_list = []

    def SetGotList(self, title_list, Overview_list, url_list):  # 外部から取得したリストのセッター
        self.url_list = url_list
        self.title_list = title_list
        self.Overview_list = Overview_list

    def __write_in_column(self, column_num, list, min=2, max=12):  # 1列ずつセルに書き込む関数
        num = 0
        for row in range(min, max):
            self.ws.cell(row=row, column=column_num).value = list[num]
            num = num + 1

    def SetCellname(self, cell_list, name_list):  # cellに名前をつけていく関数
        for num, cell in enumerate(cell_list):
            self.ws[cell] = name_list[num]

    def MakeFile(self, file_name):
        self.SetCellname(self.cell_list, self.name_list)  # 一番上の行に名前をつける
        for row in range(2, 12):
            self.ws.cell(
                row=row, column=1).value = datetime.datetime.today()  # 1列目は日付
        self.__write_in_column(2, self.title_list)  # 取得したタイトルを書き込む
        self.__write_in_column(3, self.Overview_list)
        self.__write_in_column(4, self.url_list)
        self.wb.save(file_name)  # test.xlsxで保存


class GUIWindow:
    def __init__(self,):
        sg.theme('Dark Blue 3')
        self.layout = [[sg.Text('検索ワード', size=(15, 1)), sg.InputText(default_text='', key='-SEARCHWORD-')],
                       [sg.Text('絞り込み条件', size=(15, 1)), sg.InputText(
                           default_text='', key='-CONDITION-')], [sg.Text('Excelファイル名', size=(15, 1)), sg.InputText(default_text='', key='-EXCELFILE-')],
                       [sg.Submit('検索'), sg.Submit('検索 and ファイル保存')]]
        self.window = sg.Window('検索ワードを入力', self.layout)
        self.event = 0
        self.values = 0

    def CloseWindow(self):
        self.window.close()

    def ReadWindow(self):
        self.event, self.values = self.window.read()


class Application:  # 今回のアプリケーション
    window = GUIWindow()
    websc = WebSc()
    excel = Excel(websc)

    def __init__(self):
        pass

    def ButtonAction(self, button_name):  # 引数のボタンを押したときの動作
        if button_name == '検索':
            Application.window.ReadWindow()
            Application.websc.SetSearchWord(
                Application.window.values['-SEARCHWORD-'])
            Application.websc.ExtractElement()  # 要素抜き出し
            Application.websc.ClickElementAsNewTab(10)  # 取得サイト数を指定

        if button_name == '検索 and ファイル保存':
            Application.window.ReadWindow()
            Application.websc.SetSearchWord(
                Application.window.values['-SEARCHWORD-'])
            Application.websc.ExtractElement()
            Application.websc.ClickElementAsNewTab(10)  # 取得サイト数を指定
            Application.excel.SetGotList(Application.websc.title_list, Application.websc.Overview_list,
                                         Application.websc.url_list)  # 取得したものをセット
            Application.excel.MakeFile(
                Application.window.values['-EXCELFILE-'])  # excelファイルを作成

    def RUN(self):
        while True:
            Application.window.ReadWindow()
            if Application.window.event is None:
                print('exit')
                break
            if Application.window.event == '検索':
                self.ButtonAction('検索')
            if Application.window.event == '検索 and ファイル保存':
                self.ButtonAction('検索 and ファイル保存')

        Application.excel.CloseWindow()


if __name__ == "__main__":
    main()
今回は複数タブを自動で開くプログラムでしたが、各クラスに機能を足したり、Applicationの中のメソッドの組み合わせを変えたりすればいろいろな機能が実現できそうです。例えば登録したワードを検索して指定時刻に自動的に検索して情報を収集するボットなど、幅は広がりそうです。
その他参考