Next.jsには画面の表示方法が4通りあります。
- SSG(Static Site Generator):静的サイト生成
- SSR(Server Side Rendering): サーバーサイドレンダリング
- ISR(Incremental Static Regeneration): インクリメンタル静的再生性
- CSR(Client Side Rendering): クライアントサイドレンダリング
それぞれ実装方法が違っていたりCORSのエラーが発生したり挙動に異なるので、ここでまとめようと思います。
CORSエラーが発生した時もNext.jsの機能で解決できるのでそれも紹介しています。
(データ取得時の挙動の確認がメインなのでNext.jsのコードの書き方がおかしい箇所があるかもしれません。)
そしてこれらの画面表示方法を組み合わせることで高速な画面表示も可能になるので紹介します。
前準備
前準備としてhttp://localhost:3000で動くNext.jsのフロントエンドサーバーと、http://localhost:8080で動くAPIサーバーを用意します。
APIサーバーは、http://localhost:8080/usersにアクセスすると以下のような情報が取得できるものとします。
random-userのemailアドレスはAPIが叩かれる度にランダムなメールアドレスが返されるものとしています。
特にCORSの設定などはしておりません。
[
    {"username": "user1", "email": "user1@example.com"},
    {"username": "random-user", "email": random_email},
]
使用するNext.jsのプロジェクトと、APIのプロジェクトは以下のものを使用しています。
https://github.com/y-p-e/fastapi_test
https://github.com/y-p-e/nextjs-fetch-test
1. SSGによるユーザー一覧画面表示
最初はSSGでユーザー一覧画面を表示する方法になります。
SSGの使い所は、ブログ記事など頻繁にデータが更新されないような画面に対して有効かと思います。
SSGはデータ取得にgetStaticPropsを使います。
実装は以下になります。
import type {
	GetStaticProps,
  InferGetStaticPropsType,
  NextPage,
} from 'next'

import getUsers, {ApiContext, User} from '../../services/users/get-users'

type UserPageProps = InferGetStaticPropsType<typeof getStaticProps>

const SSG: NextPage<UserPageProps> = ({users}: UserPageProps) => {
	return (
		<div>
			<h1>SSGによるユーザー一覧情報取得</h1>
			{users.map((user: User) => (
				<>
					<p>{`username: ${user.username}`}</p>
					<p>{`email: ${user.email}`}</p>
				</>
			))}
		</div>
	)
}

export const getStaticProps: GetStaticProps = async () => {
  const context: ApiContext = {apiRootUrl: 'http://localhost:8080'}
	const users = await getUsers(context)

  return {
    props: {
      users,
    },
  }
}

export default SSG
SSGはビルド時にデータを取得するのでnpm run buildを実行します。
nextjs-fetch-test % npm run build

> nextjs-fetch-test@0.1.0 build
> next build

info  - SWC minify release candidate enabled. https://nextjs.link/swcmin
info  - Linting and checking validity of types
info  - Creating an optimized production build
info  - Compiled successfully
info  - Collecting page data
info  - Generating static pages (4/4)
info  - Finalizing page optimization

Route (pages)                              Size     First Load JS
┌ ○ /                                      5.41 kB        83.3 kB
├   └ css/ae0e3e027412e072.css             707 B
├   /_app                                  0 B            77.9 kB
├ ○ /404                                   186 B          78.1 kB
├ λ /api/hello                             0 B            77.9 kB
└ ● /users/ssg                             413 B          78.3 kB
+ First Load JS shared by all              78.1 kB
  ├ chunks/framework-9b5d6ec4444c80fa.js   45.7 kB
  ├ chunks/main-3123a443c688934f.js        30.9 kB
  ├ chunks/pages/_app-deb173bd80cbaa92.js  499 B
  ├ chunks/webpack-7ee66019f7f6d30f.js     755 B
  └ css/ab44ce7add5c3d11.css               247 B

λ  (Server)  server-side renders at runtime (uses getInitialProps or getServerSideProps)
○  (Static)  automatically rendered as static HTML (uses no initial props)
●  (SSG)     automatically generated as static HTML + JSON (uses getStaticProps)
● /users/ssgとなっているので、/users/ssgがSSGで作成されたことを確認できます。
npm run startでサーバー起動。
画面は以下のようになります。

SSGはビルド時にデータを取得するので画面を更新してもrandom-userのemailは変更されません。
もしnpm run devで起動した場合は、リクエストがある度にgetStaticPropsが実行されるのでrandom-userのemailは毎回表示が変わります。
2. SSRによるユーザー一覧画面表示
次はSSRでユーザー一覧画面を表示する方法になります。
SSRの使いどころはデータのリアルタイム性が求められるような画面かと思います。
SSRはデータ取得にgetServerSidecPropsを使います。
実装は以下になります。
import type {
	GetServerSideProps,
	InferGetServerSidePropsType,
  NextPage,
} from 'next'

import getUsers, {ApiContext, User} from '../../services/users/get-users'

type UserPageProps = InferGetServerSidePropsType<typeof getServerSideProps>

const SSR: NextPage<UserPageProps> = ({users}: UserPageProps) => {
	return (
		<div>
			<h1>SSRによるユーザー一覧情報取得</h1>
			{users.map((user: User) => (
				<>
					<p>{`username: ${user.username}`}</p>
					<p>{`email: ${user.email}`}</p>
				</>
			))}
		</div>
	)
}

export const getServerSideProps: GetServerSideProps = async () => {
  const context: ApiContext = {apiRootUrl: 'http://localhost:8080'}
	const users = await getUsers(context)

  return {
    props: {
      users,
    },
  }
}

export default SSR
npm run buildを実行します。
nextjs-fetch-test % npm run build

> nextjs-fetch-test@0.1.0 build
> next build

info  - SWC minify release candidate enabled. https://nextjs.link/swcmin
info  - Linting and checking validity of types
info  - Creating an optimized production build
info  - Compiled successfully
info  - Collecting page data
info  - Generating static pages (4/4)
info  - Finalizing page optimization

Route (pages)                              Size     First Load JS
┌ ○ /                                      5.41 kB        83.3 kB
├   └ css/ae0e3e027412e072.css             707 B
├   /_app                                  0 B            77.9 kB
├ ○ /404                                   186 B          78.1 kB
├ λ /api/hello                             0 B            77.9 kB
├ ● /users/ssg                             413 B          78.3 kB
└ λ /users/ssr                             412 B          78.3 kB
+ First Load JS shared by all              78.1 kB
  ├ chunks/framework-9b5d6ec4444c80fa.js   45.7 kB
  ├ chunks/main-3123a443c688934f.js        30.9 kB
  ├ chunks/pages/_app-deb173bd80cbaa92.js  499 B
  ├ chunks/webpack-7ee66019f7f6d30f.js     755 B
  └ css/ab44ce7add5c3d11.css               247 B

λ  (Server)  server-side renders at runtime (uses getInitialProps or getServerSideProps)
○  (Static)  automatically rendered as static HTML (uses no initial props)
●  (SSG)     automatically generated as static HTML + JSON (uses getStaticProps)
λ /users/ssrとなっており、/users/ssrがSSRで作成されたことを確認できます。
npm run startでサーバー起動。
画面は以下のような感じになっています。
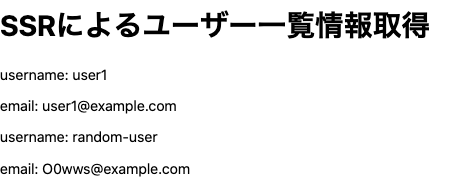
更新する度にrandom-userのemailが変更されていることが確認できます。
これはSSRはアクセスする度にサーバーでデータを取得しページを描画するためです。
3. ISRによるユーザー一覧画面表示
次はISRでユーザー一覧画面を表示する方法になります。
ISRは頻繁にデータは更新されないけど、ある程度の時間で最新情報を取得し画面を更新したい時に利用できます。
ISRはSSGと同様でデータ取得にgetStaticPropsを使います。
異なるのはrevalidateで指定した期間で静的ページを更新することです。
実装は以下になります。
import type {
	GetStaticProps,
  InferGetStaticPropsType,
  NextPage,
} from 'next'

import getUsers, {ApiContext, User} from '../../services/users/get-users'

type UserPageProps = InferGetStaticPropsType<typeof getStaticProps>

const ISR: NextPage<UserPageProps> = ({users}: UserPageProps) => {
	return (
		<div>
			<h1>ISRによるユーザー一覧情報取得</h1>
			<h2>10間隔で静的ページを更新します</h2>
			{users.map((user: User) => (
				<>
					<p>{`username: ${user.username}`}</p>
					<p>{`email: ${user.email}`}</p>
				</>
			))}
		</div>
	)
}

export const getStaticProps: GetStaticProps = async () => {
  const context: ApiContext = {apiRootUrl: 'http://localhost:8080'}
	const users = await getUsers(context)

  return {
    props: {
      users,
    },
		revalidate: 10
  }
}

export default ISR
今回は10秒間隔で静的ページを更新する設定にしています。
npm run buildを実行します。
nextjs-fetch-test % npm run build

info  - SWC minify release candidate enabled. https://nextjs.link/swcmin
info  - Linting and checking validity of types
info  - Creating an optimized production build
info  - Compiled successfully
info  - Collecting page data
info  - Generating static pages (5/5)
info  - Finalizing page optimization

Route (pages)                              Size     First Load JS
┌ ○ /                                      5.41 kB        83.3 kB
├   └ css/ae0e3e027412e072.css             707 B
├   /_app                                  0 B            77.9 kB
├ ○ /404                                   186 B          78.1 kB
├ λ /api/hello                             0 B            77.9 kB
├ ● /users/isr (ISR: 10 Seconds)           473 B          78.3 kB
├ ● /users/ssg                             413 B          78.3 kB
└ λ /users/ssr                             412 B          78.3 kB
+ First Load JS shared by all              78.1 kB
  ├ chunks/framework-9b5d6ec4444c80fa.js   45.7 kB
  ├ chunks/main-3123a443c688934f.js        30.9 kB
  ├ chunks/pages/_app-deb173bd80cbaa92.js  499 B
  ├ chunks/webpack-7ee66019f7f6d30f.js     755 B
  └ css/ab44ce7add5c3d11.css               247 B

λ  (Server)  server-side renders at runtime (uses getInitialProps or getServerSideProps)
○  (Static)  automatically rendered as static HTML (uses no initial props)
●  (SSG)     automatically generated as static HTML + JSON (uses getStaticProps)
   (ISR)     incremental static regeneration (uses revalidate in getStaticProps)
● /users/isr (ISR: 10 Seconds) と表示されているのでISRで作成されています。
npm run startでサーバー起動します。
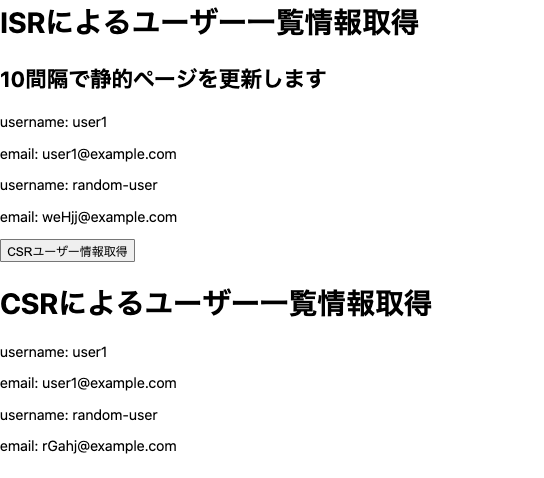
実際の画面は以下のようになります。

表示された画面を更新してもrandom-userのemailは変更されませんが、10秒たつと静的ページを更新するのでrandom-userのemailが変更されていることを確認できます。
4. CSRによるユーザー一覧画面表示
次はCSRでユーザー一覧画面を表示する方法になります。
今回はuseSWRを使用してデータを取得します。
実装は以下になります。
import type {
  NextPage,
} from 'next'

import {User} from '../../services/users/get-users'
import useSWR from 'swr'
import { fetcher } from "../../utils"


const CSR: NextPage = () => {
	const {data, error, mutate} = useSWR<User[]>('http://localhost:8080/users', fetcher, {shouldRetryOnError: false})
	console.log(data)
	const onClickUser = () => {
		mutate(data, false)
	}

	if (data === undefined) {
		return (
			<div>
				<h1>CSRによるユーザー一覧情報取得</h1>
				<button onClick={onClickUser}>ユーザー情報取得</button>
			</div>
		)
	}

	return (
		<div>
			<h1>CSRによるユーザー一覧情報取得</h1>
			<button onClick={onClickUser}>ユーザー情報取得</button>
			{	data.map((user: User) => (
					<>
						<p>{`username: ${user.username}`}</p>
						<p>{`email: ${user.email}`}</p>
					</>
				))
			}
		</div>
	)
}

export default CSR
画面更新時、ボタン押下時にデータを取得しユーザー情報を表示するコンポーネントを更新する設定にしています。
しかしこの設定で画面を開くとユーザー情報が表示されていません。

コンソールには下記のようなエラーが表示されます。

これは、next.jsで作成された画面がローカル環境ではhttp://localhost:3000であるのに対して、APIサーバーがhttp://localhost:8080となっておりオリジンが異なることによるCORSエラーになります。
CORSエラーを回避する方法
手取り早くCORSエラーを回避する方法にNext.jsのRewrites機能が使えます。
まずは画面の実装でユーザー情報を取得するAPIのURLを下記のように/api/users/csrに変更し、Next.jsのオリジンと同一にします。
const {data, error, mutate} = useSWR<User[]>('/api/users/csr', fetcher, {shouldRetryOnError: false})
次にnext.config.jsを下記のように記載し、/api/users/csrのアクセスをhttp://localhost:8080/usersに変更するように設定します。
/** @type {import('next').NextConfig} */
const nextConfig = {
  reactStrictMode: true,
  swcMinify: true,
  async rewrites() {
    return [
      {
        source: '/api/users/csr',
        destination: 'http://localhost:8080/users',
      },
    ]
  },
}

module.exports = nextConfig
この状態で画面を開くと下記のように正常に表示できます。さらに、ボタン押下でデータを取得し表示を更新もできます。

他にもCORSエラーを回避する方法としてnginxを使用して制御する方法などもありますが、これは別の記事でまとめようと思います。
ISRとCSRの組み合わせによる画面表示
上記で紹介した画面表示方法は組み合わせることができます。
そこでここでは一例としてISRとCSRを組み合わせた使い方を紹介します。
この組み合わせの良いところは、まず静的ページで画面を表示した後に必要な箇所をCSRで更新できることです。
こうすることで高速な画面表示を実現することができます。
実装例は以下のような感じになります。
import type {
	GetStaticProps,
  InferGetStaticPropsType,
  NextPage,
} from 'next'
import CsrUserList from '../../components/csrUser'
import NotCsrUserList from '../../components/notCsrUser'
import { useState } from 'react'
import getUsers, {ApiContext, User} from '../../services/users/get-users'

type UserPageProps = InferGetStaticPropsType<typeof getStaticProps>

const UserList = (props:any) => {
  return (
		<>
			<p>{`username: ${props.user.username}`}</p>
			<p>{`email: ${props.user.email}`}</p>
		</>
  );
}

const ISRCSR: NextPage<UserPageProps> = ({users}: UserPageProps) => {
	const [isRendering, setIsRendering] = useState(false)
	return (
		<div>
			<h1>ISRによるユーザー一覧情報取得</h1>
			<h2>10間隔で静的ページを更新します</h2>
			<div>
				{	users.map((user: User, index: number) => (
					<UserList user={user} key={index}/>
					))
				}
			</div>
			<button onClick={()=>setIsRendering(true)}>CSRユーザー情報取得</button>
			{isRendering ? <CsrUserList /> : <NotCsrUserList />}
		</div>
	)
}

export const getStaticProps: GetStaticProps = async () => {
  const context: ApiContext = {apiRootUrl: 'http://localhost:8080'}
	const users = await getUsers(context)

  return {
    props: {
      users,
    },
		revalidate: 60
  }
}

export default ISRCSR
初期表示用の子コンポーネントは以下を用意しました。
const NotCsrUserList = () => {
	return <div></div>
}

export default NotCsrUserList
ボタンを押下しCSRでレンダリングするためのコンポーネントは以下のようにしました。
import { User } from '../services/users/get-users'
import useSWR from 'swr'
import { fetcher } from '../utils'

const UserList = (props:any) => {
  return (
		<>
			<p>{`username: ${props.user.username}`}</p>
			<p>{`email: ${props.user.email}`}</p>
		</>
  );
}

const CsrUserList = () => {
	const {data, error} = useSWR<User[]>('/api/users/csr', fetcher, {shouldRetryOnError: false})
	if (data === undefined) {
		return (
			<div>
				<h1>CSRによるユーザー一覧情報取得</h1>
			</div>
		)
	}

	return (
		<div>
			<h1>CSRによるユーザー一覧情報取得</h1>
			<div>
			{	data.map((user: User, index: number) => (
				<UserList user={user} key={index}/>
				))
			}
			</div>
		</div>
	)
}

export default CsrUserList
これによりまずは静的ページで次のような画面を表示します。

そしてボタンを押下しCSRでデータを取得しコンポーネントをレンダリング。
これができることで静的ページで画面を表示し、更新があった箇所など必要なところだけクライアント側で更新できるので高速に画面を表示することが可能になります。
まとめ
Next.jsには画面を表示する方法をまとめてみました。これらの使い分けは、データの更新頻度やリアルタイム性などを考えて選定していくのが良いと感じました。
また、CSRの場合はCORSの問題も発生するのでそのあたりも気を付けるポイントかなと思います。
これによってどういうネットワーク構成にするのか、サーバー側でCORS回避の設定を入れるかなど設計が変わるので理解は必須だなと思いました。