概要
2019年11月7日にAWSの自然言語処理サービスであるAmazon Comprehendが日本語に対応したので、早速Alexaスキルで感情分析を試してみました。
スキルの作成にはASK CLIを使い、言語はPython3を使っているのでその辺の知識があると分かりやすいかと思います。
やった事
Amazon Comprehendの感情分析機能であるSentimentを使ってユーザーからの入力を感情分析し、その結果によってレスポンスが変わるAlexaスキルの作成
東京リージョンではまだ使えない
2019年11月8日時点でAmazon Comprehendはまだ東京リージョンに対応していないので、ASK CLIでスキル作成する前に aws configure でリージョンを us-east-1 などに変更してあげる必要があります。
現在対応しているリージョン一覧 (2019年11月8日時点)
- 米国東部 (バージニア北部)
- 米国東部 (オハイオ)
- 米国西部 (オレゴン)
- アジアパシフィック (シンガポール)
- アジアパシフィック (シドニー)
- カナダ (中部)
- EU (フランクフルト)
- EU (アイルランド)
- EU (ロンドン)
ブラウザで試してみる
最初はブラウザ上で試してみた方が分かりやすいのでAWSコンソール上でAmazon Comprehend(リージョンは任意)を開き、Input Textに直接テキストを入力して分析してみます。
分析結果はInsightsで確認でき、以下の5つの項目に分かれています。
- Entities
- Key phrase
- Language
- Sentiment (今回使う)
- Syntax
今回は感情分析の Sentiment を使います。例えば、「今日はとてもいい天気です」 と入力してみると以下のような結果が確認できます。
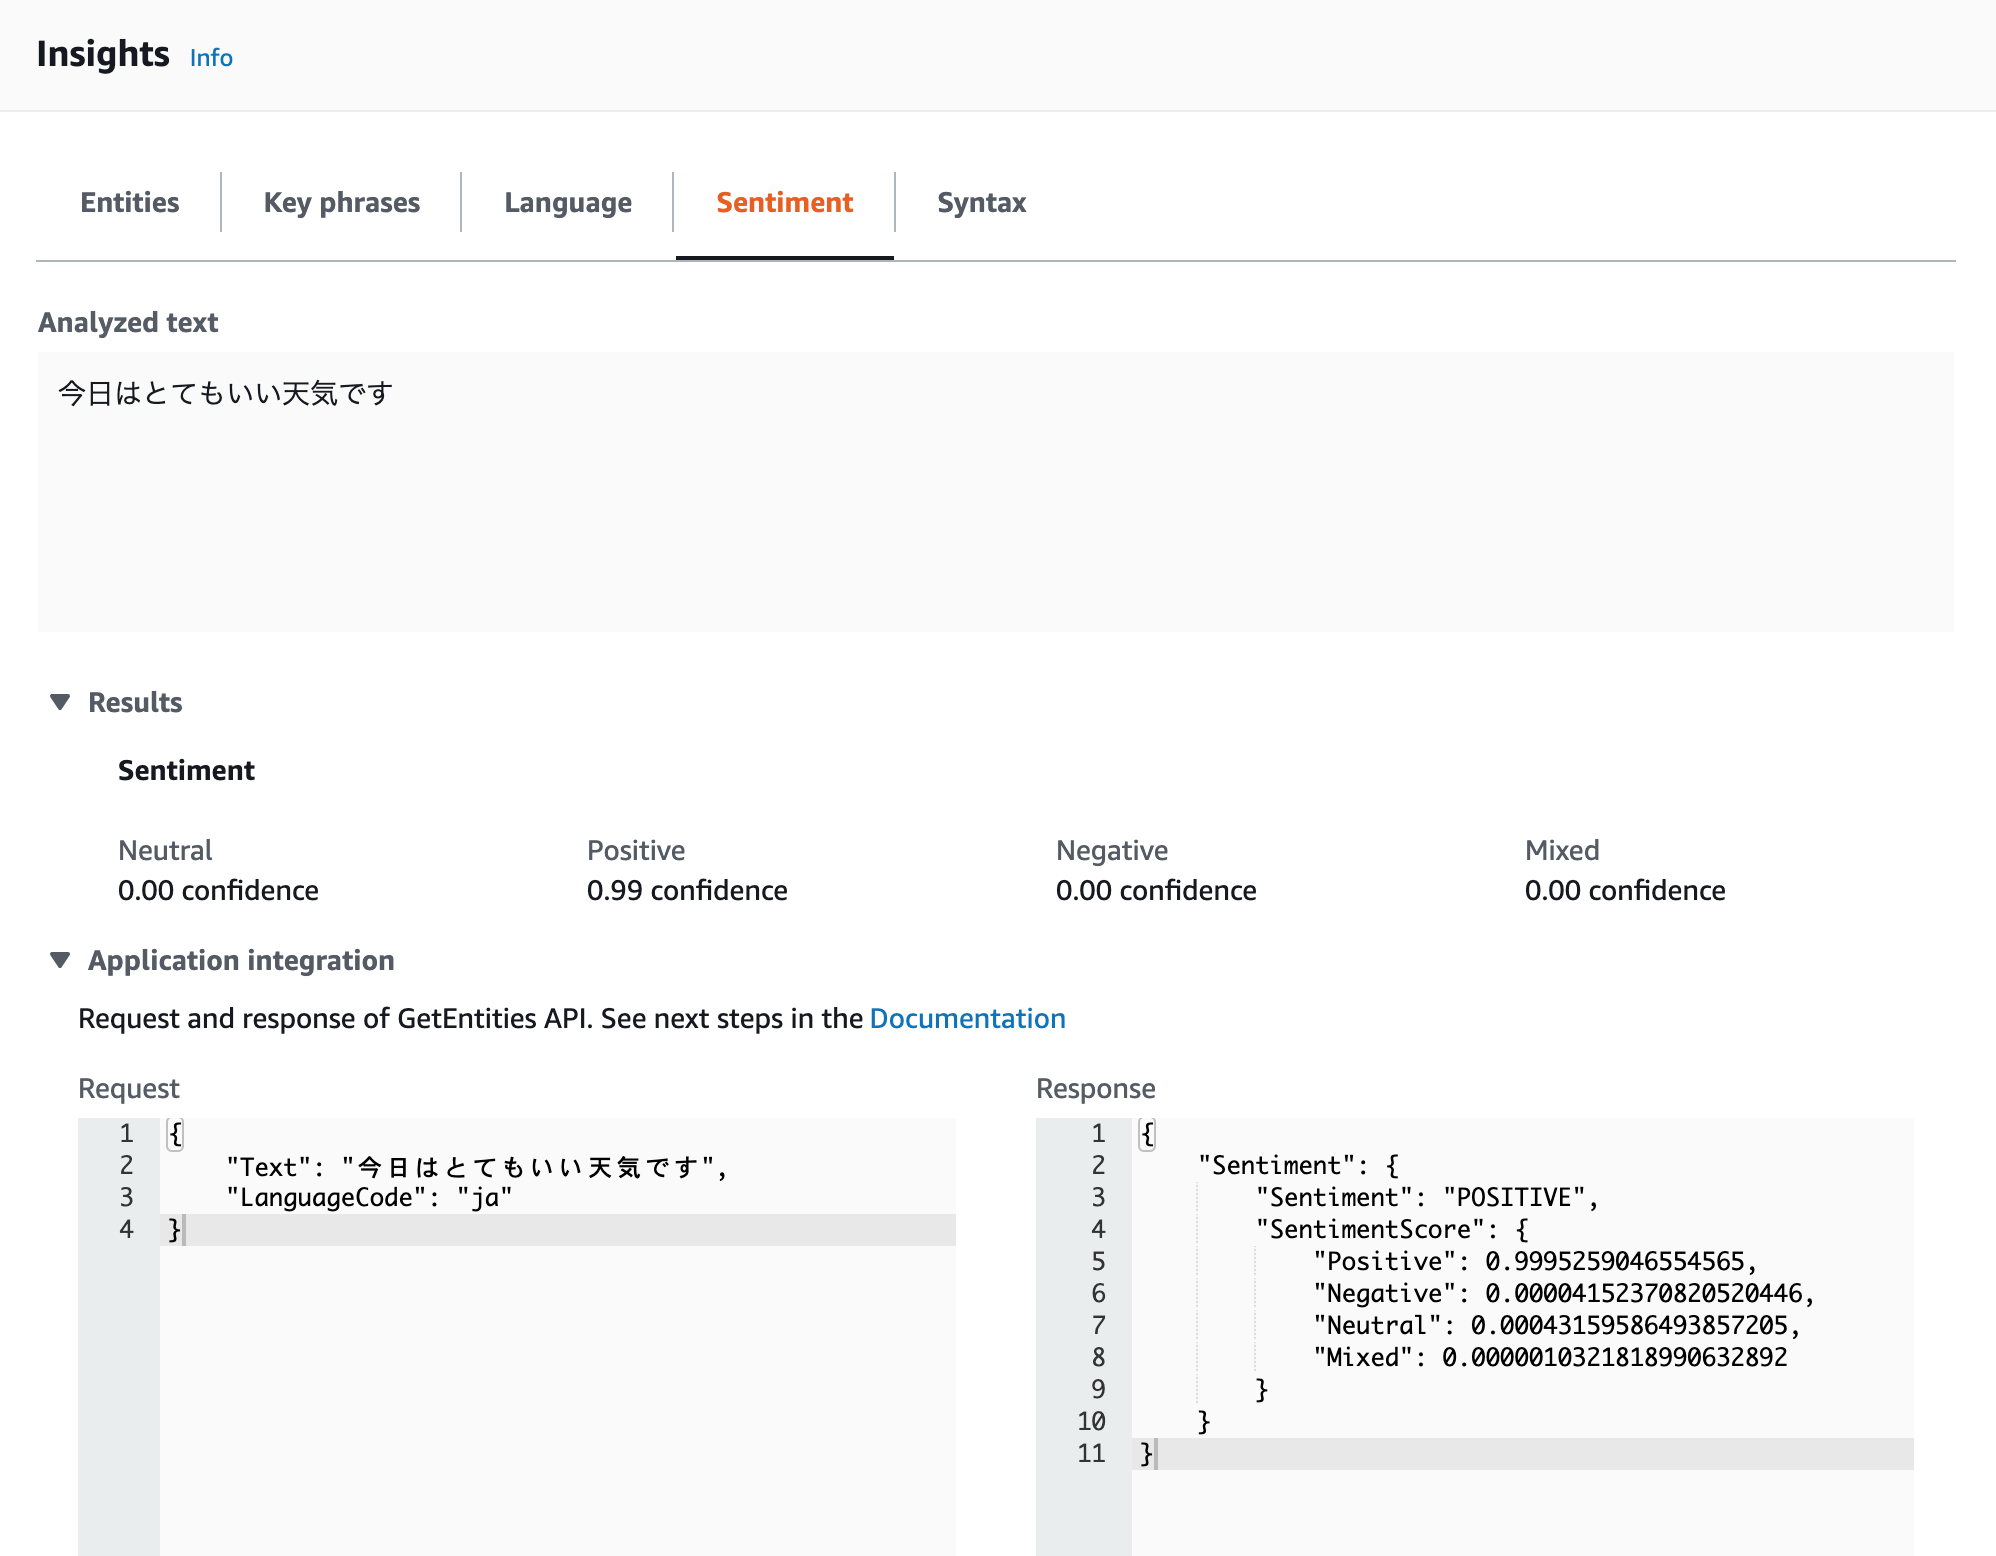
Application Integrationタブを開くと、分析結果によって 「POSITIVE」 「NEUTRAL」 「NEGATIVE」 「MIXED」 のどれかがResponseの中に値として入ってきます。これを使ってコード上で条件分岐をしていきます。
Alexaスキルの作成
本題ではないのでざっくりと。
ask new- 「
Please select the runtime」 と聞かれるのでPython3を選択 - 「
List of templates you can choose」 と聞かれるのでシンプルな 「Hello World (using Classes)」 を選択
boto3のインストール
boto3を使うとAWSサービスをPythonから簡単に扱う事ができます。今回はAmazon Comprehendにアクセスするために使用します。
pip install boto3
AWS Lambdaのコード
boto3の追加
import boto3
client = boto3.client('comprehend')
感情分析用インテントの作成
元々あるHelloWorldIntentを以下のように書き換えればOKです。(参照箇所のインテント名も同様に置き換えます)
変数 sentiment に代入している箇所で感情分析をしているのがポイントです。
class SentimentAnalysisIntentHandler(AbstractRequestHandler):
    """Handler for Sentiment Analysis Intent."""

    def can_handle(self, handler_input):
        return ask_utils.is_intent_name("SentimentAnalysisIntent")(handler_input)

    def handle(self, handler_input):。
        _ = handler_input.attributes_manager.request_attributes["_"]
        speak_output = _(data.HELLO_MSG)
        feeling = ask_utils.get_slot_value(handler_input, "feeling")
        sentiment = client.detect_sentiment(Text=feeling, LanguageCode='ja')['Sentiment']

        if sentiment == 'POSITIVE':
            speak_output = '元気そうですね'
        elif sentiment == 'NEGATIVE':
            speak_output = '落ち込んでますね'
        else:
            speak_output = 'いつも通りですね'

        return (
            handler_input.response_builder
            .speak(speak_output)
            .response
        )
モデルのJSON
Alexaスキルでは自由入力は推奨されていなかったはずなので、「今の気分は」 に続く文章を分析対象とています。
{
  "interactionModel": {
    "languageModel": {
      "invocationName": "感情分析デモ",
      "intents": [
        {
          "name": "AMAZON.CancelIntent",
          "samples": []
        },
        {
          "name": "AMAZON.HelpIntent",
          "samples": []
        },
        {
          "name": "AMAZON.StopIntent",
          "samples": []
        },
        {
          "name": "SentimentAnalysisIntent",
          "slots": [
            {
              "name": "feeling",
              "type": "AMAZON.SearchQuery"
            }
          ],
          "samples": [
            "今の気分は {feeling} "
          ]
        },
        {
          "name": "AMAZON.NavigateHomeIntent",
          "samples": []
        }
      ],
      "types": []
    }
  },
  "version": "1"
}
デプロイ
その他諸々のいつもの設定(呼び出し名の設定など)が終わったら ask deploy でデプロイします。
実行権限の付与
Policyの作成
このままだとAmazon Comprehendの実行権限がないので以下のPolicyを作成します。
{
    "Version": "2012-10-17",
    "Statement": [
        {
            "Effect": "Allow",
            "Action": [
                "logs:CreateLogGroup",
                "logs:CreateLogStream",
                "logs:PutLogEvents"
            ],
            "Resource": "arn:aws:logs:*:*:*"
        },
        {
            "Action": [
                "comprehend:DetectDominantLanguage",
                "comprehend:DetectSentiment"
            ],
            "Effect": "Allow",
            "Resource": "*"
        }
    ]
}
Policyをアタッチする
設定したリージョンのAWS Lambdaを開き作成された関数を確認すると ask-lambda-sentiment-analysis (sentiment-analysicの部分はスキル名) の様な名前のRoleが自動的に設定されているので、このRoleに先ほど作成したPolicyをアタッチします。これでAmazon ComprehendをAWS Lambdaから実行可能になります。
テストしてみる
Alexa Developer Consoleでスキルのテストをしてみます。
POSITVE

NEGATIVE
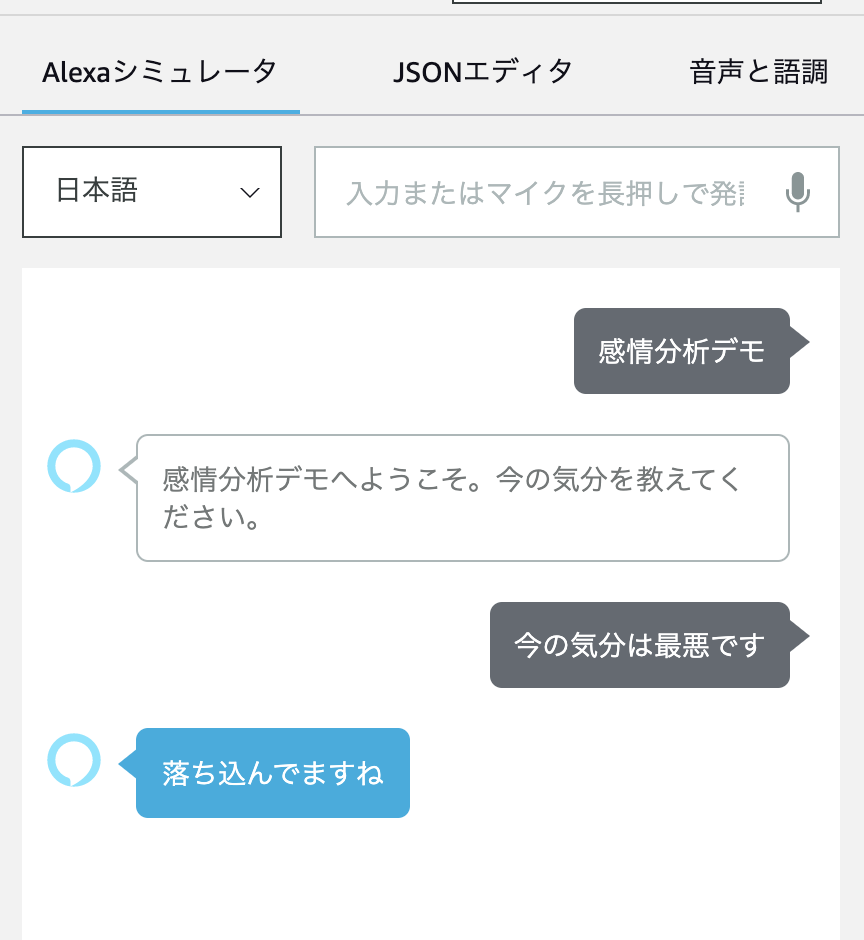
とてもシンプルですが、感情分析を使ってアウトプットを出し分ける事ができました。
まとめ
Amazon Comprehendを使う事でAlexaスキルで簡単に感情分析する事ができました。
Node.jsのスキルでは試していないですが、Python3ではサクッと導入でき思ったより簡単に使う事が出来たので今後のスキル開発にもどんどん取りれていきたいです。