はじめに
今回はAzure App Serviceについて学ぶ機会があったので、Azure App Serviceに含まれるAzure Web Appsについて勉強した内容をまとめました。Web Appsは、多様なランタイム、SSO、CI/CD、スケールアウト/スケールイン、デプロイスロット、に対応しているマネージドなWebサーバーになります。堅牢なWebアプリを簡単に作ることができることから、非常におすすめなPaaSサービスとなります。本記事は、Microsoft公式ドキュメントにある以下のクイックスタートを参考にしていますので、詳しく知りたい方は確認してみてください。
App Service Plan と Web App の作成
Web Appの作成やデプロイや、Azureポータル、Visual Studio、Visual Studio Code、Azure CLI、Azure Developer CLI、Azure PowerShell、を使って行うことができますが、ここではVisual Studio Codeを使って、Web Appsの作成とアプリのデプロイを実施することにします。Web Appを作成するためには、App Service Planが必要なので両方とも作成していきます。
App Service Planとは、CPUやメモリーなどのアプリを動かすVMサーバー群のスペックを決める枠組みになります。
Visual Studio Codeで、以下の「Azure App Service」の拡張機能をインストールします。

コマンドパレットを開き、「azure app service: create new web app」と入力し、「Azure App Service: Create New Web App...(Advanced)」を選択します。

Web Appの名前として、グローバルに一意の名前を入力します。

「+ Create new resoure group」を選択します。

使用するランタイムを選択します。(ここではPython 3.11を選択しました。)

新規のApp Service Planを作成するため、「+ Create new App Service plan」を選択します。

App Service Planを選択します。(ここではS1を選択しました。)

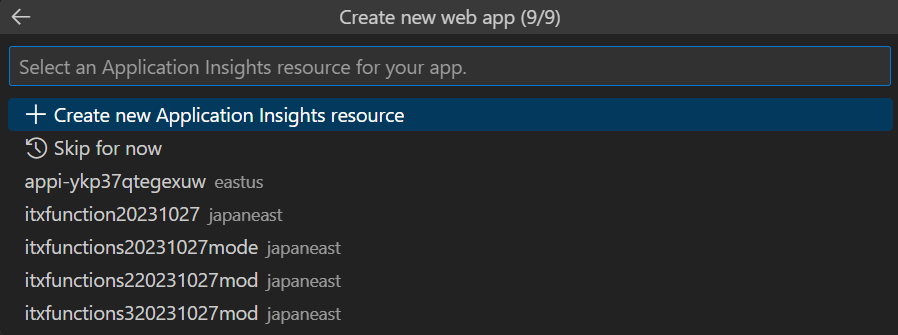
Application Insightsを作成するため、「+ Create new Application Insights resource」を選択します。(Skip for nowを選択してもよいです。)

Visual Studio CodeのAZURE:ACTIVITY LOGタブで「Succeeded」が表示されれば、無事App Service PlanとWeb Appが作成されました。

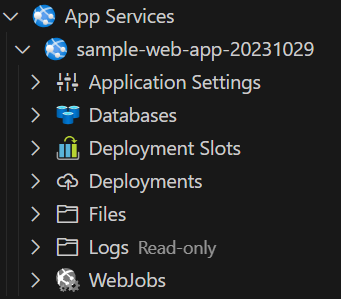
また、Visual Studio Code上でリソース一覧を確認すると、先ほど作成したWeb Appが表示されています。(Web App名は、sample-web-app-20231029)

サンプルアプリケーションのクローン
次に、Webアプリケーションをデプロイする前に、アプリが無い場合はサンプルアプリをクローンします。(Webアプリが用意されていれば、次のWebアプリのデプロイに進んでください。)
以下のサンプルアプリをクローンします。
git clone https://github.com/Azure-Samples/msdocs-python-flask-webapp-quickstart
アプリケーションフォルダーに移動します。
cd msdocs-python-flask-webapp-quickstart
アプリの仮想環境を作成します。OSに合わせて以下のどちらかのコマンドを実行してください。
py -m venv .venv
.venv\scripts\activate
python3 -m venv .venv
source .venv/bin/activate
依存関係をインストールします。
pip install -r requirements.txt
アプリを実行します。
flask run
ブラウザの検索バーに「 http://127.0.0.1:5000 」と検索して、以下の画面が表示されれば無事サンプルアプリが動いています。

Webアプリのデプロイ
コマンドパレットを開き、「Azure App Service: Depoy to Web App...」を選択します。

サンプルアプリが含まれるディレクトリを選択するために、「Browse...」を選択します。

エクスプローラーが表示されるので、サンプルアプリをクローンした場合は「msdocs-python-flask-webapp-quickstart」を「Select」します。

デプロイすることで前回のデプロイが上書きされることについての警告が出ますが、気にせず「Deploy」を選択します。

Web Appがデプロイされたことの確認
Visual Studio Codeでコマンドパレットを開き、「Azure App Service: Browse Website」を選択します。

ブラウザが開かれるので、以下のような画面が表示されれば、デプロイの成功です。

おわりに
本記事では、Visual Studio Codeを使ってAzure Web Appの作成とデプロイをしました。まず最初はAzureポータルを使って作成&デプロイするのが簡単に思えるかもしれませんが、Visual Studio Codeを使えば、わざわざAzureポータルにログインしたり、検索バーからAzure App Serviceを検索したりする必要がなく、コマンドパレットから全ての操作が可能なため、慣れると非常に便利だと感じました。今回は紹介していませんが、Visual Studio Codeを使えば、Azure Functionsの作成やデプロイも今回と同じようにできるため、ぜひ試してみてください。


