前編としてUbuntu×Postfix×Dovecotを用いて送受信可能なメールサーバの構築を行い、
後編としてLet's Encryptを用いて証明書を取得しセキュアなメールサーバにするまでが目標です。
今回は「後編:Let's Encryptを用いて証明書を取得しセキュアなメールサーバにする」
→前編はこちら
SSLを設定してセキュアなメールサーバにする
Let's Encryptを用いてサーバ証明書を発行し、SSL/TLSに対応することで送受信を暗号化する
正引き確認
hostコマンドでDNS設定を確認
# 正引き確認
host mail.(ドメイン)
IPアドレスが返ってくるかを確認
ファイアフォールの接続許可を追加
HTTP用の80番ポートとHTTPS用の443番ポートを追加
# ポートの追加
sudo ufw allow 80
sudo ufw allow 443
# 設定のリロード
sudo ufw reload
# ステータス確認
sudo ufw status

Status: active
To                         Action      From
--                         ------      ----
80                         ALLOW       Anywhere
443                        ALLOW       Anywhere
80 (v6)                    ALLOW       Anywhere (v6)
443 (v6)                   ALLOW       Anywhere (v6)
80番と443番ポートが追加されていることを確認
Let's Encryptでサーバ証明書を取得する
- certbotのインストール
# certbotインストール
sudo apt install certbot

# インストールされているか確認
apt list --installed | grep certbot
- 証明書の作成
# 証明書作成前にApatchを停止
sudo service apache2 stop

# 証明書作成
sudo certbot certonly --standalone -d mail.mail.(ドメイン名)

Saving debug log to /var/log/letsencrypt/letsencrypt.log
Plugins selected: Authenticator standalone, Installer None
Enter email address (used for urgent renewal and security notices) (Enter 'c' to
cancel): (任意のメールアドレスを入力)

- - - - - - - - - - - - - - - - - - - - - - - - - - - - - - - - - - - - - - - -
Please read the Terms of Service at
https://letsencrypt.org/documents/LE-SA-v1.2-November-15-2017.pdf. You must
agree in order to register with the ACME server at
https://acme-v02.api.letsencrypt.org/directory
- - - - - - - - - - - - - - - - - - - - - - - - - - - - - - - - - - - - - - - -
(A)gree/(C)ancel: A # 利用規約の承諾

- - - - - - - - - - - - - - - - - - - - - - - - - - - - - - - - - - - - - - - -
Would you be willing to share your email address with the Electronic Frontier
Foundation, a founding partner of the Let's Encrypt project and the non-profit
organization that develops Certbot? We'd like to send you email about our work
encrypting the web, EFF news, campaigns, and ways to support digital freedom.
- - - - - - - - - - - - - - - - - - - - - - - - - - - - - - - - - - - - - - - -
(Y)es/(N)o: N # メーリングリストの登録可否
Obtaining a new certificate
Performing the following challenges:
http-01 challenge for mail.kaitobono.work
Cleaning up challenges

IMPORTANT NOTES:
 - Congratulations! Your certificate and chain have been saved at:
   /etc/letsencrypt/live/mail.(ドメイン名)/fullchain.pem
   Your key file has been saved at:
   /etc/letsencrypt/live/mail.(ドメイン名)/privkey.pem
   Your cert will expire on 2022-03-19. To obtain a new or tweaked
   version of this certificate in the future, simply run certbot
   again. To non-interactively renew *all* of your certificates, run
   "certbot renew"
 - If you like Certbot, please consider supporting our work by:

   Donating to ISRG / Let's Encrypt:   https://letsencrypt.org/donate
   Donating to EFF:                    https://eff.org/donate-le

# 証明書作成後Apatchを起動
sudo service apache2 start
- 証明書更新のため定期実行設定
# cron設定編集
crontab -e

# 以下のcron設定を追記
00 3 * * * certbot renew -q --deploy-hook "systemctl restart postfix dovecot"
00 5 * * * certbot renew -q --deploy-hook "systemctl restart postfix dovecot"

# cron設定の確認
crontab -l
PostfixのSSL/TLS設定
- main.cfの編集
# main.cfのバックアップ作成
sudo cp -p /etc/postfix/main.cf /etc/postfix/main.cf.org1

# main.cfをviで開く
sudo vi /etc/postfix/main.cf

# 最後尾に以下を追加
### SSL/TLS Settings
smtp_tls_security_level = may
smtpd_tls_cert_file = /etc/letsencrypt/live/mail.(ドメイン名)/fullchain.pem
smtpd_tls_key_file = /etc/letsencrypt/live/mail.(ドメイン名)/privkey.pem
smtpd_tls_session_cache_database = btree:/var/lib/postfix/smtpd_scache
smtpd_tls_session_cache_timeout = 3600s
smtpd_tls_received_header = yes
smtpd_tls_loglevel = 1
- master.cfの編集
# master.cfのバックアップ作成
sudo cp -p /etc/postfix/master.cf /etc/postfix/master.cf.org2

# master.cfをviで開く
sudo vi /etc/postfix/master.cf

# コメントを外して変更
smtps     inet  n       -       n       -       -       smtpd
# コメントを外す
-o smtpd_tls_wrappermode=yes
# コメントを外す
-o smtpd_sasl_auth_enable=yes
# コメントを外して変更
-o smtpd_recipient_restrictions=permit_sasl_authenticated,reject
- 変更内容の確認・チェック
# 設定の確認
postconf -n
# 設定のチェック
sudo postfix check
- 設定内容の反映
# Postfixの再起動
sudo systemctl restart postfix
# ステータス確認
systemctl status postfix
- 465番ポートの状態確認
# ポートの確認
netstat -nat

ctive Internet connections (servers and established)
Proto Recv-Q Send-Q Local Address           Foreign Address         State
tcp        0      0 0.0.0.0:465             0.0.0.0:*               LISTEN
DovecotのSSL/TLS設定
- 10-ssl.confの編集
# 10-ssl.confのバックアップ作成
sudo cp -p /etc/dovecot/conf.d/10-ssl.conf /etc/dovecot/conf.d/10-ssl.conf.org2

# viで10-ssl.confを開く
sudo vi /etc/dovecot/conf.d/10-ssl.conf

# 変更
ssl = required
# コメント外して変更
ssl_cert = </etc/letsencrypt/live/mail.(ドメイン名)/fullchain.pem
# コメント外して変更
ssl_key = </etc/letsencrypt/live/mail.(ドメイン名)/privkey.pem
- 10-master.confの編集
# 10-master.confのバックアップ作成
sudo cp -p /etc/dovecot/conf.d/10-master.conf /etc/dovecot/conf.d/10-master.conf.org2

# viで10-master.confを開く
sudo vi /etc/dovecot/conf.d/10-master.conf

# 編集
service imap-login {
  inet_listener imap {
    port = 0 # コメント外して変更
  }
  inet_listener imaps {
    port = 993 # コメント外す
    ssl = yes # コメント外す
  }
# 編集
service pop3-login {
  inet_listener pop3 {
    port = 0 # コメント外して変更
  }
  inet_listener pop3s {
    port = 995 # コメント外す
    ssl = yes # コメント外す
  }
}
- 変更内容の確認
# 設定の確認
doveconf -n
- 設定内容の反映
# Dovecotの再起動
sudo systemctl restart dovecot
# ステータス確認
systemctl status dovecot
- 465番ポートの状態確認
# ポートの確認
netstat -nat

Active Internet connections (servers and established)
Proto Recv-Q Send-Q Local Address           Foreign Address         State
tcp        0      0 0.0.0.0:993             0.0.0.0:*               LISTEN
tcp        0      0 0.0.0.0:995             0.0.0.0:*               LISTEN
クライアントアプリを使ってテスト
-
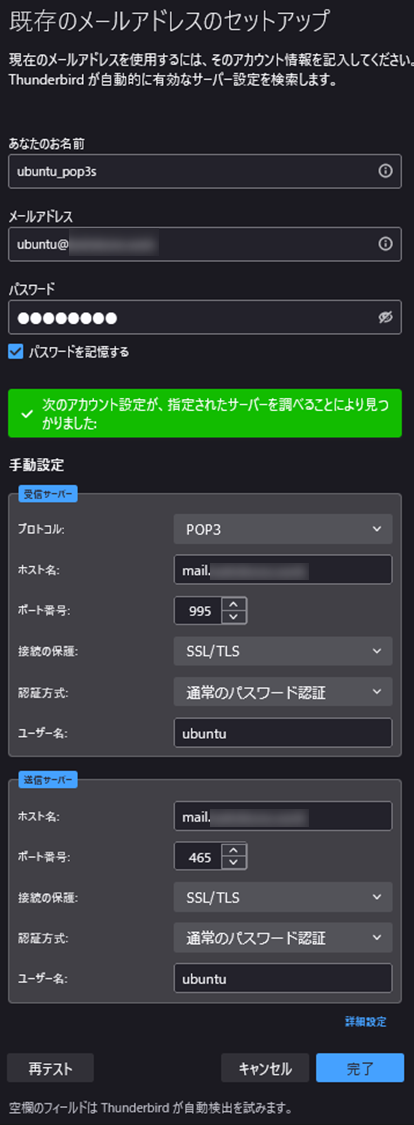
POP3S × SMTPSでテスト
- thunderbirdにメールアカウントを設定
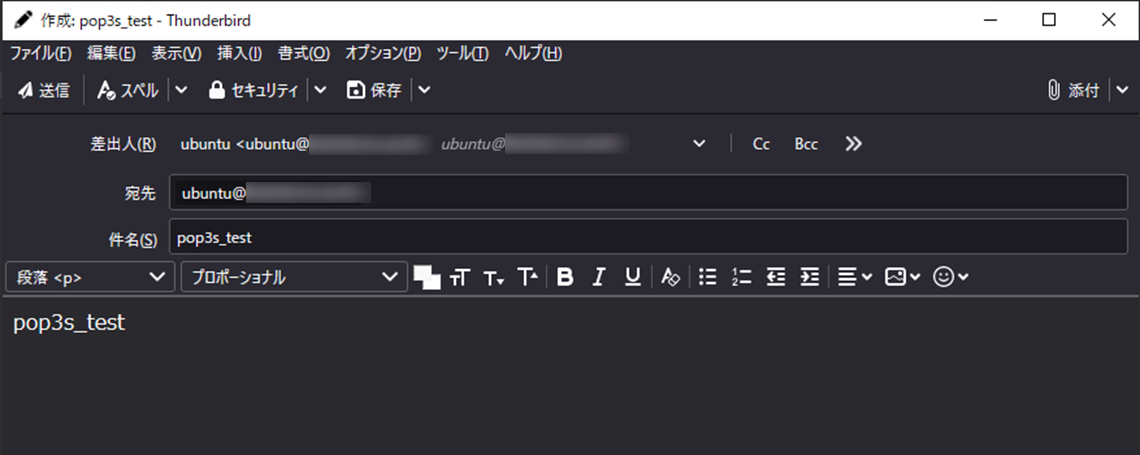
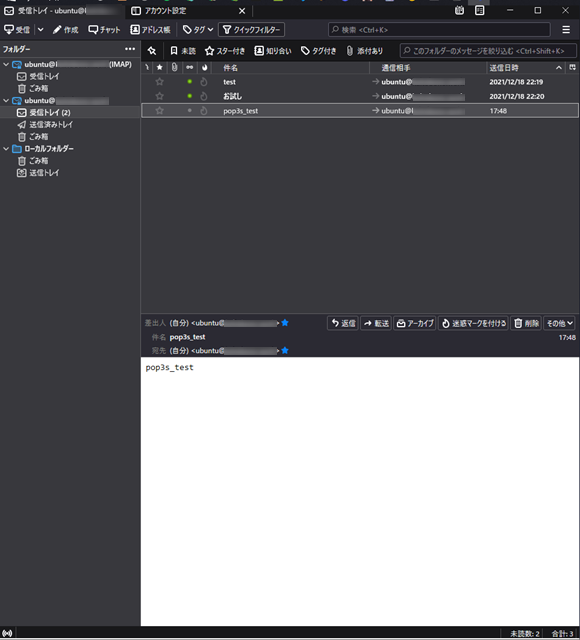
- クライアントでテスト送信
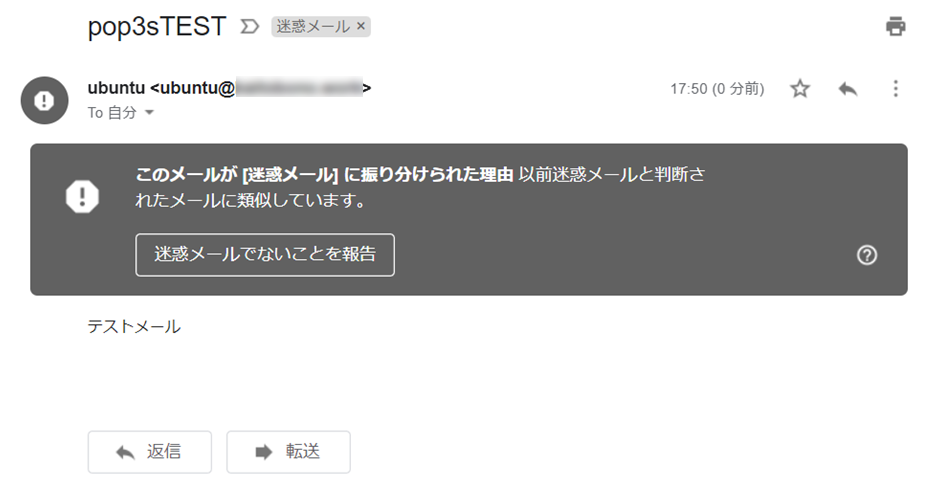
- SMTP-AUTHを使ってメールを外部にリレー配送
-
IMAPS × SMTPSでテスト

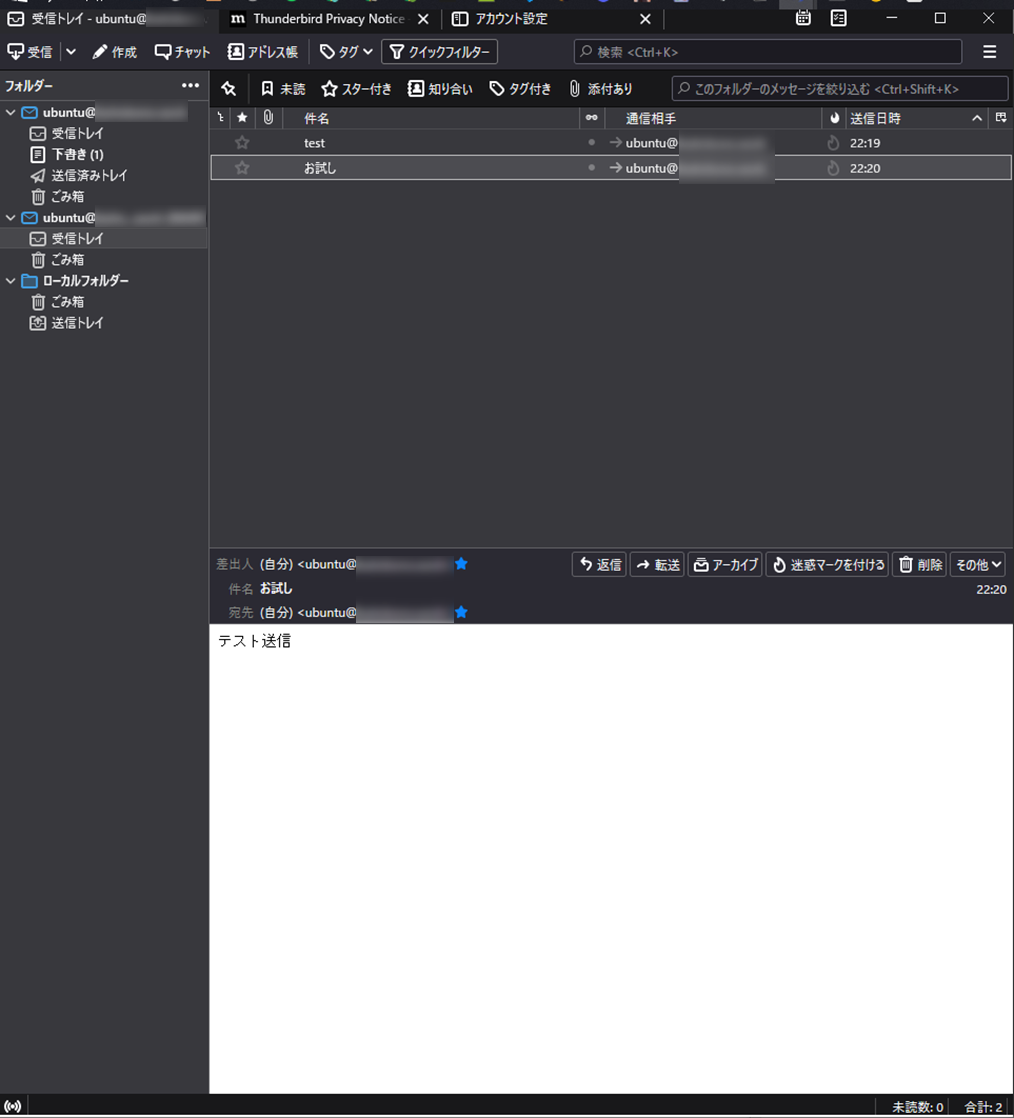
IMAPSの場合でも正常に接続できていることを確認
以上でセキュアなメールサーバ構築が完了しました。
Gmail等に送信した場合迷惑メール判定をされてしまうなど課題点は残りますが、
暗号化することでセキュアなメールサーバの構築までを行うことができました。