はじめに
icon fontを使用して、アイコンを表示してみます。
今回は、Icon Font & SVG Icon Sets ❍ IcoMoonで生成したttfファイルのフォントを使用します。

開発環境
| category | Version |
|---|---|
| Swift | 3.1 |
| XCode | 8.3.3 |
導入手順1. Xcodeにttfファイルを追加する
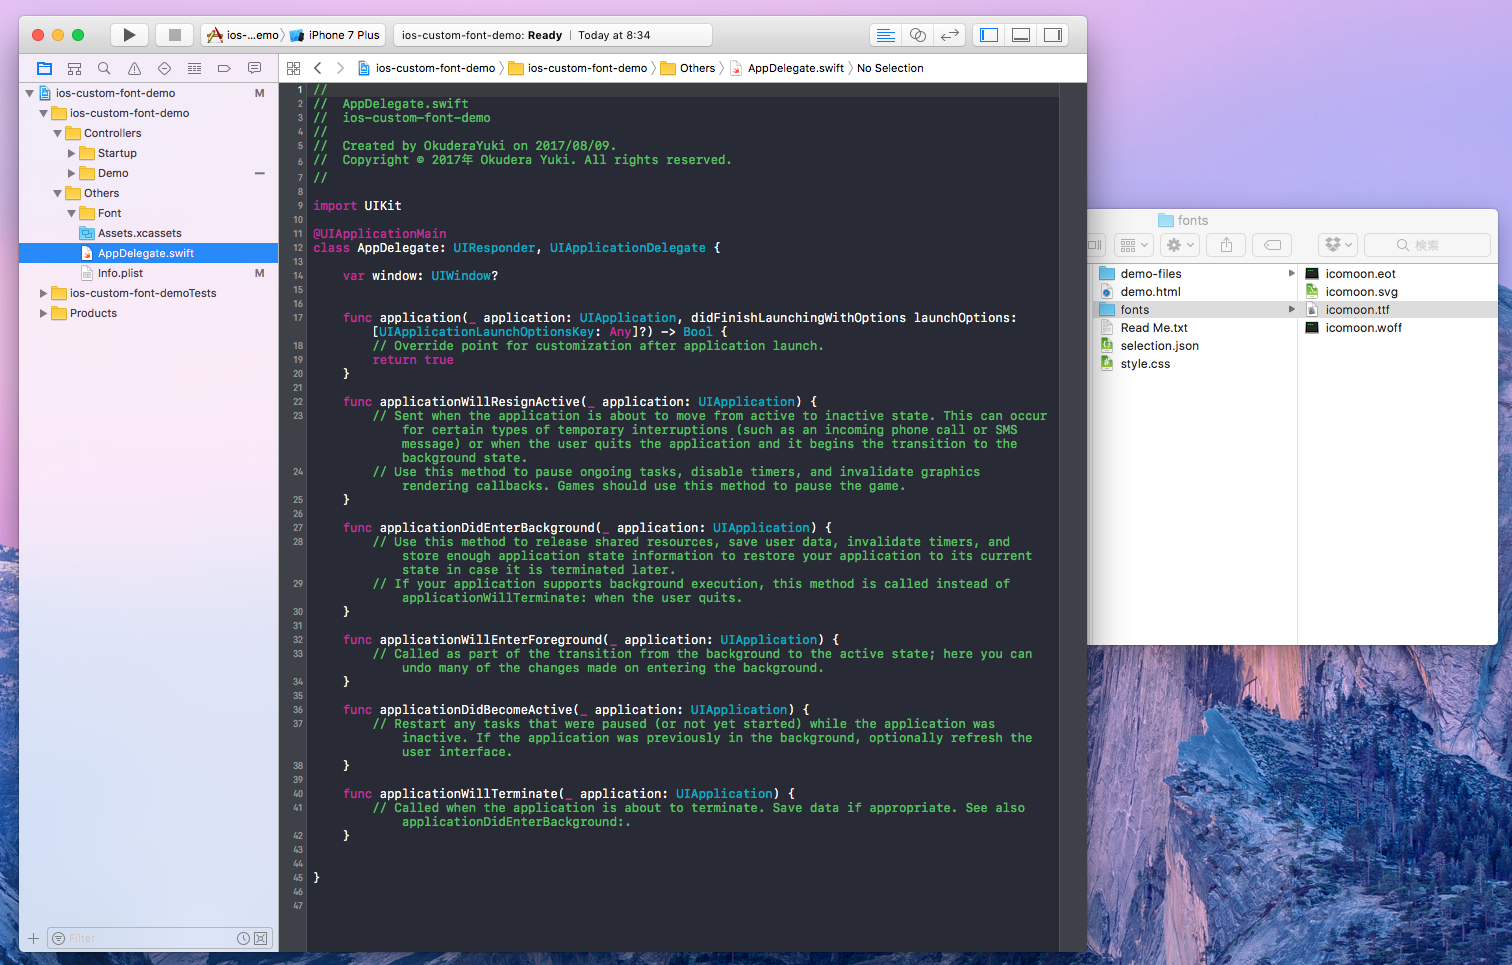
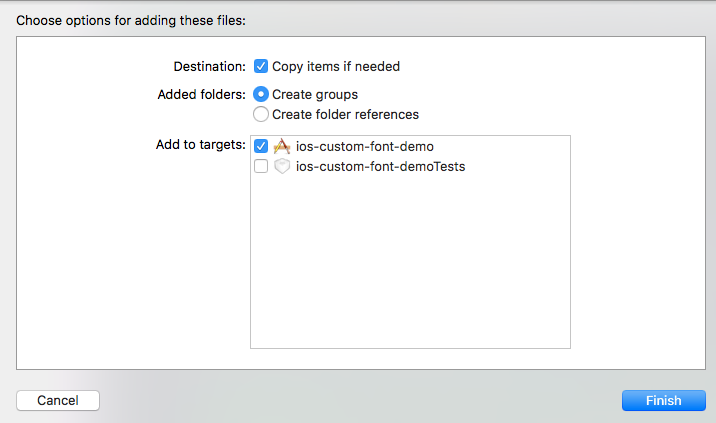
ドラッグ&ドロップで追加します。(targetのチェックを忘れずに。)
導入手順2. info.plistのFonts provided by applicationを設定する
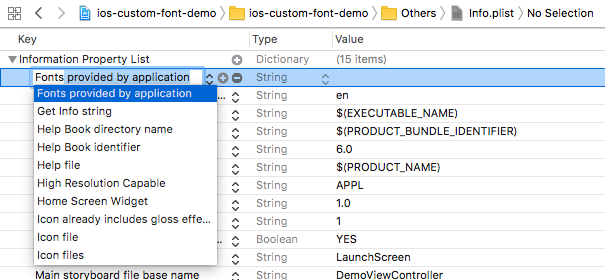
info.plistの「Fonts provided by application」に先ほど追加したttfファイルのファイル名を記載します。
複数のcustom fontを使用する場合は、Arrayのitemを追加してファイル名を記載します。
以上で導入は完了です。
ttfファイルのPostScript名を確認する
terminalで以下を実行することで確認できます。
$ mdls <ttfファイルのPATH>
例:
$ mdls /Users/yuki/Desktop/icomoon/fonts/icomoon.ttf

PostScript名は、ソースコードでUIFontのインスタンスを生成する際に使用します。
let font = UIFont(name: <PostScript名>, size: 20.0)
上記の例の場合:
let font = UIFont(name: "icomoon", size: 20.0)
UILabelに表示してみる
使用するiconのicon名をenumで定義しておきます。
/// IconFont名
enum IconFont: String {

    /// tongue
    case tongue = "\u{e9e3}"

    /// tongue2
    case highlightedTongue = "\u{e9e4}"

    /// cool
    case cool = "\u{e9eb}"

    /// cool2
    case highlightedCool = "\u{e9ec}"

    /// confused
    case confused = "\u{e9f5}"

    /// confused2
    case highlightedConfused = "\u{e9f6}"

    /// hipster
    case hipster = "\u{e9f9}"

    /// hipster2
    case highlightedHipster = "\u{e9fa}"
}
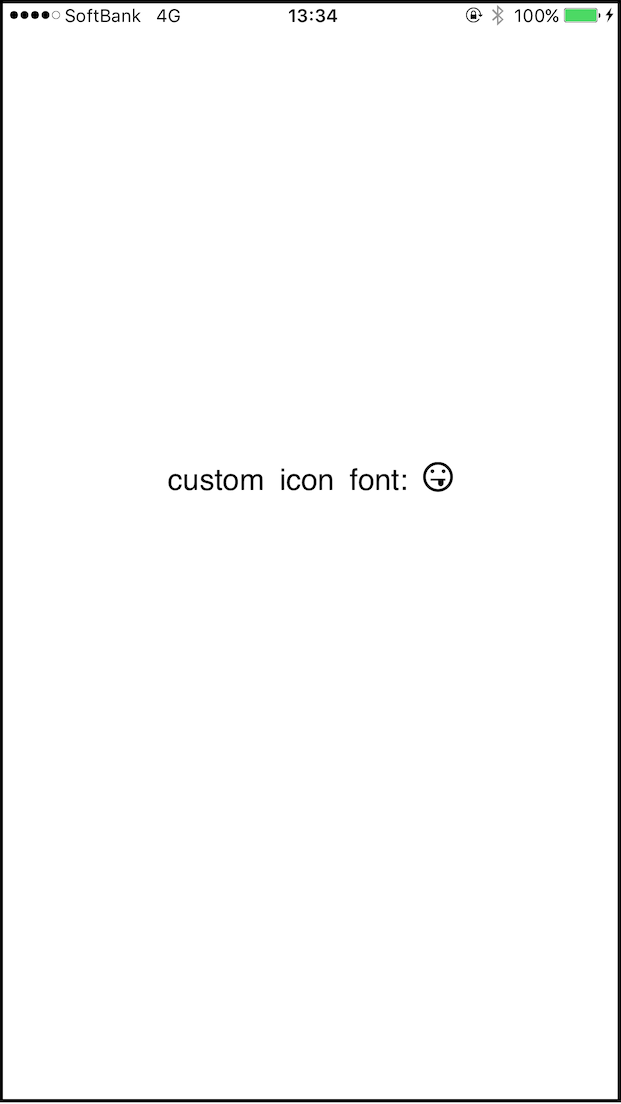
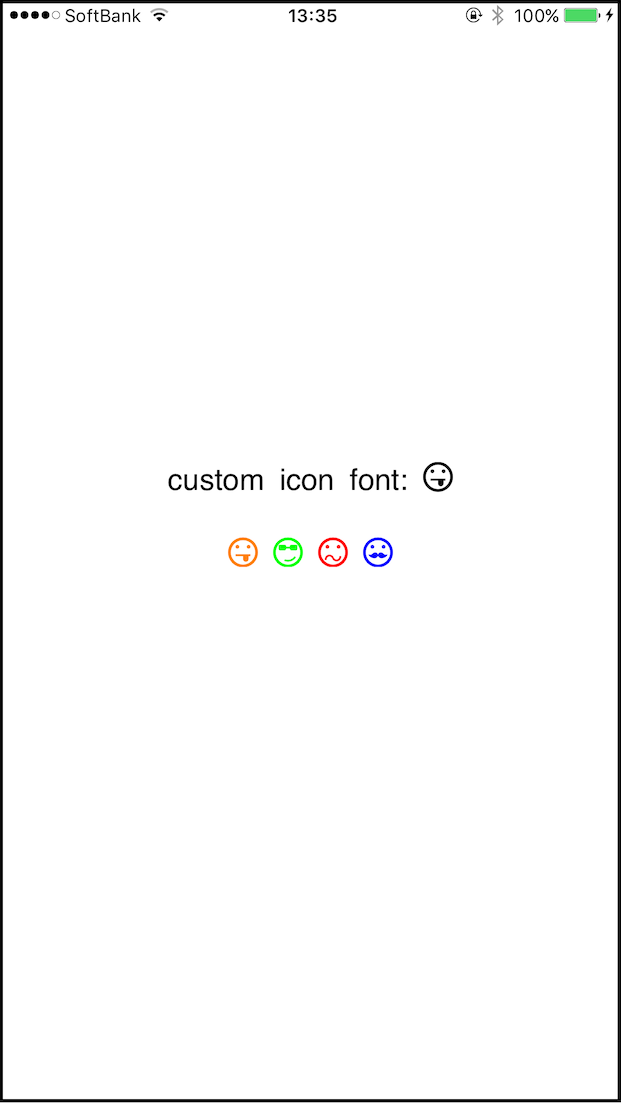
上記enumでicon名を指定して、UILabelに表示してみます。
// nameには、PostScript名をセット
guard let font = UIFont(name: "icomoon", size: 20) else { return }
let attributedString = NSAttributedString(string: "custom icon font: " + IconFont.tongue.rawValue,
                                          attributes: [NSFontAttributeName: font])
label.attributedText = attributedString
UILabelにアイコンを表示することができました!!
UIImageに変換する
TabBarのアイコンに使用したい場合等テキストだと都合の悪い場合もあるので、
UIImageに変換するextensionも用意します。
extension UIImage {

    /// IconFontからUIImageを生成する
    ///
    /// - Parameters:
    ///   - icon: IconFont名
    ///   - fontSize: 基のフォントサイズ (default: 20.0)
    ///   - rect: 生成する画像のサイズ (default: CGSize(width: 20.0, height: 20.0))
    ///   - color: 生成する画像の色 (default: .blue)
    /// - Returns: 画像
    class func iconFont(icon: IconFont,
                        fontSize: CGFloat = 20.0,
                        rect: CGSize = CGSize(width: 20.0, height: 20.0),
                        color: UIColor = .blue) -> UIImage? {

        guard let font = UIFont(name: "icomoon", size: fontSize) else { return nil }
        UIGraphicsBeginImageContextWithOptions(rect, false, 0.0)
        let attributes = [NSForegroundColorAttributeName: color,
                          NSFontAttributeName: font]
        let attributedString = NSAttributedString(string: icon.rawValue,
                                                  attributes: attributes)

        let context = NSStringDrawingContext()
        let boundingRect = attributedString.boundingRect(with: CGSize(width: fontSize, height: fontSize),
                                                         options: .usesLineFragmentOrigin,
                                                         context: context)

        let imageRect = CGRect(x: (rect.width / 2.0) - (boundingRect.size.width / 2.0),
                               y: (rect.height / 2.0) - (boundingRect.size.height / 2.0),
                               width: rect.width,
                               height: rect.height)

        attributedString.draw(in: imageRect)
        let iconImage = UIGraphicsGetImageFromCurrentImageContext()
        UIGraphicsEndImageContext()
        return iconImage
    }
}
先ほどはUILabelにアイコンを表示してみましたが、
今度は上記extensionでUIImageに変換してUIImageViewに表示してみます。
// UIImageViewに画像をセット
imageView1.image = UIImage.iconFont(icon: .tongue, color: .orange)
imageView2.image = UIImage.iconFont(icon: .cool, color: .green)
imageView3.image = UIImage.iconFont(icon: .confused, color: .red)
imageView4.image = UIImage.iconFont(icon: .hipster, color: .blue)
UIImageViewでもアイコンを表示することができました!!
さいごに
Githubに作成したサンプルをあげました。
サンプルコード
