はじめに
バックエンドとフロントエンドを順番に作成し、動作確認を行い、一つにまとめた状態のTomcat内蔵のjarファイルを最後に作成します。
Springプロジェクトの作成
Eclipseで作成します。
名前をbackendに変えるのみでその他はデフォルトのまま、Springスタータープロジェクトで作成。
作成場所はWindowsのファイルシステム内のC:\Users\Public\<project_root>\backendにします。
簡易的な足し算を返すコントローラーのみ作成します。
package com.example.demo.controller;

import org.springframework.web.bind.annotation.PostMapping;
import org.springframework.web.bind.annotation.RequestBody;
import org.springframework.web.bind.annotation.RequestMapping;
import org.springframework.web.bind.annotation.RestController;

import lombok.Data;

@RestController
@RequestMapping("/api")
public class SumController {

	@PostMapping("/sum")
	public SumResponse sum(@RequestBody SumRequest request) {
		int result = request.getNum1() + request.getNum2();
		return new SumResponse(result);
	}

	@Data
	static class SumRequest {
		private int num1;
		private int num2;
	}

	@Data
	static class SumResponse {
		private final int sum;
	}

}
Springプロジェクトとして起動します。
これはWindowsシステムで動いているので、WSLから疎通確認を行う際はIPアドレスの指定をする必要があるので、PowerShellでIPアドレスを確認。
ipconfig
    // IPv4 アドレス . . . . . . . . . . . .: 192.168.11.59
WSLからcurlで疎通確認。
curl -X POST http://192.168.11.59:8080/api/sum      -H "Content-Type: application/json"      -d '{"num1": 5, "num2": 3}'
    // {"sum":8}
問題なし。
Reactプロジェクトの作成
Nodeの環境が必要なので、WSLからWindowsのファイルシステムにアクセスしC:\Users\Public\<project_root>\frontendを作成しました。
(余談:チームに展開するときも、Windowsシステム上にCloneしてもらえば良さそう)
import { FC, useState } from "react";
import axios from "axios";
const Sum:FC = () => {
// Spring Boot のエンドポイント
const API_URL = "http://192.168.11.59:8080/api/sum";
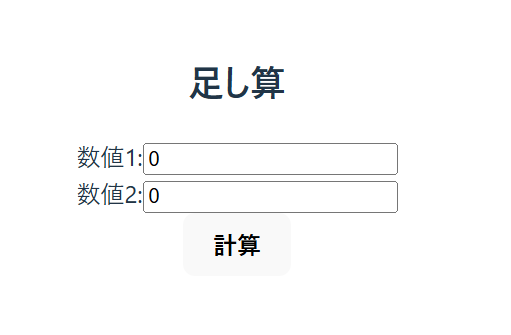
const [num1, setNum1] = useState<number>(0);
const [num2, setNum2] = useState<number>(0);
const [sum, setSum] = useState<number | null>(null);
const [error, setError] = useState<string | null>(null);
const handleSum = async () => {
setError(null);
try {
const response = await axios.post(API_URL, { num1, num2 });
setSum(response.data.sum);
} catch (err) {
setError("計算失敗");
console.error(err);
}
};
return (
<div>
<h2>足し算</h2>
<div>
<label>数値1:</label>
<input type="number" value={num1} onChange={(e) => setNum1(Number(e.target.value))} />
</div>
<div>
<label>数値2:</label>
<input type="number" value={num2} onChange={(e) => setNum2(Number(e.target.value))} />
</div>
<button onClick={handleSum}>計算</button>
{sum !== null && <p>合計: {sum}</p>}
{error && <p style={{ color: "red" }}>{error}</p>}
</div>
);
};
export default Sum;
フロント起動して、API実行!
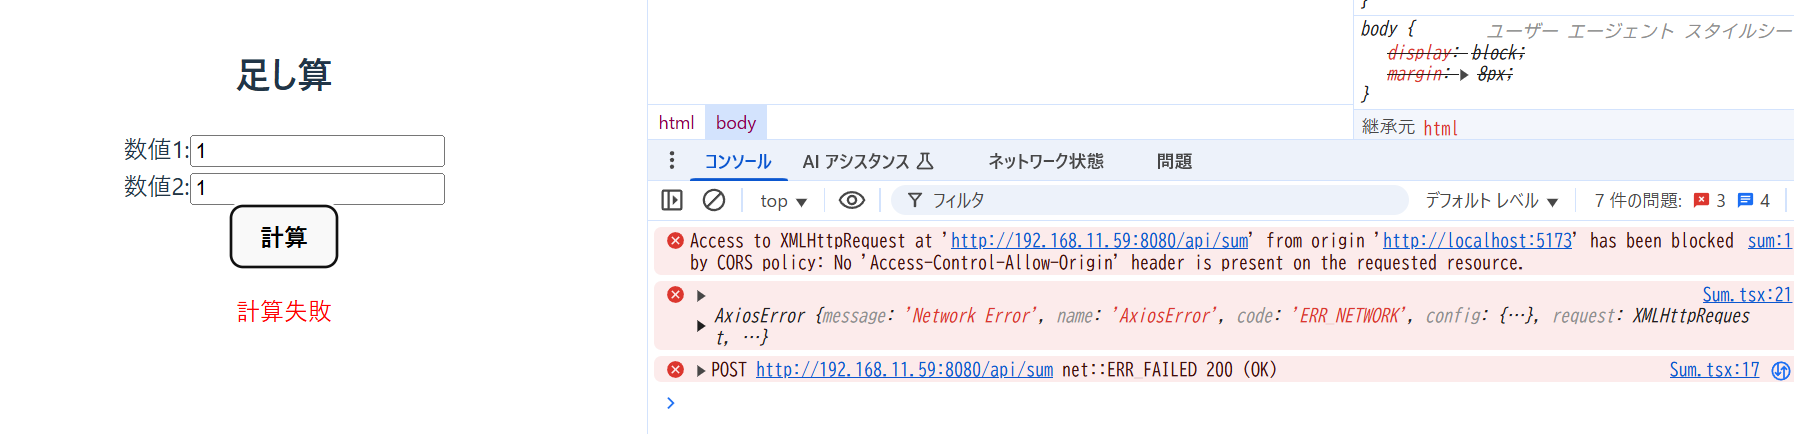
何度もこんにちは。CORSエラー。
Spring側に設定を加えます。
@CrossOrigin(origins = "http://localhost:5173")を追加。
package com.example.demo.controller;

import org.springframework.web.bind.annotation.CrossOrigin;
import org.springframework.web.bind.annotation.PostMapping;
import org.springframework.web.bind.annotation.RequestBody;
import org.springframework.web.bind.annotation.RequestMapping;
import org.springframework.web.bind.annotation.RestController;

import lombok.Data;

@RestController
@RequestMapping("/api")
@CrossOrigin(origins = "http://localhost:5173")
public class SumController {

	@PostMapping("/sum")
	public SumResponse sum(@RequestBody SumRequest request) {
		int result = request.getNum1() + request.getNum2();
		return new SumResponse(result);
	}

	@Data
	static class SumRequest {
		private int num1;
		private int num2;
	}

	@Data
	static class SumResponse {
		private final int sum;
	}

}
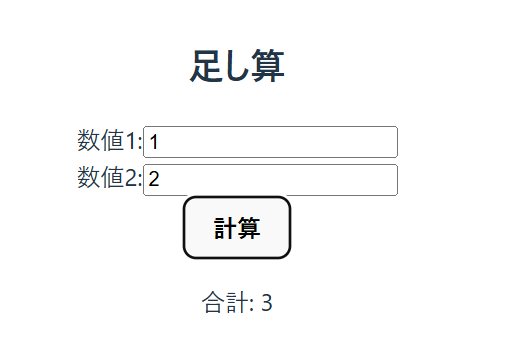
オッケーです。
jarファイルを作成
お次にReactプロジェクトをビルドし、Springのstaticに配置し、ビルドしてjarモジュールを作成していきます。
Reactで作成した際に、APIの向き先にIPアドレスを指定していましたが、今回はひとつのモジュールにまとめるため、相対パスに変更しておきます。
const API_URL = "/api/sum";
またSpringにて設定していたCORSエラー解消のために入れていた修正も外します。
Reactのビルド
npm run build
作成されたモジュール群をSpringに組み込みます。
cp -r frontend/dist/* ../backend/src/main/resources/static/
毎回Reactビルドした後にコピーするのは面倒なので、npmスクリプトのpostbuildを追加します。
  "scripts": {
    "dev": "vite",
    "build": "tsc -b && vite build",
    "postbuild": "cp -r dist/* ../backend/src/main/resources/static/",
    "lint": "eslint .",
    "preview": "vite preview"
  },
Spring君を起動してアクセスしても、APIリクエストと勘違いしちゃうおっちょこちょいさんなので、Reactのルーティングを認識してもらいます。
import org.springframework.context.annotation.Configuration;
import org.springframework.web.servlet.config.annotation.ViewControllerRegistry;
import org.springframework.web.servlet.config.annotation.WebMvcConfigurer;

@Configuration
public class WebConfig implements WebMvcConfigurer {
    @Override
    public void addViewControllers(ViewControllerRegistry registry) {
        registry.addViewController("/{spring:[a-zA-Z0-9-_]+}")
                .setViewName("forward:/index.html");
    }
}
Module化する前にEclipseで起動して確認。
http://localhost:8080にアクセス。
ここまでも問題なく進めました。
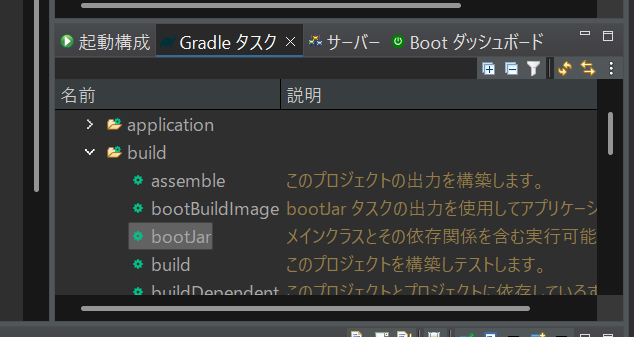
jarにする
EclipseのGradleタスクから、bootjarを実行します。
動作確認
最後に作成されたjarファイルを実行し、動作確認を行います。
java -jar <root_path>/build/libs/backend-0.0.1-SNAPSHOT.jar
localhost:8080にアクセスします。

おわりに
プロジェクトの構成は以下のようになっているので、このままGitリポジトリにしてしまえばフロントエンドもバックエンドも一つのリポジトリで管理できます。
.
├── Servers
├── backend
└── frontend
``