Lambdaオーソライザーとは
API Gatewayを使うとインターネット上にREST APIを公開できます。
そしてLambdaオーソライザー(以前のカスタムオーソライザー)は、Lambda関数を使用してAPIへのアクセスを制御するAPI Gatewayの機能です。(公式より抜粋)
実行イメージ
Lambdaオーソライザーの実行イメージは以下の通りです。(公式より抜粋)
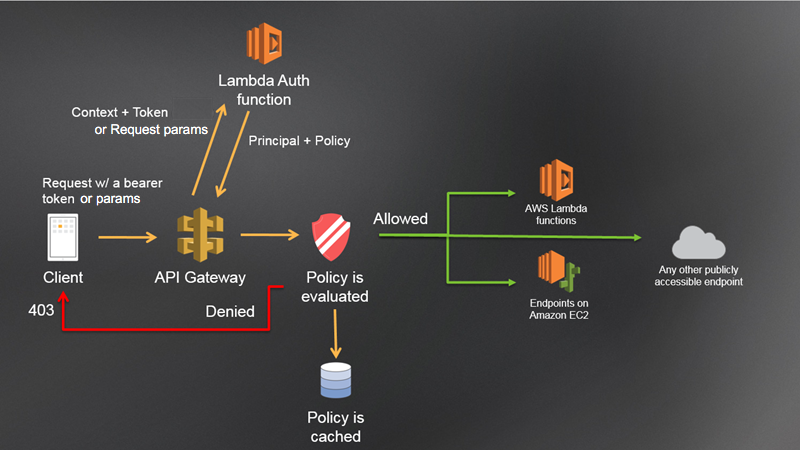
- ClientがAPI Gatewayにアクセス
- API Gatewayは必要情報をLambda Auth functionに送信
- Lambda Auth functionは入力情報を元に認証を行った後、アクセス許可orアクセス拒否を返す
- アクセスが拒否された場合、API GatewayはHTTP403等のエラーステータスをClientに返す
- アクセスが許可された場合、後続の処理を実行する
Lambdaオーソライザーの種類
Lambdaオーソライザーには2種類あります。(公式より抜粋)
-
トークンベースのLambdaオーソライザー(TOKEN オーソライザーとも呼ばれる)は、JSONウェブトークン(JWT)やOAuthトークンなどのベアラートークンで発信者IDを受け取ります。
-
リクエストパラメータベースのLambdaオーソライザー(REQUEST オーソライザーとも呼ばれます)は、ヘッダー、クエリ文字列パラメータ、stageVariables、および$context変数の組み合わせで発信者IDを受け取ります。
やること
Lambdaオーソライザーの概要が分かったところで、今回はリクエストパラメータベースのLambda オーソライザーを使用してアクセス制御処理を実装して動作確認までしていきたいと思います。
実施手順
テスト用のLambda function作成
まずは、Lambdaオーソライザーでアクセス許可した後に実行されるLambdaを作ります。
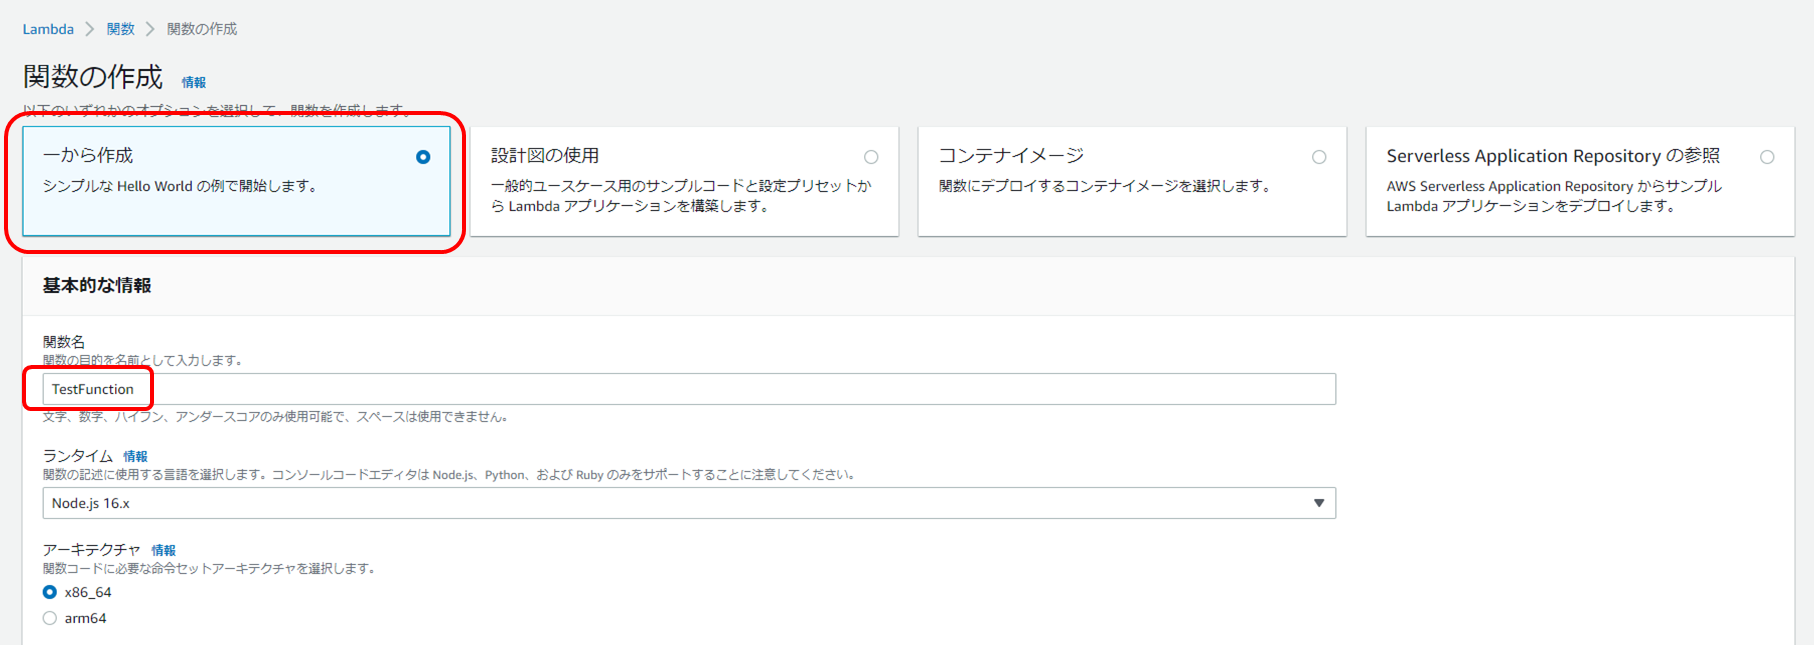
Lambdaのページに行って、「関数の作成」を押下します。

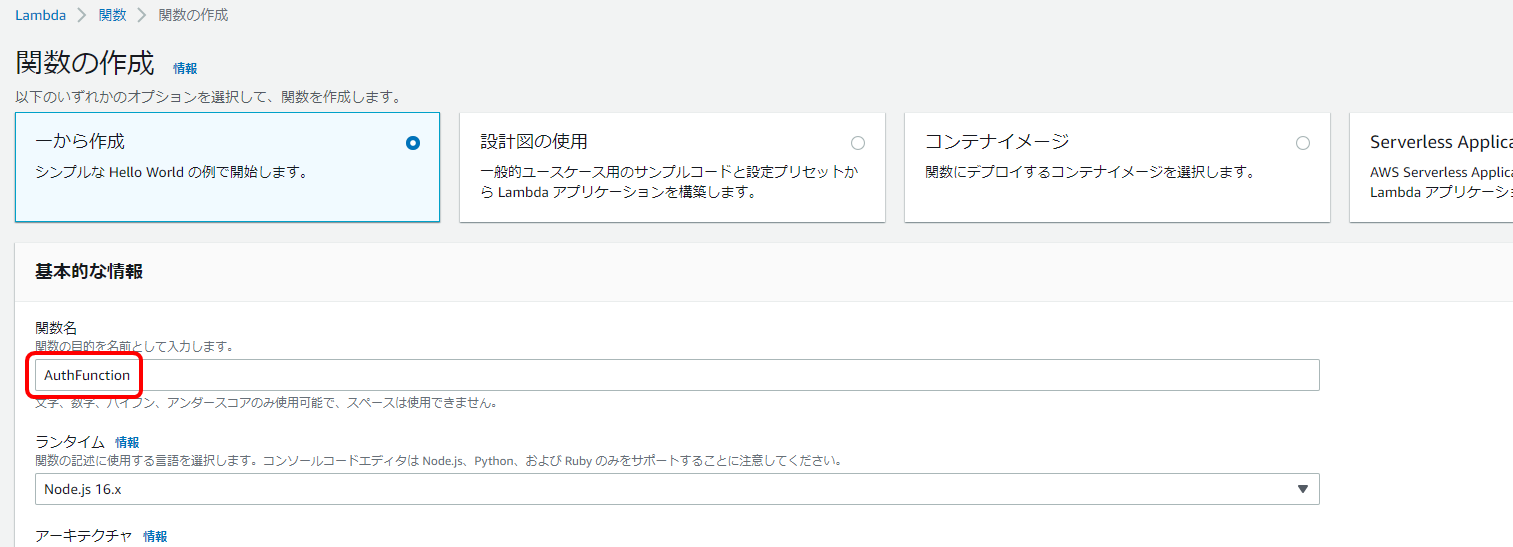
「一から作成」、関数名は「TestFunction」とし、他は変えずにLambda関数を作成します。
HTTPステータス200と固定文字列を返すシンプルなLambda関数が完成しました。

API Gateway作成
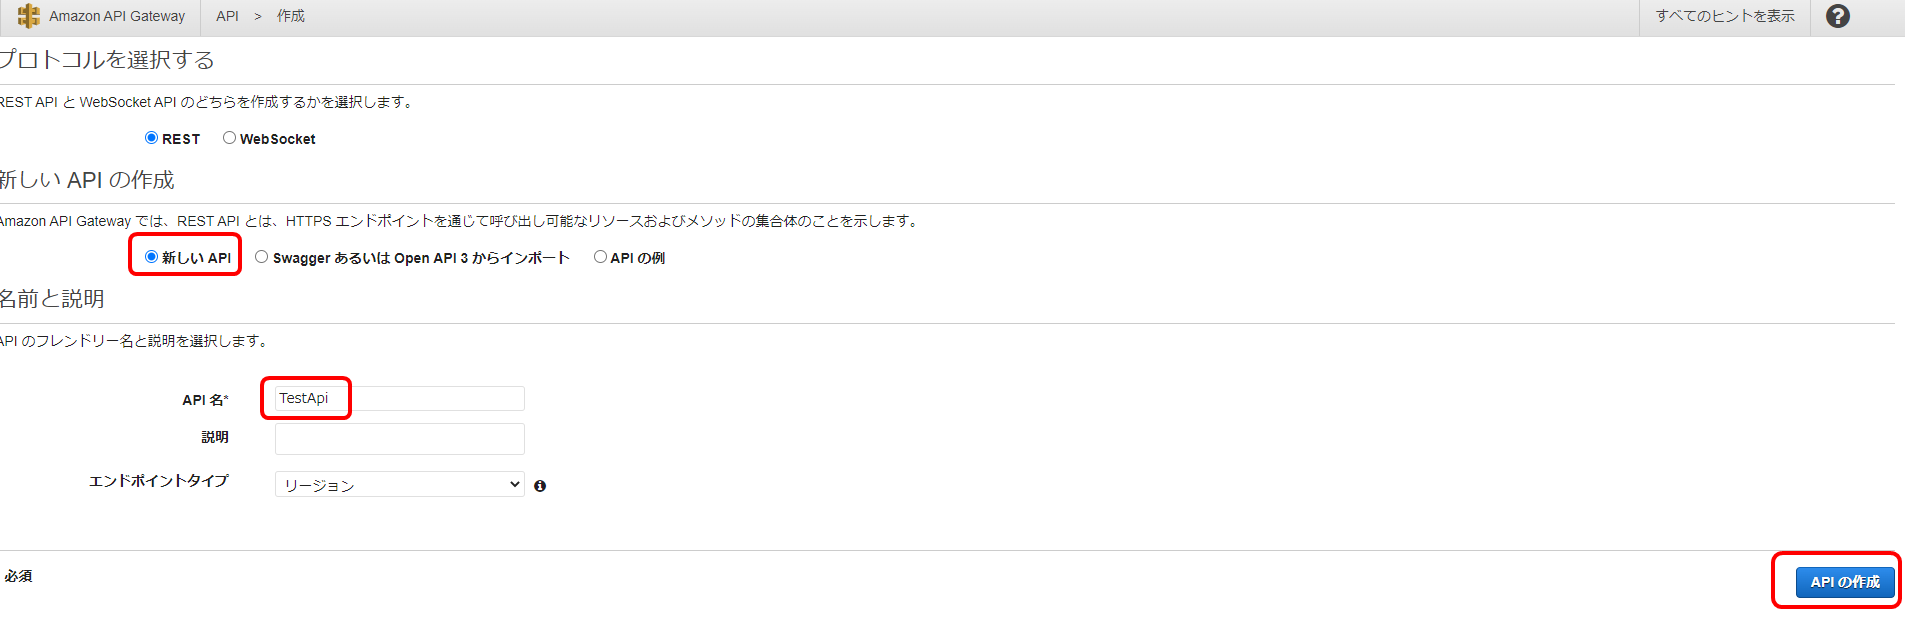
API Gatewayのページに行って、REST APIの「構築」を押下します。

「新しいAPI」を選択、API名は「TestApi」とし、「APIの作成」を押下します。
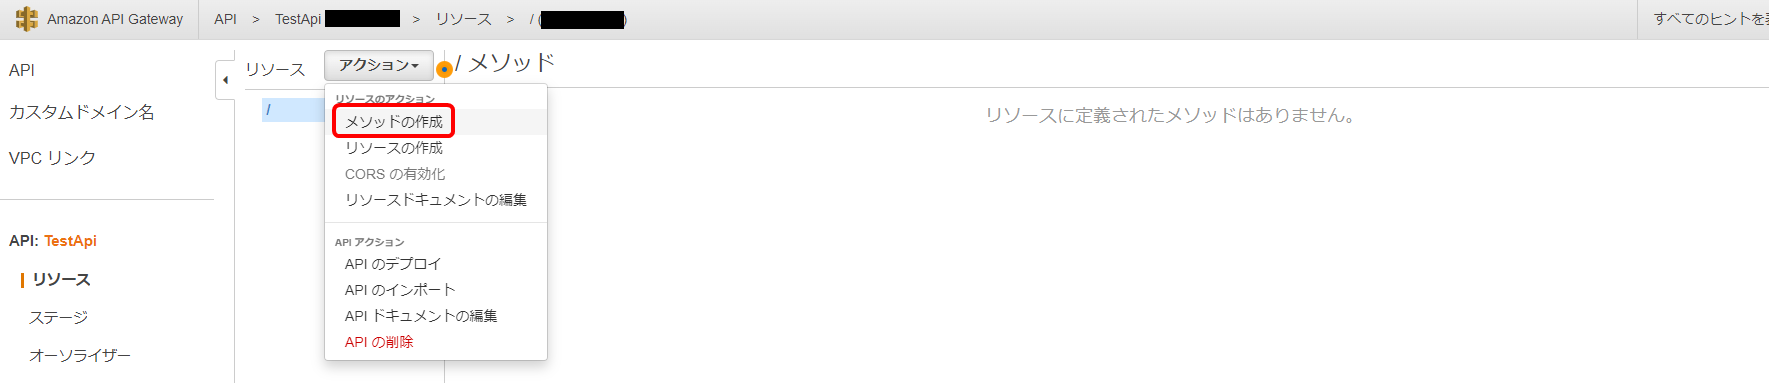
テスト用のAPIが出来たら「アクション」→「メソッドの作成」を押下します。
「Lambdaプロキシ統合の使用」にチェック、Lambda関数に先ほど作成したLambda名を入力し、「保存」を押下します。
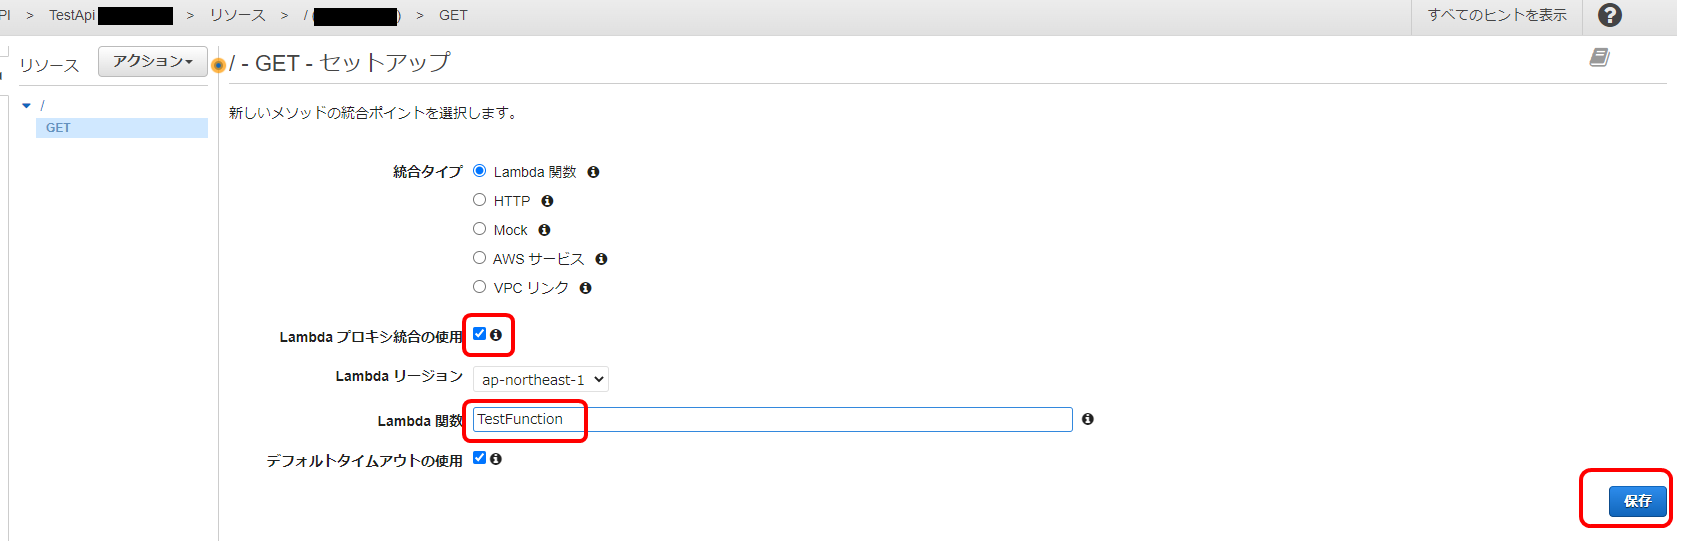
GETメソッドにアクセスしたらLambda関数「TestFunction」を実行するように設定しました。
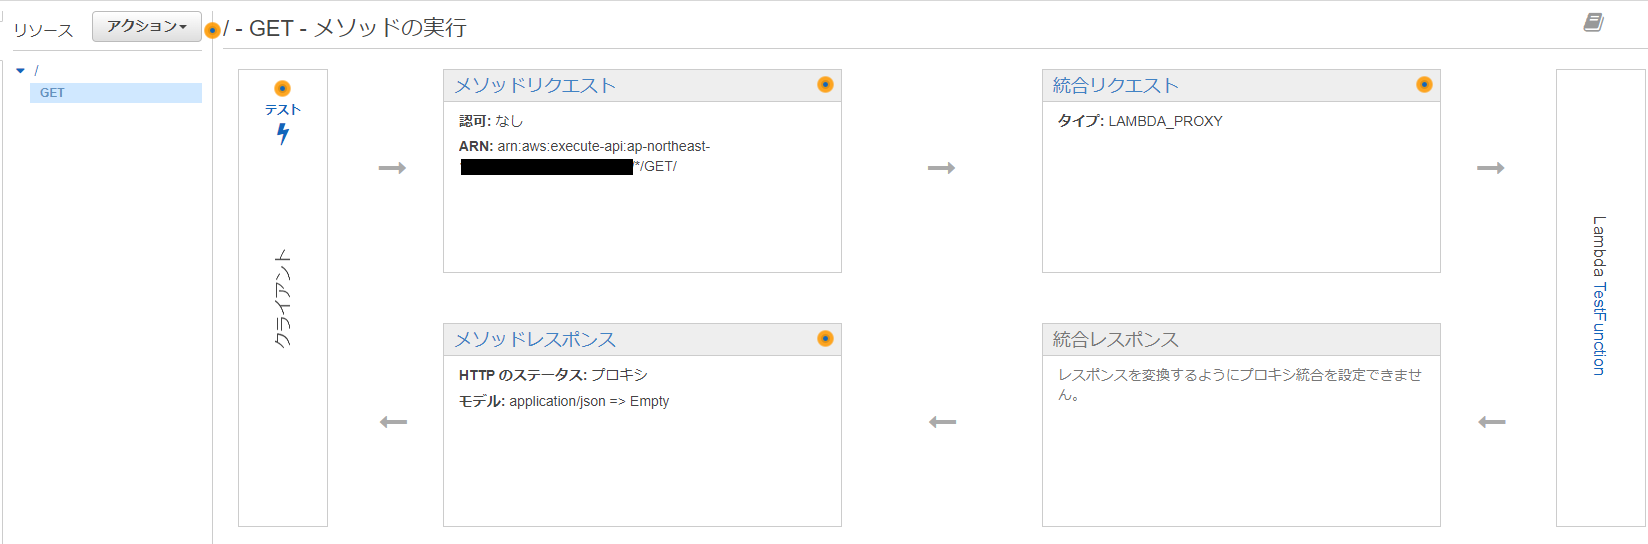
デプロイして動作確認
まだこれだけではREST APIとして機能しません。APIとして機能させるにはデプロイ操作をする必要があります。
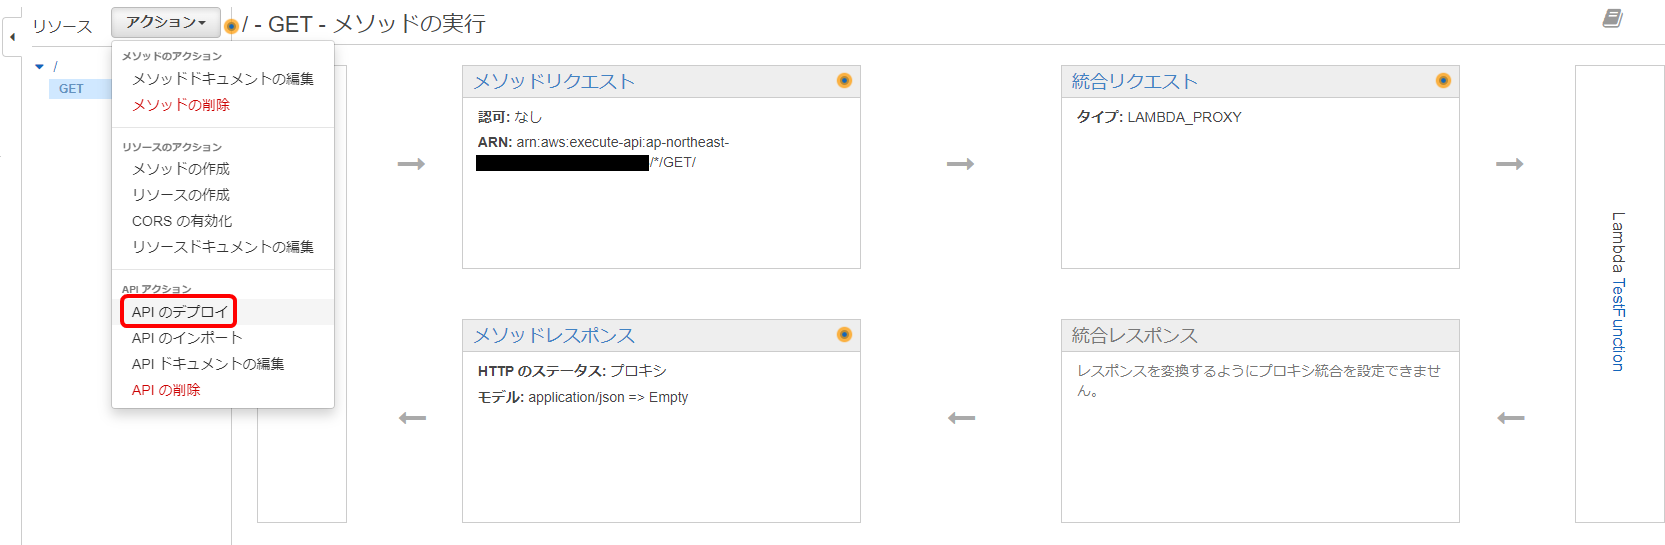
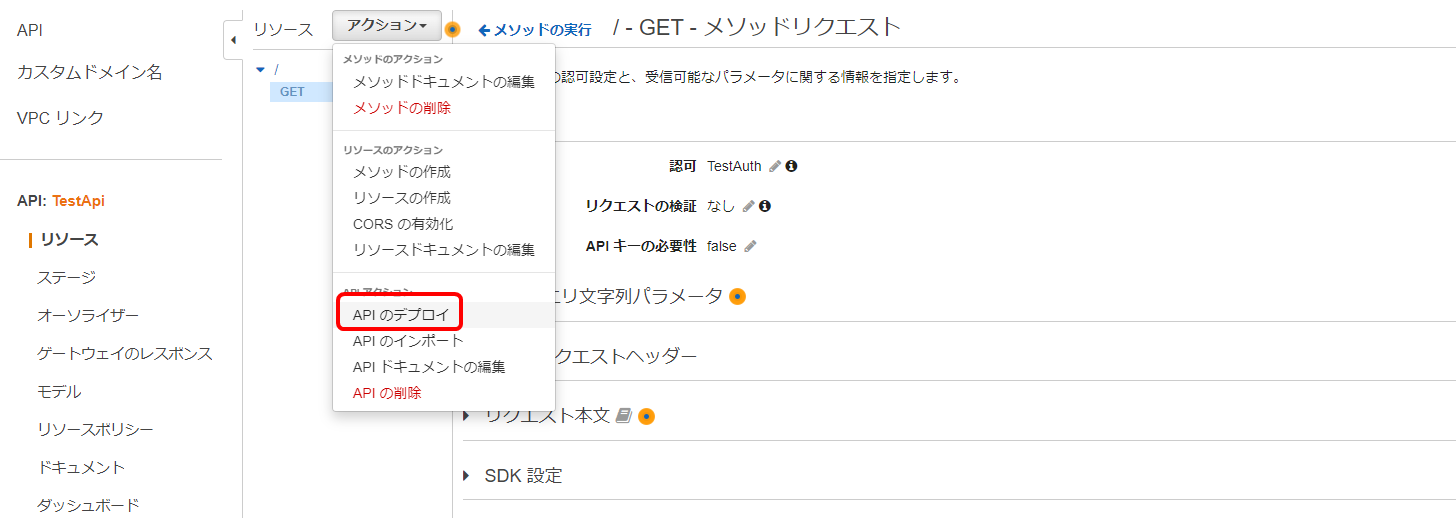
今時点でちゃんと動くか確認します。まずは「アクション」→「APIのデプロイ」を押下します。
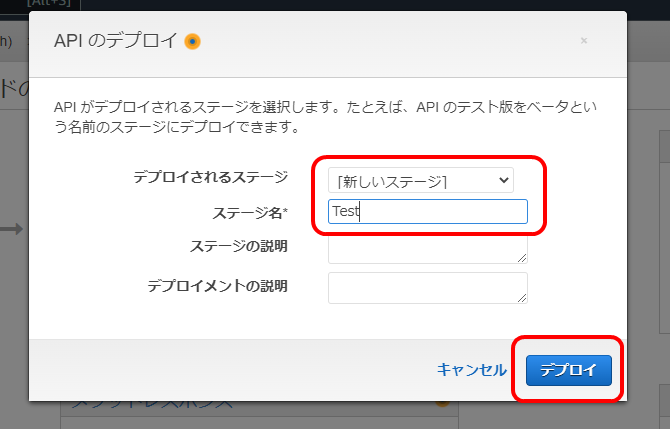
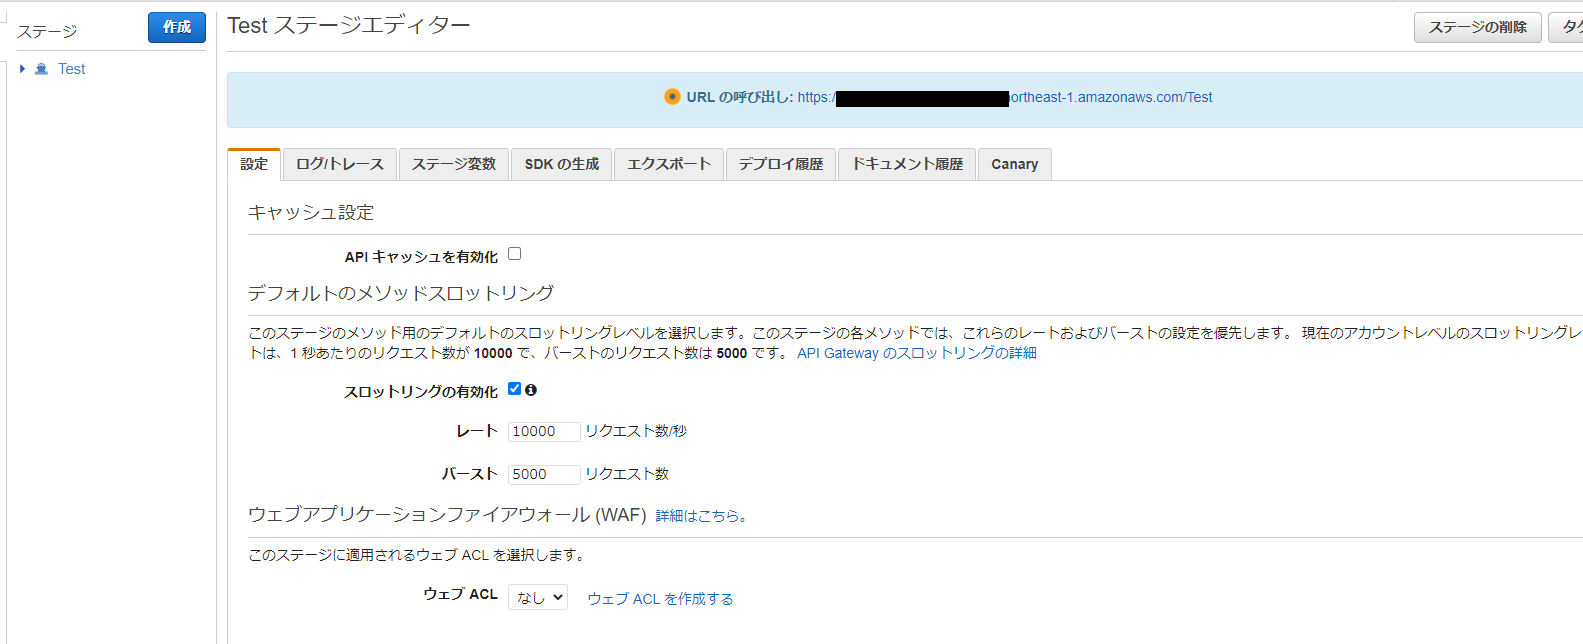
デプロイされるステージ「新しいステージ」、ステージ名「Test」を入力し、「デプロイ」を押下します。
デプロイ出来ました。この画像上では黒く塗りつぶしていますが、「URLの呼び出し」の後に書かれているURLがアクセスするためのURLになりますので、コピーしといてください。
動作確認をしてみます。
$ curl -XGET https://xxxxxxxxxxxxxxxx.ap-northeast-1.amazonaws.com/Test && echo
Hello from Lambda!
ちゃんと動いていますね!
Lambdaオーソライザーを作成する
いよいよLambdaオーソライザーを作成します。TestFunctionを作ったときと同様の手順で、新規でLambdaを作成します。
Lambda名は「AuthFunction」とします。
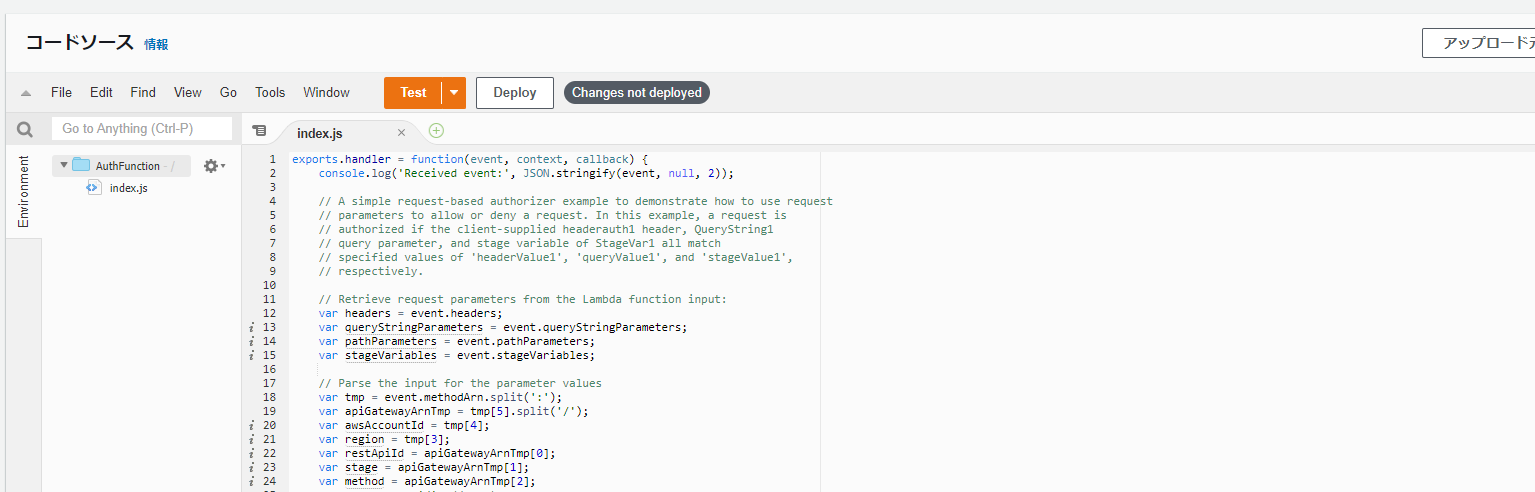
ソースは以下をコピペしてください。
exports.handler = function(event, context, callback) {
    console.log('Received event:', JSON.stringify(event, null, 2));

    // A simple request-based authorizer example to demonstrate how to use request
    // parameters to allow or deny a request. In this example, a request is
    // authorized if the client-supplied headerauth1 header, QueryString1
    // query parameter, and stage variable of StageVar1 all match
    // specified values of 'headerValue1', 'queryValue1', and 'stageValue1',
    // respectively.

    // Retrieve request parameters from the Lambda function input:
    var headers = event.headers;
    var queryStringParameters = event.queryStringParameters;
    var pathParameters = event.pathParameters;
    var stageVariables = event.stageVariables;

    // Parse the input for the parameter values
    var tmp = event.methodArn.split(':');
    var apiGatewayArnTmp = tmp[5].split('/');
    var awsAccountId = tmp[4];
    var region = tmp[3];
    var restApiId = apiGatewayArnTmp[0];
    var stage = apiGatewayArnTmp[1];
    var method = apiGatewayArnTmp[2];
    var resource = '/'; // root resource
    if (apiGatewayArnTmp[3]) {
        resource += apiGatewayArnTmp[3];
    }

    // Perform authorization to return the Allow policy for correct parameters and
    // the 'Unauthorized' error, otherwise.
    var authResponse = {};
    var condition = {};
    condition.IpAddress = {};

    // if (headers.headerauth1 === "headerValue1"
    //     && queryStringParameters.QueryString1 === "queryValue1"
    //     && stageVariables.StageVar1 === "stageValue1") {
    // ここに認証処理を実装する
    // 今回はサンプルなので、HttpヘッダーのhogeIdとhogeTokenに固定文字列が来た場合のみ認証を通過することにする
    if (headers.hogeId === "hogeId1" && headers.hogeToken === "hogeToken1") {
        callback(null, generateAllow('me', event.methodArn));
    }  else {
        callback("Unauthorized");
    }
}

// Help function to generate an IAM policy
var generatePolicy = function(principalId, effect, resource) {
    // Required output:
    var authResponse = {};
    authResponse.principalId = principalId;
    if (effect && resource) {
        var policyDocument = {};
        policyDocument.Version = '2012-10-17'; // default version
        policyDocument.Statement = [];
        var statementOne = {};
        statementOne.Action = 'execute-api:Invoke'; // default action
        statementOne.Effect = effect;
        statementOne.Resource = resource;
        policyDocument.Statement[0] = statementOne;
        authResponse.policyDocument = policyDocument;
    }
    // Optional output with custom properties of the String, Number or Boolean type.
    authResponse.context = {
        "stringKey": "stringval",
        "numberKey": 123,
        "booleanKey": true
    };
    return authResponse;
}

var generateAllow = function(principalId, resource) {
    return generatePolicy(principalId, 'Allow', resource);
}

var generateDeny = function(principalId, resource) {
    return generatePolicy(principalId, 'Deny', resource);
}
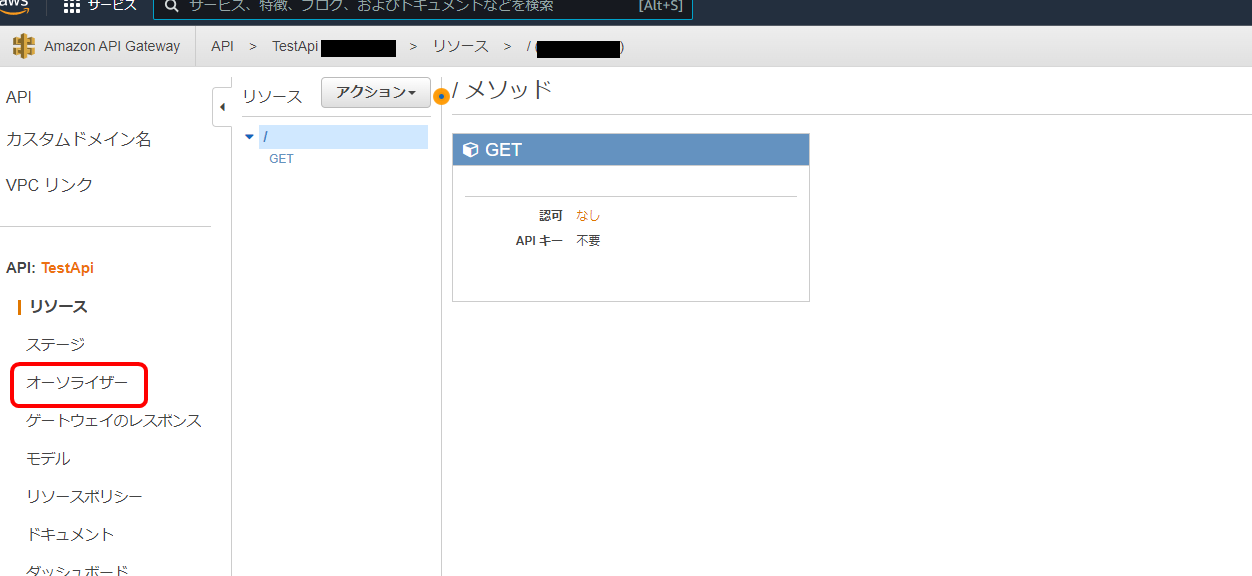
AuthFunctionをAPI GatewayのLambdaオーソライザーに指定する
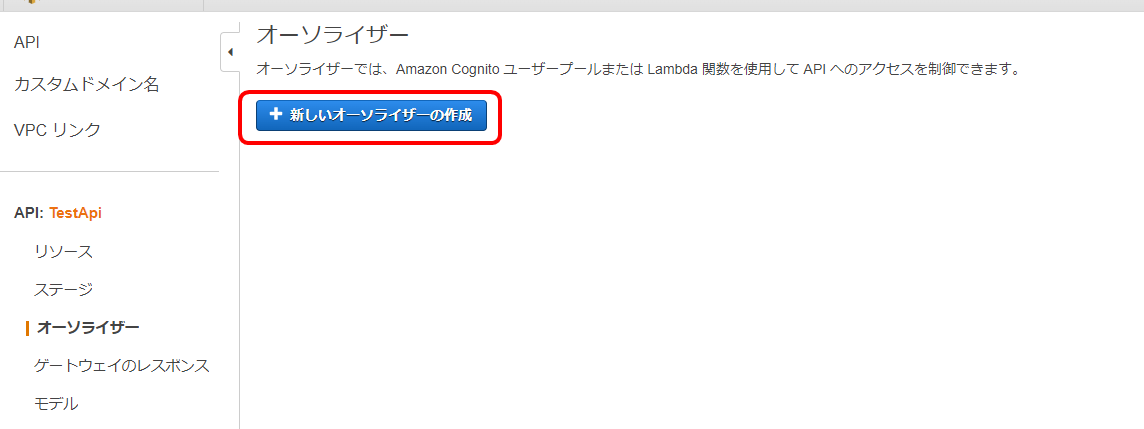
API Gatewayのページの「オーソライザー」を押下します。
「新しいオーソライザー」を押下します。
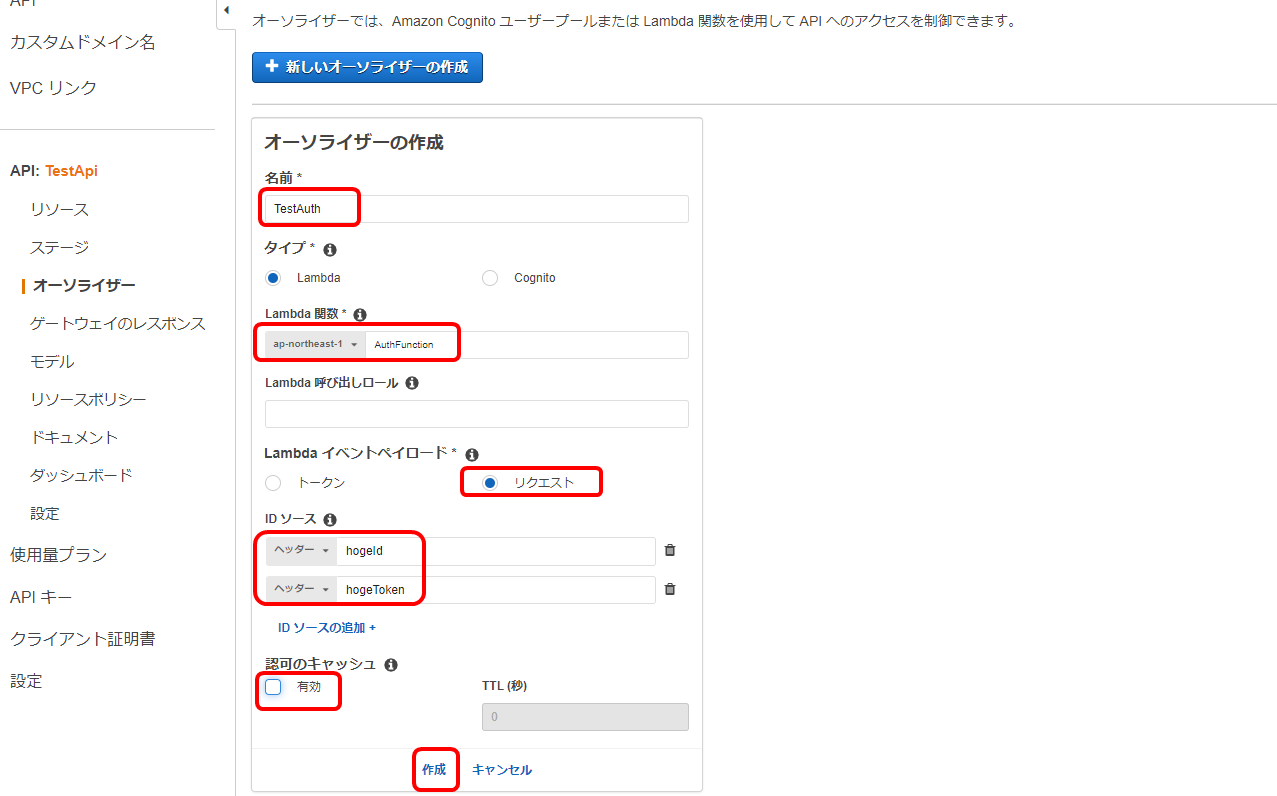
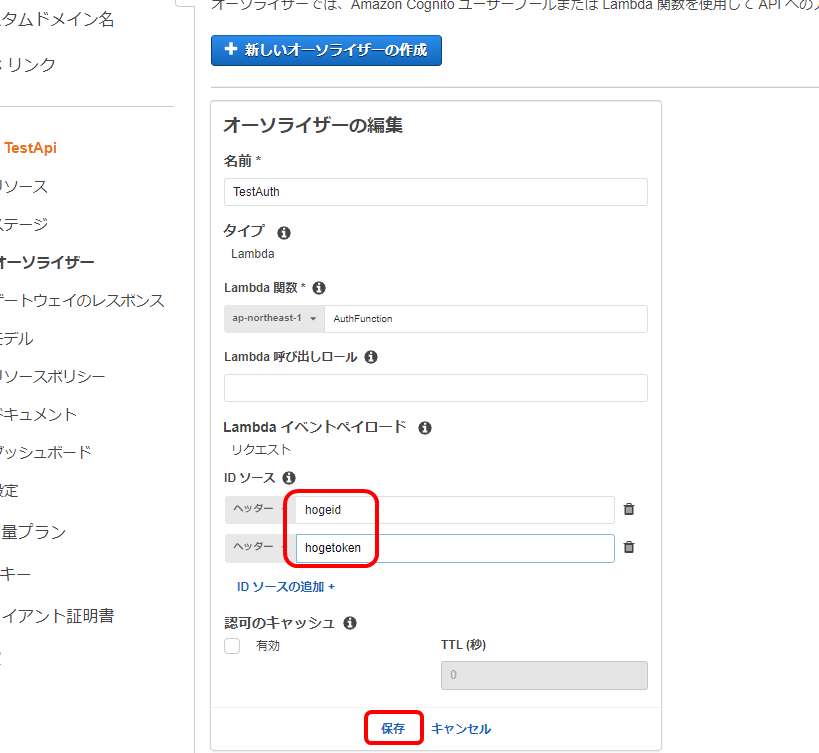
各種情報を入力していきます。
- 名前「TestAuth」
- Lambda関数「AuthFunction」
- Lambdaイベントペイロード「リクエスト」
- IDソースは
- 「ヘッダー」を選択して「hogeId」※1
- 「ヘッダー」を選択して「hogeToken」※1
- 認可のキャッシュ「無効」※2
以上を入力したら「作成」を押下します。
※1 これを登録する時点では気づいてないのですが、ヘッダーに大文字は使えないっぽいです。
なので、それぞれ
hogeId→hogeid
hogeToken→hogetoken
とする必要があります。その作業は後続の手順で行っています。
※2 認可のキャッシュを無効にしているのは、こういう事象があるようなので無効にしています。
https://future-architect.github.io/articles/20210610a/#%E8%AA%8D%E5%8F%AF%E3%81%AE%E3%82%AD%E3%83%A3%E3%83%83%E3%82%B7%E3%83%A5
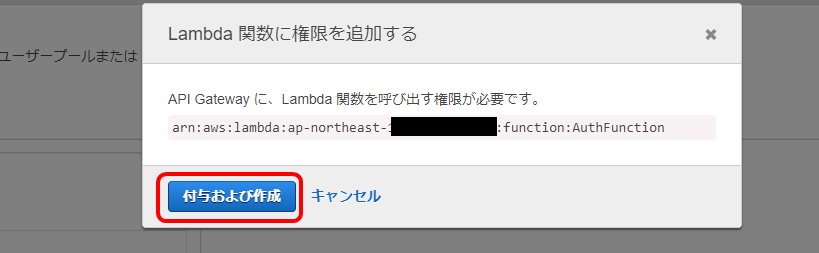
ダイアログでは「付与および作成」を押下します。
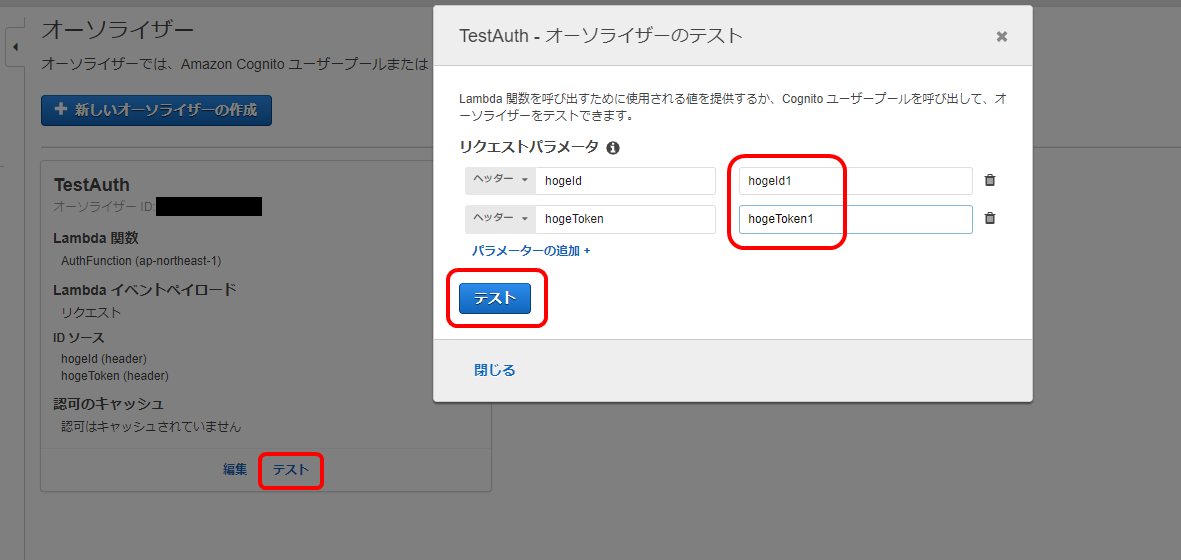
オーソライザーのテストが出来そうなのでやってみます。
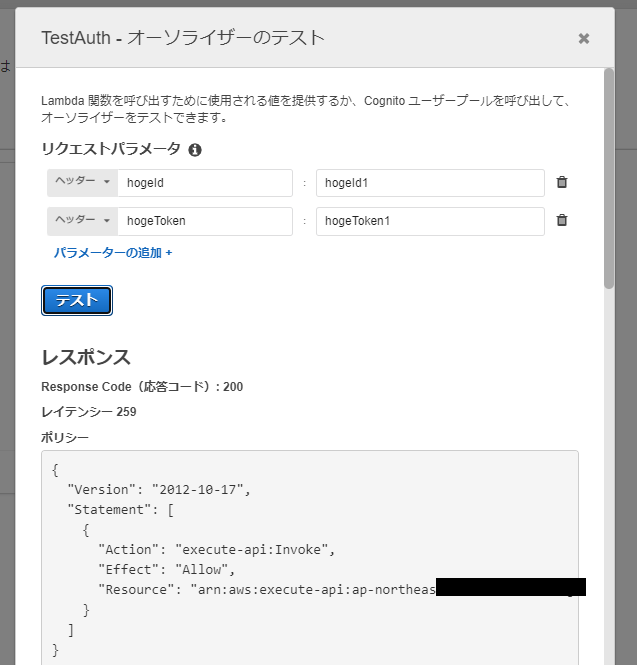
「テスト」を押下した後に出てくるダイアログにて、リクエストパラメータにそれぞれ
「hogeId1」「hogeToken1」を指定して、「テスト」を押下します。
こういう結果が返ってくれば認証OKです。
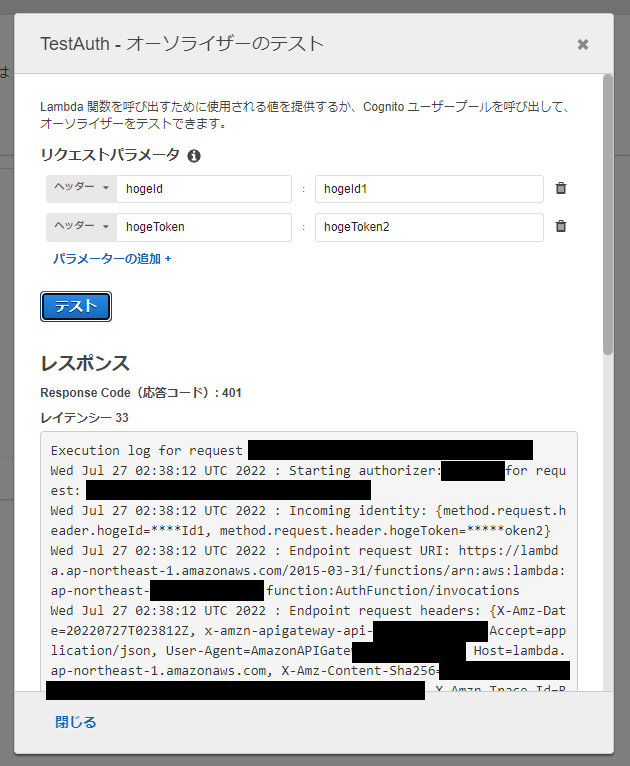
こういう結果が返ってきた場合、認証NGです。(個人を特定できそうなID等は塗りつぶしてます)
テストが通ったのでオーソライザーは完成しました。次に進んでいきます。
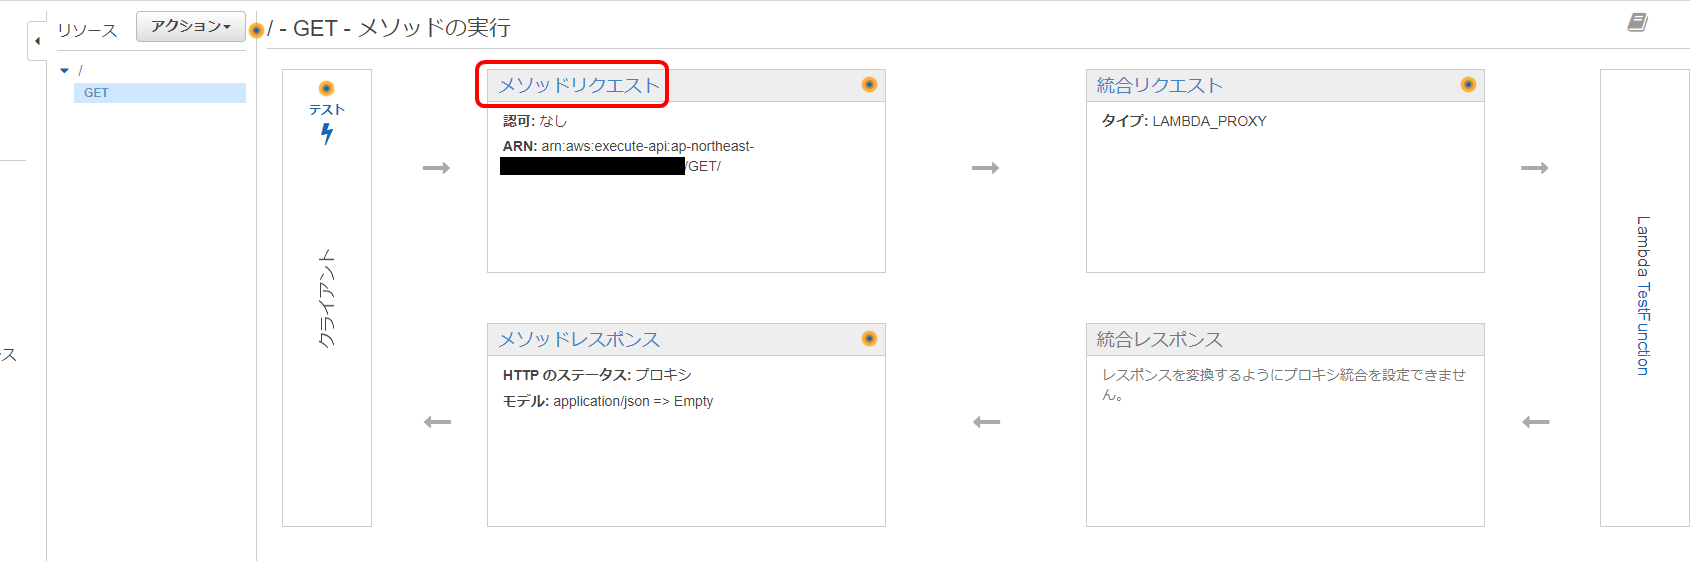
APIのGETメソッドとオーソライザーを紐づけていきます。
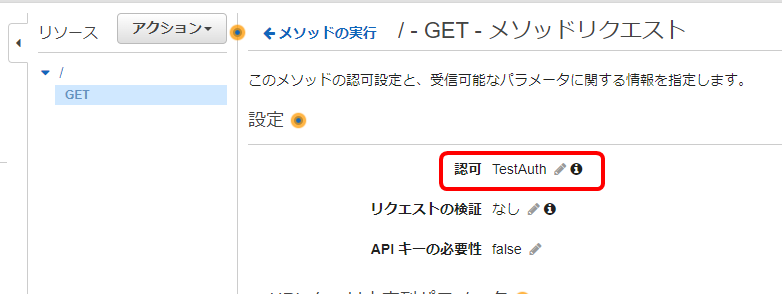
この画面で「メソッドリクエスト」を押下します。
認可で「TestAuth」を選択して、その横のチェックマークを押下します。
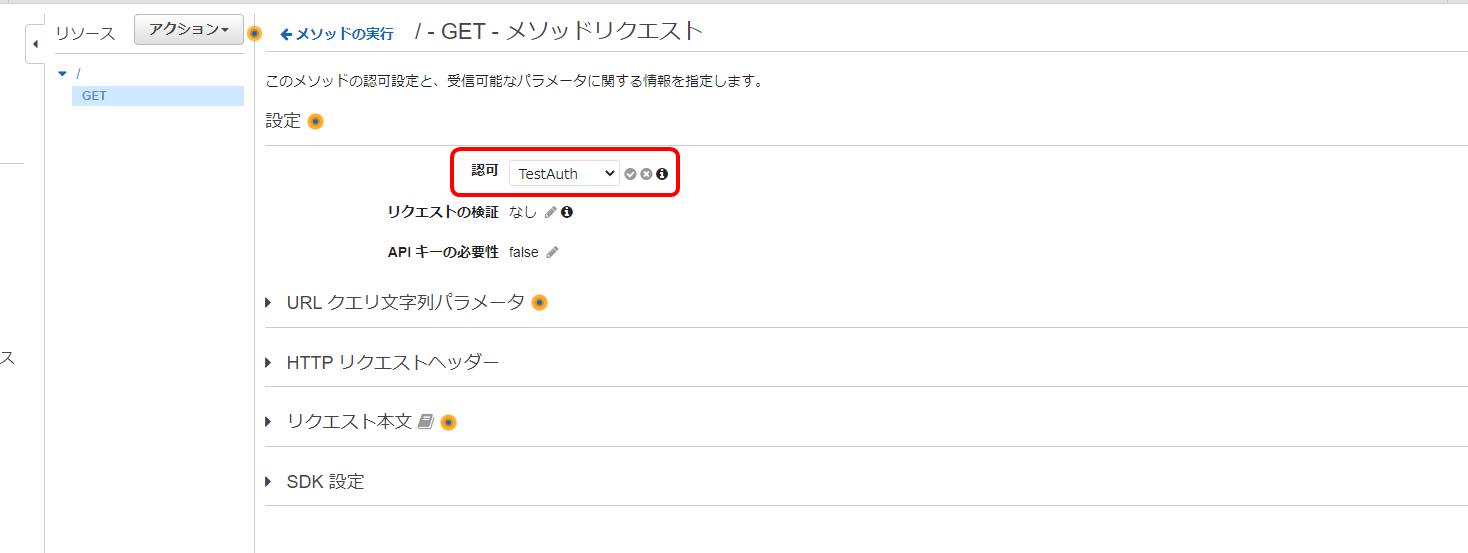
認可欄がこのように変われば設定できています。
API Gatewayをデプロイして動作確認
先ほどと同じ手順でデプロイして動作確認を行います。
「アクション」→「APIのデプロイ」を押下します。
デプロイされるステージでは「Test」を選択して「デプロイ」を押下します。

デプロイ出来ました。この画像上では黒く塗りつぶしていますが、「URLの呼び出し」の後に書かれているURLがアクセスするためのURLになりますので、コピーしといてください。
動作確認をします。が認証が通るはずのヘッダーを付けてリクエストしてもHTTP401が返ってきてしまいました。なぜ?
$ curl -XGET -H 'hogeId: hogeId1' -H 'hogeToken: hogeToken1' https://xxxxxxxxxxxxxxxx.ap-northeast-1.amazonaws.com/Test -v && echo
Note: Unnecessary use of -X or --request, GET is already inferred.
*   Trying xx.xxx.xx.xxx...
* TCP_NODELAY set
* Connected to xxxxxxxxxxxxxxxx.execute-api.ap-northeast-1.amazonaws.com (xx.xxx.xx.xxx) port 443 (#0)
* ALPN, offering h2
* ALPN, offering http/1.1
* Cipher selection: ALL:!EXPORT:!EXPORT40:!EXPORT56:!aNULL:!LOW:!RC4:@STRENGTH
* successfully set certificate verify locations:
*   CAfile: xxxxxxxxxxxxxxxx/ca-bundle.crt
  CApath: none
* TLSv1.2 (OUT), TLS header, Certificate Status (22):
* TLSv1.2 (OUT), TLS handshake, Client hello (1):
* TLSv1.2 (IN), TLS handshake, Server hello (2):
* TLSv1.2 (IN), TLS handshake, Certificate (11):
* TLSv1.2 (IN), TLS handshake, Server key exchange (12):
* TLSv1.2 (IN), TLS handshake, Server finished (14):
* TLSv1.2 (OUT), TLS handshake, Client key exchange (16):
* TLSv1.2 (OUT), TLS change cipher, Change cipher spec (1):
* TLSv1.2 (OUT), TLS handshake, Finished (20):
* TLSv1.2 (IN), TLS change cipher, Change cipher spec (1):
* TLSv1.2 (IN), TLS handshake, Finished (20):
* SSL connection using TLSv1.2 / ECDHE-RSA-AES128-GCM-SHA256
* ALPN, server accepted to use h2
* Server certificate:
*  subject: CN=*.execute-api.ap-northeast-1.amazonaws.com
*  start date: Jul  2 00:00:00 2022 GMT
*  expire date: Jul 31 23:59:59 2023 GMT
*  subjectAltName: host "xxxxxxxxxxxxxxxx.ap-northeast-1.amazonaws.com" matched cert's "*.execute-api.ap-northeast-1.amazonaws.com"
*  issuer: C=US; O=Amazon; OU=Server CA 1B; CN=Amazon
*  SSL certificate verify ok.
* Using HTTP2, server supports multi-use
* Connection state changed (HTTP/2 confirmed)
* Copying HTTP/2 data in stream buffer to connection buffer after upgrade: len=0
* Using Stream ID: 1 (easy handle xxxxxxxxxxxxxxxx)
> GET /Test HTTP/2
> Host: xxxxxxxxxxxxxxxx.ap-northeast-1.amazonaws.com
> User-Agent: curl/7.61.1
> Accept: */*
> hogeId: hogeId1
> hogeToken: hogeToken1
>
* Connection state changed (MAX_CONCURRENT_STREAMS == 128)!
< HTTP/2 401
< date: Wed, 27 Jul 2022 02:47:13 GMT
< content-type: application/json
< content-length: 26
< x-amzn-requestid: xxxxxxxxxxxxxxxx
< x-amzn-errortype: UnauthorizedException
< x-amz-apigw-id: xxxxxxxxxxxxxxxx
<
{"message":"Unauthorized"}
原因調査
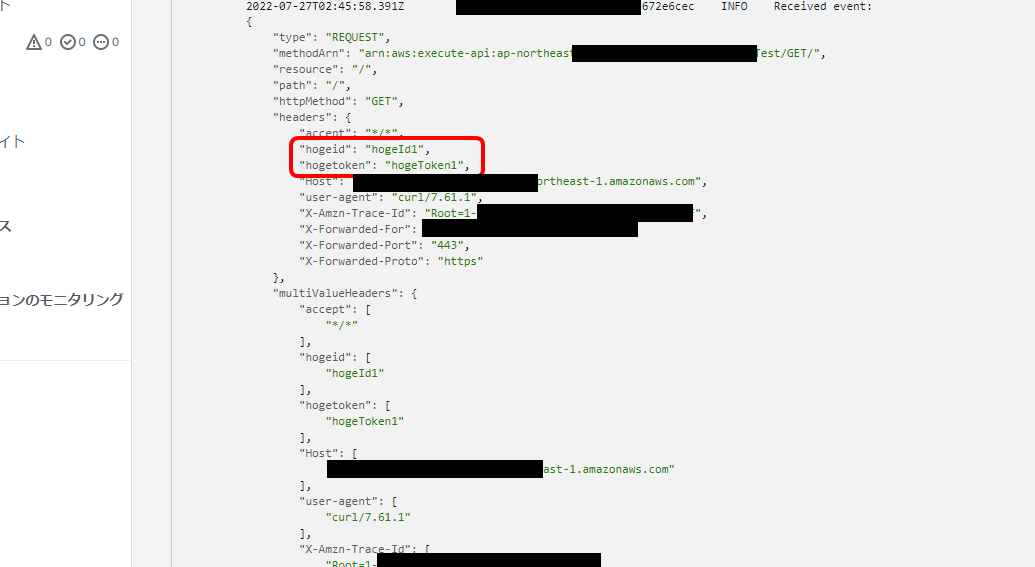
色々調べていくとCloudWatchのログにこのような箇所がありました。
hogeId, hogeTokenが小文字に変換されている。。。
特にこちらでそういう設定はしていないので、そういうものなんだと納得することにします。
不具合修正
原因が分かったので各機能を修正します。
まずはオーソライザーのIDソース欄を小文字の「hogeid」「hogetoken」にそれぞれ変更して「保存」を押下します。
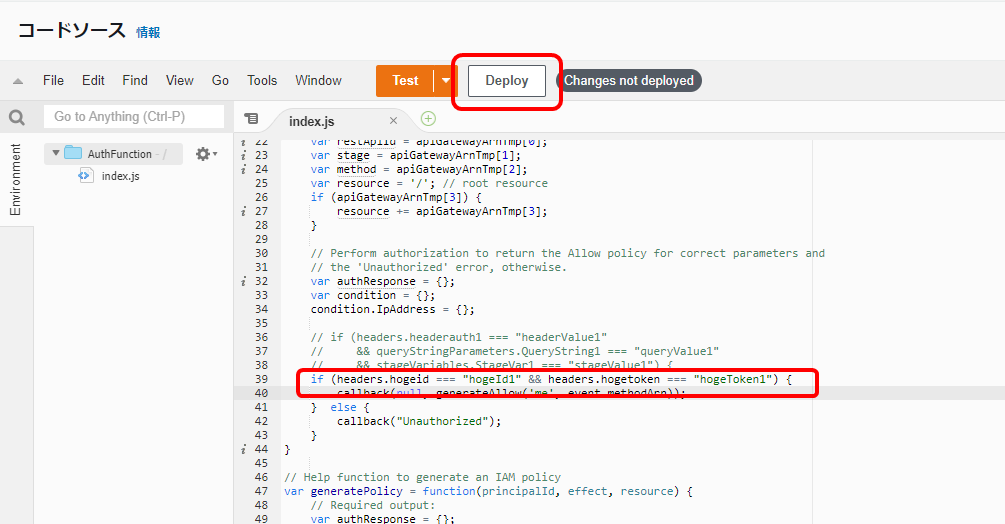
続いてAuthFunctionを修正します。
ソースの赤枠部分を小文字の「hogeid」「hogetoken」にそれぞれ変更して上書き保存した後「Deploy」を押下します。
再度、デプロイして動作確認
先ほどと同じ手順でデプロイして動作確認を行います。
「アクション」→「APIのデプロイ」を押下します。
デプロイされるステージでは「Test」を選択して「デプロイ」を押下します。
デプロイ出来ました。
動作確認します。まずはOKパターンの検証から
$ curl -XGET -H 'hogeid: hogeId1' -H 'hogetoken: hogeToken1' https://xxxxxxxxxxxxxxxx.ap-northeast-1.amazonaws.com/Test && echo
Hello from Lambda!
無事動きました。
続いてNGパターンの検証を行います。
$ curl -XGET -H 'hogeid: hogeId1' -H 'hogetoken: hogeToken2' https://xxxxxxxxxxxxxxxx.ap-northeast-1.amazonaws.com/Test -v && echo
Note: Unnecessary use of -X or --request, GET is already inferred.
*   Trying xx.xxx.xx.xxx...
* TCP_NODELAY set
* Connected to xxxxxxxxxxxxxxxx.ap-northeast-1.amazonaws.com (xx.xxx.xx.xxx) port 443 (#0)
* ALPN, offering h2
* ALPN, offering http/1.1
* Cipher selection: ALL:!EXPORT:!EXPORT40:!EXPORT56:!aNULL:!LOW:!RC4:@STRENGTH
* successfully set certificate verify locations:
*   CAfile: xxxxxxxxxxxxxxxx/ca-bundle.crt
  CApath: none
* TLSv1.2 (OUT), TLS header, Certificate Status (22):
* TLSv1.2 (OUT), TLS handshake, Client hello (1):
* TLSv1.2 (IN), TLS handshake, Server hello (2):
* TLSv1.2 (IN), TLS handshake, Certificate (11):
* TLSv1.2 (IN), TLS handshake, Server key exchange (12):
* TLSv1.2 (IN), TLS handshake, Server finished (14):
* TLSv1.2 (OUT), TLS handshake, Client key exchange (16):
* TLSv1.2 (OUT), TLS change cipher, Change cipher spec (1):
* TLSv1.2 (OUT), TLS handshake, Finished (20):
* TLSv1.2 (IN), TLS change cipher, Change cipher spec (1):
* TLSv1.2 (IN), TLS handshake, Finished (20):
* SSL connection using TLSv1.2 / ECDHE-RSA-AES128-GCM-SHA256
* ALPN, server accepted to use h2
* Server certificate:
*  subject: CN=*.execute-api.ap-northeast-1.amazonaws.com
*  start date: Jul  2 00:00:00 2022 GMT
*  expire date: Jul 31 23:59:59 2023 GMT
*  subjectAltName: host "xxxxxxxxxxxxxxxx.ap-northeast-1.amazonaws.com" matched cert's "*.execute-api.ap-northeast-1.amazonaws.com"
*  issuer: C=US; O=Amazon; OU=Server CA 1B; CN=Amazon
*  SSL certificate verify ok.
* Using HTTP2, server supports multi-use
* Connection state changed (HTTP/2 confirmed)
* Copying HTTP/2 data in stream buffer to connection buffer after upgrade: len=0
* Using Stream ID: 1 (easy handle xxxxxxxxxxxxxxxx)
> GET /Test HTTP/2
> Host: xxxxxxxxxxxxxxxx.ap-northeast-1.amazonaws.com
> User-Agent: curl/7.61.1
> Accept: */*
> hogeid: hogeId1
> hogetoken: hogeToken2
>
* Connection state changed (MAX_CONCURRENT_STREAMS == 128)!
< HTTP/2 401
< date: Wed, 27 Jul 2022 02:50:12 GMT
< content-type: application/json
< content-length: 26
< x-amzn-requestid: xxxxxxxxxxxxxxxx
< x-amzn-errortype: UnauthorizedException
< x-amz-apigw-id: xxxxxxxxxxxxxxxx
<
{"message":"Unauthorized"}
無事動きました!
まとめ
このような手順でLambdaオーソライザーを動かすことが出来ました。
API Gateway経由でLambdaを動かす場合、Lambda本体の処理を行う前に、その処理を行う権限があるのかを事前にチェック出来るので使いどころは大いにありそうです。
参考サイト
https://docs.aws.amazon.com/ja_jp/apigateway/latest/developerguide/apigateway-use-lambda-authorizer.html
https://future-architect.github.io/articles/20210610a/
https://dev.classmethod.jp/articles/api-gateway-custom-authorization/
https://qiita.com/miyuki_samitani/items/f01f1bd49334f97fe84c