この記事はC# Advent Calendar 2018 24日目の記事です。
何番煎じか分かりませんが、Discord.Netを使ってC#で簡単なDiscordBotを作成し、それをそのままAzureにデプロイさせてみようと思います。
今回の開発環境は以下の通りになります。
- Windows7
- Visual Studio 2017
- .Net Core 2.1
- C#7.2
Discord側での作業
アカウント作成、ログイン、新規サーバー作成は省略します。
Botアカウント作成
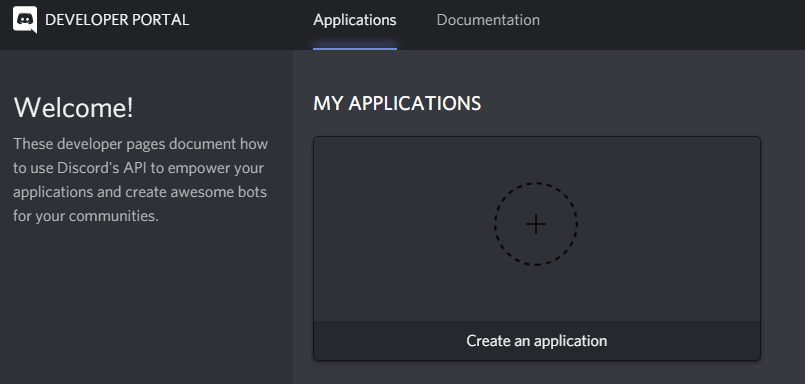
まずは、DiscordのDEVELOPER PORTALに遷移し、”Create an application”から新規アプリケーションを作成します。
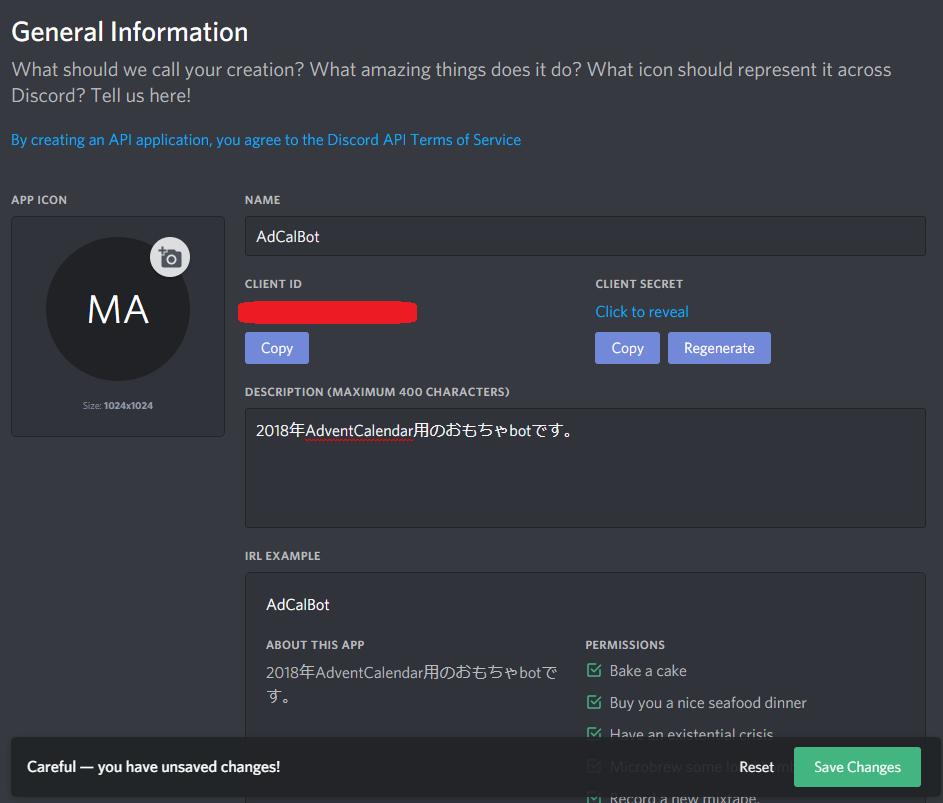
アプリケーション設定画面でBotアカウント名(Description、Botアイコン画像)を入力します。
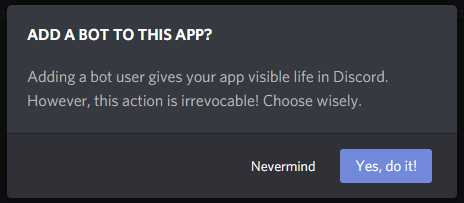
次に左のSETTINGSから Bot を選び、 ”Add Bot” でアカウントにBotを実装します。
ちなみに、一度Botを追加するとアプリケーションを削除しない限り、botをなくす事はできないようです。

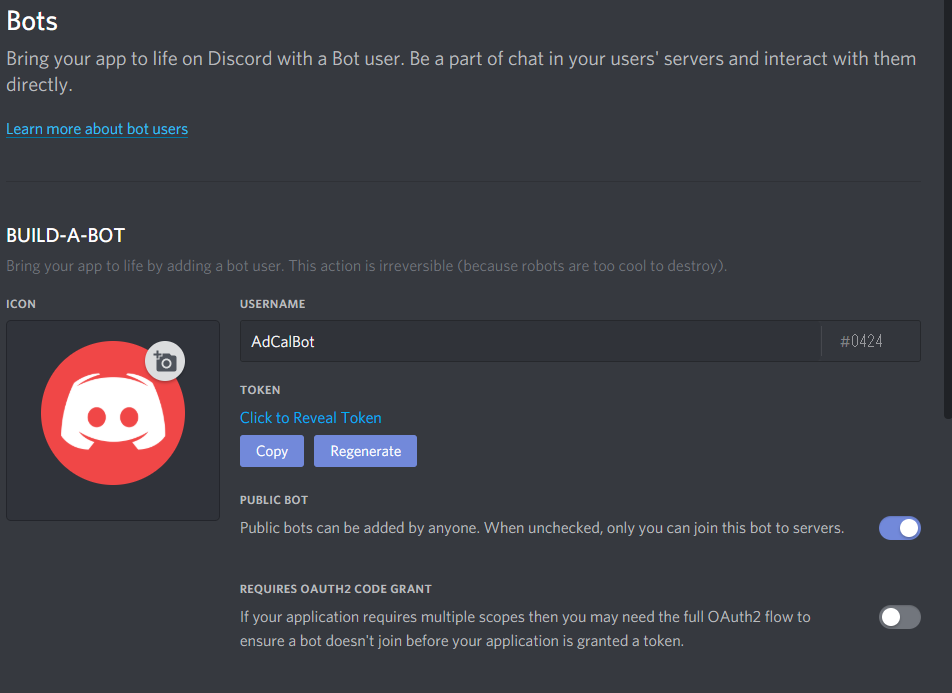
以上でBotアカウントの作成は完了ですので、このアカウントをサーバーに追加してあげましょう。
アクセストークンが知られるとBotが乗っ取られますので、管理には十分注意してください。
Botをサーバーに追加
左のSETTINGSから OAuth2 を選び、 SCOPES から "bot"を選択、BOTの権限を聞かれるので今回は面倒だからAdministratorを選びます。
(必要に応じて適切な権限を与えて下さい。)
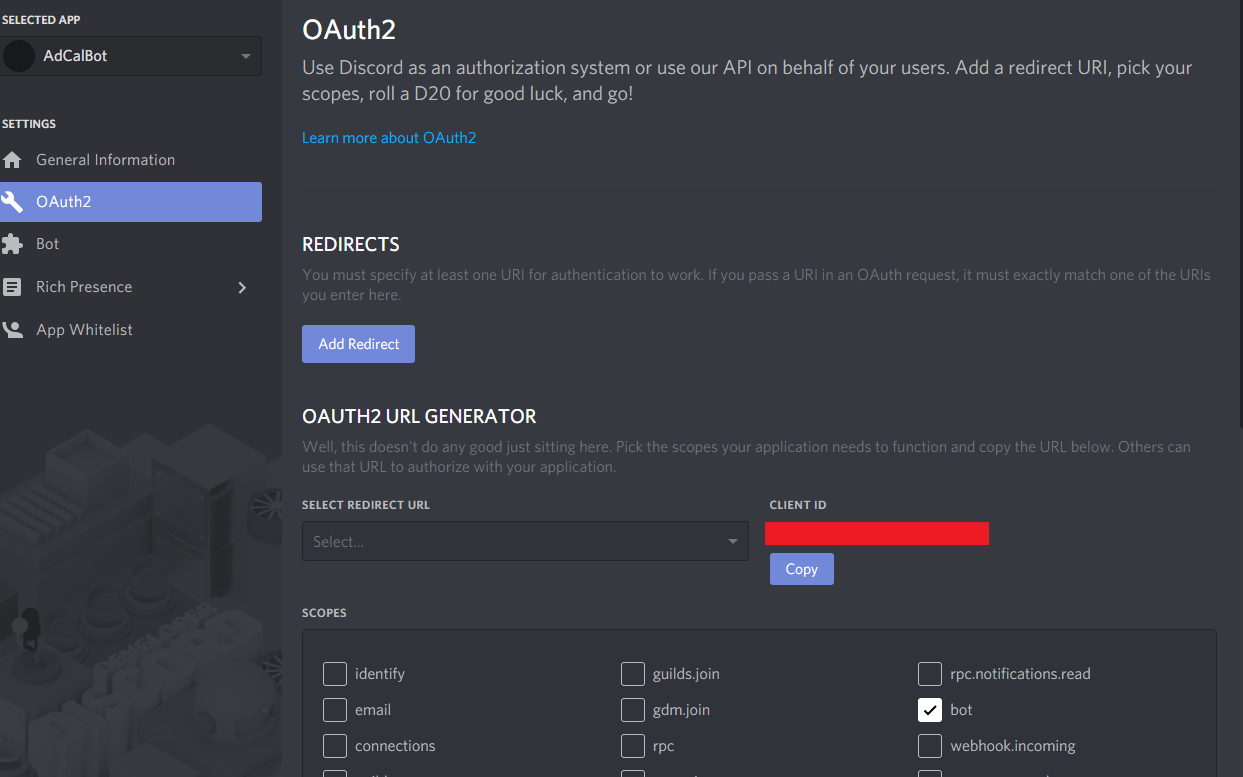
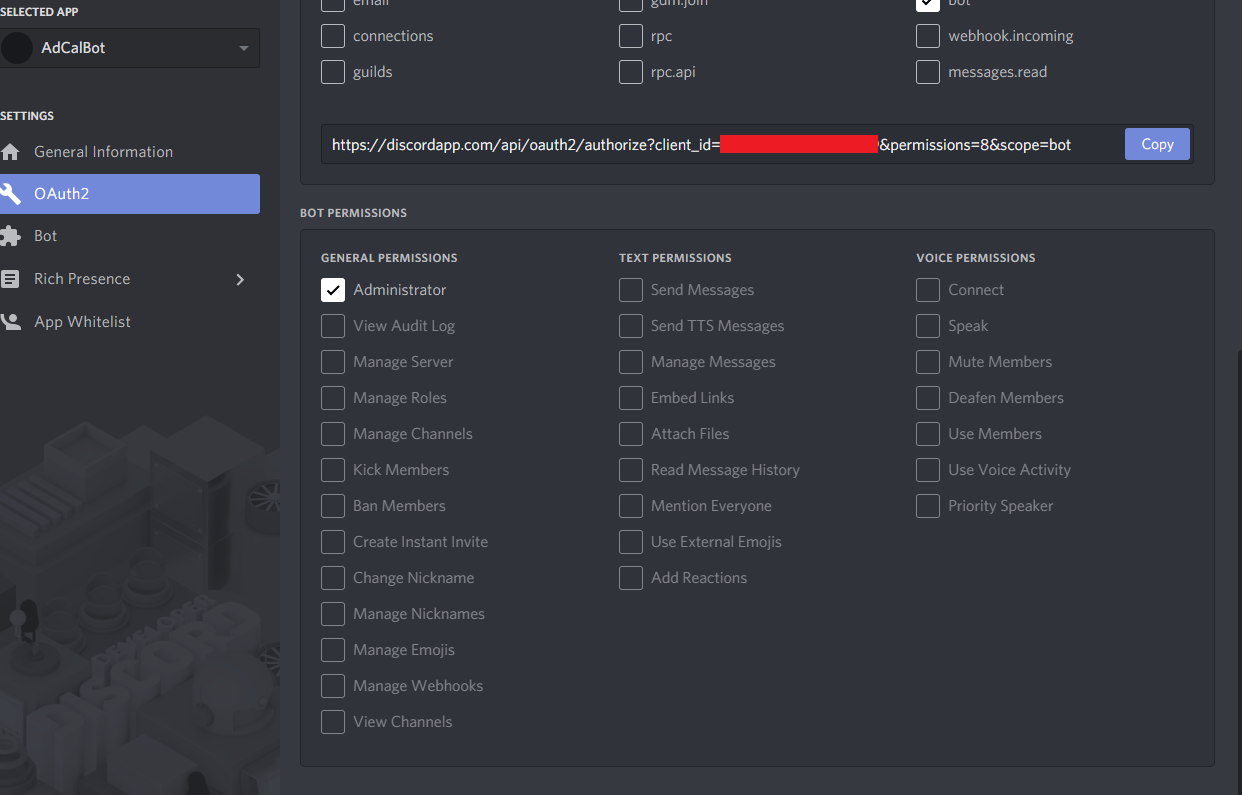
その後、SCOPESにあるURLにアクセスすると追加先のサーバーを聞かれるので、最初に作ったサーバーと紐付けます。
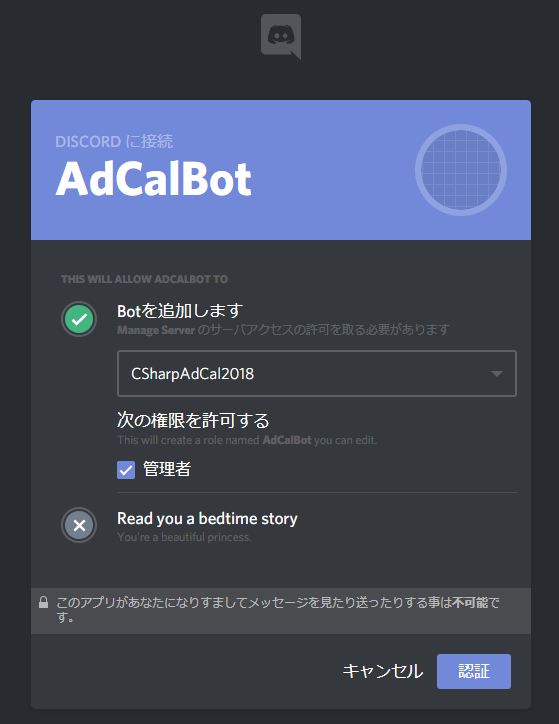
選択出来るサーバーは自身が管理者のサーバーだけになります。
以上の手順で、作成したBotがサーバーにログインできます。
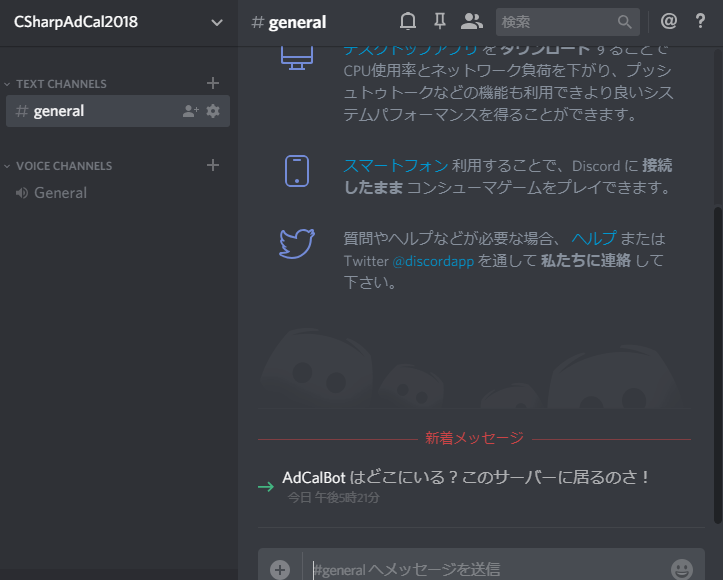
以上でDiscord側の作業は全て完了です。あとはBotに機能を追加していきましょう。
C#側の作業
ここからはC#でDiscord.Netを使ってBot機能を実装していきます。
Discord.Netについての詳しい事は以下を参照にしてください。
Discordとのやり取り部分実装
とりあえず、コンソールアプリケーションを新規作成し、DiscordサーバーとBotとがやり取りするメイン部分を実装していきます。
ここでの主な実装内容は「Botアカウントログイン」と「Botに行わせたいActionのトリガー」です。
using Discord;
using Discord.Commands;
using Discord.WebSocket;
using Microsoft.Extensions.DependencyInjection;
using System;
using System.Reflection;
using System.Threading.Tasks;

namespace DiscordBot.NetCore
{
    /// <summary>
    ///     DiscordBot メイン処理
    /// </summary>
    public class MainLogic
    {
        /// <summary>
        ///     Botクライアント
        /// </summary>
        public static DiscordSocketClient Client;
        /// <summary>
        ///     Discordコマンドをやり取りするService層
        /// </summary>
        public static CommandService Commands;
        /// <summary>
        ///     ServiceProvider
        /// </summary>
        public static IServiceProvider Provider;

        /// <summary>
        ///     起動時処理
        /// </summary>
        /// <returns></returns>
        public async Task MainAsync()
        {
            // ServiceProviderインスタンス生成
            Provider = new ServiceCollection().BuildServiceProvider();

            // 自身のアセンブリにコマンドの処理を構築する為、自身をCommandServiceに追加
            Commands = new CommandService();
            await Commands.AddModulesAsync(Assembly.GetEntryAssembly());

            // Botアカウントに機能を追加
            Client = new DiscordSocketClient();
            Client.MessageReceived += CommandRecieved;
            Client.Log += msg => { Console.WriteLine(msg.ToString()); return Task.CompletedTask; };
            // BotアカウントLogin
            var token = "";
            await Client.LoginAsync(TokenType.Bot, token);
            await Client.StartAsync();

            // タスクを常駐
            await Task.Delay(-1);
        }

        /// <summary>
        ///     メッセージの受信処理
        /// </summary>
        /// <param name="messageParam">受信メッセージ</param>
        /// <returns></returns>
        private async Task CommandRecieved(SocketMessage messageParam)
        {
            var message = messageParam as SocketUserMessage;
            Console.WriteLine("{0} {1}:{2}", message.Channel.Name, message.Author.Username, message);

            // コメントがユーザーかBotかの判定
            if (message?.Author.IsBot ?? true)
            {
                return;
            }

            // Botコマンドかどうか判定(判定条件は接頭辞"!"付き発言 or Botアカウントへのメンション)
            int argPos = 0;
            if (!(message.HasCharPrefix('!', ref argPos) || message.HasMentionPrefix(Client.CurrentUser, ref argPos)))
            {
                return;
            }

            // 実行
            var context = new CommandContext(Client, message);
            var result = await Commands.ExecuteAsync(context, argPos, Provider);

            //実行できなかった場合
            if (!result.IsSuccess)
            {
                await context.Channel.SendMessageAsync(result.ErrorReason);
            }
        }
    }
}
Discordとのやり取り部分が実装できたら、エントリーポイントからそれを呼び出してあげましょう。
namespace DiscordBot.NetCore
{
    class EntryPoint
    {
        /// <summary>
        ///     エントリーポイント
        /// </summary>
        /// <remarks>
        /// <see cref="MainLogic"/><see cref="MainLogic.MainAsync"/>
        /// </remarks>
        static void Main() => new MainLogic().MainAsync().GetAwaiter().GetResult();
    }
}
これで、DiscordとBotプログラムのやり取りは完了です。あとはBot機能を実装していきます。
コマンド作成(pingpong)
とりあえず、pingと打ったらpongを返す機能を実装していきます。
ポイントは以下の通りです。
- クラスに Discord.Commands.ModuleBase を継承させる
- 動かしたいメソッドに Discord.Commands.CommandAttribute を付け、トリガーとなる発言を引数に指定
- 基底クラスで実装されている ReplyAsync() に返したい文字列を入れてTaskを返す
using Discord.Commands;
using System.Threading.Tasks;

namespace DiscordBot.NetCore.Commands
{
    /// <summary>
    ///     PingPongを実行するクラス
    /// </summary>
    public class PingPong : ModuleBase
    {
        /// <summary>
        ///     pingの発言があった場合、pongを返します
        /// </summary>
        /// <returns></returns>
        [Command("ping")]
        public async Task Ping()
        {
            await ReplyAsync("pong");
        }
    }
}
以上で実装完了です。
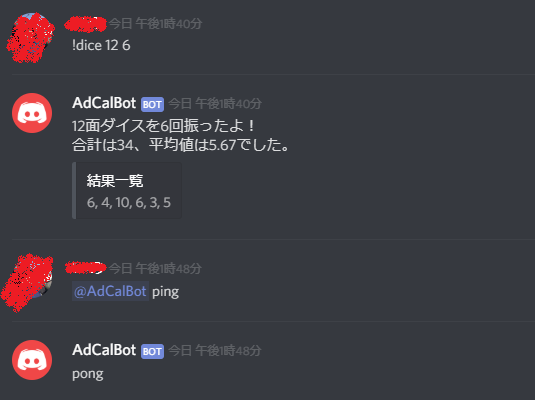
あとはプログラムを実行してDiscordでpingと発言してみましょう。
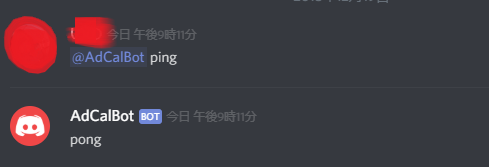
無事、Botが正しく反応してくれました!
コマンド作成(サイコロ)
ついでにもう一つぐらい機能を追加してみます。
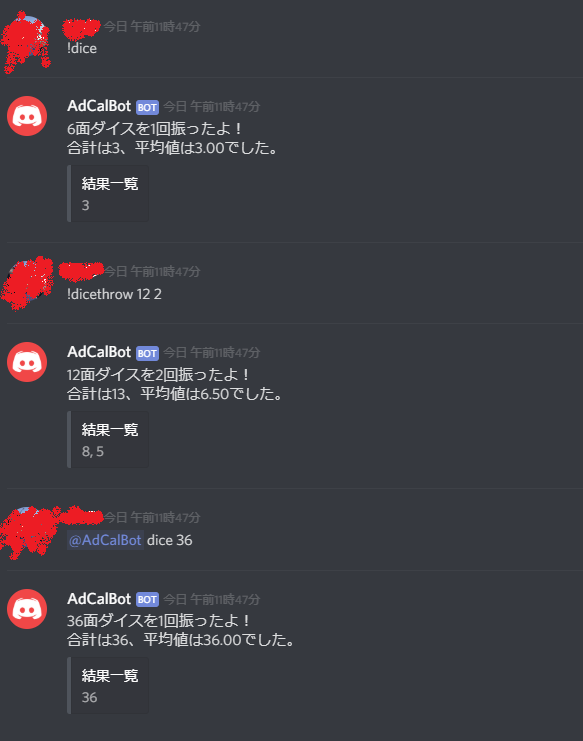
今度は引数を受け取って、その面のサイコロを指定回数振って結果を表示する機能です。
今回の機能は引数を受け取る以外にも以下の機能を実装してみました。
- 複数のコマンド(dice, dicethrow)で起動
- 引数省略時に既定値で実行
- サマリー以外の結果は埋め込みで返却
以下がそのコードになります。
using Discord;
using Discord.Commands;
using System;
using System.Text;
using System.Threading.Tasks;

namespace DiscordBot.NetCore.Commands
{
    /// <summary>
    ///     サイコロ機能クラス
    /// </summary>
    public class Dice : ModuleBase
    {
        /// <summary>
        ///     サイコロを振ります
        /// </summary>
        /// <param name="face">振るダイスの面の数</param>
        /// <param name="throwCount">投げる回数</param>
        /// <returns></returns>
        [Command("dice"), Alias("dicethrow")]
        public async Task DiceThrow(byte face = 6, byte throwCount = 1)
        {
            // 入力値検証
            if (face < 1)
            {
                await ReplyAsync("せめて面を1つは下さい :pray:");
                return;
            }
            if (throwCount < 1)
            {
                await ReplyAsync("振るなら1回以上は振ろうぜ :anger:");
                return;
            }

            // サイコロを振ってます・・・
            var resultText = new StringBuilder();
            var firstLine = true;
            var summary = 0;
            for (int i = 0; i < throwCount; i++)
            {
                var result = new Random().Next(1, face + 1);
                resultText.Append(firstLine ? result.ToString().PadLeft(3) : $", {result.ToString().PadLeft(3)}");
                summary += result;

                firstLine = false;
                if ((i + 1) % 10 == 0)
                {
                    resultText.AppendLine();
                    firstLine = true;
                }
            }

            // 結果一覧の埋め込み要素を作成
            var embed = new EmbedBuilder();
            embed.WithTitle("結果一覧");
            embed.WithDescription(resultText.ToString());

            // 結果返却
            await ReplyAsync($"{face}面ダイスを{throwCount}回振ったよ!\r\n合計は{summary}、平均値は{((double)summary / throwCount).ToString("#,0.00")}でした。", embed: embed.Build());
        }
    }
}
そしたらまたプログラムを起動させてDiscord上で呼び出してみます。
Azure側の作業
最後に、せっかく作成したBotプログラムなので、自身がPCを起動させていない時でも動いてくれるようにAzure上にデプロイさせてあげましょう。
VisualStudioからAzureへのデプロイはVSだけで簡単に出来るのでお薦めです!
(Azureアカウントやリソースグループが必要ですが、それらの作成方法については省略します。)
プロファイル作成
プロジェクトを右クリックしての「発行(B)」から「新規作成」でプロファイルを作成します。
プロファイルには「アプリ名、使用するサブスクリプション、リソースグループ、ホスティングプラン」を入力してください。
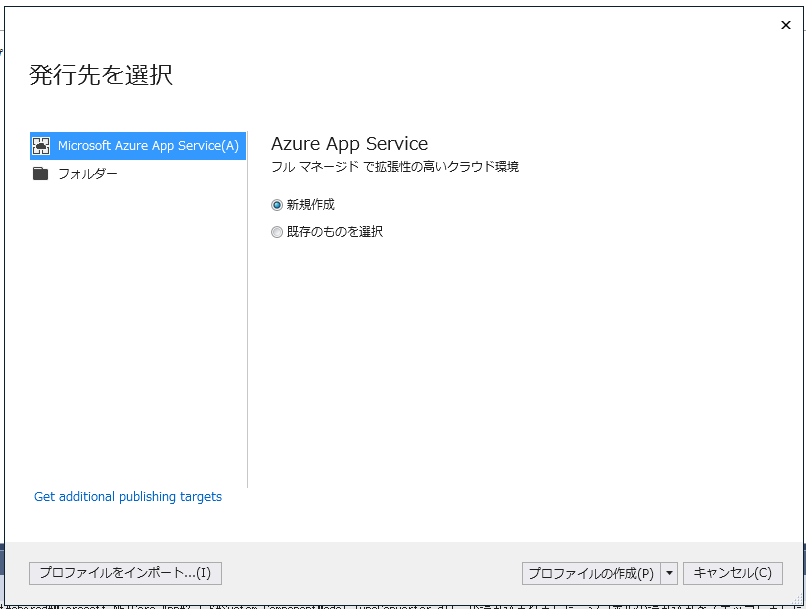
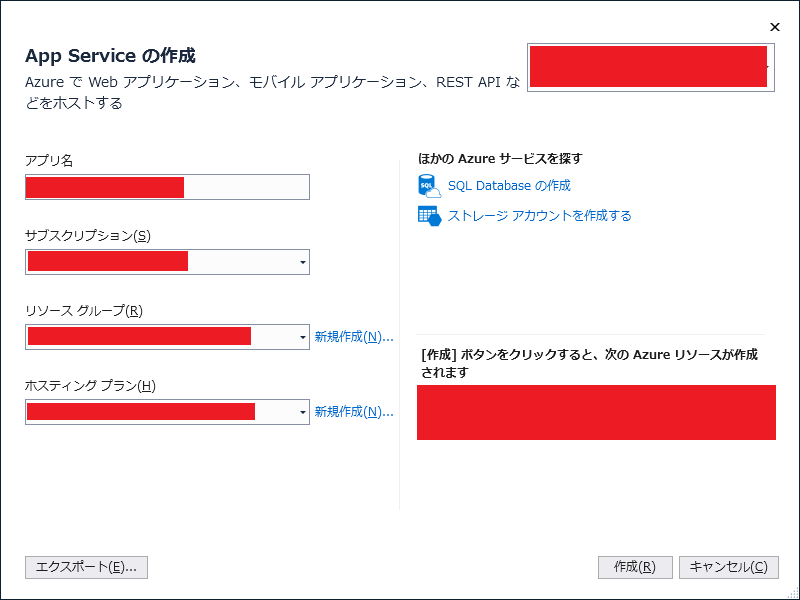
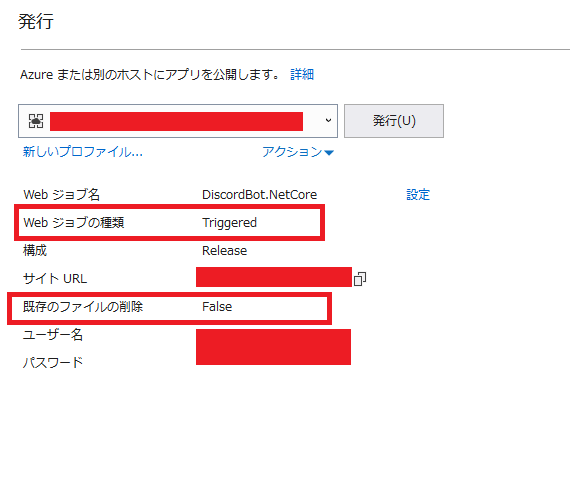
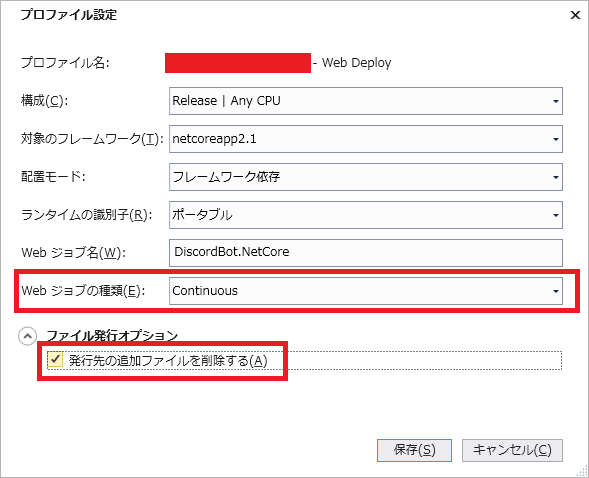
上記の手順で作成するとプロファイルが作られますが、そのままだと種別が「トリガー」になっていますので、常駐起動用の「継続」に変更します。
今回はついでに、デプロイ方法も「前回のリソースを削除」にしました。
デプロイ
上記で作成したプロファイルを使って発行するだけでデプロイ完了です。簡単・・・。
これで発行すると、指定したリソースグループ内のWebジョブにアプリケーションが追加されます。
ちなみに、継続的なWebジョブの場合はアプリケーションの「常時接続」をONにする必要があります。
これはAzure Potalに入ってAppServiceの「設定 > アプリケーション設定 > 常時接続」から設定することができます。
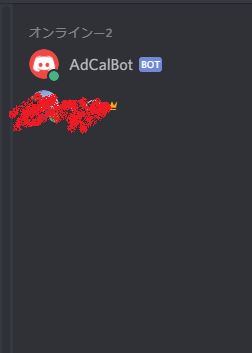
無事、設定が完了したらDiscordを確認します。
Botアカウントがオンラインになっていれば成功です。
まとめ
無事、DiscordサーバーにC#で作成してAzureにデプロイしたBotを動かす事が出来ました。
簡単ではありますが、今回使用したソースコードは自分のgithubに公開してありますので、よろしければどーぞ。
https://github.com/xxi-noxx/CSharpAdCal2018
(PullRequestは優しくお願いします。何卒・・・何卒・・・。。。)
今ではゲーム好きには当たり前になったと思っているDiscordですが、
最近スマブラとか発売されて新規オンラインゲーム勢も増えたと思うので、
コミュニケーションツールにDiscordを使って、Botを仕込んでドヤってみましょう!(