この記事の概要
こんなものを作ってみました。
コードの全体像
HTML は以下のようになっています。
id="custom-cursor" の要素が変形するマウスカーソルの実体です。
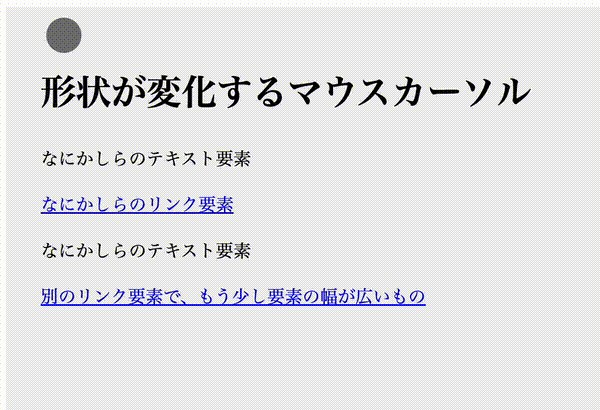
<div class="container">
  <h1>形状が変化するマウスカーソル</h1>
  <p>なにかしらのテキスト要素</p>
  <a href="#">なにかしらのリンク要素</a>
  <p>なにかしらのテキスト要素</p>
  <a href="#">別のリンク要素で、もう少し要素の幅が広いもの</a>
  <div id="custom-cursor"></div>
</div>
CSS は特筆することはありません。
* {
  cursor: none;
  line-height: 1.6;
}

#custom-cursor {
  display: none;
  background-color: rgb(0 0 0 / 0.5);
  width: 2rem;
  height: 2rem;
  border-radius: calc(infinity * 1px);
  position: fixed;
  pointer-events: none;
  transition: transform 100ms ease-out, width 100ms ease-out, border-radius 100ms ease-out;
  transform-origin: center;
}

.container {
  background-color: #f0f0f0;
  width: 100dvw;
  height: 100dvh;
  padding: 2rem;
}
JavaScript の内容は抜粋して説明します。
const cursor = document.getElementById("custom-cursor");
const defaultCursorSize = '2rem'
const adjustCursorPosition = '1rem' // defaultCursorSize / 2

window.addEventListener("mousemove", function(event) {
  cursor.style.display = 'block';
  cursor.style.left = `calc(${event.clientX}px - ${adjustCursorPosition}`;
  cursor.style.top = `calc(${event.clientY}px - ${adjustCursorPosition}`;
});

window.addEventListener('mouseout', function() {
  cursor.style.display = 'none';
});

document.querySelectorAll('a').forEach(function(element) {
  element.addEventListener('mouseover', function() {
    const rect = this.getBoundingClientRect();
    cursor.style.backgroundColor = 'rgb(0 0 0 / 0.2)';
    cursor.style.borderRadius = '8px';
    cursor.style.transform = `translateX(${(-1 * event.clientX) + rect.left}px)`;
    cursor.style.width = `calc(${rect.width}px + ${defaultCursorSize})`;
    cursor.style.height = `calc(${rect.height}px + ${adjustCursorPosition}`;
    this.addEventListener('mousemove', function(event) {
      cursor.style.transform = `translateX(${(-1 * event.clientX) + rect.left}px)`;
    });
  });

  element.addEventListener('mouseout', function() {
    cursor.style.backgroundColor = 'rgb(0 0 0 / 0.5)';
    cursor.style.borderRadius = 'calc(infinity * 1px)';
    cursor.style.transform = `translateX(0)`;
    cursor.style.width = defaultCursorSize;
    cursor.style.height = defaultCursorSize;
  });
});

document.querySelectorAll('h1, p').forEach(function(element) {
  element.addEventListener('mouseover', function() {
    const rect = this.getBoundingClientRect();
    cursor.style.borderRadius = '1px';
    cursor.style.transform = `translateX(${adjustCursorPosition})`;
    cursor.style.width = `2px`;
    cursor.style.height = `${rect.height}px`;
  });

  element.addEventListener('mouseout', function() {
    cursor.style.borderRadius = 'calc(infinity * 1px)';
    cursor.style.transform = `translateX(0)`;
    cursor.style.width = defaultCursorSize;
    cursor.style.height = defaultCursorSize;
  });
})
本物のマウスカーソルに自作のマウスカーソルを追従させる
event.clientX や event.clientY だけだと、本物のマウスカーソルの先端の位置なので、丸いカーソルに対してはズレて見えます。
そのため adjustCursorPosition で調整しています。
2023//6/20 追記
こちらのコメントでいただいたように、ウインドウの外にマウスが出たときに自作のカーソルを消す処理を追記しました。
const cursor = document.getElementById("custom-cursor");
const defaultCursorSize = '2rem'
const adjustCursorPosition = '1rem' // defaultCursorSize / 2

window.addEventListener("mousemove", function(event) {
  cursor.style.display = 'block';
  cursor.style.left = `calc(${event.clientX}px - ${adjustCursorPosition}`;
  cursor.style.top = `calc(${event.clientY}px - ${adjustCursorPosition}`;
});

window.addEventListener('mouseout', function() {
  cursor.style.display = 'none';
});
リンクにマウスオーバーした際の挙動

マウスオーバーした要素のサイズを取得し(this.getBoundingClientRect())、それにあわせてカーソルのサイズや座標を変えています。
(querySelectorAll('a').forEach は、いささかパワープレイ過ぎる気もしますが……)
また、 mouseover の中で mousemove を使い位置を調整することで、カーソルが動いても見た目上の選択範囲は常にリンクに吸着している雰囲気を出しています。
document.querySelectorAll('a').forEach(function(element) {
  element.addEventListener('mouseover', function() {
    const rect = this.getBoundingClientRect();
    cursor.style.backgroundColor = 'rgb(0 0 0 / 0.2)';
    cursor.style.borderRadius = '8px';
    cursor.style.transform = `translateX(${(-1 * event.clientX) + rect.left}px)`;
    cursor.style.width = `calc(${rect.width}px + ${defaultCursorSize})`;
    cursor.style.height = `calc(${rect.height}px + ${adjustCursorPosition}`;
    this.addEventListener('mousemove', function(event) {
      cursor.style.transform = `translateX(${(-1 * event.clientX) + rect.left}px)`;
    });
  });

  element.addEventListener('mouseout', function() {
    cursor.style.backgroundColor = 'rgb(0 0 0 / 0.5)';
    cursor.style.borderRadius = 'calc(infinity * 1px)';
    cursor.style.transform = `translateX(0)`;
    cursor.style.width = defaultCursorSize;
    cursor.style.height = defaultCursorSize;
  });
});
テキストにマウスオーバーした際の挙動

やっていることはリンクのときとほぼ変わりません。
スタイルを、アイビームっぽい形状にしているくらいの差です。
document.querySelectorAll('h1, p').forEach(function(element) {
  element.addEventListener('mouseover', function() {
    const rect = this.getBoundingClientRect();
    cursor.style.borderRadius = '1px';
    cursor.style.transform = `translateX(${adjustCursorPosition})`;
    cursor.style.width = `2px`;
    cursor.style.height = `${rect.height}px`;
  });

  element.addEventListener('mouseout', function() {
    cursor.style.borderRadius = 'calc(infinity * 1px)';
    cursor.style.transform = `translateX(0)`;
    cursor.style.width = defaultCursorSize;
    cursor.style.height = defaultCursorSize;
  });
})
最後に
display: block;なテキスト要素にカーソルが乗ると、テキストの無いエリアでもアイビームになってしまうとか、 2 行以上のテキストにカーソルが乗るとサイズが大きくなり過ぎるとか、改善点は色々ありますが、雰囲気としては面白いものが作れた気がします。
なお、気づいている人は気づいていると思いますが iPad にマウスを接続したときのカーソルの見た目や動きを参考にしています。
最後まで読んでくださってありがとうございます!
Twitterでも情報を発信しているので、良かったらフォローお願いします!
Devトークでお話してくださる方も募集中です!