この記事の概要
2024年8月15日に社内で開催したFigmaのCode Connectについての勉強会の資料です。
社内だけに閉じる必要もなかったので、Qiitaにて記事として公開しました。
Code ConnectはReact, React Native, SwiftUI, Jetpack Composeに対応しています。
今回紹介するのはReactでの内容です。
コンポーネントの準備
Code Connectを実施する前に、Figmaデータとしてのコンポーネントと、コードとしてのコンポーネント、両方が必要です。
今回は簡単にボタンコンポーネントでの例を見せます。

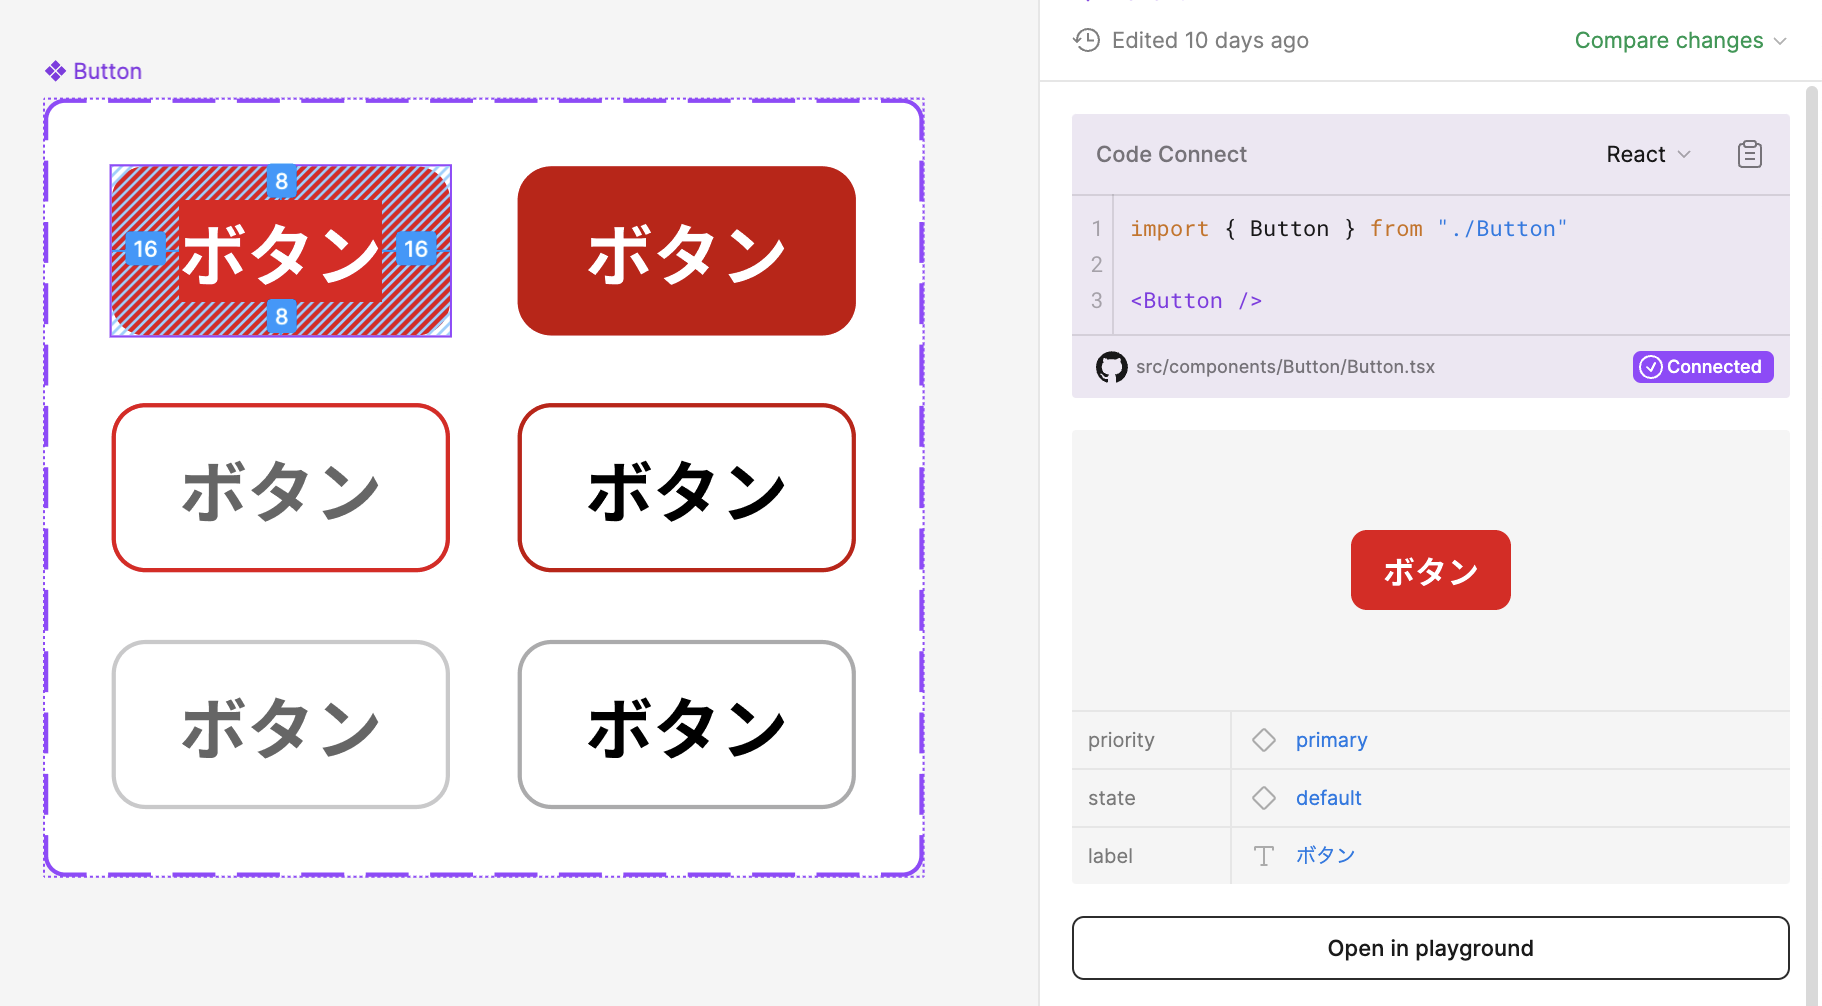
Figmaでのpropertiesは以下のようになっています。
| Property名 | 内容 |
|---|---|
| proprity | primary, secondary, tertiary |
| state | default, hover |
| label | ラベルのテキスト |
上から順にprimary, secondary, tertiary。
左がdefault、右がhoverです。
コードではこのようになっています。
import type { ButtonHTMLAttributes } from "react";
import classes from "./Button.module.css";

type Props = {
	priority?: "primary" | "secondary" | "tertiary";
} & ButtonHTMLAttributes<HTMLButtonElement>;

export function Button({
	children,
	priority = "primary",
	type = "button",
	...props
}: Props) {
	return (
		<button className={classes[priority]} type={type} {...props}>
			{children}
		</button>
	);
}
現時点ではFigmaでDev modeに入るとGet started with Code Connectと表示されていて、まだ繋がっていないことが分かります。

ここから繋いでいきます。
トークンの発行と設定
FigmaのSettings > Account > Personal access tokensからGenerate new tokenして、トークンを作成します。
Token nameは自由につけてください。
Expirationもお任せします。
Scopesは、File contentをRead-onlyに、Code ConnectをWriteに設定し、それ以外はNo accessで大丈夫です。

作成したら、コピーして手元に保存しておいてください。
次に、リポジトリ内に.envを作成し、トークンを設定します。
FIGMA_ACCESS_TOKEN=先ほど作成したトークン
依存関係のインストールとセットアップ
次に、Code ConnectのCLIをインストールします。
npm i @figma/code-connect
インストールが完了したら、ルートディレクトリにfigma.config.jsonを作成し、中身を以下のようにします。
{
	"codeConnect": {
		"include": ["src/components/**/*.{tsx,jsx}"],
		"parser": "react"
	}
}
ひとまずの接続
Code ConnectしたいコンポーネントのURLを取得してからコマンドを叩きます。
右クリック > Copy/Paste as > Copy link to selectionで要素ごとのURLがクリップボードにコピーされます。
npx figma connect create 今コピーしたURL
ルートディレクトリにButton.figma.tsxが作成されるので、src/components/Button/に移動させましょう。
import { Button } from "./Button";
import figma from "@figma/code-connect";

figma.connect(
	Button,
	"ファイルのURL",
	{
		props: {
			label300: figma.string("label"),
			priority: figma.enum("priority", {
				primary: "primary",
				secondary: "secondary",
				tertiary: "tertiary",
			}),
			state: figma.enum("state", {
				default: "default",
				hover: "hover",
			}),
		},
		example: (props) => <Button  />,
	},
)
できたら一度publishします。
npx figma connect publish
完了したらFimgaに戻り、Dev modeに入ってcomponentを選択すると、Code Connectされていると思います。
使えるコードにする
Figmaデータとコードの接続こそされましたが、現時点では正直使えるものではありません。
まずは以下のように変更します。
figma.connect(
	Button,
	"ファイルのURL",
	{
		props: {
			label300: figma.string("label"),
			priority: figma.enum("priority", {
				primary: "primary",
				secondary: "secondary",
				tertiary: "tertiary",
			}),
			state: figma.enum("state", {
				default: "default",
				hover: "hover",
			}),
		},
-		example: (props) => <Button  />,
+		example: (props) => <Button {...props} />
	},
)
再度publishします。
npx figma connect publish
これでlabelやpriorityなどにあわせたコードが表示されるようになりました。

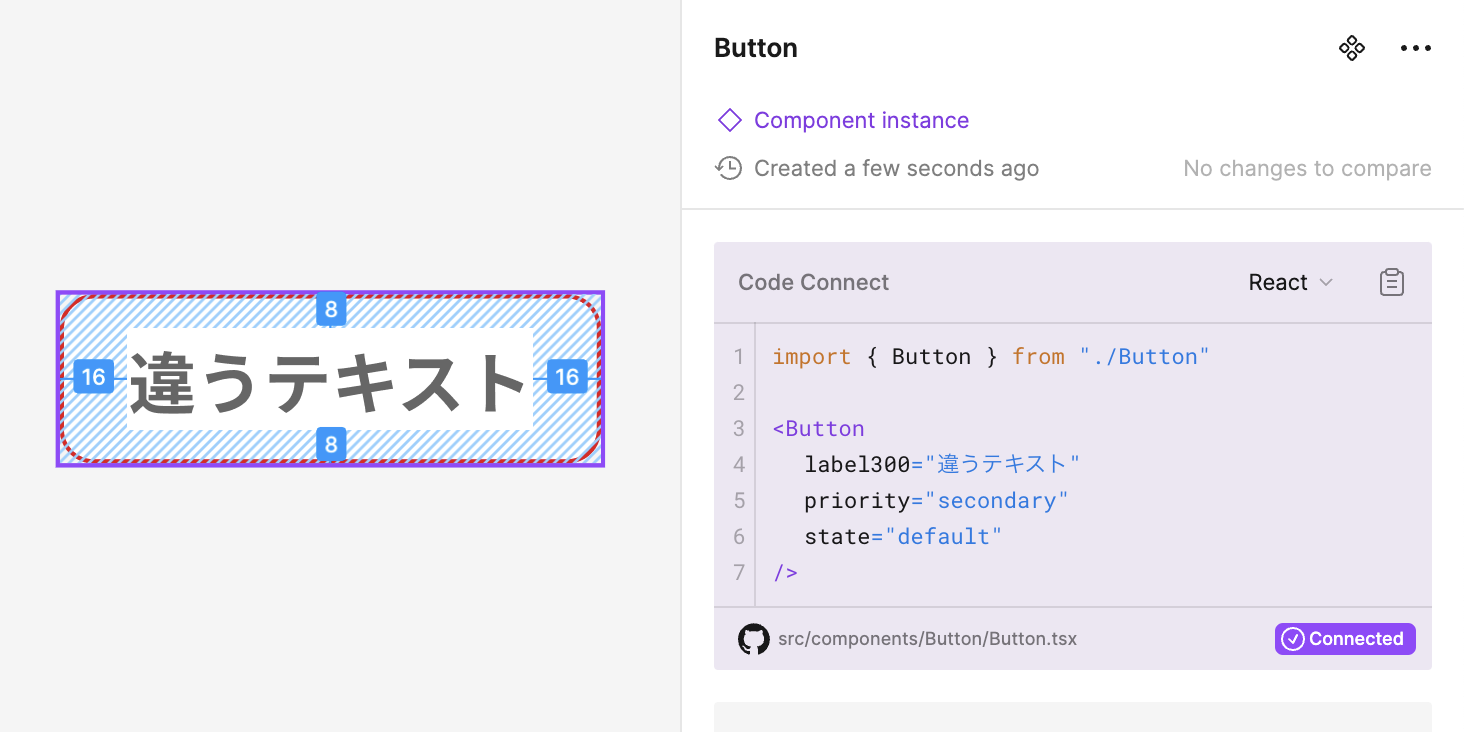
ただ、今の時点だといくつか不整合もあります。
-
labelがlabel300という名前になっている - テキストをchildrenで受け取っていない
- hoverのスタイルをpropsとして渡すはずないのに、渡っている
- import文が実態にそぐわない
label300という名前は、なぜかこうなってしまっているだけで勝手に変えていいそうです(Figma Japanに確認しました)。
childrenは適切になるようにコードを修正します。
hoverのスタイルまわりは不要なので削ります。
figma.connect(
	Button,
	"ファイルのURL",
	{
		props: {
-			label300: figma.string("label"),
+			label: figma.string("label"),
			priority: figma.enum("priority", {
				primary: "primary",
				secondary: "secondary",
				tertiary: "tertiary",
			}),
-			state: figma.enum("state", {
-				default: "default",
-				hover: "hover",
-			}),
		},
-		example: (props) => <Button {...props} />
+		example: ({ label, priority }) => (
+			<Button priority={priority}>{label}</Button>
+		),
	},
)
この状態で再publishしましょう。
npx figma connect publish


解消されています。
最後にimportですが、tsconfigのpathsを設定しているプロジェクトも多いと思います。
それに合わせた変更をします。
{
	"codeConnect": {
+ 		"importPaths": {
+			"src/components/*": "@components/*"
+		},
		"include": ["src/components/**/*.{tsx,jsx}"],
		"parser": "react"
	}
}
@componentsの部分は実際のコードにあわせてください。
これで再度publishします。
npx figma connect publish
これで、Code Connectで示されたコードをコピー&ペーストするだけで、実際のコードの中でも使えるようになるはずです。
