iOS7でJavaScriptを組み込みスクリプトとして使う方法の紹介です。
(iOS7以降が要件となっているので注意!)
組み込みスクリプトを使う利点
- コンパイル不要でトライアンドエラーを高速化
なんといってもこれです。
UI等、実際に見て微調整していくことで最適なものに少しずつ寄せていく、という目視確認に頼る場合などに特に威力を発揮します。
フェード速度を0.1f変えてまたビルドして動きを見て、と繰り返すのは辛いですね。
その性質上、ゲーム開発の現場ではよく使われており、代表的な言語にLua、Squirrel、Pythonなどがあります。
実際にやってみる
ViewController上に配置されたオブジェクトに対して、JavaScriptから色々操作してみます。
事前準備
プロジェクトにJavaScriptCore.frameworkを追加しておきます。
ViewControllerにリロード機構を実装する
リロードとは、プログラムの実行中にスクリプトを読み直すことです。
いきなり今回のキモですね。スクリプト上でオブジェクトの参照を握っている場合等はその辺り諸々考慮する必要がありますが、省略します。
全てのUIViewControllerに適用するため、DJSAdditionというUIViewControllerのカテゴリを作ります(Dはdynamicの意味です、一応)。
# import <UIKit/UIKit.h>

@interface UIViewController (DJSAddition)

@property NSString* textTag;

- (BOOL)canBecomeFirstResponder;
- (NSArray *)keyCommands;
- (void)reload:(UIKeyCommand *)command;

@end
読み込むjsファイルの名前を"(ViewControllerのタグ名)-(ボタン等オブジェクトのユニークな名前).js"にするため、textTagという文字列をプロパティで持たせています。
# import "UIViewController+DJSAddition.h"
# import <objc/runtime.h>

# define TEXT_TAG @"textTag"

@implementation UIViewController (DJSAddition_h)

- (void)setTextTag:(NSString *)textTag
{
    if (objc_getAssociatedObject(self, TEXT_TAG) == textTag) return;

    objc_setAssociatedObject(self, TEXT_TAG, textTag, OBJC_ASSOCIATION_RETAIN_NONATOMIC);
}

- (NSString *)textTag
{
    return objc_getAssociatedObject(self, TEXT_TAG);
}

- (BOOL)canBecomeFirstResponder
{
    return YES;
}

- (NSArray *)keyCommands
{
    return @[[UIKeyCommand keyCommandWithInput:@"R"
                                 modifierFlags:UIKeyModifierCommand
                                        action:@selector(reload:)]];
}

- (void)reload:(UIKeyCommand *)command
{
    NSNotificationCenter* nc = [NSNotificationCenter defaultCenter];
    NSDictionary *userInfo = [NSDictionary dictionaryWithObjectsAndKeys:self.textTag, @"vcTag", nil];
    [nc postNotificationName:@"JSAddition-reload" object:self userInfo:userInfo];
}

@end
カテゴリを使いつつtextTagというプロパティを追加するためにgetter/setterを実装してあります。
今回は Command+R でリロードを走らせることにするので、canBecomeFirstResponderとkeyCommandsを実装してキー入力を受け取り、NSNotificationCenterに通知しています。
JavaScriptのVMを用意する
JavaScriptを実行する部分です。シングルトンで用意します。
このクラス自体もJavaScriptにバインドしたいため、まずヘッダにJSExportプロトコルに準拠したプロトコルを定義しておいて、そこにJavaScriptにバインドするメソッドを記述します。
sharedInstanceとgetByIdがそれに該当します。
# import <Foundation/Foundation.h>
# import <JavaScriptCore/JavaScriptCore.h>

@class DJavaScript;

@protocol DJSExport <JSExport>

+ (DJavaScript *)sharedInstance;
- (id)getById:(NSString*)objId;

@end

@interface DJavaScript : NSObject <DJSExport>

- (void)runScript:(NSString*)code;
- (bool)registerId:(NSString*)key Object:(id)value;

@end
mファイルにはオブジェクトを管理するためのマップをプロパティで持たせます。
registerIdメソッドでオブジェクト自ら登録させることで、JavaScriptからアクセスできるようにするわけですね。
# import "DJavaScript.h"
# import <JavaScriptCore/JavaScriptCore.h>

@interface DJavaScript ()

@property NSMutableDictionary* objMap;

@end

@implementation DJavaScript

+ (DJavaScript *)sharedInstance
{
    static DJavaScript *sharedInstance = nil;
    static dispatch_once_t onceToken;
    dispatch_once(&onceToken, ^{
        sharedInstance = [[DJavaScript alloc] init];
    });
    return sharedInstance;
}

- (id)init
{
    self = [super init];
    if (self) {
        _objMap = [NSMutableDictionary dictionary];
    }
    return self;
}

- (void)runScript:(NSString*)code
{
    JSVirtualMachine* vm = [[JSVirtualMachine alloc] init];
    JSContext* ctx = [[JSContext alloc] initWithVirtualMachine:vm];

    // 例外ハンドラを設定
    ctx.exceptionHandler = ^(JSContext* ctx, JSValue* error) {
        NSLog(@"JS Exec: %@", error);
    };

    // バインド
    ctx[@"DJavaScript"] = [DJavaScript class];

    [ctx evaluateScript:code];
}

- (bool)registerId:(NSString*)key Object:(id)value
{
    if ([_objMap objectForKey:key]) {
        return NO;
    }
    [_objMap setObject:value forKey:key];
    return YES;
}

- (id)getById:(NSString*)objId;
{
    return [_objMap objectForKey:objId];
}

@end
対象UIViewのクラス定義
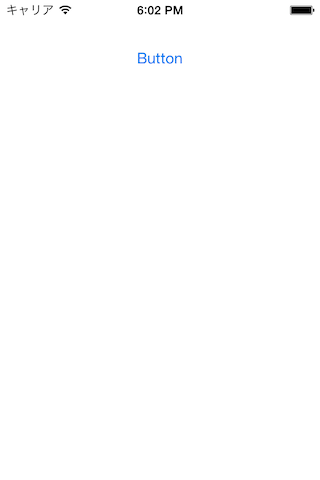
Storyboard上で、まっさらなViewControllerにUIButtonを一つ追加します。今回はこのボタンを操作対象にしてみましょう。

UIButtonを継承して、DJSButtonというクラスを作成しました。(Dはdynamicの意味です、一応)
# import <UIKit/UIKit.h>
# import <JavaScriptCore/JavaScriptCore.h>

@class DJSButton;
@protocol DJSButtonJSExport <JSExport>

- (DJSButton*)setX:(float)value;
- (DJSButton*)setY:(float)value;
- (DJSButton*)setAlpha:(float)value;
- (DJSButton*)setTitle:(NSString*)value;

@end

@interface DJSButton : UIButton <DJSButtonJSExport>

@end
まずヘッダにJSExportプロトコルに準拠したプロトコルを定義しておいて、そこにJavaScriptにバインドするメソッドを記述します。
操作用にいくつか簡単なインターフェイスを用意しました。
次に実装ですが、このボタンが生成された時にawakeFromNibを使って先ほどのオブジェクトマップに自身のインスタンスを登録しておきます。
また、同じくawakeFromNib内でNSNotificationCenterに登録しておきます。
ViewControllerからリロードが通知されたタイミングでjsファイルを読み込んで実行するためですね。
# import "DJSButton.h"
# import "DJavaScript.h"

@interface DJSButton ()

@property NSString* objId;

@end

@implementation DJSButton

- (void)awakeFromNib
{
    [[DJavaScript sharedInstance] registerId:_objId Object:self];
    [[NSNotificationCenter defaultCenter] addObserver:self
                                             selector:@selector(reload:)
                                                 name:@"JSAddition-reload"
                                               object:nil];
}

- (void)reload:(NSNotification*)notification
{
    NSString *vcTag = [[notification userInfo] objectForKey:@"vcTag"];
    NSString *homeDir = NSHomeDirectory();
    NSString *fileName = [NSString stringWithFormat:@"%@-%@.js", vcTag, _objId];
    NSString *filePath = [homeDir stringByAppendingPathComponent:fileName];
    NSFileHandle *fileHandle = [NSFileHandle fileHandleForReadingAtPath:filePath];
    if (!fileHandle) {
        NSLog(@"ファイルがありません.");
        return;
    }
    NSData *data = [fileHandle readDataToEndOfFile];
    NSString *str = [[NSString alloc]initWithData:data
                                         encoding:NSUTF8StringEncoding];
    [fileHandle closeFile];

    [[DJavaScript sharedInstance] runScript:str];
}

- (DJSButton*)setX:(float)value
{
    CGRect rect = [self frame];
    rect.origin.x = value;
    [self setFrame:rect];
    return self;
}

- (DJSButton*)setY:(float)value
{
    CGRect rect = [self frame];
    rect.origin.y = value;
    [self setFrame:rect];
    return self;
}

- (DJSButton*)setAlpha:(float)value
{
    [super setAlpha:value];
    return self;
}

- (DJSButton*)setTitle:(NSString*)value
{
    [super setTitle:value forState:UIControlStateNormal];
    return self;
}

@end
ちなみにバインドしている各メソッドが自身のインスタンスを返しているのは、JavaScriptのドットシンタックスでjQueryライクに連結するためです。
Storyboard(xib)上で設定
UIViewControllerの設定
User Defined Runtime Attributesで textTag に "firstView" というvalueを入れました。

DJSButtonの設定
先ほど設置したUIButtonのClassをDJSButtonにします。
User Defined Runtime Attributesで objId に "piyo" というvalueを入れました。

JavaScriptを書く
DJSButtonで用意したインターフェイスを使って、「座標を動かす→透明度を弄る→文字を変える」という操作を行っています。
var dJs = DJavaScript.sharedInstance();
dJs.getById('piyo').setX(20).setY(350).setAlpha(0.95).setTitle('hello dynamic reload!');
なおシミュレータで実行する場合、ファイルのフルパスは
Library/Application Support/iPhone Simulator/7.0.3/Applications/(UIID)/firstView-piyo.js
のようになり、ここを直接編集していくことになります。
実行する
実行します。シミュレータが立ち上がりました。
ここで、シミュレータで実行中のアプリに向かって Command+R を押します。ふわっと画面が変化しました。
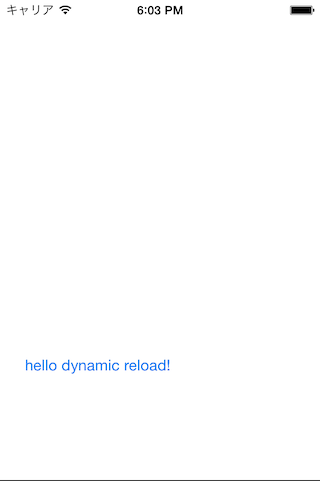
実行したままリアルタイムでfirstView-piyo.jsを書き換え、 Command+R を押すと即座に変更が反映されます。