3D Sensor Advent Calendar 2019 の 10 日目の記事です。
概要
3D センサー歴 3 か月程度の初心者ですが、もう一度、 AzureKinect で頑張ってみます。
前回は、AzureKinect をVisual Studio で動かしてみました。今回の目標としては、初心者レベルでUnity の使用と点群表示、画面を移動するところまで解説してみたいと思います。
環境
- windows 10 pro
- Unity 2019.2.12
- Microsoft .NET Framework Version 4.8.03752
- Azure Kinect Sensor SDK 1.3.0
環境としては、Unityと前回の Visual Studio、それと Azure Kinect Sensor SDK 3.0 がインストールされている状態で開始します。
環境について
今回もできるだけ初心者(私)向けに最小限でやりたいのですが、Unity だと、以下のような手順を踏みます
- Azure Kinect のソースからコンパイル、C/C++ SDK 作成
- Azure Kinect の SDK -> SDK を呼び出す C# wrapper 作成
- Unity から呼び出し
となります。準備するだけでも手間がかかる・・・でも、前回の知識で省略できるところがあります。
1.Azure Kinect のソースからコンパイル
最終的にはSensor SDK の k4a.dll / depthengine_2_0.dll というコンパイル済のモジュールが Unity では必要になります。しかし、これは、Azure Kinect Sensor SDK をサイトからダウンロードしていれば以下の場所にありますので、これを使うことにします。
これを Unity でネイティブプラグイン、今回なら、AzureKinect Sensor SDKや、C# Wrapper といった、別言語でコンパイルし多様なモジュールを読み込むための特殊フォルダ「Plugins」に格納すれば、読み込めるようになります。SDKはWindowsの64bit版だと
以下のデフォルトの場所に配置されます。
C:\Program Files\Azure Kinect SDK v1.3.0\sdk\windows-desktop\amd64\release\bin
2.Azure Kinect の SDK -> SDK を呼び出す C# wrapper 作成
これは、本来なら C# wrapper をコンパイルして Microsoft.Azure.Kinect.Sensor モジュールを配置する必要があります。
実はこれもまた、 Sensor SDK 内にあるのですが・・・
C:\Program Files\Azure Kinect SDK v1.3.0\sdk\netstandard2.0\release
最小限のサンプルという意味では、AzureKinect の Azure Kinect SensorSDK と、SDK C#Wrapper、これだけあれば済むかと思いきや、とりあえずやってみると・・・
おや・・・?
これは、System.Memoryというモジュールが足りない、と言われているようですね。それがないのでC# wrapper 本体がloadできないようです。(他のエラーは別原因でした)
The type 'Memory<>' is defined in an assembly that is not referenced. You must add a reference to assembly
'System.Memory, Version=4.0.1.1, Culture=neutral, PublicKeyToken=cc7b13ffcd2ddd51'.
どうやら、C# SDK 内のモジュールをPlugins に配置するだけでは動かないようです。これは 3DSensor Advent Calendar 二日目に書いた、「NuGet」を使用したいと思います(visual studioと同じ資源が使用できるのは非常に便利ですね。作成者に感謝です)。
それでは、以下に手順を書きます
1.先に「NuGetForUnity」をWebからダウンロードします
https://github.com/GlitchEnzo/NuGetForUnity/releases
NuGetForUnity.2.0.0.unitypackage をダウンロード
2.Unityを起動します。
3.NuGetForUnity.2.0.0.unitypackage をUnity のAssetsフォルダにドラッグしインストールします。
4.Nugetを選択します
- Azure Kinect で検索し、Azure Kinect Sensor SDK 1.3.0 をインストールします。(これで、SensorSDK以外に必要なモジュールも自動で入る)
6.C:\Program Files\Azure Kinect SDK v1.3.0\sdk\windows-desktop\amd64\release\bin
から「k4a.dll」「depthengine_2_0.dll」をPluginsフォルダに配置します。
7.これで環境構築は終了です。
Azure Kinect での point cloud 表示
では、本題の point cloud つまり点群を表示してみようと思います。
調べていると点群を Unity で表示する方法は二つあって、
1.mesh を使う方法
2.particle を使う方法
があります。どちらもスクリプトの用意さえできれば難しくないのですが、より簡単だと思った particle を使う方法を紹介します。
点群表示までの手順
- ヒエラルキーを右クリックし、Effects>Particleで Particle を生成します
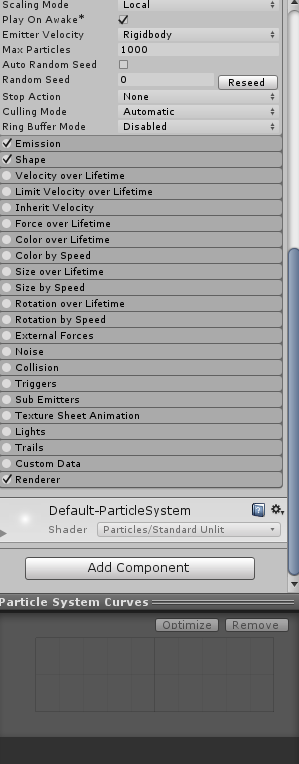
2.Particle System にカーソルを合わせ、右側のInspectorをプロパティのデフォルトから一部変更します。まず、Transform のRotation を X=0,Y=0,Z=-180に変更します。その次に、Play on Awake と Auto Random Seed のチェックボックスを外してください。
3.Assetフォルダを右クリックして Create>C#script を指定します。名前はTestPointCloudにしますが任意の名前で大丈夫です。
4.TestPointCloud.cs の中身を以下で書き換えてください。
using System.Collections;
using System.Collections.Generic;
using UnityEngine;
using Microsoft.Azure.Kinect.Sensor;
using System;


public class TestPointCloud : MonoBehaviour
{
    public GameObject particleSystemGameObject;
    private ParticleSystem pointCloudParticleSystem;
    private ParticleSystem.Particle[] particles;

    private Device device = null;
    private Capture capture = null;
    private Transformation transformation = null;

    private Color pointColor = Color.white;
    private float size = 0.02f;
    private float scale = 10.0f;

    void Start()
    {
        particleSystemGameObject = GameObject.Find("Particle System");


        device = Device.Open(0);
        device.StartCameras(new DeviceConfiguration
        {
            ColorFormat = ImageFormat.ColorBGRA32,
            ColorResolution = ColorResolution.R720p,
            DepthMode = DepthMode.NFOV_2x2Binned,
            SynchronizedImagesOnly = true,
            CameraFPS = FPS.FPS30
        });
        transformation = device.GetCalibration().CreateTransformation();
    }


    void Update()
    {
        capture = device.GetCapture();

        Image colorImage = capture.Color;
        Image depthImage = capture.Depth;

        int colorImageWidth = colorImage.WidthPixels;
        int colorImageHeight = colorImage.HeightPixels;

        List<Vector3> vertices = new List<Vector3>(colorImageWidth * colorImageHeight);
        List<Color32> colors = new List<Color32>(colorImageWidth * colorImageHeight);

        convertRGBDepthToPointXYZRGB(capture, ref vertices, ref colors);

        particles = new ParticleSystem.Particle[colorImageWidth * colorImageHeight];
        for (int i = 0; i < colorImageWidth * colorImageHeight; ++i)
        {
            particles[i].position = vertices[i];
            particles[i].startColor = colors[i];
            particles[i].startSize = size;
            if (vertices[i].z == 0.0f)
            {
                particles[i].startSize = 0;
            }
        }

        pointCloudParticleSystem = particleSystemGameObject.GetComponent<ParticleSystem>();
        pointCloudParticleSystem.Clear();
        pointCloudParticleSystem.SetParticles(particles, particles.Length);
    }
    public struct Point : IEquatable<Point>
    {
        private short x;
        private short y;
        private short z;

        public Point(short x, short y, short z)
        {
            this.x = x;
            this.y = y;
            this.z = z;
        }

        public short X { get => x; set => x = value; }
        public short Y { get => y; set => y = value; }
        public short Z { get => z; set => z = value; }

        public bool Equals(Point other)
        {
            return (this.x == other.x) && (this.y == other.y) && (this.z == other.z);
        }
    }
    public void convertRGBDepthToPointXYZRGB(Capture capture, ref List<Vector3> vertices, ref List<Color32> colors)
    {
        Image colorImage = capture.Color.Reference();
        int colorImageWidth = colorImage.WidthPixels;
        int colorImageHeight = colorImage.HeightPixels;

        Image transformedDepthImage = new Image(ImageFormat.Depth16, colorImageWidth, colorImageHeight, colorImageWidth * sizeof(short));
        Image pointCloudImage = new Image(ImageFormat.Custom, colorImageWidth, colorImageHeight, colorImageWidth * 3 * sizeof(short));

        transformation.DepthImageToColorCamera(capture, transformedDepthImage);
        transformation.DepthImageToPointCloud(transformedDepthImage, pointCloudImage, CalibrationDeviceType.Color);

        for (int h = 0; h < colorImageHeight; ++h)
        {
            for (int w = 0; w < colorImageWidth; ++w)
            {
                short x = pointCloudImage.GetPixel<Point>(h, w).X;
                short y = pointCloudImage.GetPixel<Point>(h, w).Y;
                short z = pointCloudImage.GetPixel<Point>(h, w).Z;

                Vector3 xyz = new Vector3(
                    (float)x / 1000.0f,
                    (float)y / 1000.0f,
                    (float)z / 1000.0f
                    );

                Color32 rgb = new Color32(
                    colorImage.GetPixel<BGRA>(h, w).R,
                    colorImage.GetPixel<BGRA>(h, w).G,
                    colorImage.GetPixel<BGRA>(h, w).B,
                    Byte.MaxValue);

                vertices.Add(xyz);
                colors.Add(rgb);
            }
        }
    }

    private void OnDestroy()
    {
        device.StopCameras();
    }

}
4.Particle System にカーソルを合わせ、右側のInspectorの一番下のAddComponentで今作成したTestPointCloud.csを指定します。
5.指定したTestPointCloud.cs にはParticle System という部分が GameObject(None) 、つまり何も設定されていない状態になっていますので、ここに、左側のヒエラルキーから「Particle System」をドラッグして設定しましょう。
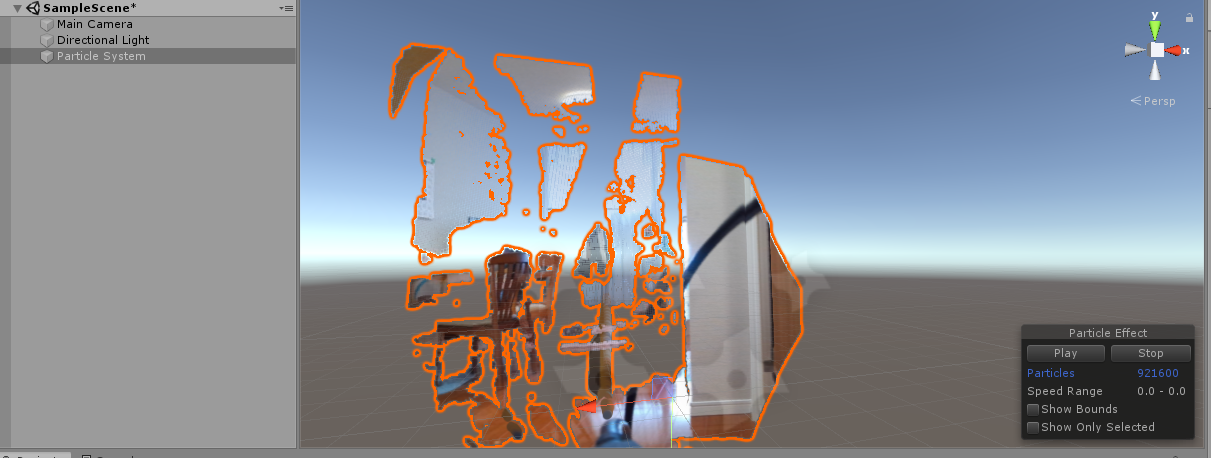
最後に上のPlayボタンで、実行します。うまくいったらカメラから点群が見えるようになります。
・・・この処理では、カメラの移動などの機能はないのですが、Unity では Scene から視点を変えられるので、立体的に表示されているのも分かると思います。
振り返り
- 今回は、 C# から Unity まで手を伸ばしました。
- 実は、AzureKinectの Unity 初心者向けは既に吉永崇さんが、ハンズオンセミナーや、記事にまとめています。(私もこれで学びました)
- まだあまり中身が説明できていない or 自分でも分かっていないので、これは別に書いてみようかなと思います。
3D Sensor は奥が深く、多様な使い方ができるし、もっと役に立つ使い方があると思うので、色々と考えたいなと・・・


