RaspberryPiで1.8" TFT液晶を使う
この記事では、1.8" TFT液晶をRaspberryPi上のPython3で駆動します。
Arduinoでの駆動例は多数あり、ライブラリも豊富ですが、Python3での駆動例は少なかったため記載します。
使用する液晶によって、表示上の赤と青が入れ替わる(RGB→BGR)となる場合があります。
私の使用した液晶ではこの症状が発生したため、画像の赤と青を反転させることで対応しています。
解決策をご存じの方がいましたら、コメントしていただけると助かります。
この記事のスクリプトは、以下のページを参考にしました。
配線
スクリプト
ライブラリについて
他のサイト等で紹介されている、ST7735s・ST7735のライブラリを用いた駆動方法は、私の環境では上手く行きませんでした。
なお、環境や使用する液晶によってはこちらでも動作する可能性はあると思います。
使用パッケージのインストールと設定
使用パッケージ
- pip3
- adafruit-circuitpython-rgb-display
- Pillow
インストール
python3-pilはおそらくインストール済みになると思われます。
sudo apt install python3-pip
sudo pip3 install adafruit-circuitpython-rgb-display
sudo apt install python3-pil
インストールの確認
python3
import PIL
import adafruit_rgb_display
以上のパッケージがインポートできれば、インストールが正常に完了しています。
exit()でpython3を終了してください。
SPI通信の有効化
sudo raspi-config
これに関しては、たくさん情報がありますのでわからない場合は検索してみてください。
配線
使用する液晶によって、ピンの名前が異なる場合があります。
| 液晶側 | RaspberryPi側 |
|---|---|
| GND | GND |
| VCC | 3.3v |
| SCL | GPIO11 |
| SDA | GPIO10 |
| RST | GPIO24 |
| DC | GPIO25 |
| CS | GPIO8 |
| BLK | GPIO12 |
コード
この記事では、1.8" TFT液晶(ST7735s)の場合のスクリプトを掲載します。
スクリプト自体は、前述した参考サイトのコードを簡略化したものになります。他の液晶を使用する場合は、参考サイトを参照して対象コードを書き換えてください。
このコードでは、画面サイズと同じサイズの画像(160x128の液晶であれば、160x128の画像)の使用を想定しています。
それ以外の画像を使用する場合は、事前にクロップするか、参考サイトを参照して自動でクロップするスクリプトを追加してください。
# -*- coding: utf-8 -*-
"""
This program is based on the sample program at Adafruit-Python-Usage.
(https://learn.adafruit.com/1-8-tft-display/python-usage)

2021/09/06 var1.0
"""

import digitalio
import board
import RPi.GPIO as GPIO
from PIL import Image, ImageDraw
from time import sleep

import adafruit_rgb_display.st7735 as st7735

cs_pin = digitalio.DigitalInOut(board.CE0)
dc_pin = digitalio.DigitalInOut(board.D25)
reset_pin = digitalio.DigitalInOut(board.D24)

BAUDRATE = 24000000

# 使用する液晶が異なる場合、サイトを参考に以下を書き換えてください。
# ----------ここから----------
disp = st7735.ST7735R(
    board.SPI(),
    rotation=270,
    cs=cs_pin,
    dc=dc_pin,
    rst=reset_pin,
    baudrate=BAUDRATE,
)
# ----------ここまで----------

backlight_pin = 12
GPIO.setmode(GPIO.BCM)
GPIO.setup(backlight_pin, GPIO.OUT)


class DisplayImage():
    def __init__(self, img):
        self.image = Image.open(img)

    def show(self):
        # 画像サイズと液晶サイズが異なると、上手く表示されない可能性があります
        disp.image(self.image)

class DisplayControl():
    def __init__(self):
        self.backlight = GPIO.PWM(backlight_pin, 100)
        self.backlight.start(0)

    def on(self):
        self.backlight.ChangeDutyCycle(100)

    def off(self):
        black = Image.new("RGB", (160, 128))
        draw = ImageDraw.Draw(black)
        draw.rectangle((0, 0, 160, 128), outline=0, fill=(0, 0, 0))
        disp.image(black)
        self.backlight.ChangeDutyCycle(0)

    def pwm(self, value):
        self.backlight.ChangeDutyCycle(value)

if __name__ == "__main__":
    Image01 = DisplayImage("picture01.jpg")
    Image02 = DisplayImage("picture02.jpg")
    DisplayCont = DisplayControl()

    try:
        while True:
            Image01.show() #一枚目を表示
            DisplayCont.on()
            sleep(1)

            Image02.show() #二枚目を表示
            DisplayCont.pwm(50)
            sleep(1)

            DisplayCont.off() #表示を消す
            sleep(1)

    except KeyboardInterrupt:
        pass
動作と解説
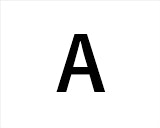
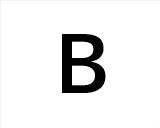
上記スクリプトをtft_display_cont.pyとして、同じディレクトリに、picture01.jpgとpicture02.jpgを保存します。
以下の画像は、それぞれ160x128の画像ですので、動作確認用にダウンロードしてお使いください。
以下のコマンドを実行し、液晶に表示されることを確認してください。
python3 tft_display_cont.py
ライブラリとして使用
使用例
以下のように、ライブラリとしてインポートして使用できます。
import tft_display_cont as tft
from time import sleep

Image01 = tft.DisplayImage("picture01.jpg") # 任意の画像ファイル
Image02 = tft.DisplayImage("picture02.jpg") # 任意の画像ファイル
DisplayCont = tft.DisplayControl()

DisplayCont.on() # バックライト点灯

while True:
    Image01.show() # 一枚目を表示
    sleep(1)
    Image02.show() # 二枚目を表示
    sleep(1)
解説
以下でインスタンスを生成します。
Image01 = tft.DisplayImage("picture01.jpg") # 任意の画像ファイル
Image02 = tft.DisplayImage("picture02.jpg") # 任意の画像ファイル
DisplayCont = tft.DisplayControl()
Image01.show()          # 画像を表示します。
Image02.show()          # 画像を表示します。
DisplayCont.on()        # バックライトを点灯します。
DisplayCont.off()       # バックライトを消灯します。
DisplayCont.pwm(50)     # バックライトをPWM制御します。 0~100で指定します。
文字の表示について
参考サイトでは、文字を表示するスクリプト例も紹介されています。
興味があれば閲覧してみてください。
最後に
使用する液晶によって、表示上の赤と青が入れ替わる(RGB→BGR)となる場合があります。
私の使用した液晶ではこの症状が発生したため、画像の赤と青を反転させることで対応しています。
解決策をご存じの方がいましたら、コメントしていただけると助かります。

