はじめに
React の Server Components の登場により、SPA が主軸だったフロントエンドの世界は大きく変わり、サーバーを視野に入れる必要が出てきました。そうしたトレンドの中でも、Next.js はフロントエンドの領域をサーバーまで押し広げる機能のサポートをいち早く行ってきました。私自身も Next.js をよく使うことがあり、この流行についていこうとしている一人です。しかし、従来の SPA とは勝手が違うため、いくつか課題があります。
中でも、認証トークンの管理をクライアントで行っていると、Server Components からはアクセスできないという問題があります。そこで今回は、Next.js v14 に Liff を導入し、クライアントでの認証トークンの管理を Cookie に移す方法を紹介します。なお、やや無理のある実装をしているため、参考程度にしてください。
前提
- Next.js v14 app router, server components 使用したアプリケーションがすでに存在する
- Liff v2
詳細
1. Line Console 上から Liff の id を取得する
Line Developersからログインし、Liff の 登録を行います。
Liff の Endpoint は https://localhost:3000 に設定します。https でしか登録できないため、スキーマを https にしていることに注意をしてください。
登録が完了すると Liff の ID が発行されるので、それを.env に登録してください。
Liff は Client 側でしか動作しないため、環境変数は NEXT_PUBLIC_ から始める必要があります。
NEXT_PUBLIC_LIFF_ID=xxxx-yyyy
2. Liff をプロジェクトに導入する
Liff module をインストールする
pnpm i @line/liff
Liff は最初に Client での初期化が必要です。
そのため、client component 上で Liff の初期化処理を作成します。
'use client';

import liff, { type Liff } from '@line/liff';
import {
  createContext,
  useState,
  useEffect,
  FC,
  ReactNode,
  useContext,
} from 'react';

type LiffContextType = {
  liffState: Liff | null;
  liffError: string | null;
};

const LiffContext = createContext<LiffContextType>({
  liffState: null,
  liffError: null,
});

export const useLiff = (): LiffContextType => {
  const context = useContext(LiffContext);
  return context;
};

/**
 * Liff スターターテンプレートがあるのでこちらを参考にしています
 * @see https://github.com/line/create-liff-app/blob/main/templates/nextjs-ts/pages/_app.tsx
 */
export const LiffProvider: FC<{ children: ReactNode }> = ({ children }) => {
  const [liffState, setliffState] = useState<Liff | null>(null);
  const [liffError, setLiffError] = useState<string | null>(null);

  useEffect(() => {
    liff.init(
      { liffId: process.env.NEXT_PUBLIC_LIFF_ID || '' },
      () => { setliffState(liff); }, // 成功時に liff をセット
      (error) => {
        console.error('LIFF initialization failed', error);
        setLiffError(error.toString()); // エラー時にエラーメッセージをセット
      },
    );
  }, []);

  return (
    <LiffContext.Provider value={{ liffState, liffError }}>
      {children}
    </LiffContext.Provider>
  );
};
Layout で LiffProvider 呼び出します。
export default function RootLayout({
  children,
}: Readonly<{
  children: React.ReactNode;
}>) {
  return (
    <html>
      <body>
        <LiffProvider>
          {children}
        </LiffProvider>
      </body>
    </html>
  );
}
3. Liff のトークンを Cookie に保存する
Liff が初期化された後、Line Developers のエンドポイントにリダイレクトされます。その際、エンドポイントから API Route へリクエストを投げて Cookie にトークンを保存します。
export default function Page() {
  const { liffState, liffError } = useLiff();
  const [authenticated, setAuthenticated] = useState(false);

  const login = useCallback(async () => {
    const token = liffState?.getAccessToken();
    const res = await fetch('/api/login', {
      method: 'POST',
      headers: { 'Content-Type': 'application/json' },
      body: JSON.stringify({ token }),
    });
    if (!res.ok) {
      console.error('failed to login');
      return;
    }
    setAuthenticated(true);
    window.location.href = '/<トップ画面>';
  }, [liffState, setAuthenticated]);

  useEffect(() => {
    if (!liffState || authenticated) return;
    login();
  }, [liffState, authenticated, login]);

  if (liffError) {
    return 'エラーが発生しました';
  }

  if (!authenticated) {
    return '認証中...';
  }

  return '認証完了';
}
API Route で Cookie を設定します。
この時、token の検証を行うことを忘れないようにしてください。
export const POST = async (req: NextRequest) => {
  const body = (await req.json()) as { token: string };
  const token = body.token;
  console.log('token', token);

  // Verify the token
  const verifyRes = await fetch(
    `https://api.line.me/oauth2/v2.1/verify?access_token=${token}`,
  );
  if (!verifyRes.ok) {
    console.error('failed to verify token');
    return NextResponse.error();
  }

  // ユーザー登録処理など...

  const res = NextResponse.json({ message: 'success' });
  res.cookies.set({
    name: 'token',
    value: token,
    httpOnly: true,
    sameSite: 'strict',
    secure: true,
  });

  return res;
};
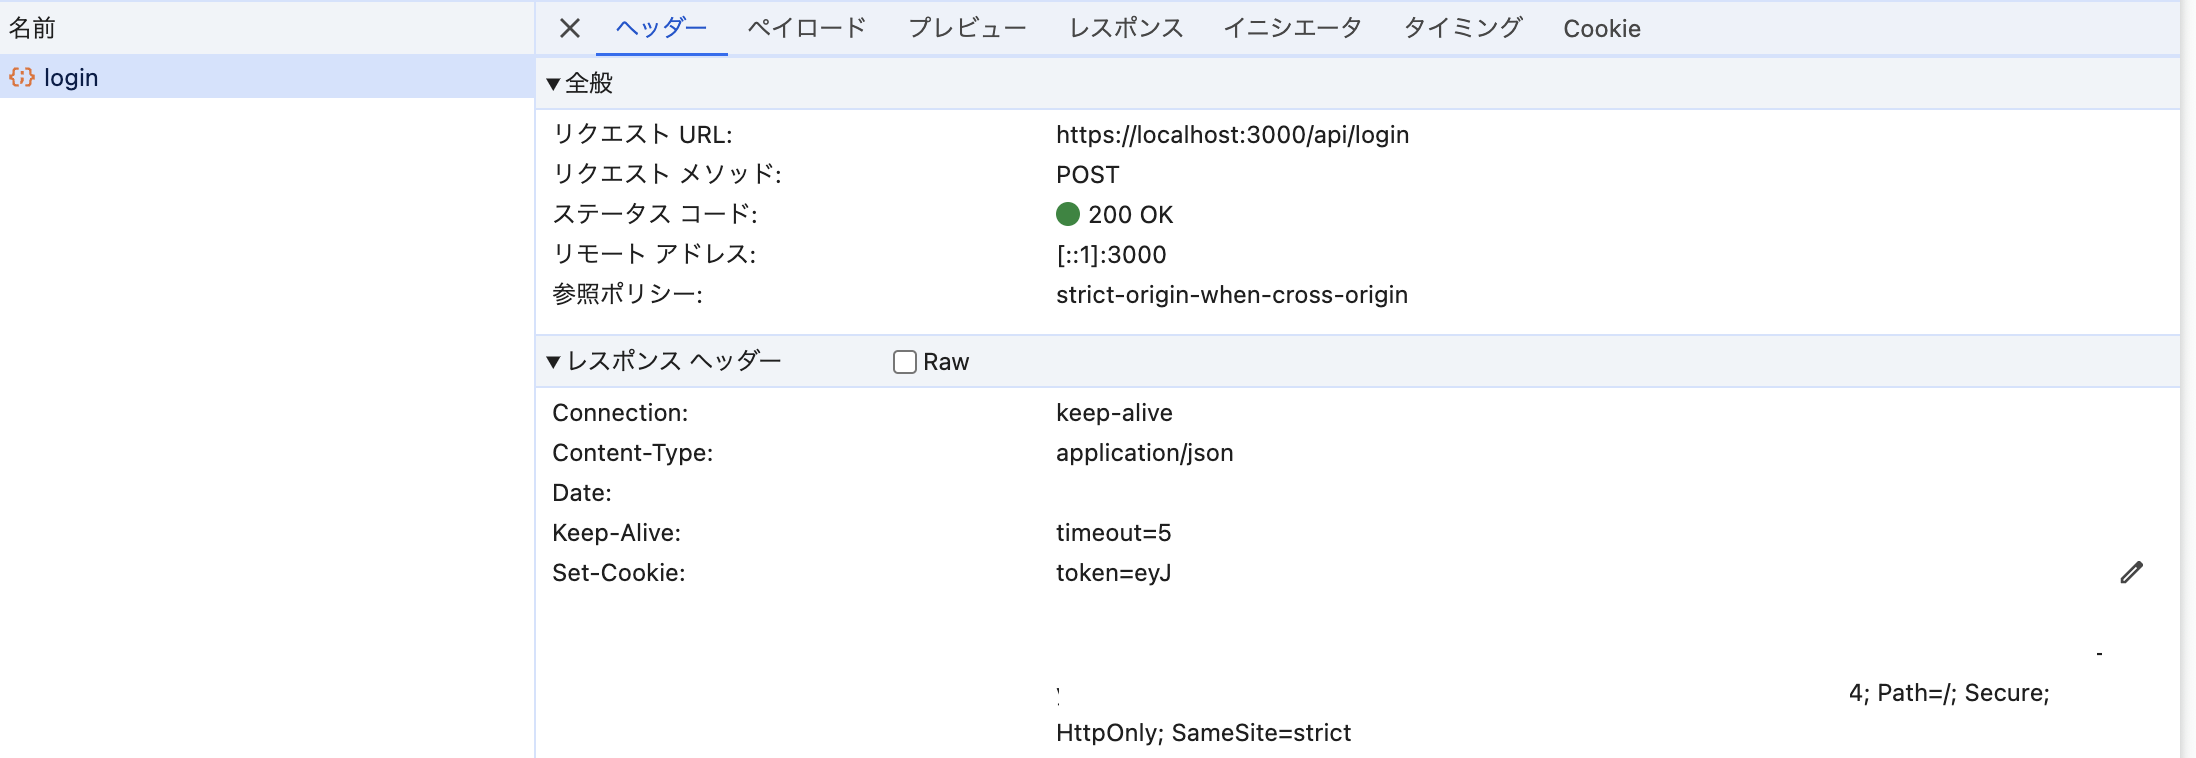
4. Cookie のセットが確認できる
ここまでくると実際に挙動を確認することができます。Next.js は 13.5 から experimental ではあるものの HTTPS でのローカル開発がサポートされています。
scripts: {
  "dev-secure": "next dev --experimental-https"
}
$ pnpm dev
https://localhost:3000 が起動
画面にアクセスすると、init -> api/login(cookie がセット) -> トップ画面 と遷移することが確認できます。
5. Cookie からトークンを取得する
これで、Server Components や middleware からもトークンを読み込むことができるため、認証やログインユーザーの識別が可能になります。
'server only';

import { cookies } from 'next/headers';

export const GET = async (req: NextRequest) => {
 const token = cookies().get('token');
  if (!token?.value) {
    return NextResponse.error();
  }

  // 認証 ...
  // ユーザー情報を取得する処理など...
};
まとめ
本記事では、Next.js v14 で Liff を導入し、Cookie 経由で認証を実現する方法について紹介しました。
認証トークンをクライアントから Cookie に移し、Server Components やミドルウェアからもトークンにアクセスできるようにすることで、より Server 主体のアーキテクチャを構築することが可能です。