1
0

Delete article

Deleted articles cannot be recovered.

Draft of this article would be also deleted.

Are you sure you want to delete this article?

More than 3 years have passed since last update.

Azure Active Directory B2C テナントを作ってみた

Last updated at Posted at 2020-11-11

Azure Active Direcotry B2C は他のサービスとの作成方法異なりますので、ここで紹介します。

Azure AD B2C テナントを作成

  1. 画面上部に Azure Active Directory B2C を入力し、Marketplace から Azure Active Directory B2C を選択する
    image.png

  2. [Create a new Azure AD B2C Tenant] (新しい Azure AD B2C テナントの作成) を選ぶ
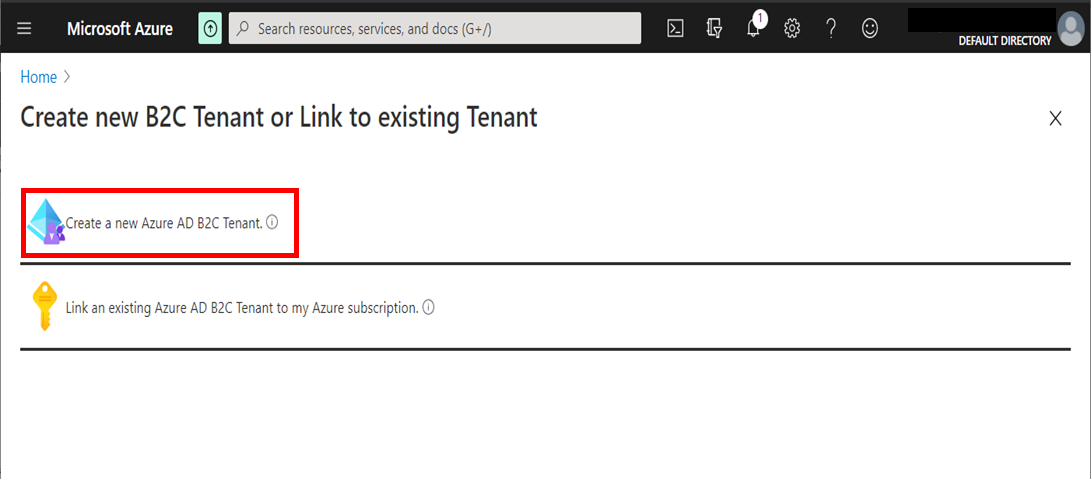
    image.png

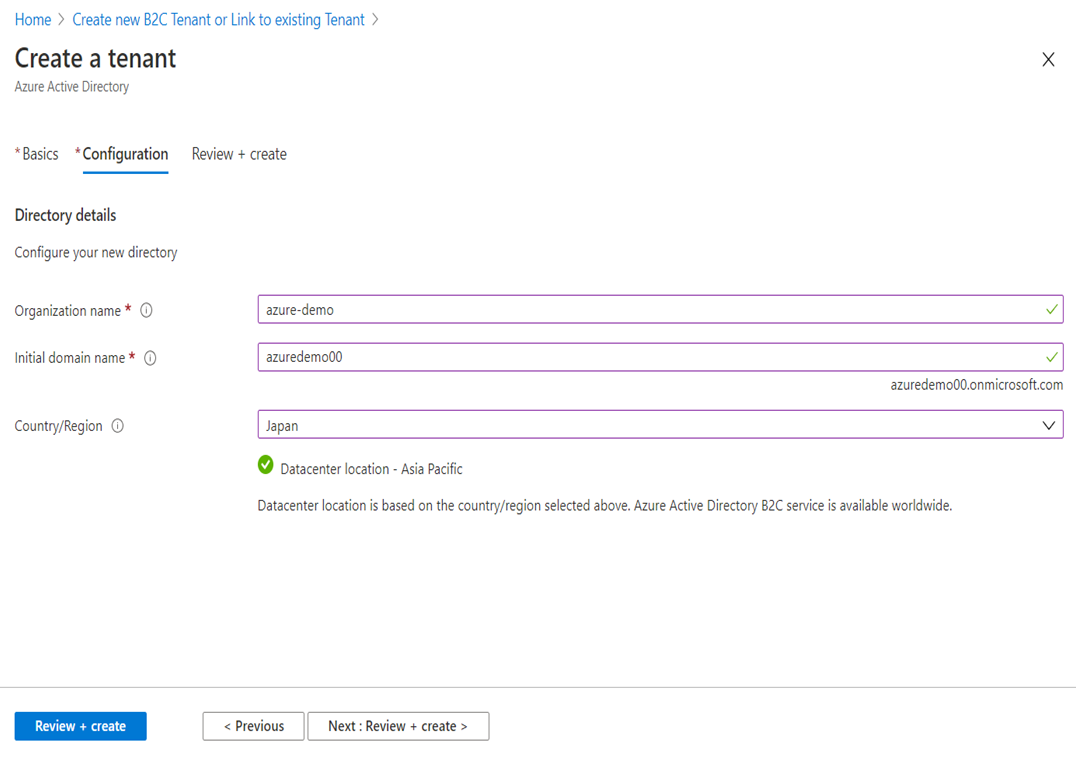
  3. 必要な情報を入力し、[Review + Create] ボタンをクリック
    image.png

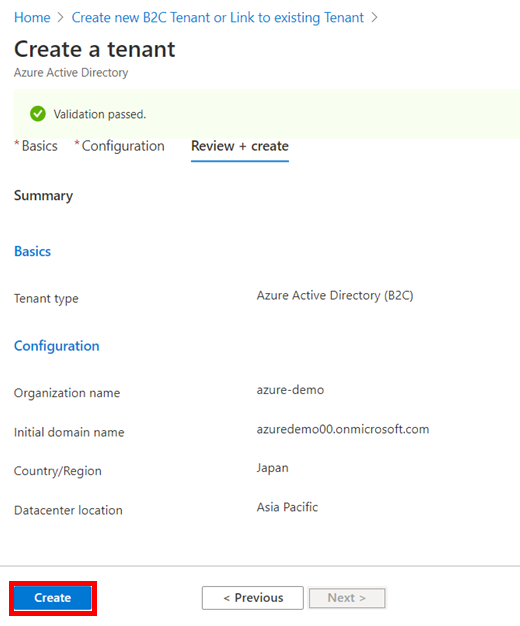
  4. 確認画面で [Create] ボタンをクリックし、作成完了までを待つ
    image.png

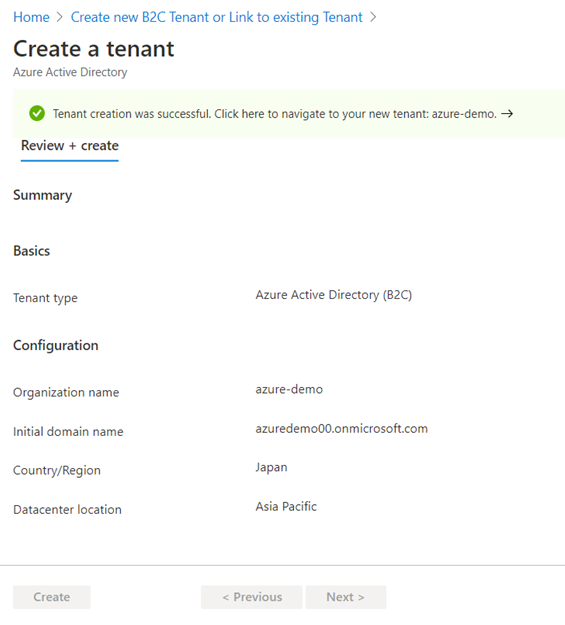
  5. 作成完了しました
    image.png

サブスクリプションへのテナントのリンク

Azure AD B2C 作っても、そのまま使えませんので、サブスクリプションとリンクする必要があります。

  1. [ディレクトリ + サブスクリプション] アイコンを選択し、Azure AD B2C テナントが含まないディレクトリをクリック
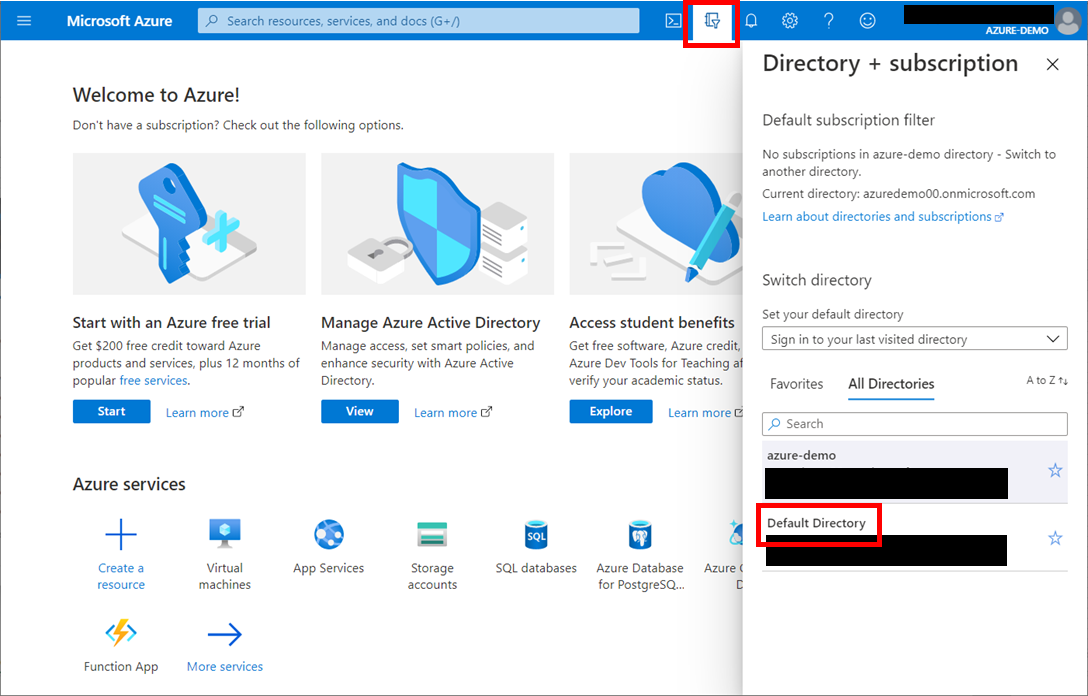
    image.png

  2. 画面上部に「Azure Active Directory B2C」を入力し、Marketplace から Azure Active Directory B2C を選択する
    image.png

  3. [Link an existing Azure AD B2C Tenant to my Azure subscription] (既存の Azure AD B2C テナントを Azure サブスクリプションにリンクする) を選ぶ
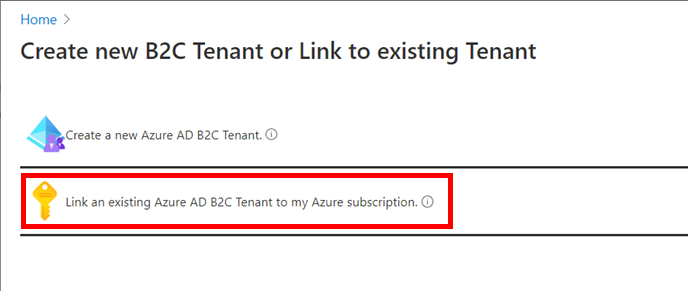
    image.png

  4. 作成した Azure AD B2C テナント を選択し、ご利用の サブスクリプション を選択し、最後 [Create] ボタンをクリック
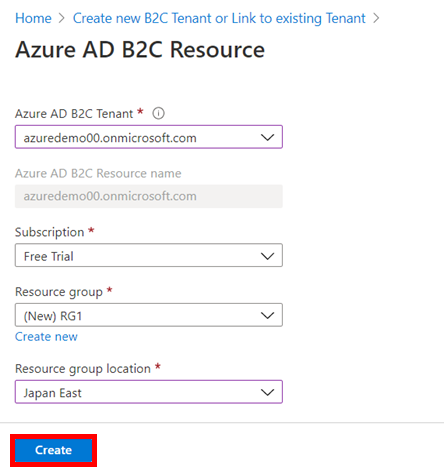
    image.png

  5. ここまで作成は完了しました。最後作った Azure AD B2C テナントに切り替えましょう。上部の「ディレクトリ + サブスクリプション」アイコンを選択し、Azure AD B2C のディレクトリをクリックします。
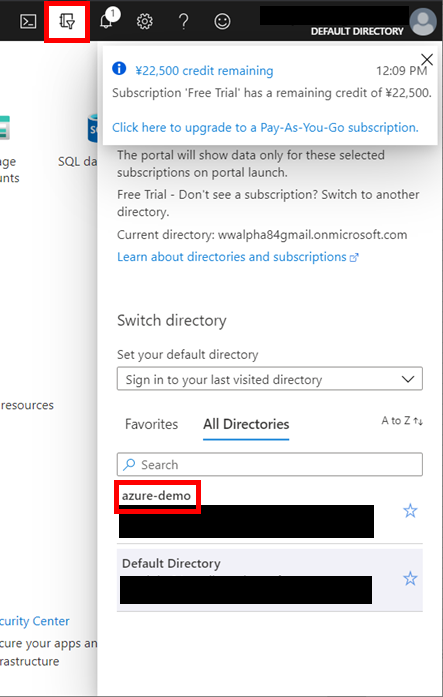
    image.png

image.png

1
0
0

Register as a new user and use Qiita more conveniently

  1. You get articles that match your needs
  2. You can efficiently read back useful information
  3. You can use dark theme
What you can do with signing up
1
0

Delete article

Deleted articles cannot be recovered.

Draft of this article would be also deleted.

Are you sure you want to delete this article?