2020年の自分のやり方をメモます。dockerコンテナ内にgpuを利用したアプリ実行するため、
- ホスト環境の整備
- ホスト環境に合わせたdockerイメージの作成
- docker起動時に適切な引数、環境変数を与える
が必要です。順に解説していきます
ホスト環境の整備
自分の環境がubuntu20.04で、これでベースにして説明します。
dockerのインストール
説明割愛
nvidiaのドライバーのインストール
20.04または18.04の環境において、以下のスクリプトで一発で入れます。
$ sudo update-pciids
$ echo -e "blacklist nouveau\noptions nouveau modeset=0" > /etc/modprobe.d/blacklist-nvidia-nouveau.conf
$ sudo update-initramfs -u
$ sudo ubuntu-drivers autoinstall
$ sudo prime-select nvidia
終わったら再起動し、nvidia-smiコマンドでgpuが使えているを確認。
nvidia container-runtime toolをインストール
- 以下の中身のnvidia-container-runtime-script.shを作成(https://collabnix.com/introducing-new-docker-cli-api-support-for-nvidia-gpus-under-docker-engine-19-03-0-beta-release/ 参照)
curl -s -L https://nvidia.github.io/nvidia-container-runtime/gpgkey | \
  sudo apt-key add -
distribution=$(. /etc/os-release;echo $ID$VERSION_ID)
curl -s -L https://nvidia.github.io/nvidia-container-runtime/$distribution/nvidia-container-runtime.list | \
  sudo tee /etc/apt/sources.list.d/nvidia-container-runtime.list
sudo apt-get update
sudo apt-get install nvidia-container-runtime
- 作成されたnvidia-container-runtime-script.shを実行する。終わったら一旦docker deamonを再起動。
$ sh nvidia-container-runtime-script.sh
$ sudo systemctl restart docker
- docker run にgpusオプションがつけるのを確認:
$ docker run --help | grep -i gpus
--gpus gpu-request               GPU devices to add to the container ('all' to pass all GPUs)
- nvidia-container-runtime-hook実行ファイルがあるのを確認:
$ which nvidia-container-runtime-hook
/usr/bin/nvidia-container-runtime-hook
ホスト環境に合わせたdockerイメージの作成
nvidia公式dockerhubから自分のosとnvidiaドライバーバージョンに一致したイメージをベースにしてDockerfileを作成:
https://ngc.nvidia.com/catalog/containers/nvidia:cudagl/tags
例えば自分の環境がubuntu20.04でCUDA Versionが11.0なので、nvidia/cudagl:11.0-base-ubuntu20.04 このイメージをベースにします。
Dockerfileサンプル:
FROM nvidia/cudagl:11.0-base-ubuntu20.04

# Run a full upgrade and install utilities for development.
ENV DEBIAN_FRONTEND=noninteractive
RUN apt-key adv --fetch-keys https://developer.download.nvidia.com/compute/cuda/repos/ubuntu1804/x86_64/3bf863cc.pub
RUN apt-key adv --fetch-keys https://developer.download.nvidia.com/compute/cuda/repos/ubuntu1804/x86_64/7fa2af80.pub
RUN apt-get update && apt-get install -y tzdata
# timezone setting
ENV TZ=Asia/Tokyo

RUN apt-get update && apt-get upgrade -y && apt-get install -y \
    mesa-utils
このdockerfileを
$ docker build --network=host -t foo-gpu-image .
でbuildします。
docker起動時に適切な引数、環境変数を与える
先ほど作成したdockerイメージを以下のスクリプトで起動
#!/bin/bash
xhost +si:localuser:root

docker run  -it --name foo_container --rm  --gpus all \
       --privileged     \
       --env="DISPLAY"  \
       --net=host \
       -e QT_X11_NO_MITSHM=1 \
       foo-gpu-image  /bin/bash
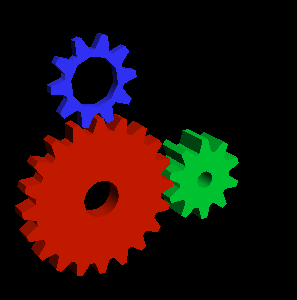
で、サンプルのopengl歯車起動
# glxgears
ぐるぐる回れば成功。おめでとう。また、QTアプリ起動する場合に環境変数QT_X11_NO_MITSHM=1 を設定する必要があります。
以上です。
次回を待て!
