環境
- Windows 10 Pro
- Microsoft Visual Studio 2019
- .Net Freamwork 4.5
必要なもの
- DockPanel Suite(導入の仕方については後述)
DockPanel Suiteの導入
-
Visual Studioのメニューの、プロジェクト(P) > NuGetパッケージの管理(N)をクリック
-
検索結果に出てきた DockPanelSuite をインストールする。
早速使ってみる
1.Visual Studioのメニューの、プロジェクト(P) > 新しい項目の追加(W)...をクリック
2.「新しい項目の追加」を開いたら、左の インストール済み > Visual C# アイテム > Windows Forms を選択する。
3.継承フォーム(Windows フォーム)を選択し、追加(A)をクリックする。
4.「継承ピッカー」が開いたら、「参照(B)...」をクリックし、「WeifenLuo.WinFormsUI.Docking.dll」を選択する。
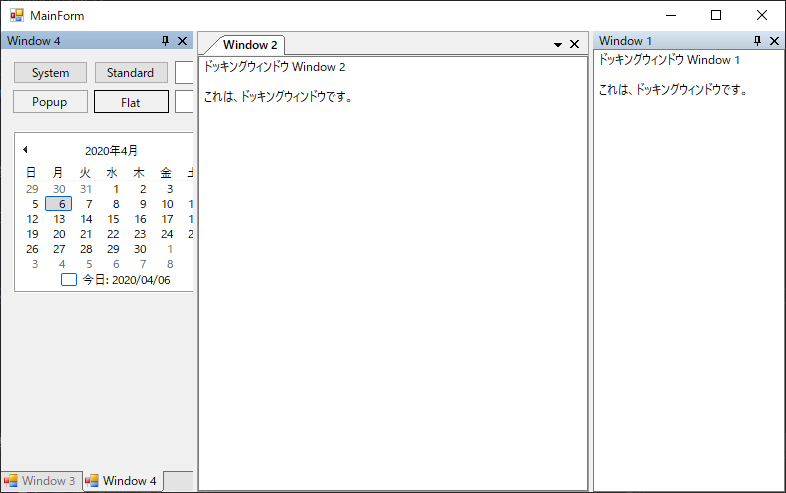
注意: このサンプルでは、継承フォーム「Window1」「Window2」「Window3」「Window4」を作成しています。
コード:
MainForm.cs
using System.Windows.Forms;
using WeifenLuo.WinFormsUI.Docking;

namespace DockingExample
{
    public partial class MainForm : Form
    {
        public MainForm()
        {
            InitializeComponent();

            dockPanel1.DocumentStyle = DocumentStyle.DockingWindow;

            Window1 window1 = new Window1();
            window1.Show(dockPanel1, DockState.DockRight);

            Window2 window2 = new Window2();
            window2.Show(dockPanel1, DockState.Document);

            Window3 window3 = new Window3();
            window3.Show(dockPanel1, DockState.DockLeft);

            Window4 window4 = new Window4();
            window4.Show(dockPanel1, DockState.DockLeft);
        }
    }
}
Window1.cs
namespace DockingExample
{
    public partial class Window1 : WeifenLuo.WinFormsUI.Docking.DockContent
    {
        public Window1()
        {
            InitializeComponent();
        }
    }
}
Window2.cs
namespace DockingExample
{
    public partial class Window2 : WeifenLuo.WinFormsUI.Docking.DockContent
    {
        public Window2()
        {
            InitializeComponent();
        }
    }
}
Window3.cs
using System;
using System.ComponentModel;
using System.Windows.Forms;

namespace DockingExample
{
    public partial class Window3 : WeifenLuo.WinFormsUI.Docking.DockContent
    {
        public Window3()
        {
            InitializeComponent();
            CheckForIllegalCrossThreadCalls = false;
        }

        private void button1_Click(object sender, EventArgs e)
        {
            backgroundWorker1.RunWorkerAsync();
        }

        private void backgroundWorker1_DoWork(object sender, DoWorkEventArgs e)
        {
            for (int i = 1; i <= 100; i++)
            {
                progressBar1.Value = i;
                System.Threading.Thread.Sleep(80);
            }
        }

        private void button2_Click(object sender, EventArgs e)
        {
            progressBar1.Value = 50;
            progressBar1.MarqueeAnimationSpeed = 40;
            progressBar1.Style = ProgressBarStyle.Marquee;
        }

        private void button3_Click(object sender, EventArgs e)
        {
            progressBar1.Value = 0;
            progressBar1.Style = ProgressBarStyle.Continuous;
        }

        private void trackBar1_Scroll(object sender, EventArgs e)
        {
            progressBar2.Value = trackBar1.Value;
        }
    }
}
Window4.cs
namespace DockingExample
{
    public partial class Window4 : WeifenLuo.WinFormsUI.Docking.DockContent
    {
        public Window4()
        {
            InitializeComponent();
        }
    }
}
結果
サンプルコードのダウンロード :
http://kgf086.bake-neko.net/Data/DockingExample.zip

