UE4においてレベルを跨いで値を保持する方法としてGameInstanceやSingletonが存在するとのこと。
これらにc++からアクセスしたい場面があったのですが、情報を探すのに苦労したので覚え書きを残しておきます。
環境
UE4 4.20.3
Visual Studio Community 2017
参考記事
BlueprintからGameInstanceにアクセスする
Singletonを設定する
下準備
まずは適当なプロジェクト作成。
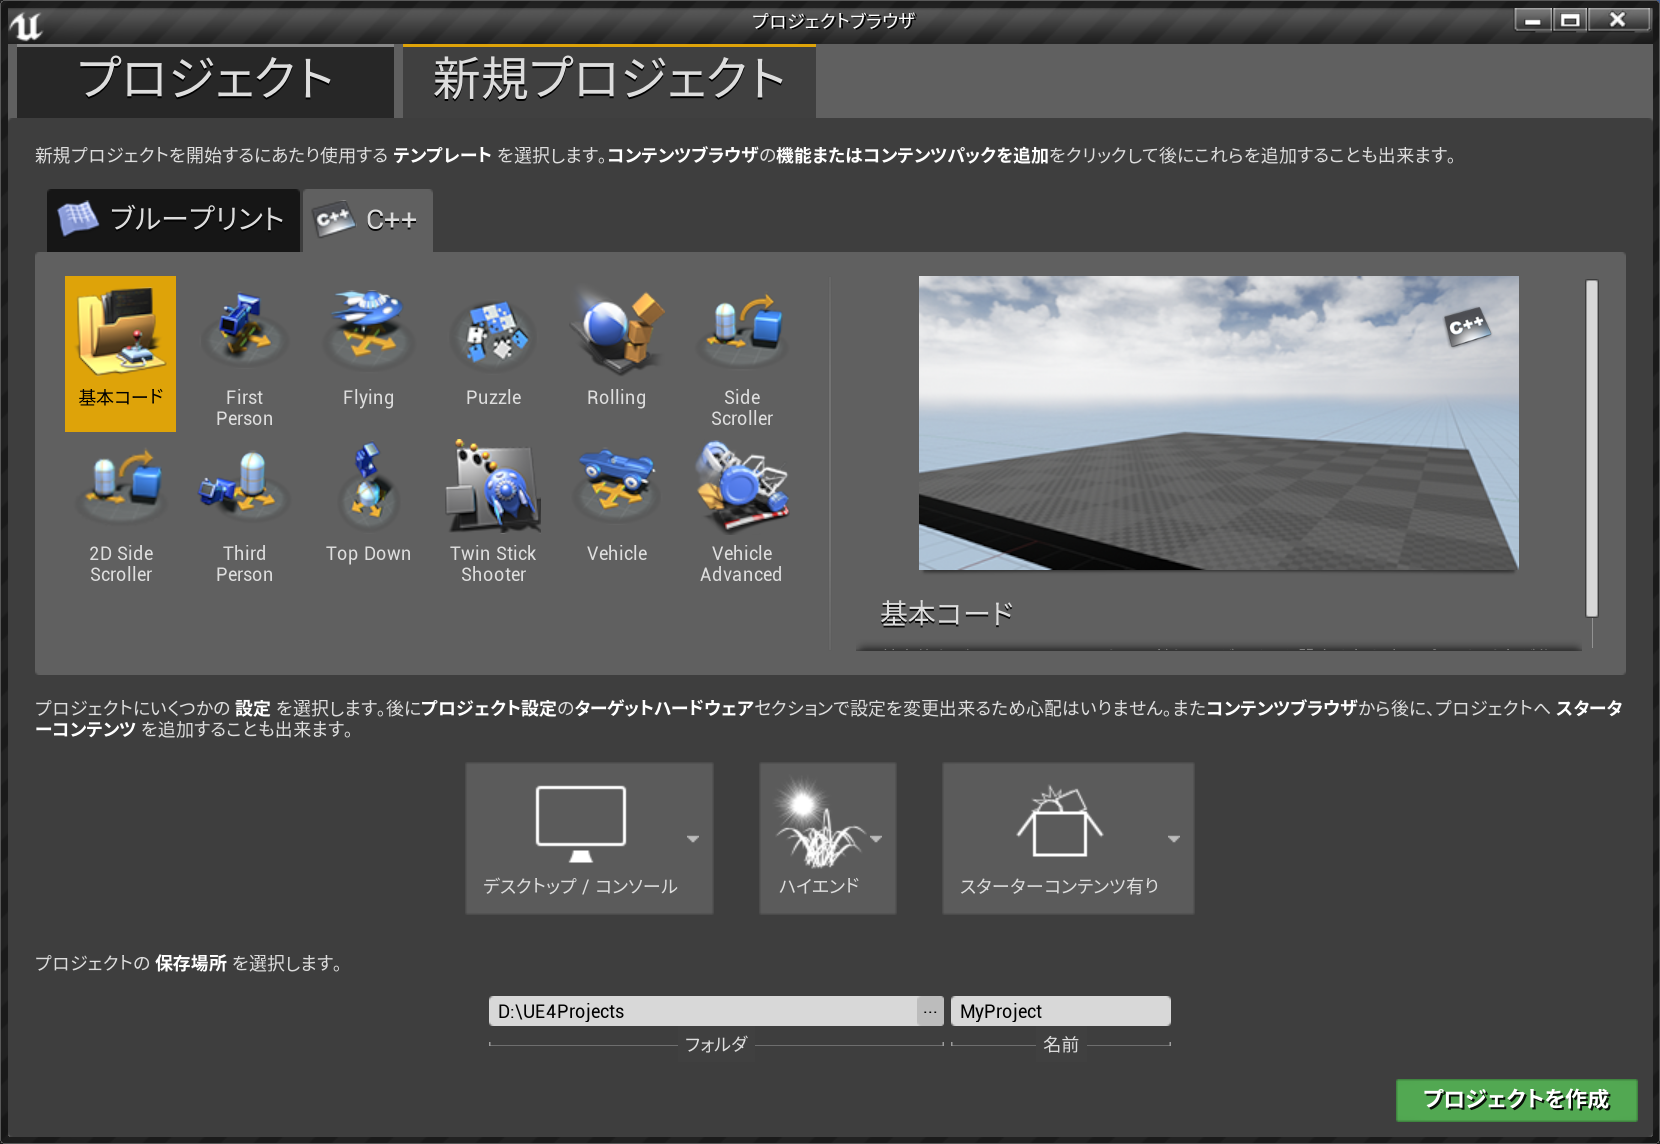
今回は新規プロジェクトタブから基本コードのプロジェクトを作成します。
GameInstanceへc++でアクセス
クラス作成
まずはGameInstanceを継承したクラスを作成します。
"ファイル">"新規c++クラス"を選択。
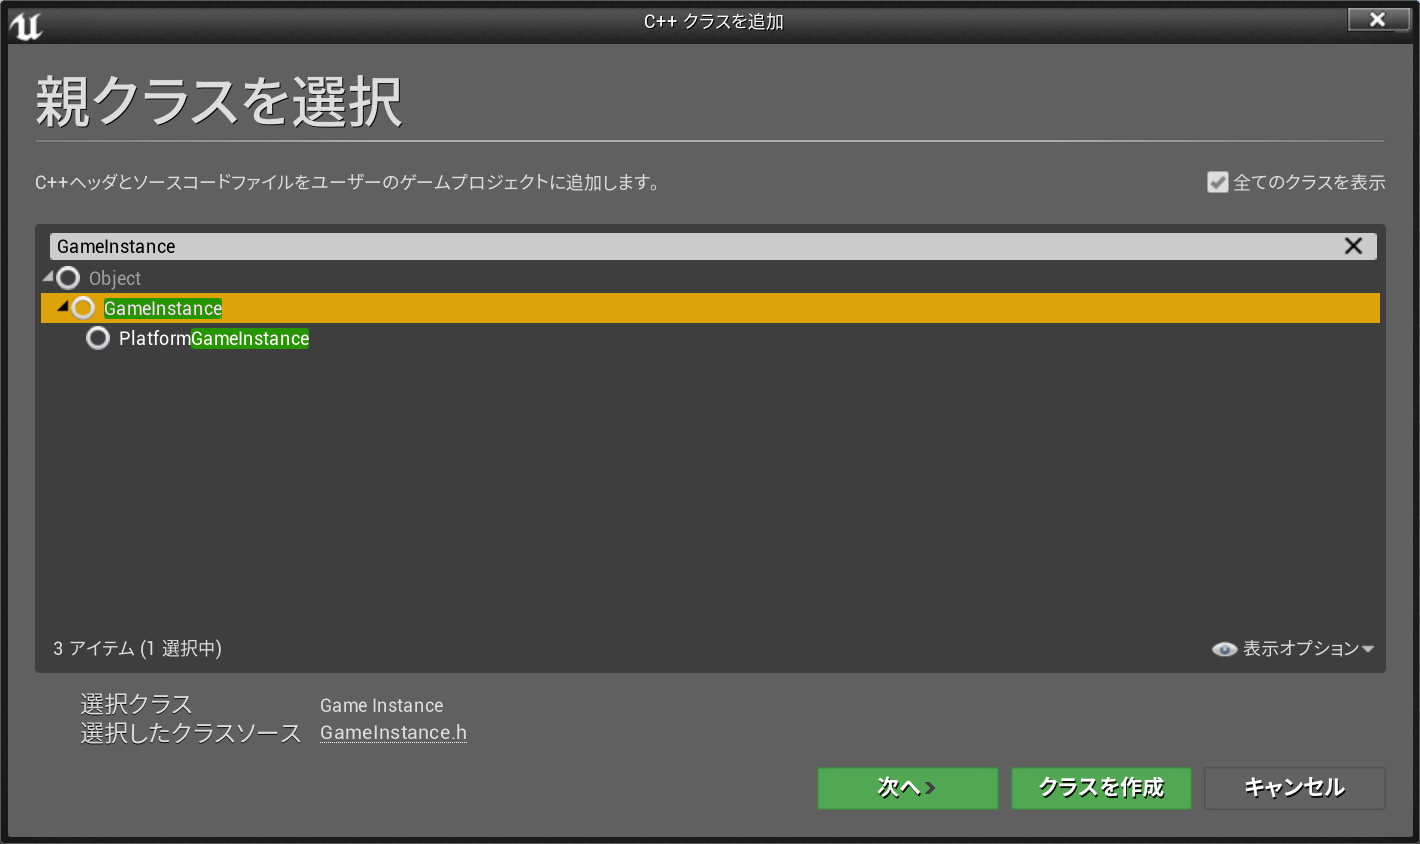
すべてのクラスを表示と書かれたチェックボックスにチェックを入れ、検索ウインドウにGameInstanceと入力し出てきたGameInstanceを親クラスとして設定してクラスを作成します。
ここではMyGameInstanceという名前で作成しました。
作成したクラスをプロジェクト設定に登録
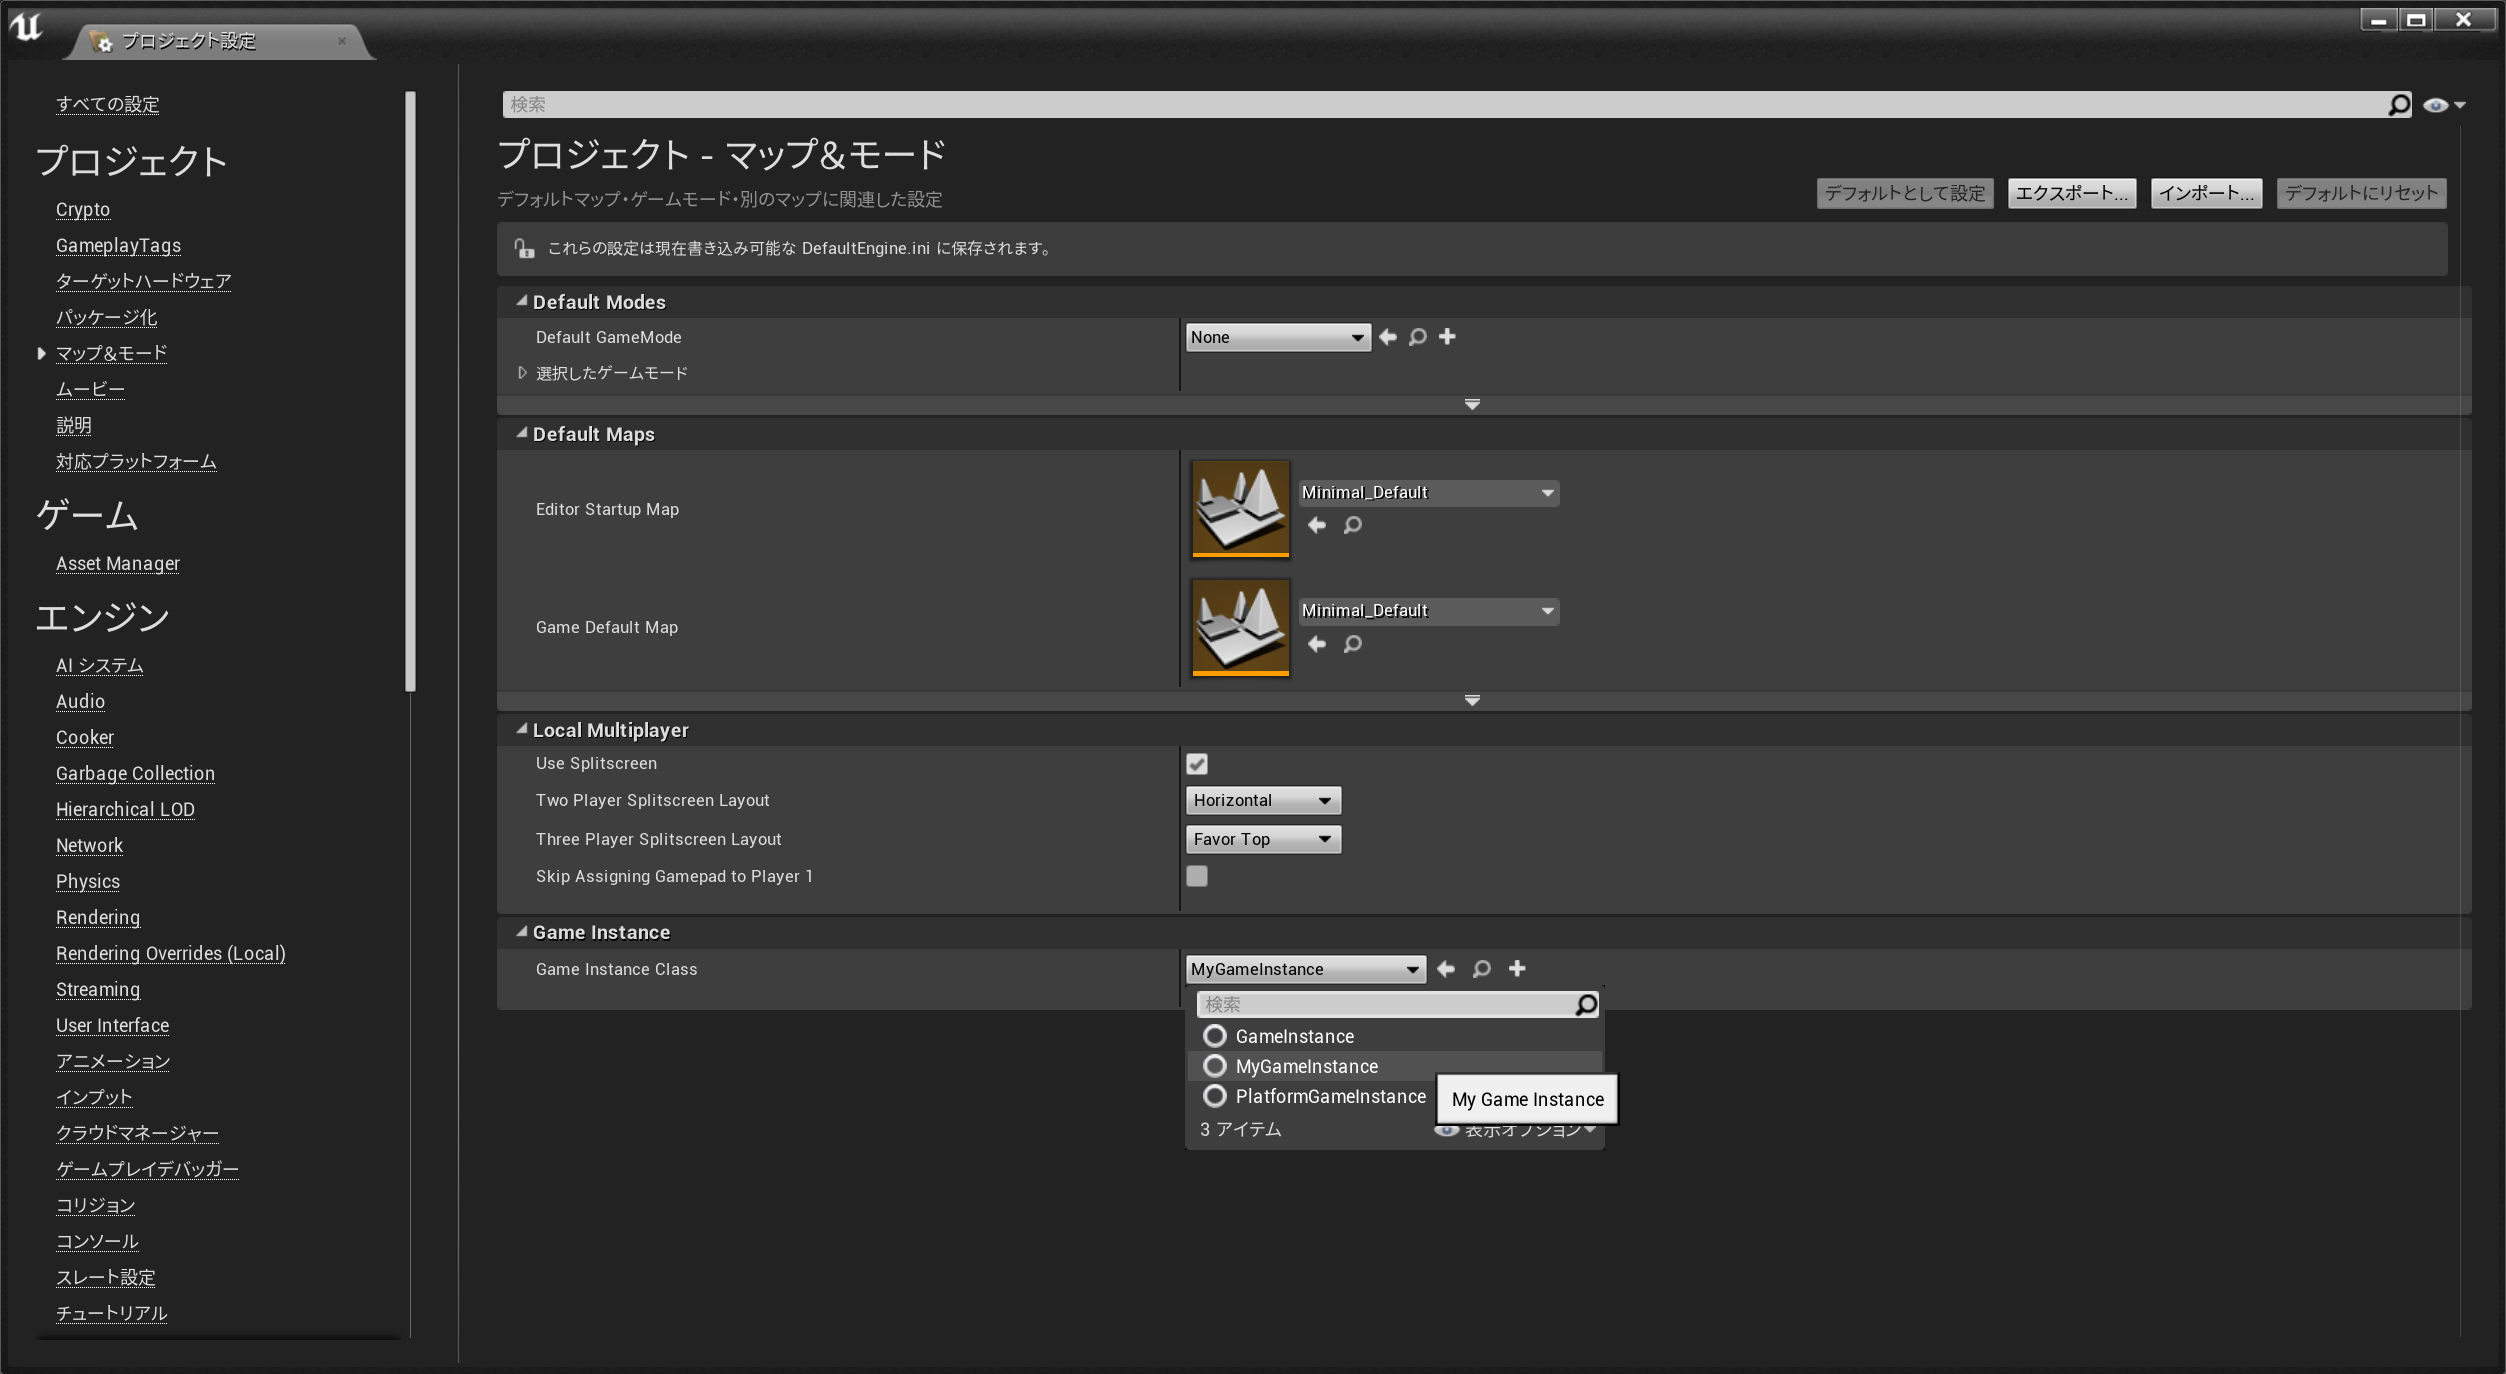
"編集">"プロジェクト設定">"マップ&モード"を選択します。
その中にあるGame Instance Classの項目に作成したクラスを設定します。
MyGameInstanceの実装
MyGameInstanceにInstance取得メソッドと、テスト用のメソッドを用意します。
GameInstanceの実態はワールドコンテキストを持っているオブジェクトから取得することができます。
MyGameInstance.h
# pragma once

# include "CoreMinimal.h"
# include "Engine/GameInstance.h"
# include "MyGameInstance.generated.h"

UCLASS()
class MYPROJECT_API UMyGameInstance : public UGameInstance
{
	GENERATED_BODY()

public:
	static UMyGameInstance* GetInstance();

	void DisplayDebugMessage(FString message);
};
MyGameInstance.cpp
# include "MyGameInstance.h"
# include "Engine/Engine.h"


UMyGameInstance* UMyGameInstance::GetInstance()
{
	UMyGameInstance* instance = nullptr;

	if (GEngine)
	{
		FWorldContext* context = GEngine->GetWorldContextFromGameViewport(GEngine->GameViewport);
		instance = Cast<UMyGameInstance>(context->OwningGameInstance);
	}

	return instance;
}


void UMyGameInstance::DisplayDebugMessage(FString message)
{
	if (GEngine)
	{
		GEngine->AddOnScreenDebugMessage(-1, 5.0f, FColor::Green, message);
	}
}
ワールドコンテキストは基本的にはワールド配置ができるオブジェクトつまりActorから取得できます。
ただ、今回実装したMyGameInstanceはワールドに配置するタイプのクラスではないためそのままでは取得できません。
そこで、ワールド上に確実に存在するであろうViewport経由でinstanceを取得しています。
GameInstanceへのアクセスを行う
アクセスのテストを行うためActorを作成します。
"ファイル">"新規c++クラス"を選択。
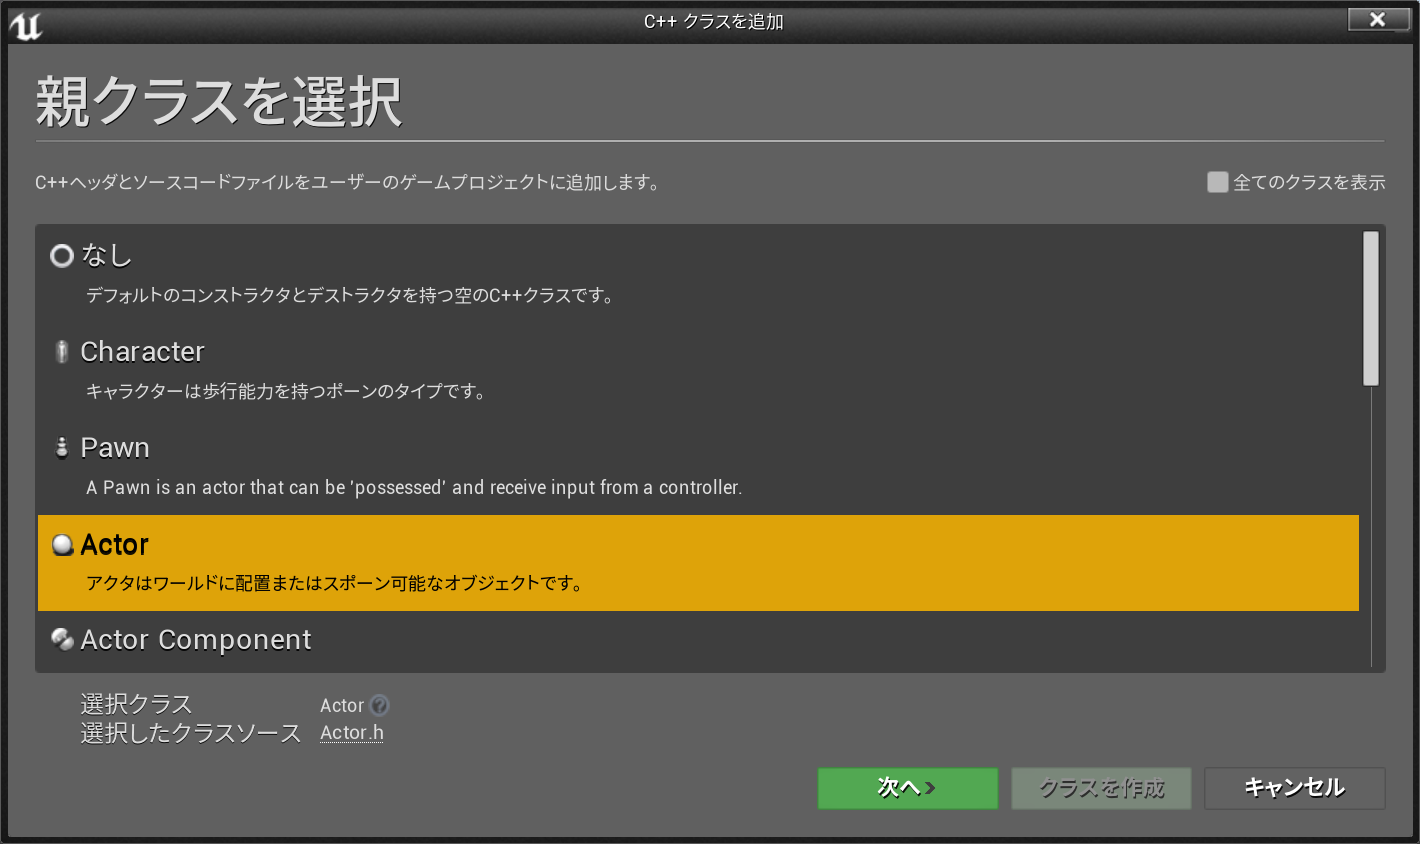
Actorを親クラスに設定してActorを作成します。
ここではMyActorという名前で作成しました。
MyActor.h
# pragma once

# include "CoreMinimal.h"
# include "GameFramework/Actor.h"
# include "MyActor.generated.h"

UCLASS()
class MYPROJECT_API AMyActor : public AActor
{
	GENERATED_BODY()

public:
	// Sets default values for this actor's properties
	AMyActor();

protected:
	// Called when the game starts or when spawned
	virtual void BeginPlay() override;

public:
	// Called every frame
	virtual void Tick(float DeltaTime) override;

	UFUNCTION(meta = (CallInEditor = "true"), Category = "test")
	void DisplayByStaticmethod();

	UFUNCTION(meta = (CallInEditor = "true"), Category = "test")
	void DisplayByActor();
};
MyActor.cpp
# include "MyActor.h"
# include "MyGameInstance.h"

// Sets default values
AMyActor::AMyActor()
{
 	// Set this actor to call Tick() every frame.  You can turn this off to improve performance if you don't need it.
	PrimaryActorTick.bCanEverTick = true;

}

// Called when the game starts or when spawned
void AMyActor::BeginPlay()
{
	Super::BeginPlay();

}

// Called every frame
void AMyActor::Tick(float DeltaTime)
{
	Super::Tick(DeltaTime);

}


void AMyActor::DisplayByStaticmethod()
{
	UMyGameInstance* instance = UMyGameInstance::GetInstance();
	if (instance)
	{
		instance->DisplayDebugMessage(FString("DisplayByStaticmethod"));
	}
}

void AMyActor::DisplayByActor()
{
	UMyGameInstance* instance = Cast<UMyGameInstance>(GetGameInstance());
	if (instance)
	{
		instance->DisplayDebugMessage("DisplayByActor");
	}
}
MyActorでは2種類の方法でGameInstanceを取得しています。
UMyGameInstance::GetInstanceは今回実装した方法。
Actorのようなワールド配置可能オブジェクトが持つGetGameInstanceで直接取得する方法。
MyActorをビューポート上にインスタンスとして配置することで詳細ウィンドウからイベントを呼び出せます。

ワールド配置するActor以降であれば自身でInstanceを取得することは用意ですが、MovementComponentのようなワールドに配置しないクラスからInstanceにアクセスしたい時はどうするのだろうか…と迷った結果、こんな感じで実装してみました。
Singletonへc++でアクセス
クラス作成
"ファイル">"新規c++クラス"を選択。
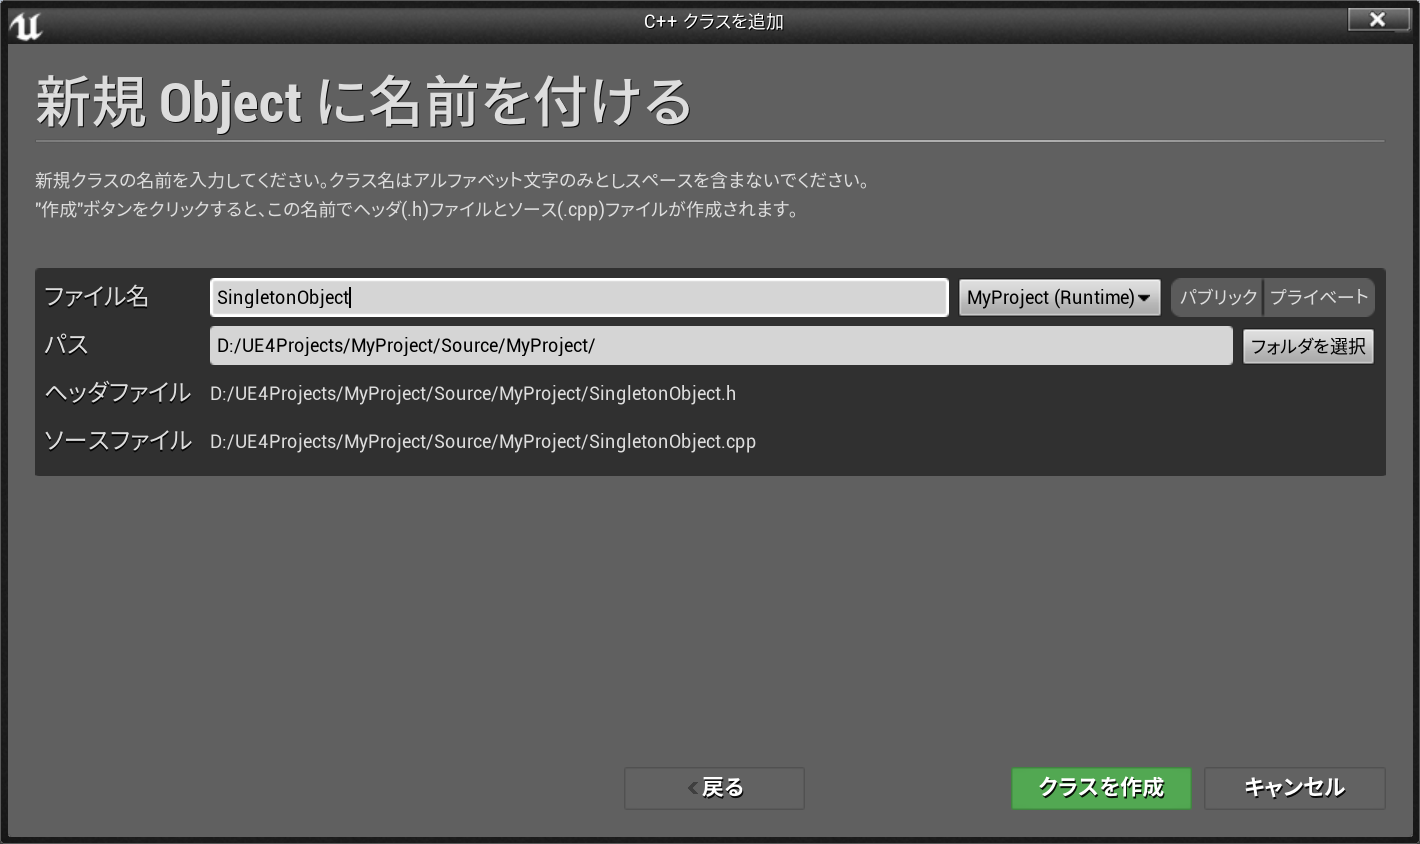
すべてのクラスを表示と書かれたチェックボックスにチェックを入れ、Objectを親クラスとして設定してクラスを作成します。
ここではSingletonObjectという名前で作成しました。
プロジェクト設定からSingletonオブジェクトを設定する
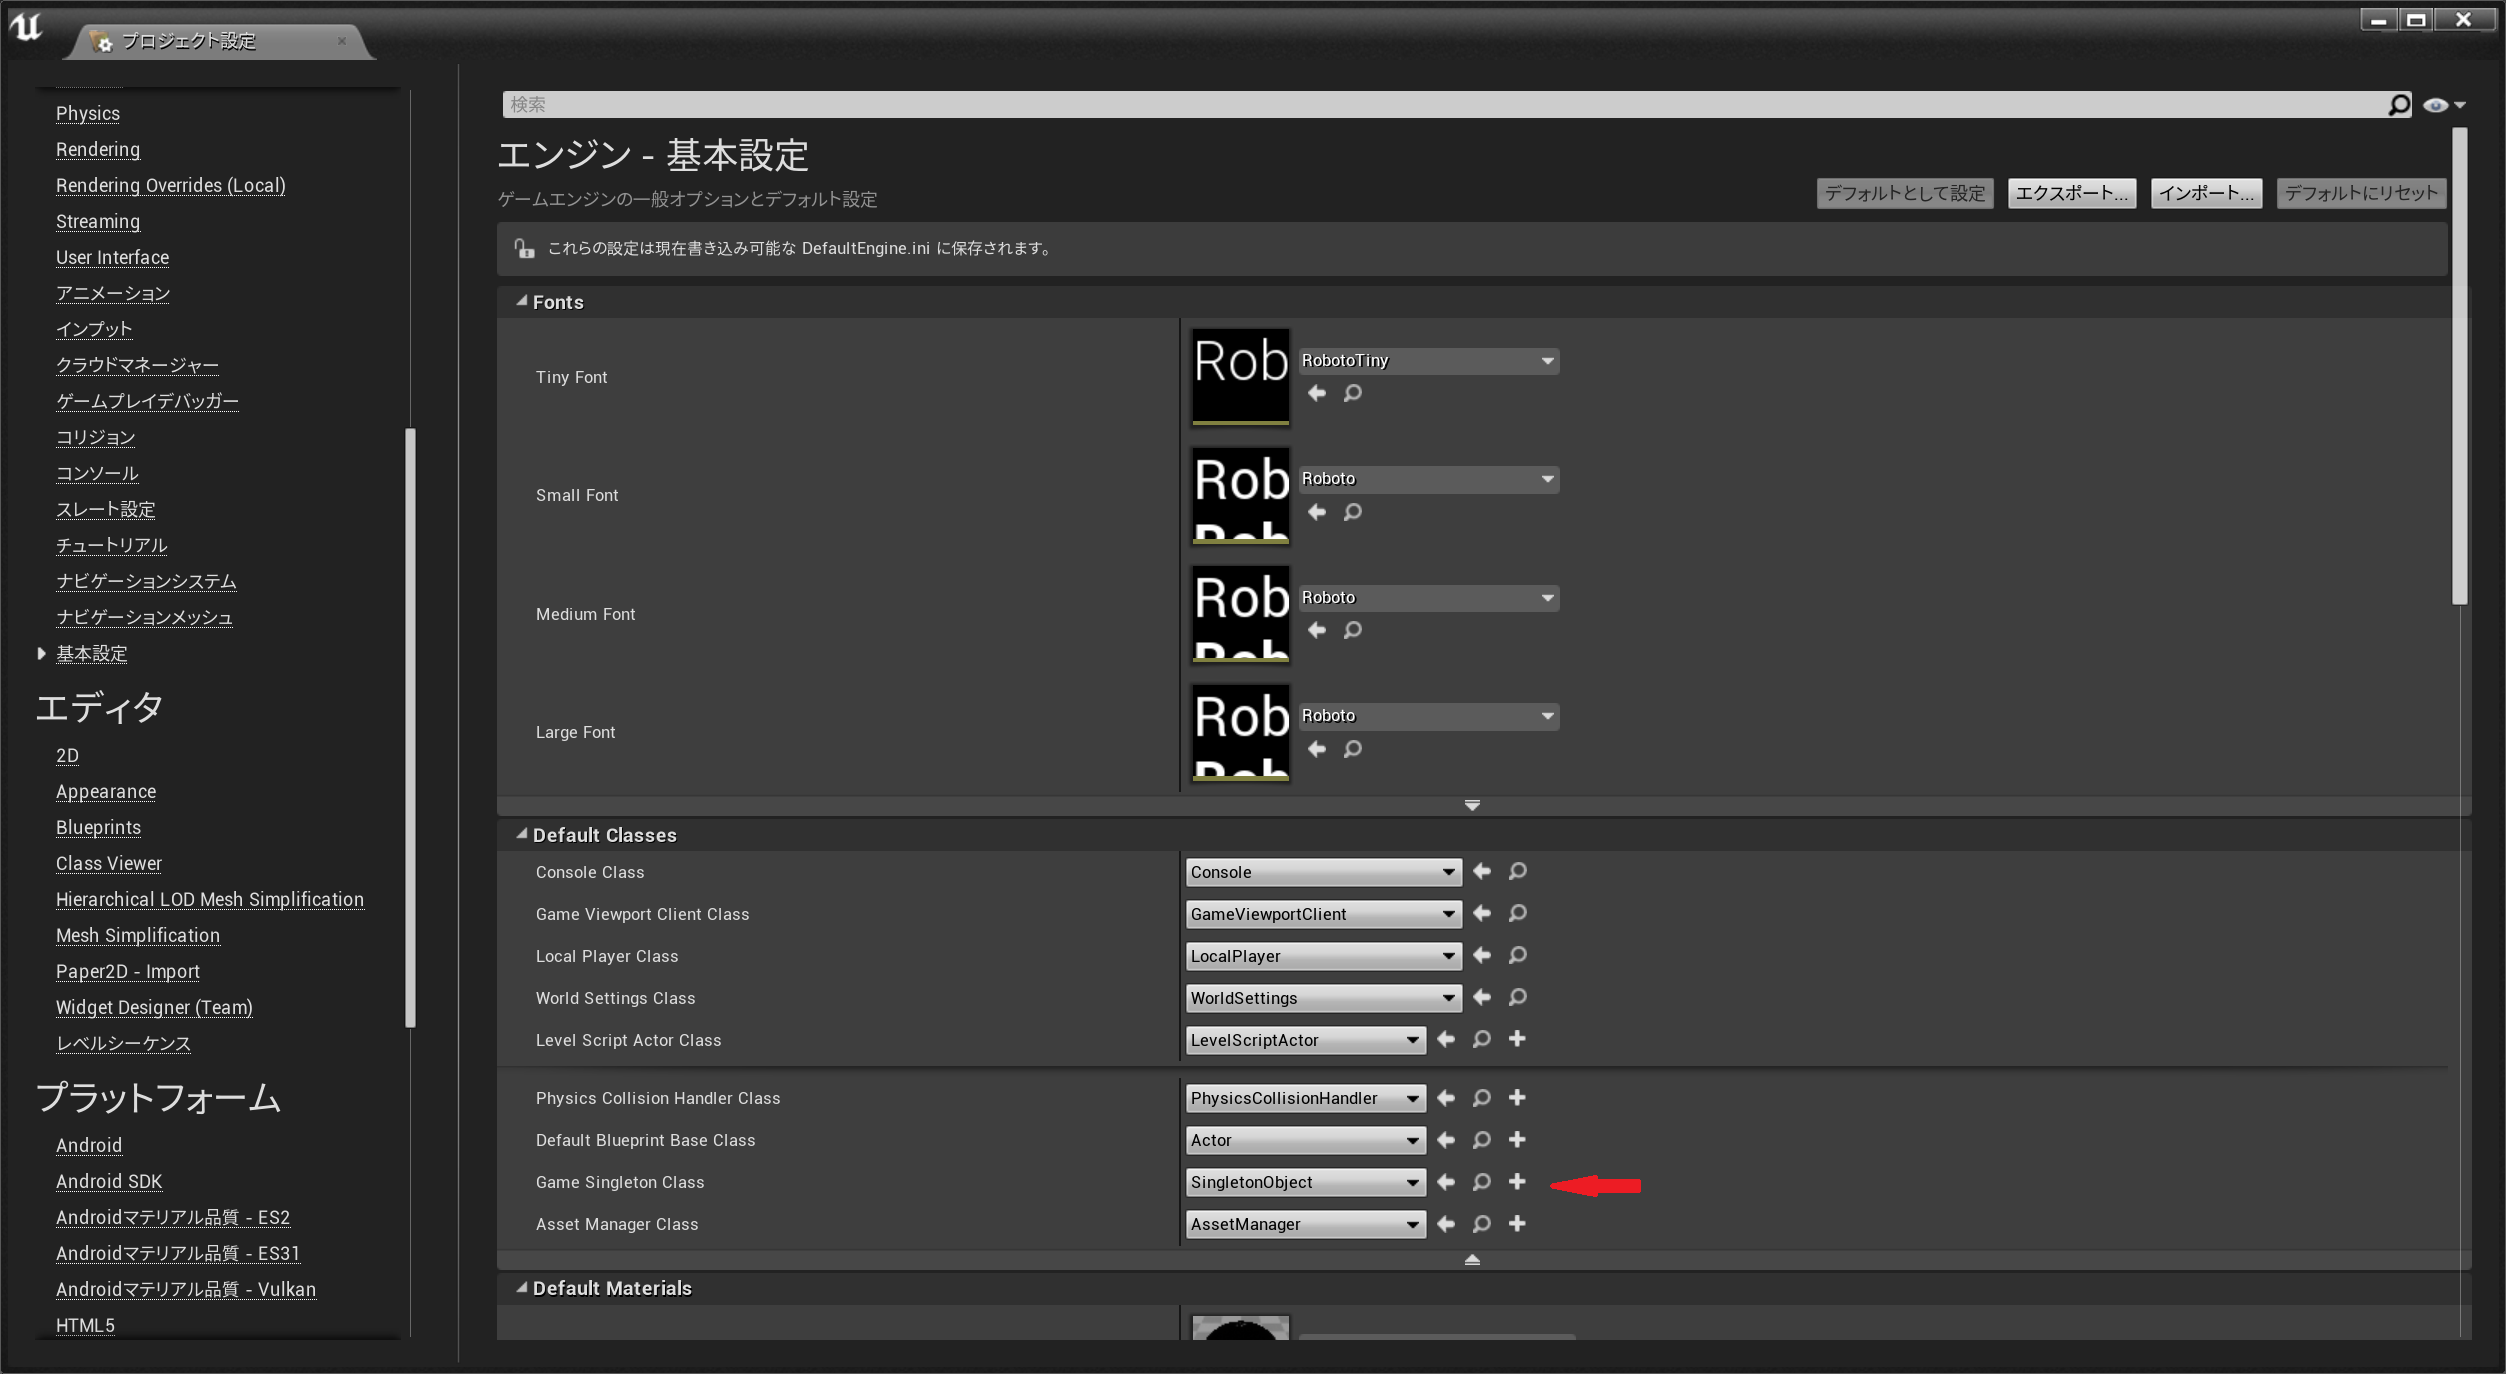
"編集">"プロジェクト設定">"基本設定"を選択します。
そのGame Singleton Classに先ほど設定したSingletonObjectクラスを設定します。
コード実装
SingletonObject.h
# pragma once

# include "CoreMinimal.h"
# include "UObject/NoExportTypes.h"
# include "SingletonObject.generated.h"

UCLASS()
class MYPROJECT_API USingletonObject : public UObject
{
	GENERATED_BODY()

public:
	static USingletonObject* GetInstance();

};
SingletonObject.cpp
# include "SingletonObject.h"
# include "Engine/Engine.h"

USingletonObject::USingletonObject()
{

}

USingletonObject* USingletonObject::GetInstance()
{
	if (GEngine)
	{
		USingletonObject* instance = Cast<USingletonObject>(GEngine->GameSingleton);
		return instance;
	}
	return nullptr;
}
SingletonオブジェクトはGEngineから直接取得することができます。
まとめ
Blueprintでアクセスすれば回りくどいことをしなくてもよかったのでしょうけれど。
いろいろな事情でc++を採用することもあるでしょう。えぇ、きっと。
そういったとき、この情報が役に立つといいなと思うのです。