クソアプリ2 Advent Calendar 2020
9日目がんばります💪
はじめに
みなさんは肩乗りぺット好きですか?
主人への愛が感じられるとても微笑ましい行動です。
どれもとても可愛らしいですね。
これらの事象を基に私は仮説を立てました。
「どんな忌み嫌われるモノでも人の肩に乗れば可愛くなるのではないか」
そこで皆が嫌がるモノ、「クソ」で実験してみたいと思います。(無理矢理)
つくる
さっそくクソ(を可愛くする)アプリを作っていきましょう。
目下R&Dに勤しんでいるAzureKinectDKとUnityを使って実現します。
AzureKinectDKは5万円弱で、ウェアラブルセンサー無しにボディトラッキングできちゃう優れものです。
AzureKinectDKで肩の位置をトラッキングして、Unityで肩の座標にクソペットを表示してやります。
Unityのソースコードはこれだけ。
using Microsoft.Azure.Kinect.BodyTracking;
using Microsoft.Azure.Kinect.Sensor;
using System.Threading.Tasks;
using UnityEngine;
using UnityEngine.UI;
namespace BodyEffect
{
    public class ShoulderPet : MonoBehaviour
    {
        [SerializeField]
        GameObject kusoPetPrefab;
        [SerializeField]
        RawImage cameraScreen;
        private Device kinect;
        private Tracker tracker;
        private Texture2D texture;
        private GameObject kusoPet;
        private void Awake()
        {
            this.kinect = Device.Open(0);
            this.kinect.StartCameras(new DeviceConfiguration
            {
                ColorFormat = ImageFormat.ColorBGRA32,
                ColorResolution = ColorResolution.R720p,
                DepthMode = DepthMode.NFOV_2x2Binned,
                SynchronizedImagesOnly = true,
                CameraFPS = FPS.FPS30
            });
            var width = kinect.GetCalibration().ColorCameraCalibration.ResolutionWidth;
            var height = kinect.GetCalibration().ColorCameraCalibration.ResolutionHeight;
            this.texture = new Texture2D(width, height, TextureFormat.RGBA32, false);
            this.texture.Apply();
            this.cameraScreen.texture = this.texture;
            this.tracker = Tracker.Create(kinect.GetCalibration(), TrackerConfiguration.Default);
            this.kusoPet = Instantiate(this.kusoPetPrefab, this.transform);
            var t = this.KinectLoop();
        }
        private void OnDestroy()
        {
            this.kinect.StopCameras();
        }
        private async Task KinectLoop()
        {
            while (true)
            {
                using (var capture = await Task.Run(() => this.kinect.GetCapture()).ConfigureAwait(true))
                {
                    var colorImage = capture.Color;
                    var colorArray = colorImage.GetPixels<BGRA>().ToArray();
                    var colors = new Color32[colorArray.Length];
                    for (var i = 0; i < colorArray.Length; i++)
                    {
                        colors[i].b = colorArray[i].B;
                        colors[i].g = colorArray[i].G;
                        colors[i].r = colorArray[i].R;
                        colors[i].a = 255;
                    }
                    this.texture.SetPixels32(colors);
                    this.texture.Apply();
                    this.tracker.EnqueueCapture(capture);
                    var frame = tracker.PopResult();
                    if (frame.NumberOfBodies > 0)
                    {
                        var joint = frame.GetBodySkeleton(0).GetJoint(JointId.ShoulderRight);
                        // 生座標は動きすぎるので適当に調整
                        var jointPos = new Vector3(
                                -1 * joint.Position.X / 30,
                                -1 * joint.Position.Y / 30 + 6,
                                joint.Position.Z / 30
                            );
                        this.kusoPet.transform.localPosition = jointPos;
                    }
                }
            }
        }
    }
}
こいつを空オブジェクトにAddComponentして、各種オブジェクトをアタッチしてやります。
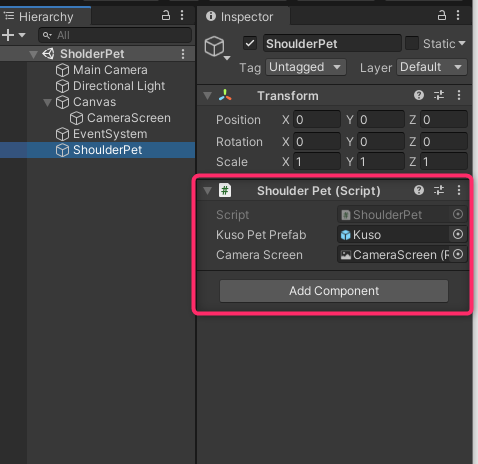
注意点としては、カメラ映像をRawImageUIを利用して投影しているところ。
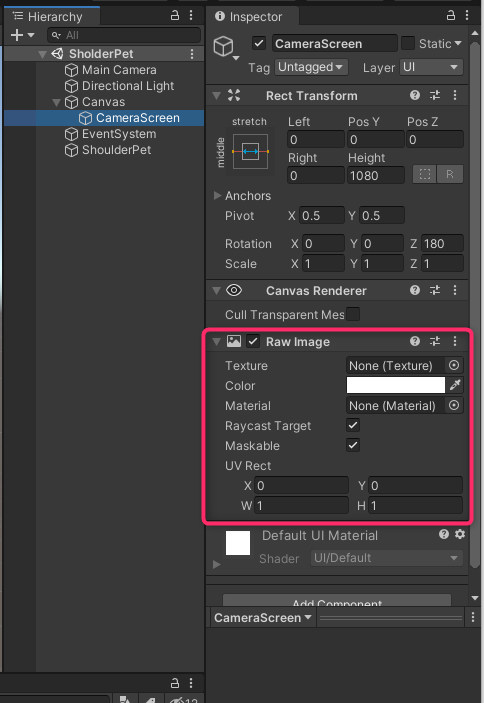
ペットにあたるGameObjectがUIより手前に表示できるようにする必要があります。

ここまでできたらデスクトップアプリにビルドして完成!
Play
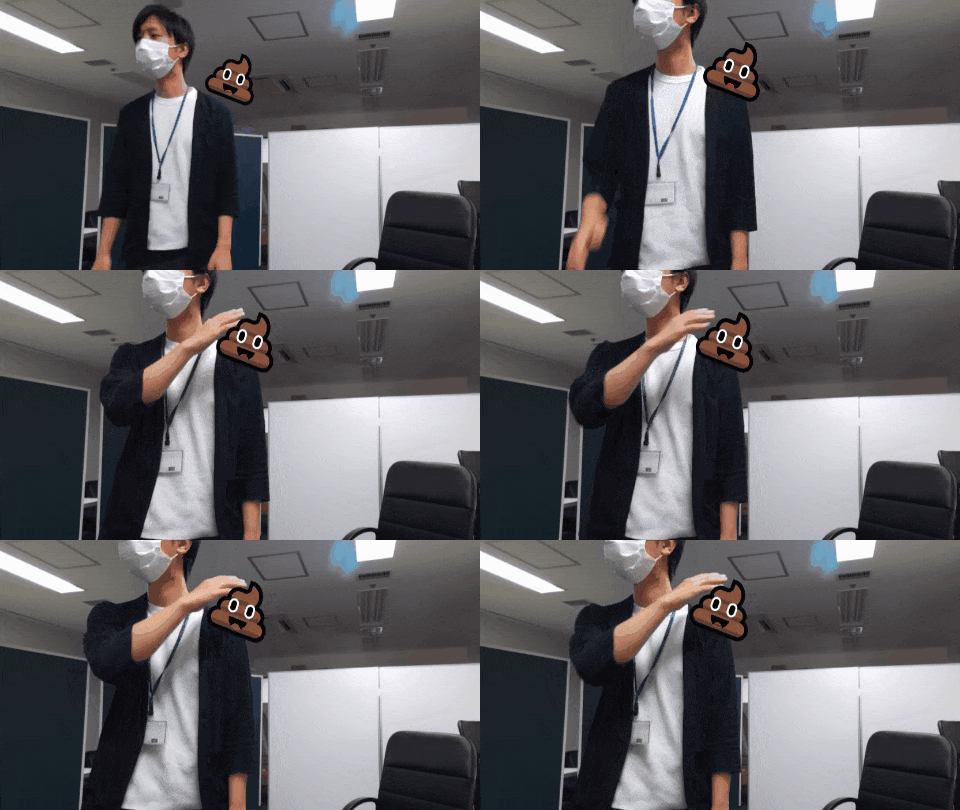
元々可愛くデフォルメされた画像を利用してしまったので実験効果がわかりにくいですね。
次回は実写で検証してみたいと思います。(嘘)

