環境
下記の環境を使用しています。
- Unity 5.4.1
- C#
- Windowsアプリ向け
1.動画をインポートする
Unity上で動画を再生するにはMovieTextureとして読み込む必要があるのでその準備です。詳しくは公式ドキュメントに載っていますが、Unityの内部でQuickTimeを使用して**Ogg Theora 形式(.ogv)**に変換しているようです。
その為、QuickTimeがインストールされていない環境(主にWindows)の場合には
こちらの記事を参考にffmpegを使用して変換してやります。
動画ファイルの準備が出来たら、今回は**Resources.Load()を使用して動画ファイルを読み込みたいので[Assets/Resources/]**の中に入れます。
2.コード
using UnityEngine;
using UnityEngine.UI;
using System.Collections;

[RequireComponent(typeof(RawImage))]
[RequireComponent(typeof(AudioSource))]
public class MovieOnUI : MonoBehaviour
{

    [SerializeField] string m_moviePath;

    MovieTexture m_movieTexture = null;

    RawImage m_rawImage = null;
    AudioSource m_audioSource = null;

    public bool IsPlaying
    {
        get { return m_movieTexture != null && m_movieTexture.isPlaying; }
    }

    public void Play()
    {
        if (IsPlaying)
        {
            Stop();
        }

        m_movieTexture = (MovieTexture)Resources.Load<MovieTexture>(m_moviePath);

        if (m_movieTexture == null)
        {
            Debug.LogError("movie is nothing:" + m_moviePath);
            return;
        }

        m_movieTexture.loop = false;

        m_rawImage.material.mainTexture = m_movieTexture;
        m_audioSource.clip = m_movieTexture.audioClip;

        m_movieTexture.Play();
        m_audioSource.Play();
    }

    public void Stop()
    {
        if (!IsPlaying)
        {
            return;
        }

        m_movieTexture.Stop();
        m_audioSource.Stop();
    }

    void Start()
    {
        m_rawImage = this.GetComponent<RawImage>();
        m_audioSource = this.GetComponent<AudioSource>();

        Play(); // テスト用
    }

    void Update()
    {
        if (m_movieTexture != null && !m_movieTexture.isPlaying)
        {
            m_movieTexture = null;
        }
    }
}
基本的に**Play()を呼べば動画が再生されます。
今回はテスト用にStart()**の中に書いてますが実際に使う場合は消しても良いと思います。
使い方
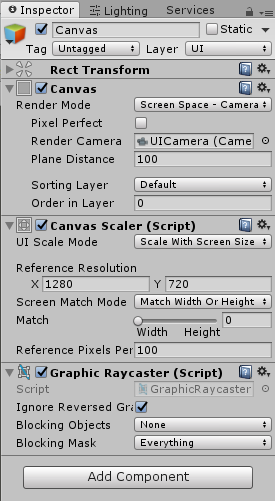
- ヒエラルキーを右クリックし[UI > Canvas]でCanvasオブジェクトを作る。
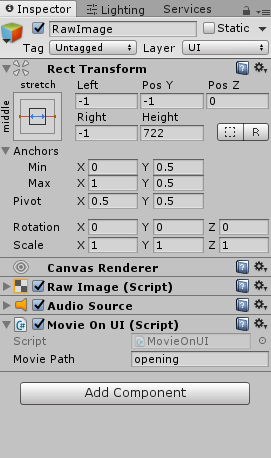
- Canvasを右クリックし[UI > RawImage]でRawImageオブジェクトを作る。
- RawImageにMovieOnUIを追加
- MoviePathに動画ファイルのパスを入力(拡張子は不要です)
後はいつものUIを調整する感じで再生したい所に出るようにしてやれば再生出来ます。
今回は16:9のウィンドウ想定で画面一杯に再生したかったので下図のような感じにしました。(隙間が出来る事があるきがしているので念のため上下左右1ずつ余分に出るようにしてます。)
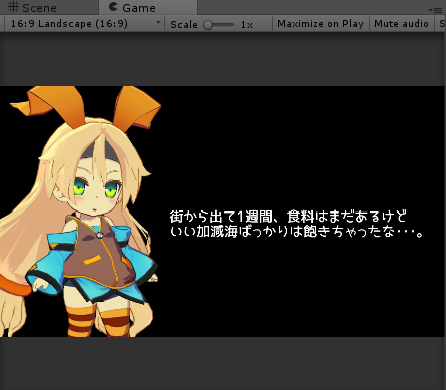
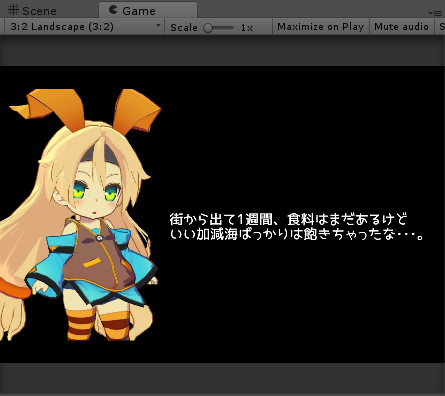
この設定で画面の比率が変わっても上下に余白が出来るので余白を黒くするようにしておけば下図の状態になって何かそれっぽくなります。
備考
今回はWindows用のゲームを想定して作っていたのでこんな感じです。公式ドキュメントにも書いてありますが、
iOS,AndroidではMovieTextureをサポートしておらずHandheld.PlayFullScreenMovieを使用してフルスクリーンストリーミング再生をするようです。また、StreamingAssets フォルダー内にビデオを格納する必要があったり、サポートされている動画形式も異なるようなのでそれぞれのアプリとしてビルドする前に一度確認しておいたほうが良さそうです。


