今回作成するコンポーネント
今回は、以下のようなシンプルなボタンのコンポーネントを作成しようと思います。
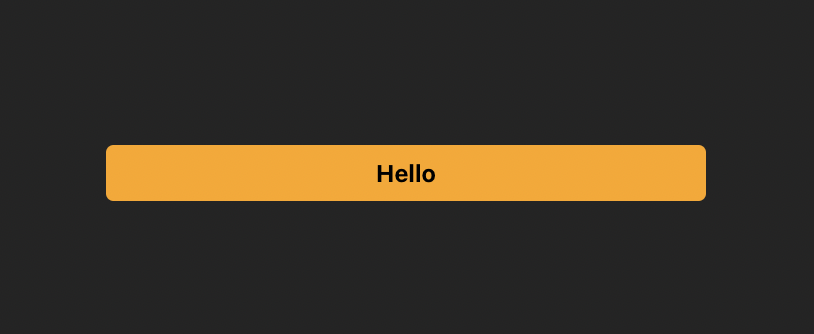
以下のようなpropsを設定し、ちょっとだけカスタマイズ可能なものにしようと思います。
| props | 型 | 制限 | デフォルト値 |
|---|---|---|---|
btnText |
String | なし | Hello |
btnSize |
String |
large / medium / small のみ許容 |
medium |
❗️今回作成するライブラリはVue3でのみ使用可能なものになります。Vue2で使用することはできません
Viteを使用してVueプロジェクトを作成
今回は、Viteを使用してVue3アプリケーションを作成していきたいと思います。プロジェクトを作成する以下コマンドでアプリケーションを作成してください。対話形式のCLIが起動するので、それぞれ以下で指定された値を入力/選択してください。
npm create vite@latest

> ? Project name: › hello-button
> ? Select a framework: › Vue
> ? Select a variant: › JavaScript
作成したプロジェクトのディレクトリに移動し、npm installを実行します。
cd hello-button
npm install
今回はライブラリ作成用のアプリケーションの為実行しませんが、以下コマンドnpm run devを実行することでVite*Vue3の開発サーバーが起動します。
npm run dev

> vite-test-app@0.0.0 dev
> vite


  VITE v4.1.4  ready in 194 ms

  ➜  Local:   http://127.0.0.1:5173/ 👈ブラウザでここにアクセス

  ➜  Network: use --host to expose
  ➜  press h to show help
ディレクトリ構成の修正
ライブラリを作成するにあたって、srcディレクトリ配下を修正していきます。
デフォルトでは以下のような構造になっていると思います。
├── src
│   ├── App.vue
│   ├── assets
│   │   └── vue.svg
│   ├── components
│   │   └── HelloWorld.vue
│   ├── main.js
│   └── style.css
以下のように修正してください👇
├── src
│   ├── components
│   │   └── HelloButton.vue
│   └── index.js
コンポーネントを作成
scriptの定義にはCompositionAPIを使用します。
propsbtnSizeにはlarge/medium/smallのみ入り、渡されたbtnSizeによってwidthを指定したクラスを変動させるという方法で、ボタンのサイズを可変にします。また、large/medium/small以外の値が渡された場合に警告をログに出力されるようにバリデーションの設定もしておきます。
<template>
  <button
    class="hello-button"
    :class="`btn-${btnSize}`"
  >
    {{ btnText }}
  </button>
</template>

<script setup>
defineProps({
  btnText: {
    type: String,
    default: 'Hello'
  },
  btnSize: {
    type: String,
    default: 'medium',
    validator (value) {
      return ['large', 'medium', 'small'].includes(value);
    }
  },
});
</script>

<style scoped>
.hello-button {
  background: orange;
  color: black;
  border: none;
  outline: none;
  font-weight: bold;
}
.btn-large {
  width: 800px;
}
.btn-medium {
  width: 400px;
}
.btn-small {
  width: 200px;
}
</style>
エントリーポイントを定義
ここでは、ライブラリとして使用される際のエントリーポイントとなるファイルを定義していきます。コンポーネントの登録を行う処理を持つinstallメソッドをエクスポートしてください。
import HelloButton from './components/HelloButton.vue';

export default {
  install (app, options = {}) {
    app.component('HelloButton', HelloButton);
  }
};
Viteのビルド設定を定義
vite.config.jsで、Viteを使用したビルドの設定を修正します。Viteではライブラリモードがサポートされている為、アプリケーションをライブラリとして使用する際のビルドのオプションを設定していきます。
これらの設定の詳細な説明に関しては、Vite公式ドキュメントを参照してください。
import { defineConfig } from 'vite';
import { resolve } from 'path';
import vue from '@vitejs/plugin-vue';

// https://vitejs.dev/config/
export default defineConfig({
  build: {
    lib: {
      entry: resolve(__dirname, './src/index.js'),
      name: 'hello-button',
      fileName: (format) => `hello-button.${format}.js`
    },
    rollupOptions: {
      external: ['vue'],
      output: {
        globals: {
          vue: 'Vue'
        }
      }
    }
  },
  plugins: [vue()],
});
ビルドの実行
以下コマンドを実行してビルドを実行します。
npm run build
以下のようなログが出力されればビルドが完了しています。
> first-hello-button@0.0.0 build
> vite build

vite v4.1.4 building for production...
✓ 4 modules transformed.
dist/style.css           0.22 kB │ gzip: 0.15 kB
dist/hello-button.es.js  0.78 kB │ gzip: 0.46 kB
dist/hello-button.umd.js  0.76 kB │ gzip: 0.48 kB
distフォルダが追加され、バンドルされたファイルが出力されます。
├── dist
│   ├── hello-button.es.js
│   ├── hello-button.umd.js
│   └── style.css
npmの設定を修正
package.jsonを編集してnpmの設定を更新します。
公開するファイル(files)、ライブラリとして使用される際のエントリーポイント(main/module/exports/)を設定していきます。
{
  "name": "hello-button",
  "private": false, // falseに変更
  "version": "0.0.0",
  "type": "module",
  "main": "./dist/hello-button.umd.js", // 追加
  "module": "./dist/hello-button.es.js", // 追加
  "files": ["dist"], // 追加
  "exports": { // 追加
    ".": {
      "import": "./dist/hello-button.es.js",
      "require": "./dist/hello-button.umd.js"
    },
    "./dist/style.css": "./dist/style.css"
  },
  "scripts": {
    "dev": "vite",
    "build": "vite build",
    "preview": "vite preview"
  },
  "dependencies": {
    "vue": "^3.2.45"
  },
  "devDependencies": {
    "@vitejs/plugin-vue": "^4.0.0",
    "vite": "^4.1.0"
  }
}
ローカルでライブラリの動作確認
npmに公開する前に、ライブラリが正常に動作するかどうかをローカルで確認する必要があります。npm linkコマンドを使用すると、ローカルでの動作確認を簡単に行うことができます。
npm linkは、シンボリックリンクを作成するコマンドです。開発中のライブラリへのシンボリックリンクを作成し、それをローカルで立ち上げている別アプリから使用することで、実際に公開されているnpmを使用している状況を擬似的に再現することができます。
まずは、作成しているライブラリのディレクトリで以下コマンドを実行してください。
npm link
次に、別のVue3のアプリケーションの開発サーバーを起動してください。(テストに使用できるアプリケーションがない場合、本記事のViteを使用してVueプロジェクトを作成、またはこちらを参考にアプリケーションを起動してください)
そこで、以下コマンドを実行してください。
npm link hello-button
node_modules/配下にhello-buttonというディレクトリが新しく追加されます。
また、lsコマンド等でnode_modules/hello-buttonを確認すると、以下のように作成しているライブラリのディレクトリを参照していることが確認できます。
hello-button -> ../../hello-button
それではライブラリを使用していきましょう。テスト用アプリのsrc/main.jsを以下のように編集してください。
import { createApp } from 'vue';
import './style.css';
import App from './App.vue';

import HelloButton from 'hello-button'; // 追加
import 'hello-button/dist/style.css'; // 追加

createApp(App).use(HelloButton).mount('#app'); // use()を追加
ここで追加したuse()が実行されたタイミングで、対象のライブラリのpackage.jsonで指定したエントリーポイントsrc/index.jsのinstall()メソッドが実行され、アプリケーションにライブラリのコンポーネントが登録されているというイメージです。
では、コンポーネントの登録が完了したので、実際に使っていきましょう。
今回はグローバルコンポーネントとして登録しました。テスト用アプリのどのコンポーネントでも良いので、以下タグを追加してみてください。
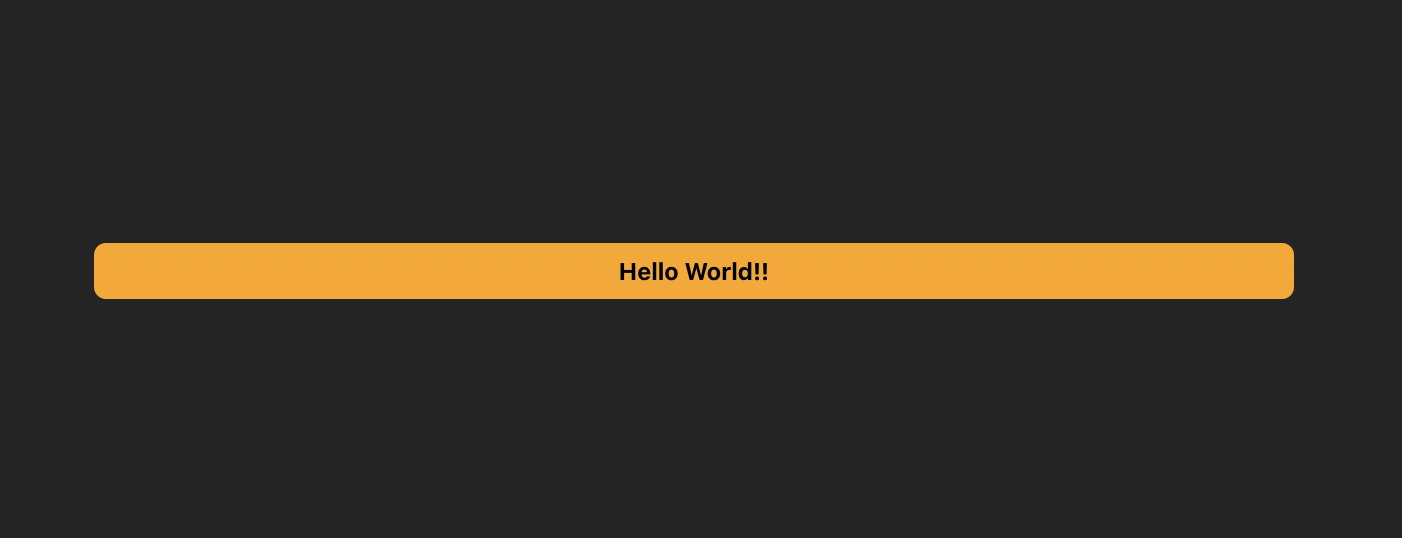
<hello-button :btnSize="`large`" :btnText="`Hello World!!`"></hello-button>
以下のようにブラウザに作成したライブラリのボタンが表示されていれば、ライブラリが問題なく動作することが確認できます!
npmに公開
ローカルでライブラリが正常に動作することが確認できたので、実際にnpmに公開していきましょう。
npm publishコマンドを実行することで、作成したライブラリを公開することができます。以下コマンドを実行して、処理が正常終了すればライブラリの公開が完了です!!
npm publish
.
.
.
+ first-hello-button@0.0.0 // このような出力があれば正常終了です
試しに、npmのサイトでパッケージの検索をしてみましょう。検索バーに公開したライブラリの名前(package.json>nameの値)を入力し、検索してみてください。以下のように公開したパッケージが検索結果に表示されることが確認できるかと思います✨記念すべき瞬間です。

npm publishを実行する際によく出るエラー①:未認証エラー
npm ERR! code ENEEDAUTH
npm ERR! need auth This command requires you to be logged in to https://registry.npmjs.org/
npm ERR! need auth You need to authorize this machine using `npm adduser`
👉 パッケージを公開する場合、npmにログインしている必要があります。npmにアカウントがない場合は登録し、以下コマンド(npm login)を実行してnpmへのログインを完了させてください。
npm login
> Username: // ユーザーネームを入力
> Password: // パスワードを入力
> Email: (this IS public): // 登録しているメールアドレスを入力
npm notice Please check your email for a one-time password (OTP)
> Enter one-time password: // 入力したメールアドレス宛てにOTPが送信されるので、確認して入力
Logged in as {ユーザーネーム} on https://registry.npmjs.org/. // これが出力されればログイン完了です!
ログインしているユーザーを確認する以下コマンドnpm whoamiを実行し、実行結果にログインしたユーザー名が出力されれば、正常にログインができています。
npm whoami
npm publishを実行する際によく出るエラー②:公開範囲エラー
npm ERR! code EPRIVATE
npm ERR! This package has been marked as private
npm ERR! Remove the 'private' field from the package.json to publish it.
👉 パッケージのプライベートモードが有効になっている際に出るエラーです。package.jsonのprivateがtrueになっている場合、プライベートモードが有効になる為、npmへの公開ができません。こちらをfalseに変更することでエラーが解消します。
"private": true
👇
"private": false
npm publishを実行する際によく出るエラー③:パッケージ名重複エラー
npm ERR! 403 403 Forbidden - PUT https://registry.npmjs.org/hello-button - Package name too similar to existing package hellobutton; try renaming your package to '@whopper1962/hello-button' and publishing with 'npm publish --access=public' instead
npm ERR! 403 In most cases, you or one of your dependencies are requesting
npm ERR! 403 a package version that is forbidden by your security policy, or
npm ERR! 403 on a server you do not have access to.
👉 公開しようとしているパッケージの名前が、既に公開されているパッケージと同じまたは似ている場合は上記のエラーが出ます。package.jsonのnameがパッケージの名前として使用されるので、他のパッケージと被らないような名前に変更することでエラーが解消します。パッケージ名にユーザーネーム等を入れると被りにくいです。
"name": "hello-button",
👇
"name": "{ユーザーネーム}-hello-button",
実際にインストールして動作確認...完成!🔥
では、先ほど使用したテストアプリの環境で、ローカルで作成したシンボリックリンクではなく実際に公開したものをインストールする形でライブラリの動作確認を行っていきましょう!
テストアプリ環境で、以下コマンドを実行してください。これで導入したシンボリックリンクを削除することができます。(実行後、node_modules/配下からhello-buttonが消えていることが確認できるかと思います)
npm install
ここで、テストアプリの開発サーバーを再起動してみてください。以下のようなエラーが出力されると思います。
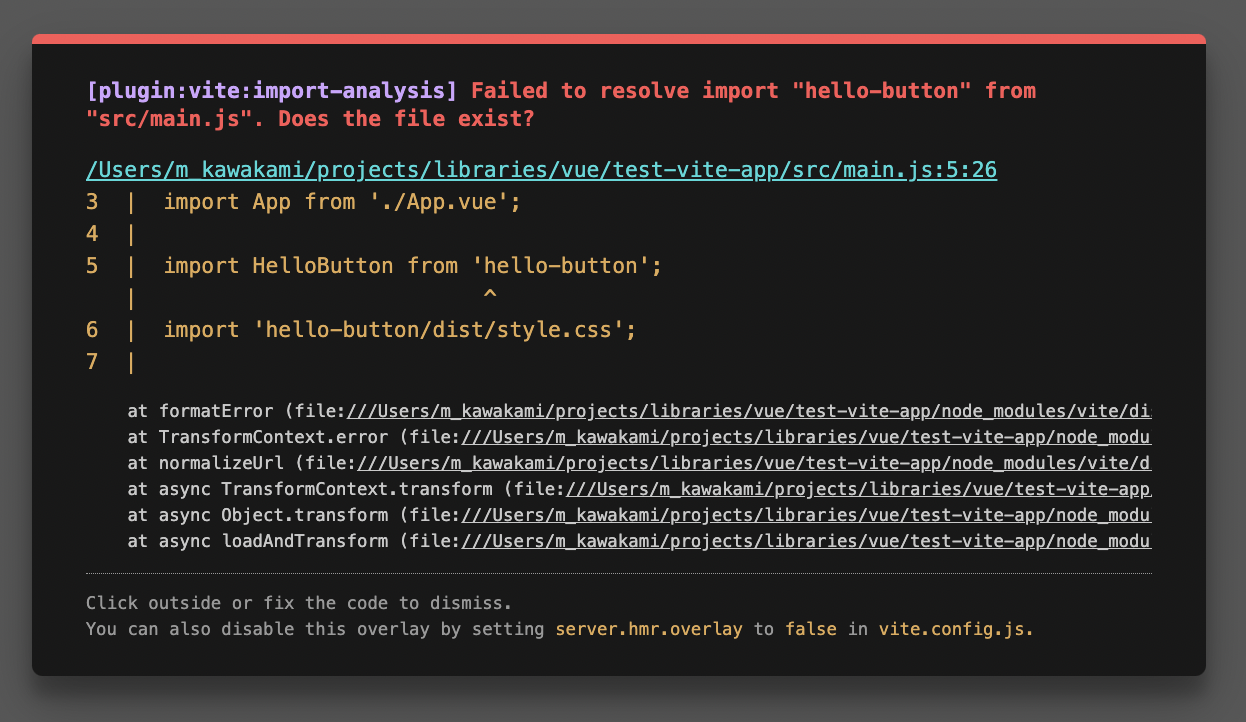
それではインストールしていきましょう。npmで、作成したライブラリのページに移動し、画面右のInstallのエリアをクリックしてください。インストール用のコマンドがクリップボードにコピーされます。
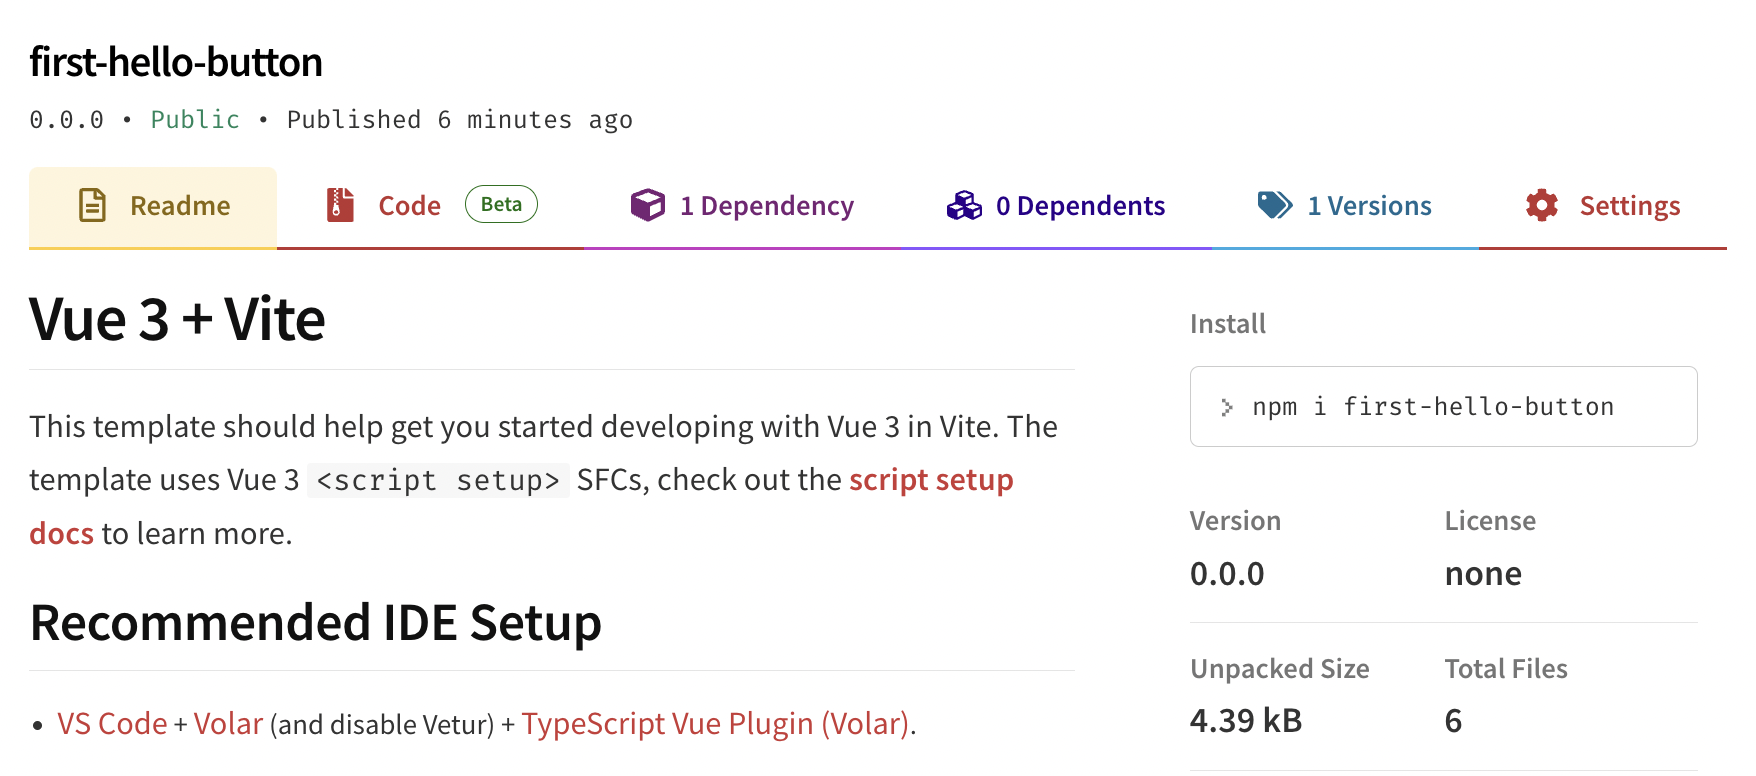
インストールコマンドを実行し、正常にインストールが完了したら、テストアプリ環境をもう一度見てみてください。(必要に応じてsrc/main.jsのimport部分のパッケージ名を修正してください)

問題なくボタンが表示されることが確認できれば、コンポーネントライブラリの完成です!おめでとうございます!!👏👏👏
