概要
Pythonを使うと超簡単にLチカができるということで試してみた
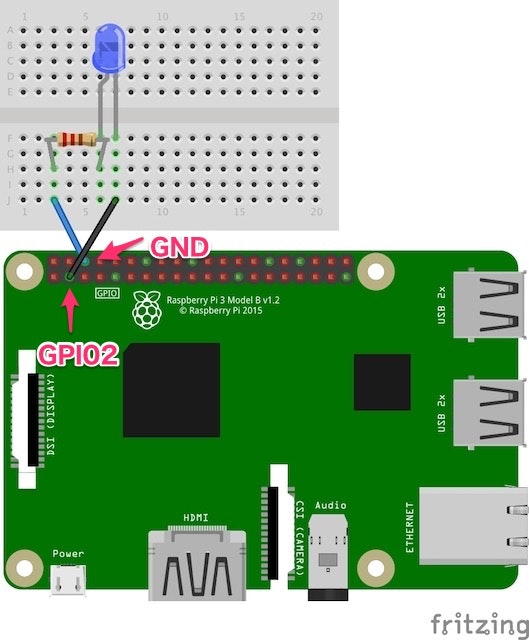
このように配線した
Lチカプログラム
ソースコードをgithubにアップしています。
git clone https://github.com/Teriyaki-0901/led-python
cd led-python
python lchika.py
ソースコード
lchika.py
# !/usr/bin/env python
# -*- coding: utf-8 -*-

import RPi.GPIO as GPIO
import time

GPIO.setmode(GPIO.BCM)
GPIO.setup(2,GPIO.OUT)
for x in xrange(5):
    GPIO.output(2,True)
    time.sleep(2)
    GPIO.output(2,False)
    time.sleep(2)
GPIO.cleanup()
設定するところ
setmode
setmodeには「BOARD」と「BCM」の2種類がある。
BOARDは物理的なピン番号、BCMはGPIO3なら3といった論理番号のこと。
BOARD
GPIO.setmode(GPIO.BOARD)
BCM
GPIO.setmode(GPIO.BCM)
ピン番号
上のソースコードでは、GPIO2に接続したので、接続したピンのGPIO番号に変更する
(下のソースの「2」の部分)
GPIO.setup(2,GPIO.OUT)
GPIO.output(2,True)
    time.sleep(2)
    GPIO.output(2,False)
    time.sleep(2)
