(2014/09追記)
Deep Learning (ディープラーニング、深層学習) の技術を用いて、猫の品種を識別する方法の記事も書いています。もし興味があればご参照ください。
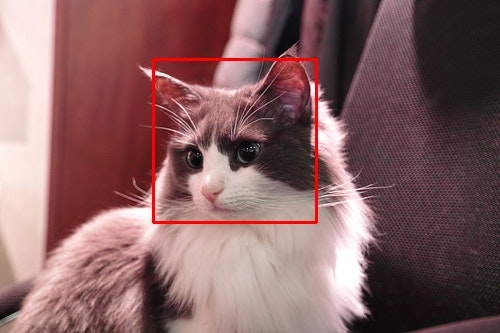
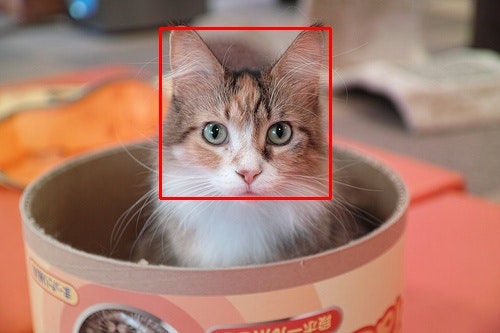
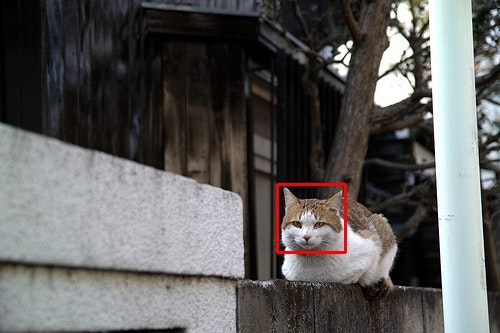
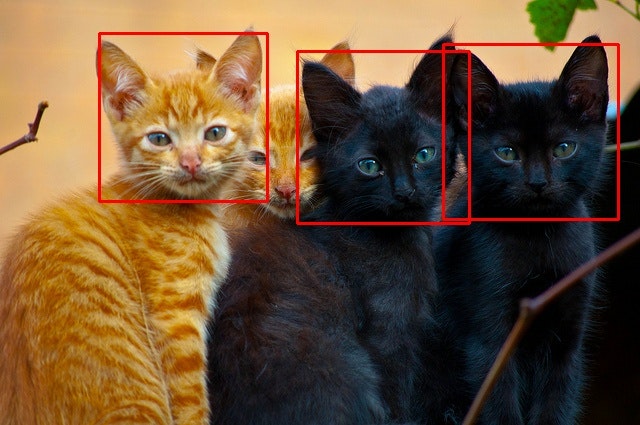
OpenCVで猫検出
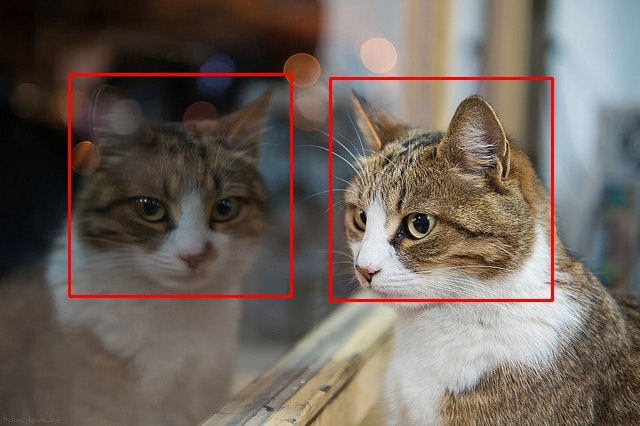
(ショコラ - 吉祥寺 きゃりこ)
ねこと画像処理 part 1 – 素材集めでは猫画像の集め方について整理しましたが、ここではその集めた猫画像を使って猫検出用の学習モデル(分類器)を作成しました。
技術的な内容詳細についてはブログの方に書いてありますので興味があれば。モデル配布についてはこのエントリーの後半で説明します。
学習はお馴染みのBoosting(アンサンブル学習手法の1つ)で。特徴量はモデル作成と検証を速く繰り返すことができるLBP特徴を採用しました。また、約7,000枚のアノテーションデータはクラウドソーシングを活用して集めました。
使い方
C++
C++からは以下のように使います。
// objdetect.cpp
# include <iostream>
# include <vector>
# include <opencv2/opencv.hpp>
# include <opencv2/highgui/highgui.hpp>
# include <opencv2/objdetect/objdetect.hpp>

int main(int argc, char** argv) {
  using namespace std;
  if(argc != 3) {
    cerr << "./objdetect [image file] [cascade file]" << endl;
    exit(-1);
  }
  cv::Mat src_img = cv::imread(argv[1], 1);
  if(src_img.empty()) {
    cerr << "cannot load image" << endl;
    exit(-1);
  }
  cv::Mat dst_img = src_img.clone();
  string cascade_file = string(argv[2]);
  cv::CascadeClassifier cascade;
  cascade.load(cascade_file);
  if(cascade.empty()) {
    cerr << "cannot load cascade file" << endl;
    exit(-1);
  }
  vector<cv::Rect> objects;
  cascade.detectMultiScale(src_img, objects, 1.1, 3);
  vector<cv::Rect>::const_iterator iter = objects.begin();
  cout << "count: " << objects.size() << endl;
  while(iter!=objects.end()) {
    cout << "(x, y, width, height) = (" << iter->x << ", " << iter->y << ", "
         << iter->width << ", " << iter->height << ")" << endl;
    cv::rectangle(dst_img,
                  cv::Rect(iter->x, iter->y, iter->width, iter->height),
                  cv::Scalar(0, 0, 255), 2);
    ++iter;
  }
  cv::imwrite("result.jpg", dst_img);
  return 0;
}
## コンパイル、実行
$ g++ -o objdetect objdetect.cpp -I/path/to/opencv/include -L/path/to/opencv/lib -lopencv_core -lopencv_highgui -lopencv_objdetect
$ ./objdetect cat.jpg cascade.xml
count: 1
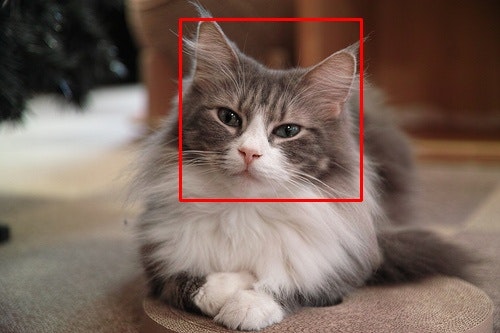
(x, y, width, height) = (278, 185, 65, 65)
検出時のパラメータをゆるめに指定(minNeighborsパラメータを小さな値にする)しておくと体感的には検出精度は上がるようです。当然誤検出も増えますが、検出領域が一定のサイズ以下の場合は除く(minSizeパラメータを指定する)といった処理を入れればそれなりの精度に見せかけることはできます。
CascadeClassifier::detectMultiScale - docs.opencv.org
Python
Pythonからも簡単に使えます。
# !/usr/local/bin/python
# -*- coding: utf-8 -*-

import sys
import cv2 as cv

def detect(imagefilename, cascadefilename):
    srcimg = cv.imread(imagefilename)
    if srcimg is None:
        print('cannot load image')
        sys.exit(-1)
    dstimg = srcimg.copy()
    cascade = cv.CascadeClassifier(cascadefilename)
    if cascade.empty():
        print('cannnot load cascade file')
        sys.exit(-1)
    objects = cascade.detectMultiScale(srcimg, 1.1, 3)
    for (x, y, w, h) in objects:
        print(x, y, w, h)
        cv.rectangle(dstimg, (x, y), (x + w, y + h), (0, 0, 255), 2)
    return dstimg

if __name__ == '__main__':
    result = detect('cat.jpg', 'cascade.xml')
    cv.imwrite('result.jpg', result)
モデル配布
今回作ったモデルを公開しておきます。OpenCVで読み込むことができるカスケードファイル(cascade.xml)です。
データベースに教師データが新たに追加されたのを検知して学習を走らせるバッチ処理を個人サーバ上で動かしているので、継続的により精度の高いモデルに自動更新されていくはずです。
とは言っても何も施策を打たないと精度は頭打ちになると思いますので、後はいろいろ前後処理を加えたりしてアルゴリズムの改良をしていくことになると思います。