本記事は自動テストツールShirates(シラテス)の紹介記事です。※はてなブログからの転載です。
モバイルアプリのテストの自動化
昨今、ソフトウェアテストの自動化がますます重要になっています。モバイルアプリも例外ではありません。自動化を実現するツールには有償・無償のものが多数存在します。無償のもので注目されている製品としてはAppiumがあります。筆者もAppiumを導入して使用しましたが、とてもハードルが高いという感想です。はっきり言って、茨の道です。ちゃんと使ってテストの実務で成果を出せるようになるにはある程度の期間修行が必要です。開発スキルを持ったエンジニアでも苦労するのですから、もっと導入や使用方法が簡単でないとテストエンジニアに広く普及させるのは難しいと考えています。
Shiratesとは
Shiratesはそのような敷居の高さを少し下げてくれるOSSのツールです。GitHubから入手できます。
ざっくりした概要はこちらの記事を参照ください。
ざっくりしたデモ動画はこちらをご覧ください。
※2022/10/18追記
Shiratesには主に以下のような特徴があります。
- テストコードを記述するためのほぼクロスプラットフォームで使いやすいAPI。AndroidとiOSのプラットフォームをサポート
- 強力なログ出力機能とレポーティング機能を提供
- テスト環境をセットアップするための柔軟な構成管理フレームワークを提供
まずは環境構築
ShiratesはmacOSまたはWindowsで利用できます。
クイックスタート を実施して環境を構築します。
プロジェクトの作成
プロジェクトを作成します。
※完成したソースコード一式はこちらから入手できます。
-
IntelliJ IDEAを起動し、
File > New > Projectを選択します -
New Projectウィンドウで
New Projectタプを選択します -
以下の項目を入力します
-
Name:(任意の名前) -
Location:(保存先) -
Language:Kotlin -
Build system:Gradle -
JDK:(適切なバージョンを選択) -
Gradle DSL:Kotlin -
Add sample code:OFF

-
-
Createをクリックします。 -
バックグラウンドタスクが完了するまでしばらく待ちます
build.gradle.ktsの初期状態は以下のようになります
import org.jetbrains.kotlin.gradle.tasks.KotlinCompile

plugins {
    kotlin("jvm") version "1.7.10"
}

group = "org.example"
version = "1.0-SNAPSHOT"

repositories {
    mavenCentral()
}

dependencies {
    testImplementation(kotlin("test"))
}

tasks.test {
    useJUnitPlatform()
}

tasks.withType<KotlinCompile> {
    kotlinOptions.jvmTarget = "1.8"
}
必要な記述を追加します。編集後は以下のようになります。
import org.jetbrains.kotlin.gradle.tasks.KotlinCompile

plugins {
    kotlin("jvm") version "1.7.10"
}

group = "org.example"
version = "1.0-SNAPSHOT"

val shiratesCoreVersion = "1.0.1"
val appiumClientVersion = "8.1.0"

repositories {
    mavenCentral()
}

dependencies {
    testImplementation(kotlin("test"))

    // JUnit 5
    testImplementation("org.junit.jupiter:junit-jupiter-api:5.9.0")
    testRuntimeOnly("org.junit.jupiter:junit-jupiter-engine:5.9.0")

    // Appium
    testImplementation("io.appium:java-client:$appiumClientVersion")

    // shirates-core
    testImplementation("io.github.ldi-github:shirates-core:$shiratesCoreVersion")

    // https://mvnrepository.com/artifact/org.apache.logging.log4j/log4j-core
    testImplementation("org.apache.logging.log4j:log4j-core:2.18.0")

    // https://mvnrepository.com/artifact/org.slf4j/slf4j-nop
    testImplementation("org.slf4j:slf4j-nop:1.7.36")
}

tasks.test {
    useJUnitPlatform()
}

tasks.withType<KotlinCompile> {
    kotlinOptions.jvmTarget = "1.8"
}
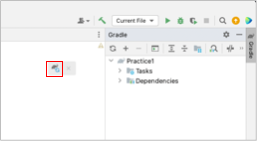
クリックしてGradleの再読み込みを行います。必要なソフトウェアがダウンロードされます。
テスト構成ファイルの作成
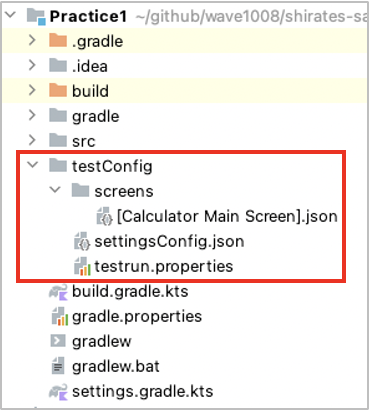
フォルダとファイルの作成
- プロジェクトディレクトリの直下に
testConfigフォルダを作成します -
testConfigフォルダの直下にscreensフォルダを作成します -
screensフォルダの直下に[Calculator Main Screen].jsonを作成します -
testConfigフォルダの直下にsettingsConfig.jsonを作成します -
testConfigフォルダの直下にtestrun.propertiesを作成します
[Calculator Main Screen].json
画面の定義ファイルです。
以下の内容を記述します。
{
  "key": "[Calculator Main Screen]",

  "identity": "[AC][()]",

  "selectors": {
    "[formula]": "#formula",
    "[result final]": "#result_final",
    "[result preview]": "#result_preview",

    "[√]": "#op_sqrt",
    "[π]": "#const_pi",
    "[^]": "#op_pow",
    "[!]": "#op_fact",

    "[AC]": "#clr",
    "[()]": "#parens",
    "[%]": "#op_pct",

    "[÷]": "#op_div",
    "[×]": "#op_mul",
    "[-]": "#op_sub",
    "[+]": "#op_add",
    "[=]": "#eq",
    "[⌫]": "#del",

    "[0]": "#digit_0",
    "[1]": "#digit_1",
    "[2]": "#digit_2",
    "[3]": "#digit_3",
    "[4]": "#digit_4",
    "[5]": "#digit_5",
    "[6]": "#digit_6",
    "[7]": "#digit_7",
    "[8]": "#digit_8",
    "[9]": "#digit_9",
    "[.]": "#dec_point"
  }

}
settingsConfig.json
Appiumによるアプリの起動に関するパラメーターを設定します。
以下の内容を記述します。
{
  "testConfigName": "settingsConfig",

  "appIconName": "電卓",
  "packageOrBundleId": "com.google.android.calculator",

  "startupPackageOrBundleId": "com.android.settings",
  "startupActivity": "com.android.settings.Settings",

  "profiles": [
    {
      "profileName": "Android 12",
      "capabilities": {
        "automationName": "UiAutomator2",
        "platformName": "Android",
        "platformVersion": "12",
        "language": "ja",
        "locale": "JP"
      }
    }
  ]
}
testrun.properties
使用するテスト構成ファイルとプロファイルを設定します。
以下の内容を記述します。
android.configFile=testConfig/settingsConfig.json
android.profile=Android 12
テストコードの作成
作成するテストコードの概要
Androidで以下の操作を行い結果を検証するテストコードを作成します。
- 電卓アイコンをタップして電卓アプリを起動する
-
[AC]を打鍵する -
123+456=を打鍵する - 計算結果が
579であることを検証する
テストコードの作成
-
src/test/kotlinの直下にCalculatorTest1クラスを作成します - 以下の内容を記述します
import org.junit.jupiter.api.Test
import shirates.core.driver.commandextension.select
import shirates.core.driver.commandextension.tap
import shirates.core.driver.commandextension.tapAppIcon
import shirates.core.driver.commandextension.textIs
import shirates.core.testcode.UITest

class CalculatorTest1: UITest() {

    @Test
    fun test1() {

        scenario {
            case(1){
                condition {
                    it.tapAppIcon("電卓")
                        .tap("[AC]")
                }.action {
                    it.tap("[1]")
                        .tap("[2]")
                        .tap("[3]")
                        .tap("[+]")
                        .tap("[4]")
                        .tap("[5]")
                        .tap("[6]")
                        .tap("[=]")
                }.expectation {
                    it.select("[result final]")
                        .textIs("579")
                }
            }
        }
    }
}
テストコードの実行
-
Android 12エミュレーターを起動しておきます。電卓アプリがインストールされていない場合はGoogle Playストアでインストールしてください
-
test1()を右クリックし、
Debugを選択してテストを実行します
-
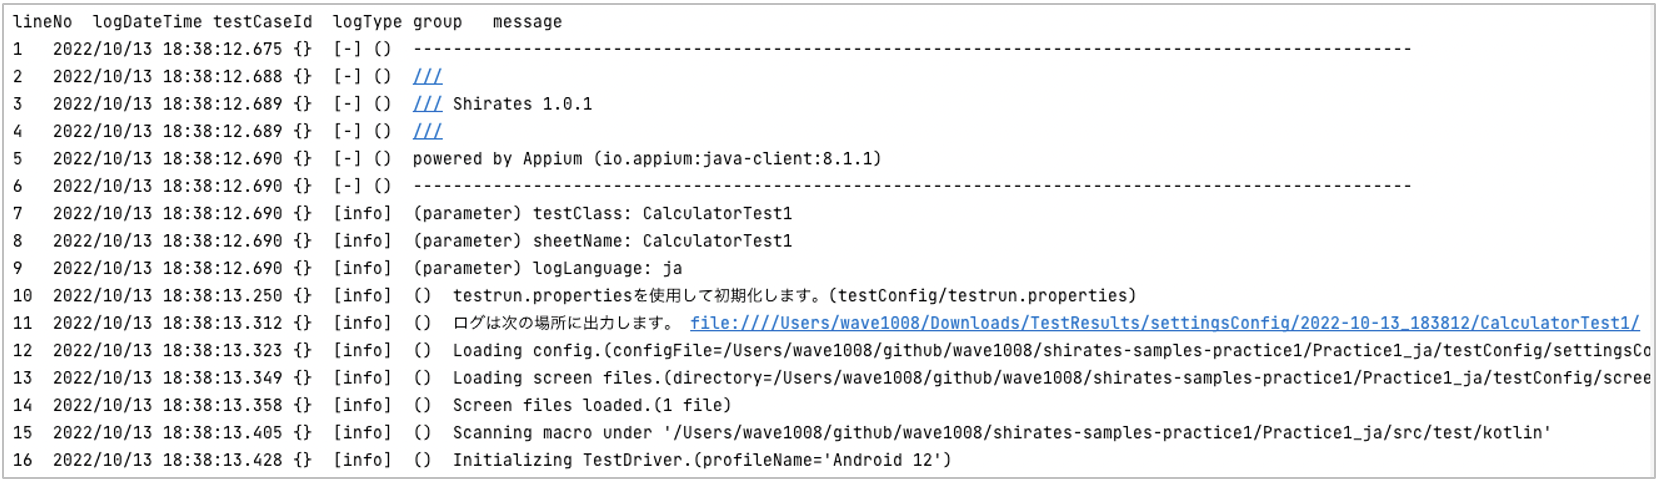
テストの実行が完了したらコンソール出力の
file://...のリンクをクリックします。Finder(またはExplorer)が開きます
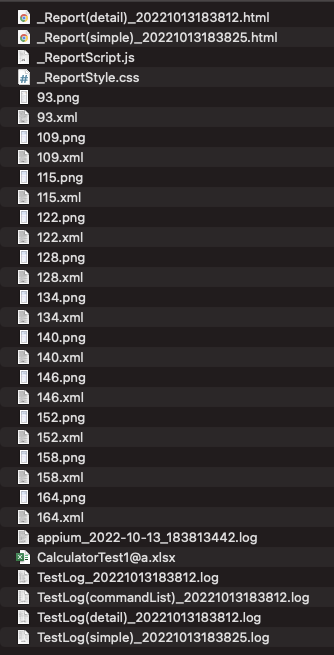
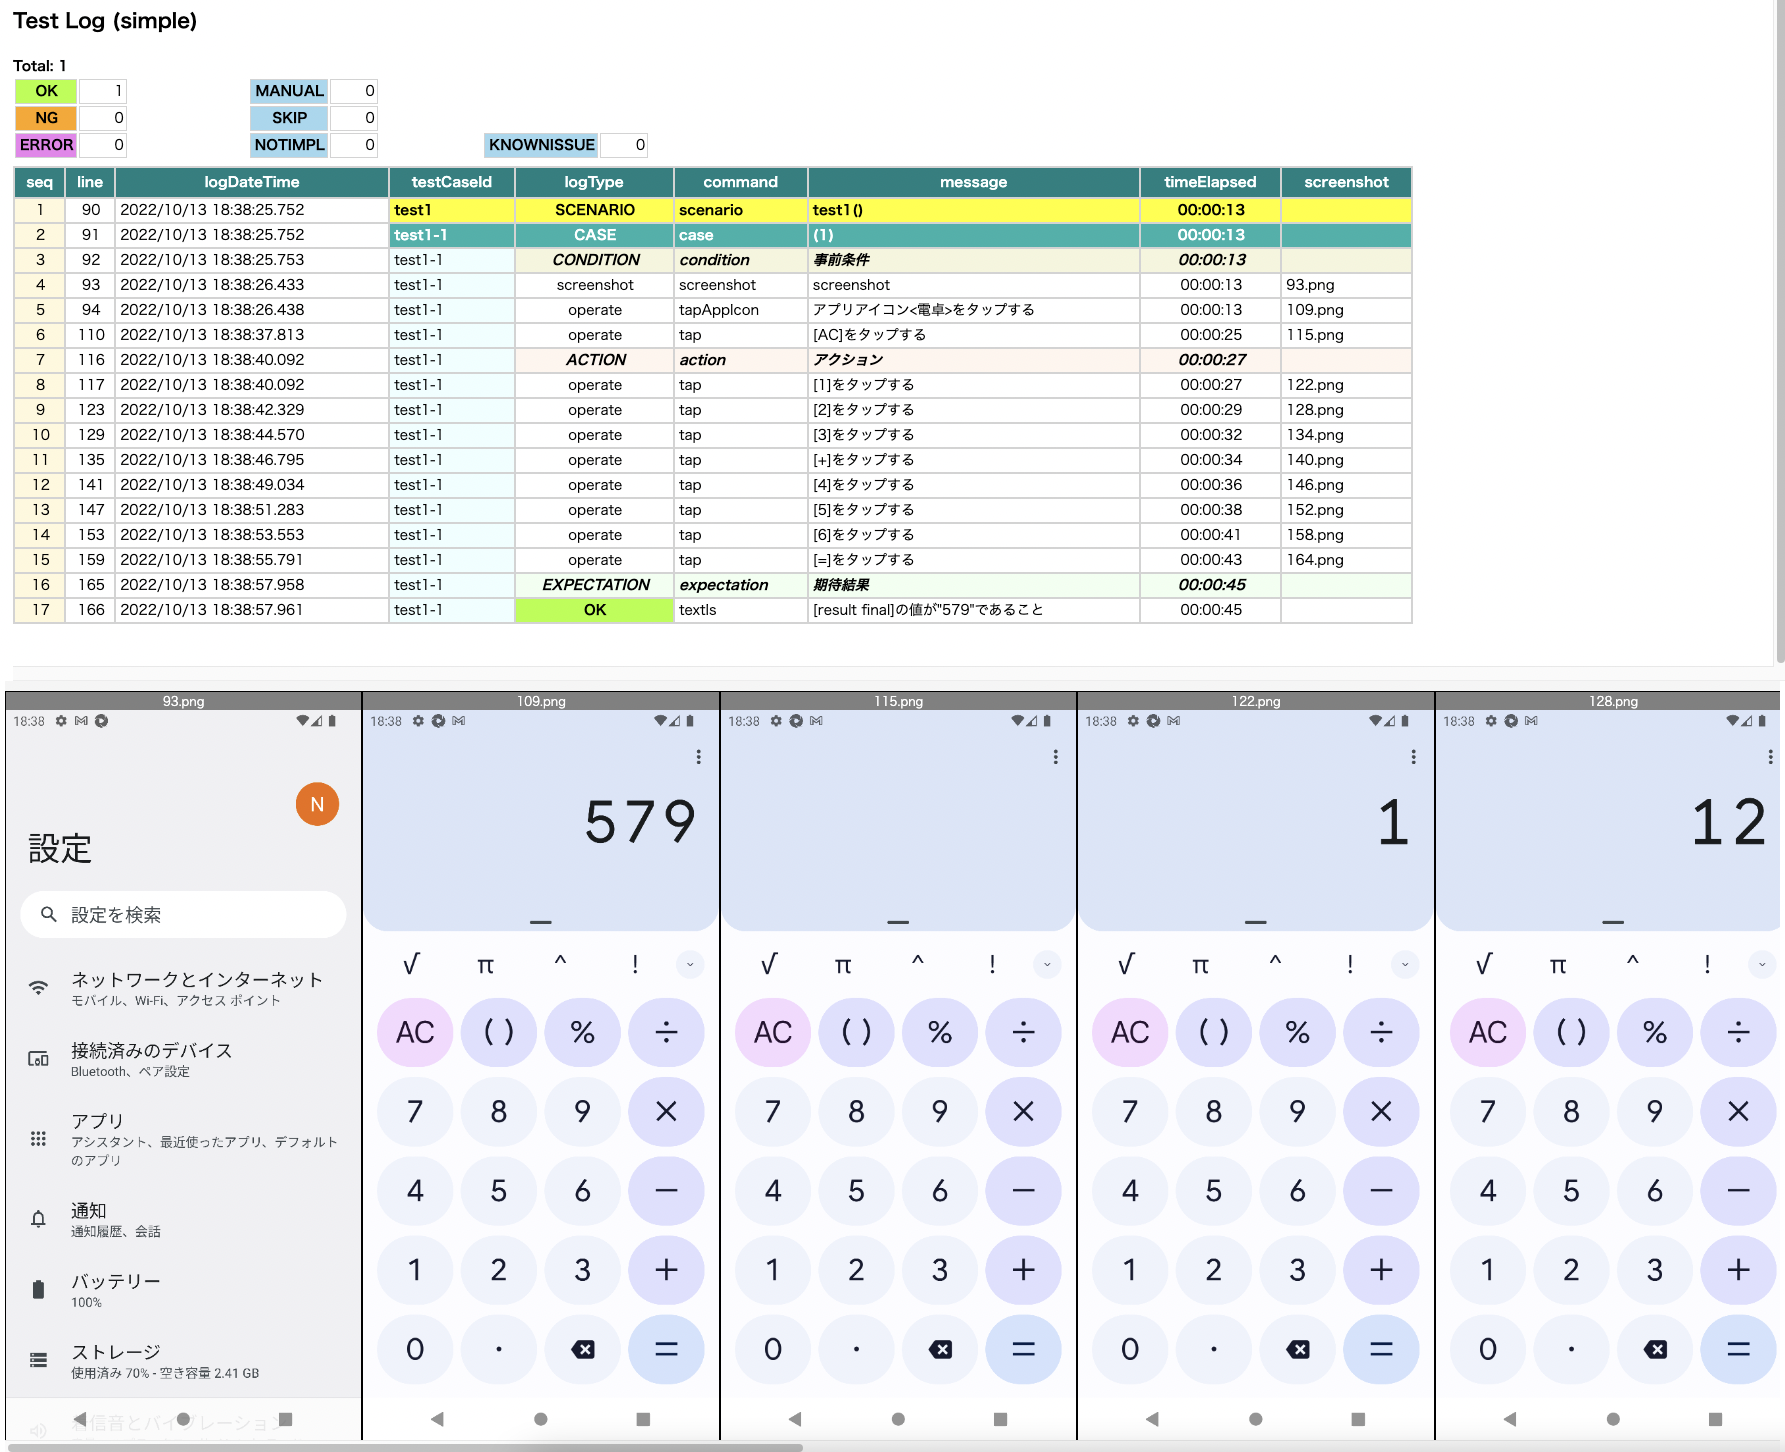
-
_Report(simple).htmlをダブルクリックします。HTMLでレポートが表示されます
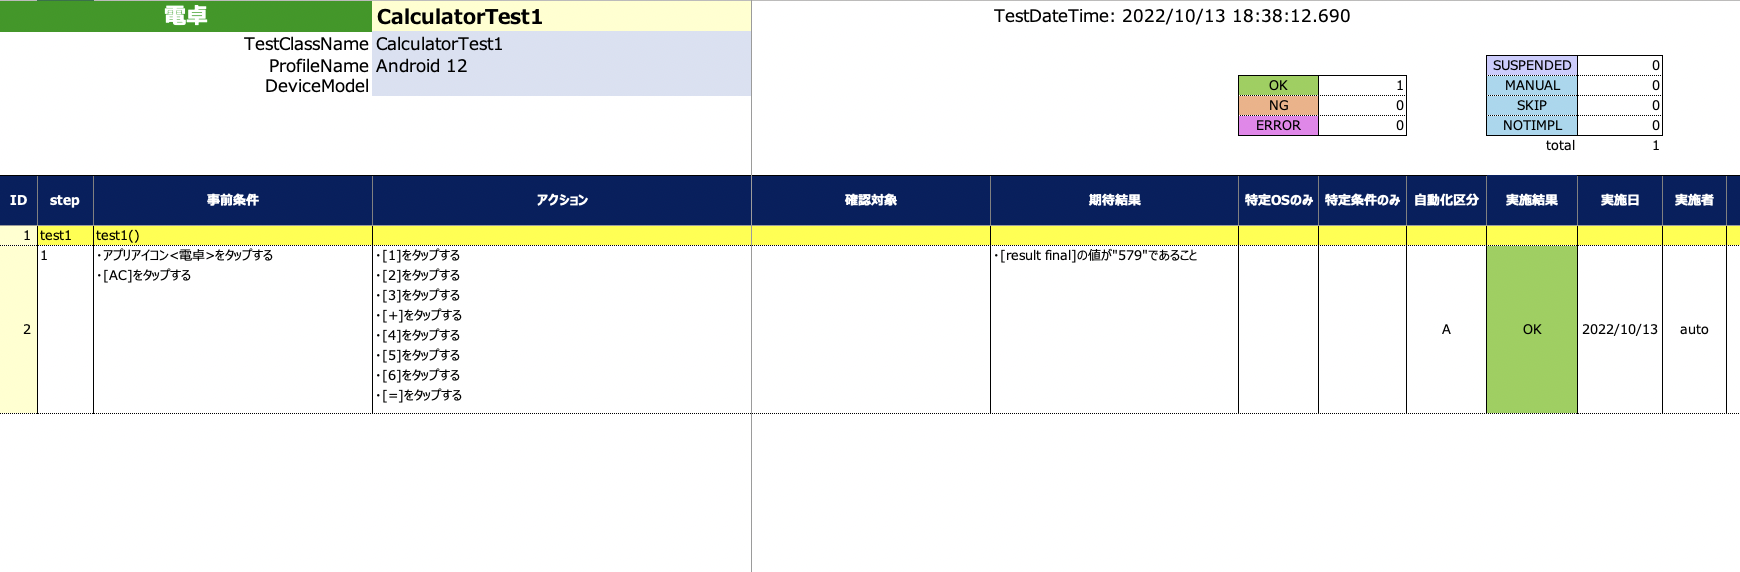
-
CalculatorTest1@a.xlsxをダブルクリックします。スプレッドシートでテスト結果を確認できます
テストコードの解説
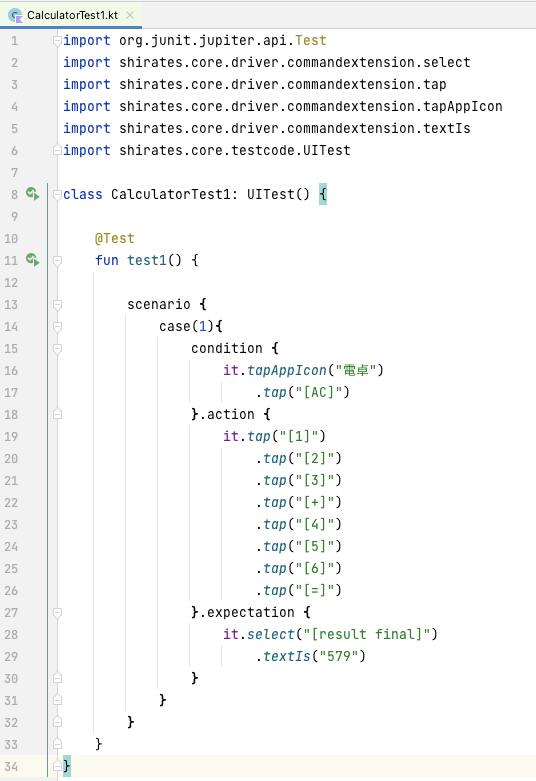
- 8: UITestクラスを継承します
- 10: JUnit 5のTestアノテーションを適用します。これによりtest1関数がテストメソッドとしてJUnit 5に認識されます
- 13: scenario関数を実行します
- 14: case関数を実行します。引数でテストケース番号を指定します
- 15: condition関数を実行します。ここには事前条件を記述します
- 18-26: action関数を実行します。電卓のキーをタップします
- 27-29: expectation関数を実行します。実行結果を検証します
このようにShiratesでは簡素な記述でテストを書くことができます。