はじめに
前回の記事Android Studioでの開発を爆速化させるテンプレート作成術 〜テンプレートのしくみ〜でAndroid Studioのテンプレートのしくみを説明しました。
今回は、実際にテンプレートを作成していきます。
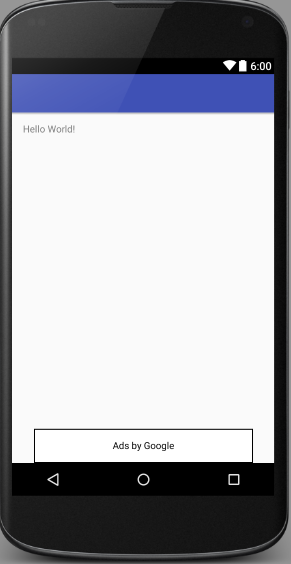
作成するのは、Adsenseのバナーを画面下部に表示するFragmentです。
いろんなアプリで、このように画面下部にバナーが出ていると思います。
よく作成するものだと思うのでテンプレート化して、作業時間の短縮をします。
テンプレートの作成
テンプレートは下記ディレクトリに作成します。
/Applications/Android Studio.app/Contents/plugins/android/lib/templates/other/AdFragment/
簡単に作成するため、BlankFragmentのテンプレートをコピーして作成します。
$ cd /Applications/Android Studio.app/Contents/plugins/android/lib/templates/other/
$ cp -r BlankFragment AdFragment
サムネイル画像ファイル名の変更
$ cd AdFragment
$ mv template_blank_fragment.png template_ad_fragment.png
template.xml
テンプレートの名前を「Ad Fragment」に変更します。
また、サムネイルの画像ファイル名を変更します。
<template
    format="5"
    revision="3"
    name="Ad Fragment"
    description="Creates a ad fragment that is compatible back to API level 4."
    minApi="7"
    minBuildApi="8">

    <category value="Fragment" />

    ...

    <thumbs>
        <thumb>template_ad_fragment.png</thumb>
    </thumbs>

    ...
ソースファイル
いつもバナー表示に使っているFargmentのコードを書きます。
package名とクラス名は、変数にしておきテンプレート使用時に置換されるようにしておきます。
package ${packageName};

import android.os.Bundle;
import android${SupportPackage}.app.Fragment;
import android.view.LayoutInflater;
import android.view.View;
import android.view.ViewGroup;

import com.google.android.gms.ads.AdListener;
import com.google.android.gms.ads.AdRequest;
import com.google.android.gms.ads.AdView;

import ${packageName}.R;

public class ${className} extends Fragment {

    private AdView mAdView;

    public ${className}() {
        super();
    }

    @Override
    public View onCreateView(LayoutInflater inflater, ViewGroup container, Bundle saveInstanceState) {
        return inflater.inflate(R.layout.fragment_ad, container, false);
    }

    @Override
    public void onActivityCreated(Bundle bundle) {
        super.onActivityCreated(bundle);

        // Gets the ad view defined in layout/ad_fragment.xml with ad unit ID set in values/strings.xml
        View rootView = getView();
        if (rootView == null) {
            return;
        }
        mAdView = (AdView) rootView.findViewById(R.id.adView);
        if (mAdView != null) {

            // Create an ad request. Check logcat output for the hashed device ID to
            // get thet ads on aphysical device. e.g.
            // "Use AdRequest.Builder.addTestDevice("ABCDEF012345") to get test ads on this device."
            AdRequest.Builder builder = new AdRequest.Builder()
                    .addTestDevice(AdRequest.DEVICE_ID_EMULATOR);

            String[] testDevices = getResources().getStringArray(R.array.test_devices);
            for (String testDevice : testDevices){
                builder.addTestDevice(testDevice);
            }
            AdRequest adRequest = builder.build();

            mAdView.setAdListener(new AdListener() {
                @Override
                public void onAdFailedToLoad(int errorCode) {
                    super.onAdFailedToLoad(errorCode);

                    // display mAdView update
                    mAdView.setVisibility(AdView.GONE);
                }
            });

            // Start loading the ad in the background.
            mAdView.loadAd(adRequest);
        }
    }

    @Override
    public void onPause() {
        if (mAdView != null) {
            mAdView.pause();
        }
        super.onPause();
    }

    @Override
    public void onResume() {
        super.onResume();
        if (mAdView != null) {
            mAdView.resume();
        }
    }

    @Override
    public void onDestroy() {
        if (mAdView != null) {
            mAdView.destroy();
        }
        super.onDestroy();
    }
}
レイアウトファイル
レイアウトファイルもいつも使っているものを記述します。
<?xml version="1.0" encoding="utf-8"?>
<RelativeLayout xmlns:android="http://schemas.android.com/apk/res/android"
    xmlns:ads="http://schemas.android.com/apk/res-auto"
    xmlns:tools="http://schemas.android.com/tools"
    android:layout_width="match_parent"
    android:layout_height="match_parent"
    tools:context="${relativePackage}.${className}">

    <com.google.android.gms.ads.AdView
        android:id="@+id/adView"
        android:layout_width="match_parent"
        android:layout_height="wrap_content"
        android:layout_centerHorizontal="true"
        ads:adSize="BANNER"
        ads:adUnitId="@string/google_ads_banner_ad_unit_id" />

</RelativeLayout>
設定ファイル
AdFragment.java.ftlでバナーのIDと指定したデバイスではテスト用のバナーに差し替える処理をしているので、それらの設定値を記述するファイルが作成されるようにしておきます。
<?xml version="1.0" encoding="utf-8"?>
<resources>
    <string name="google_ads_banner_ad_unit_id">ca-app-pub-xxxxxxxxxxxxxxxxxx</string>
    <string-array name="test_devices">
        <item>XXXXXXXXXXXXXXXXXXXXXXXXXXXXXXXX</item>
        <item>XXXXXXXXXXXXXXXXXXXXXXXXXXXXXXXX</item>
    </string-array>
</resources>
recipe.xml.ftl
recipe.xml.ftlでこれまで作成した元ファイルをプロジェクトのどの位置に配置するかを記述します。
<?xml version="1.0"?>
<recipe>

    <#if useSupport><dependency mavenUrl="com.android.support:support-v4:${buildApi}.+"/></#if>

    <!-- 必要ライブラリなので追加 -->
    <dependency mavenUrl="com.google.android.gms:play-services:8.1.0"/>

    <!-- Adsenseの設定ファイルを作成 -->
    <merge from="root/res/values/ad_config.xml.ftl" to="${escapeXmlAttribute(resOut)}/values/ad_config.xml" />
    <open file="${escapeXmlAttribute(resOut)}/values/ad_config.xml" />

    <#if includeLayout>
        <!-- レイアウトファイルの配置 -->
        <instantiate from="root/res/layout/fragment_ad.xml.ftl"
                       to="${escapeXmlAttribute(resOut)}/layout/${escapeXmlAttribute(fragmentName)}.xml" />

        <open file="${escapeXmlAttribute(resOut)}/layout/${escapeXmlAttribute(fragmentName)}.xml" />
    </#if>

    <open file="${escapeXmlAttribute(srcOut)}/${className}.java" />

    <!-- ソースファイルの配置 -->
    <instantiate from="root/src/app_package/AdFragment.java.ftl"
                   to="${escapeXmlAttribute(srcOut)}/${className}.java" />

</recipe>
以上で、テンプレートの作成は終了です。
作成したテンプレートの使用方法
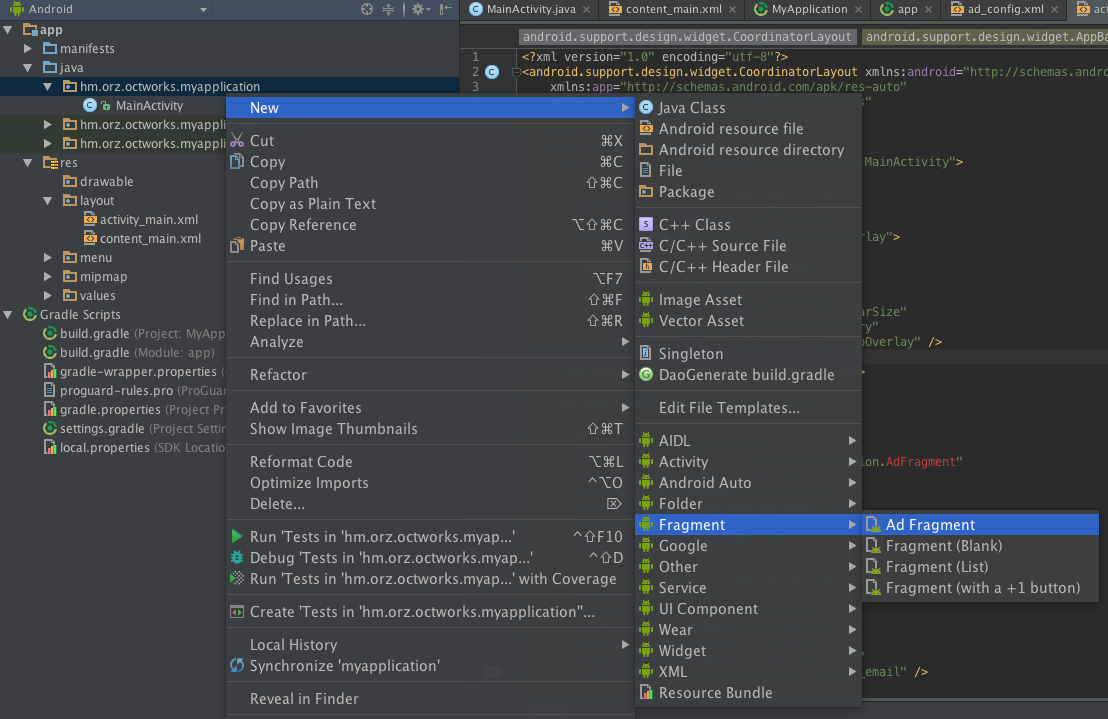
Android Studioを再起動すると作成したテンプレートが読み込まれています。
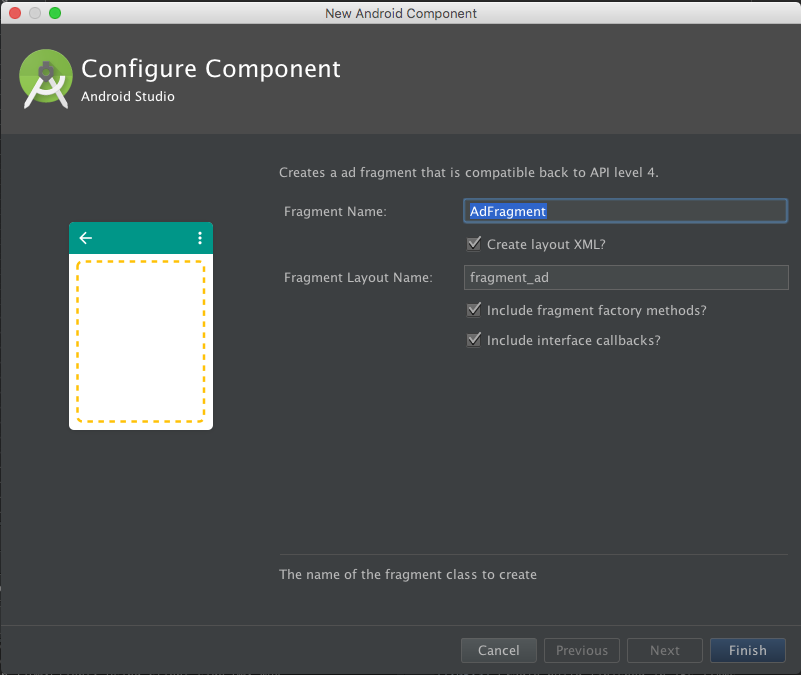
テンプレートを選択するとこのようなウィザードが出てきて名前の設定ができます。

ウィザードのFinishボタンを押すと、ファイル類がプロジェクトに追加されます。
Fragmentは、res/values/ad_config.xmlの設定をして、Activityのレイアウトファイルに下記を追加すると、表示されるようになります。
    <fragment
        android:id="@+id/adFragment"
        android:name="myapplication.AdFragment"
        android:layout_width="match_parent"
        android:layout_height="wrap_content"
        android:layout_alignParentBottom="true"
        android:layout_gravity="bottom"
        android:layout_marginTop="10dp"
        tools:layout="@layout/fragment_ad" />
まとめ
作成手順を見ればわかるように、いつも使っているファイルがある場合は、ファイル名を変えたり、パッケージ名やクラス名を変数に置き換えるだけで簡単にテンプレートを作成することができます。
ぜひ、皆さんもやってみてください。
今回作成したテンプレートの詳しいコード等は、下記レポジトリを参照してください。
https://github.com/waura/AdFragmentTemplate

