はじめに
おはようございます。こんにちは。こんばんは。
Watatakuです。
今回はVue.jsをCLI3を使ってプロジェクトを作成していきたいと思います。
前回Vue.jsについての基礎(インストール)で書かせていただいた環境構築の方法はvue-cli2での環境開発でした。
なので今回はvue-cli3を使っての環境開発の方法を紹介していきます。
因みに筆者もこちらのvue-cli3を使うようにしました。
では、やっていきましょう。
vue-cli のアンインストール
パッケージ名が旧バージョンから変更されているため、VueCLI3をインストールする前に、旧バージョンを削除してください。
$ npm uninstall vue-cli -g
Vue CLI3のインストール
Vue CLI3をインストールしましょう。
(Vue CLI3を使用するためにはNode.js8.9以上がインストールされている必要があります)
$ npm install -g @vue/cli
バージョンを確認
vue cliのバージョンが3であることを確認しましょう。
$ vue --version
3.1.1
新しいプロジェクトを作成
新しいVueアプリケーションを作成します。
(ここではアプリ名は「my−app」としています)
$ vue create my-app
すると以下の画面が表示されます。
Vue CLI v3.1.1
? Please pick a preset: (Use arrow keys)
❯ default (babel, eslint)
  Manually select features
デフォルト設定(babel/ESlint)か手動設定かを、上下キーで選択します。
簡単に済ますにはデフォルト設定が楽ですが、どのような選択が可能なのか理解するために、手動設定を選択してみましょう。
「Manually select features」を選択すると、以下の画面になります。
Vue CLI v3.1.1
? Please pick a preset: Manually select features
? Check the features needed for your project: (Press <space> to select, <a> to toggle all, <i
> to invert selection)
❯◉ Babel
 ◯ TypeScript
 ◯ Progressive Web App (PWA) Support
 ◯ Router
 ◯ Vuex
 ◯ CSS Pre-processors
 ◉ Linter / Formatter
 ◯ Unit Testing
 ◯ E2E Testing
この画面でこのプロジェクトで使いたいモジュールを選択し、選択したモジュールに応じた質問が聞かれます。
今回は全て選択してみます。
Vue CLI v3.1.1
? Please pick a preset: Manually select features
? Check the features needed for your project: Babel, TS, PWA, Router, Vuex, CSS Pre-processor
s, Linter, Unit, E2E
? Use class-style component syntax? (Y/n)
「Use class-style component syntax?」
クラススタイルでコンポーネントを書くかどうか確認されます。
基本TypeScriptベースでVue.jsの開発をする場合はクラススタイルで書くため、
今回はクラススタイルでの記述としたいため「Y」を入力します。
Vue CLI v3.1.1
? Please pick a preset: Manually select features
? Check the features needed for your project: Babel, TS, PWA, Router, Vuex, CSS Pre-processor
s, Linter, Unit, E2E
? Use class-style component syntax? Yes
? Use Babel alongside TypeScript for auto-detected polyfills? (Y/n)
「Use Babel alongside TypeScript for auto-detected polyfills?」
自動検出されたポリフィルにBabelとTypeScriptを使用するか確認されます。
こちらも使用するため「Y」を入力します。
Vue CLI v3.1.1
? Please pick a preset: Manually select features
? Check the features needed for your project: Babel, TS, PWA, Router, Vuex, CSS Pre-processor
s, Linter, Unit, E2E
? Use class-style component syntax? Yes
? Use Babel alongside TypeScript for auto-detected polyfills? Yes
? Use history mode for router? (Requires proper server setup for index fallback in production
) (Y/n)
「Use history mode for router? (Requires proper server setup for index fallback in production)」
Vue Routerのヒストリーモードを使用するかどうか確認されます。
Vue Routerのヒストリーモードを使用した場合は、history.pushState APIを使用してシングルページアプリケーションの場合でも、ページのリロード無しにURL遷移を実現することが出来ます。
簡単に説明すると、Vue Routerのデフォルトのhashモードの場合のURLは「http://a.com/#/user 」となり、historyモードの場合は完全なURLを使用することが出来て「 http://a.com/user 」となります。
今回はキチンとしたURL構造を使いたいため「Y」を選択します。
Vue CLI v3.1.1
? Please pick a preset: Manually select features
? Check the features needed for your project: Babel, TS, PWA, Router, Vuex, CSS Pre-processor
s, Linter, Unit, E2E
? Use class-style component syntax? Yes
? Use Babel alongside TypeScript for auto-detected polyfills? Yes
? Use history mode for router? (Requires proper server setup for index fallback in production
) Yes
? Pick a CSS pre-processor (PostCSS, Autoprefixer and CSS Modules are supported by default):
(Use arrow keys)
❯ SCSS/SASS
  LESS
  Stylus
「Pick a CSS pre-processor (PostCSS, Autoprefixer and CSS Modules are supported by default)」
CSSプリプロセッサに何を使うか確認されます。
「SCSS/SASS」「LESS」「Stylus」の3つから選択可能です。
今回は「SASS」を使いたいので「SCSS/SASS」を選択します。
Vue CLI v3.1.1
? Please pick a preset: Manually select features
? Check the features needed for your project: Babel, TS, PWA, Router, Vuex, CSS Pre-processor
s, Linter, Unit, E2E
? Use class-style component syntax? Yes
? Use Babel alongside TypeScript for auto-detected polyfills? Yes
? Use history mode for router? (Requires proper server setup for index fallback in production
) Yes
? Pick a CSS pre-processor (PostCSS, Autoprefixer and CSS Modules are supported by default):
SCSS/SASS
? Pick a linter / formatter config:
  TSLint
  ESLint with error prevention only
❯ ESLint + Airbnb config
  ESLint + Standard config
  ESLint + Prettier
「Pick a linter / formatter config」
Linter/Formatterの設定を確認されます。
「TSLint」「ESLint(4種類)」から選択可能です。
a
今回はTypeScriptメインで考えているため「TSLint」を選択してください。
Vue CLI v3.1.1
? Please pick a preset: Manually select features
? Check the features needed for your project: Babel, TS, PWA, Router, Vuex, CSS Pre-processor
s, Linter, Unit, E2E
? Use class-style component syntax? Yes
? Use Babel alongside TypeScript for auto-detected polyfills? Yes
? Use history mode for router? (Requires proper server setup for index fallback in production
) Yes
? Pick a CSS pre-processor (PostCSS, Autoprefixer and CSS Modules are supported by default):
SCSS/SASS
? Pick a linter / formatter config: TSLint
? Pick additional lint features: (Press <space> to select, <a> to toggle all, <i> to invert selection)
❯◉ Lint on save
 ◯ Lint and fix on commit
「pick additional lint features」
追加のLint機能の選択を確認されます。
「Lint on save(保存時のLint実行)」「Lint and fix on commit(コミット時のLint実行)」の2つの選択があります。
今回は両方ともチェック対象としたいため、「a」キーを押して両方選択します。
Vue CLI v3.1.1
? Please pick a preset: Manually select features
? Check the features needed for your project: Babel, TS, PWA, Router, Vuex, CSS Pre-processor
s, Linter, Unit, E2E
? Use class-style component syntax? Yes
? Use Babel alongside TypeScript for auto-detected polyfills? Yes
? Use history mode for router? (Requires proper server setup for index fallback in production
) Yes
? Pick a CSS pre-processor (PostCSS, Autoprefixer and CSS Modules are supported by default):
SCSS/SASS
? Pick a linter / formatter config: TSLint
? Pick additional lint features: Lint on save, Lint and fix on commit
? Pick a unit testing solution: (Use arrow keys)
❯ Mocha + Chai
  Jest
「Pick a unit testing solution」
ユニットテストのツールを何にするか確認されます。
「Mocha + Chai」と「Jest」から選択が可能です。
今回は「Jest」を選択します。
Vue CLI v3.1.1
? Please pick a preset: Manually select features
? Check the features needed for your project: Babel, TS, PWA, Router, Vuex, CSS Pre-processor
s, Linter, Unit, E2E
? Use class-style component syntax? Yes
? Use Babel alongside TypeScript for auto-detected polyfills? Yes
? Use history mode for router? (Requires proper server setup for index fallback in production
) Yes
? Pick a CSS pre-processor (PostCSS, Autoprefixer and CSS Modules are supported by default):
SCSS/SASS
? Pick a linter / formatter config: TSLint
? Pick additional lint features: Lint on save, Lint and fix on commit
? Pick a unit testing solution: Jest
? Pick a E2E testing solution: (Use arrow keys)
❯ Cypress (Chrome only)
  Nightwatch (Selenium-based)
「Pick a E2E testing solution」
E2Eテストツールに何を使うか確認されます。
「Cypress」と「Nightwatch」から選択が可能です。
今回は使い慣れているSeleniumベースの「Nightwatch」を選択します。
Vue CLI v3.1.1
? Please pick a preset: Manually select features
? Check the features needed for your project: Babel, TS, PWA, Router, Vuex, CSS Pre-processor
s, Linter, Unit, E2E
? Use class-style component syntax? Yes
? Use Babel alongside TypeScript for auto-detected polyfills? Yes
? Use history mode for router? (Requires proper server setup for index fallback in production
) Yes
? Pick a CSS pre-processor (PostCSS, Autoprefixer and CSS Modules are supported by default):
SCSS/SASS
? Pick a linter / formatter config: TSLint
? Pick additional lint features: Lint on save, Lint and fix on commit
? Pick a unit testing solution: Jest
? Pick a E2E testing solution: Nightwatch
? Where do you prefer placing config for Babel, PostCSS, ESLint, etc.? (Use arrow keys)
❯ In dedicated config files
  In package.json
「Where do you prefer placing config for Babel, PostCSS, ESLint, etc.?」
Babel、PostCSS、ESLintなどの設定をどこでするかを確認されます。
「専用の設定ファイル」か「package.json」が選択可能です。
今回は1箇所で管理したいため「package.json」を選択します。
Vue CLI v3.1.1
? Please pick a preset: Manually select features
? Check the features needed for your project: Babel, TS, PWA, Router, Vuex, CSS Pre-processor
s, Linter, Unit, E2E
? Use class-style component syntax? Yes
? Use Babel alongside TypeScript for auto-detected polyfills? Yes
? Use history mode for router? (Requires proper server setup for index fallback in production
) Yes
? Pick a CSS pre-processor (PostCSS, Autoprefixer and CSS Modules are supported by default):
SCSS/SASS
? Pick a linter / formatter config: TSLint
? Pick additional lint features: Lint on save, Lint and fix on commit
? Pick a unit testing solution: Jest
? Pick a E2E testing solution: Nightwatch
? Where do you prefer placing config for Babel, PostCSS, ESLint, etc.? In package.json
? Save this as a preset for future projects? (y/N)
「Save this as a preset for future projects?」
今回の設定内容を次回以降のプロジェクトで使用するために保存しておくかを確認されます。
今回は再利用可能なように保存しますので「Y」を選択します。
? Save this as a preset for future projects? Yes
? Save preset as:
「Save preset as」
どこに保存するか確認されます。
今回は「~/test」とします。
Vue CLI v3.1.1
? Please pick a preset: Manually select features
? Check the features needed for your project: Babel, TS, PWA, Router, Vuex, CSS Pre-processor
s, Linter, Unit, E2E
? Use class-style component syntax? Yes
? Use Babel alongside TypeScript for auto-detected polyfills? Yes
? Use history mode for router? (Requires proper server setup for index fallback in production
) Yes
? Pick a CSS pre-processor (PostCSS, Autoprefixer and CSS Modules are supported by default):
SCSS/SASS
? Pick a linter / formatter config: TSLint
? Pick additional lint features: Lint on save, Lint and fix on commit
? Pick a unit testing solution: Jest
? Pick a E2E testing solution: Nightwatch
? Where do you prefer placing config for Babel, PostCSS, ESLint, etc.? In package.json
? Save this as a preset for future projects? Yes
? Save preset as: ~test
? Pick the package manager to use when installing dependencies: (Use arrow keys)
❯ Use Yarn
  Use NPM
「Pick the package manager to use when installing dependencies」
インストール時に使用するパッケージマネージャに何を使うか確認されます。
「Yarn」あるいは「NPM」が選択可能です。
**「Successfully created project my-app.」**が表示されたら完了です
アプリケーションの起動
ディレクトリを移動してサーバーを起動してみましょう。
旧バージョンでは「npm run dev」でサーバー起動でしたが、Vue CLI3からは「npm run serve」に変わっているので注意してください。
$ cd my-app
$ npm run serve
その後にhttp://localhost:8080にアクセスして下記画面が表示されれば成功。
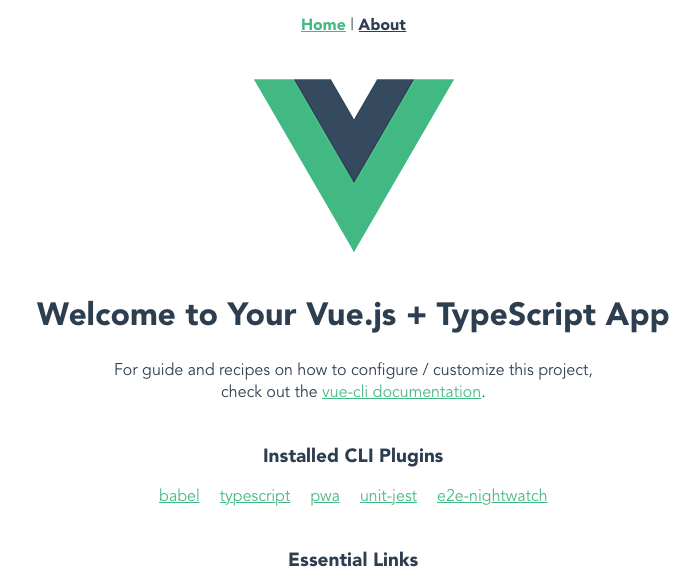
お疲れ様でした。
最後に
最後まで読んでいただきありがとうございました。
もし、間違い等、アドバイス、ご指摘等有れば教えていただけたら幸いです。