OpenSearch はオープンソースのデータ検索および分析スイートであり、Amazon OpenSearch Service は AWS 上での OpenSearch のデプロイや運用を容易にしてくれるサービスだ。
そして、Amazon OpenSearch Serverless はスケーリングやインフラ管理を自動化し、従量課金モデルでコストを最適化できるサーバーレスサービスだ。
背景
OpenSearch Serverless は、Amazon Bedrock ナレッジベースのベクトルストアとして利用していた。コンソールで選択するだけで自動作成されるため、特に意識したことはなかった。
そこで、CDK を使うことで、どのように作成・管理できるのか確かめたかった。
今回は
- CDK プロジェクトの作成
- OpenSearch Serverless のデプロイ
- ダッシュボードの操作
をやってみた。
CDK プロジェクトの作成
作業ディレクトリを作成し、移動する。
mkdir opensearch-serverless-sample && cd opensearch-serverless-sample
CDK プロジェクトを作成する。
cdk init app --language=typescript
opensearch-serverless-sample/
├── ...
├── cdk.json
├── lib
│   └── opensearch-serverless-sample-stack.ts
├── ...
cdk init で作成されるファイルの内、lib/opensearch-serverless-sample-stack.ts と cdk.json を以下のように変更する。
import { CfnOutput, Stack, StackProps } from "aws-cdk-lib";
import {
  CfnAccessPolicy,
  CfnCollection,
  CfnSecurityPolicy,
} from "aws-cdk-lib/aws-opensearchserverless";
import { Construct } from "constructs";

export class OpensearchServerlessSampleStack extends Stack {
  constructor(scope: Construct, id: string, props?: StackProps) {
    super(scope, id, props);

    const collectionName = "collection";

    const encryptionSecurityPolicy = new CfnSecurityPolicy(
      this,
      "EncryptionSecurityPolicy",
      {
        name: "encryption-policy",
        type: "encryption",
        policy: JSON.stringify({
          Rules: [
            {
              ResourceType: "collection",
              Resource: [`collection/${collectionName}`],
            },
          ],
          AWSOwnedKey: true,
        }),
      }
    );

    const networkSecurityPolicy = new CfnSecurityPolicy(
      this,
      "NetworkSecurityPolicy",
      {
        name: "network-policy",
        type: "network",
        policy: JSON.stringify([
          {
            Rules: [
              {
                ResourceType: "dashboard",
                Resource: [`collection/${collectionName}`],
              },
            ],
            AllowFromPublic: true,
          },
        ]),
      }
    );

    const dashboardUserOrRoleArn = this.node.tryGetContext('dashboardUserOrRoleArn');

    if (!dashboardUserOrRoleArn) {
      throw new Error("dashboardUserOrRoleArn required!");
    }

    const accessPolicy = new CfnAccessPolicy(this, "AccessPolicy", {
      name: "access-policy",
      type: "data",
      policy: JSON.stringify([
        {
          Rules: [
            {
              ResourceType: "collection",
              Resource: [`collection/${collectionName}`],
              Permission: [
                "aoss:*",
              ],
            },
            {
              ResourceType: "index",
              Resource: [`index/${collectionName}/*`],
              Permission: [
                "aoss:*",
              ],
            },
          ],
          Principal: [dashboardUserOrRoleArn],
        },
      ]),
    });

    const collection = new CfnCollection(this, "Collection", {
      name: collectionName,
      type: "SEARCH",
      standbyReplicas: "DISABLED",
    });
    collection.addDependency(encryptionSecurityPolicy);
    collection.addDependency(networkSecurityPolicy);
    collection.addDependency(accessPolicy);

    new CfnOutput(this, "OpenSearchDashboardEndpoint", {
      value: collection.attrDashboardEndpoint,
    });
  }
}
コレクションが作成される前に、暗号化ポリシーが作成されている必要がある。これは collection.addDependency(encryptionSecurityPolicy) を用いて実現している。
参考:class CfnCollection (construct)
You must create a matching encryption policy in order for a collection to be created successfully. You can specify the policy resource within the same CloudFormation template as the collection resource if you use the DependsOn attribute. ... Otherwise the encryption policy must already exist before you create the collection.
{
  ...,
  "context": {
    ...,
    "dashboardUserOrRoleArn": "<your-user-or-role-arn>"
  }
}
dashboardUserOrRoleArn は OpenSearch ダッシュボードを使用するユーザーまたはロールの ARN だ。
OpenSearch Serverless のデプロイ
cdk bootstrap
cdk deploy
✨ Total time: 270.19s
デプロイ完了後、CloudFormation コンソールに OpensearchServerlessSampleStack が作成されている。出力 タブでダッシュボードの URL を確認できる。
URL をクリックして OpenSearch ダッシュボードにアクセスする。
ダッシュボードを操作してみる
今回は チュートリアル: Amazon OpenSearch Serverless の開始方法 を参考にダッシュボードを操作してみた。
Dev Tools を開く
Explore on my own をクリックする。

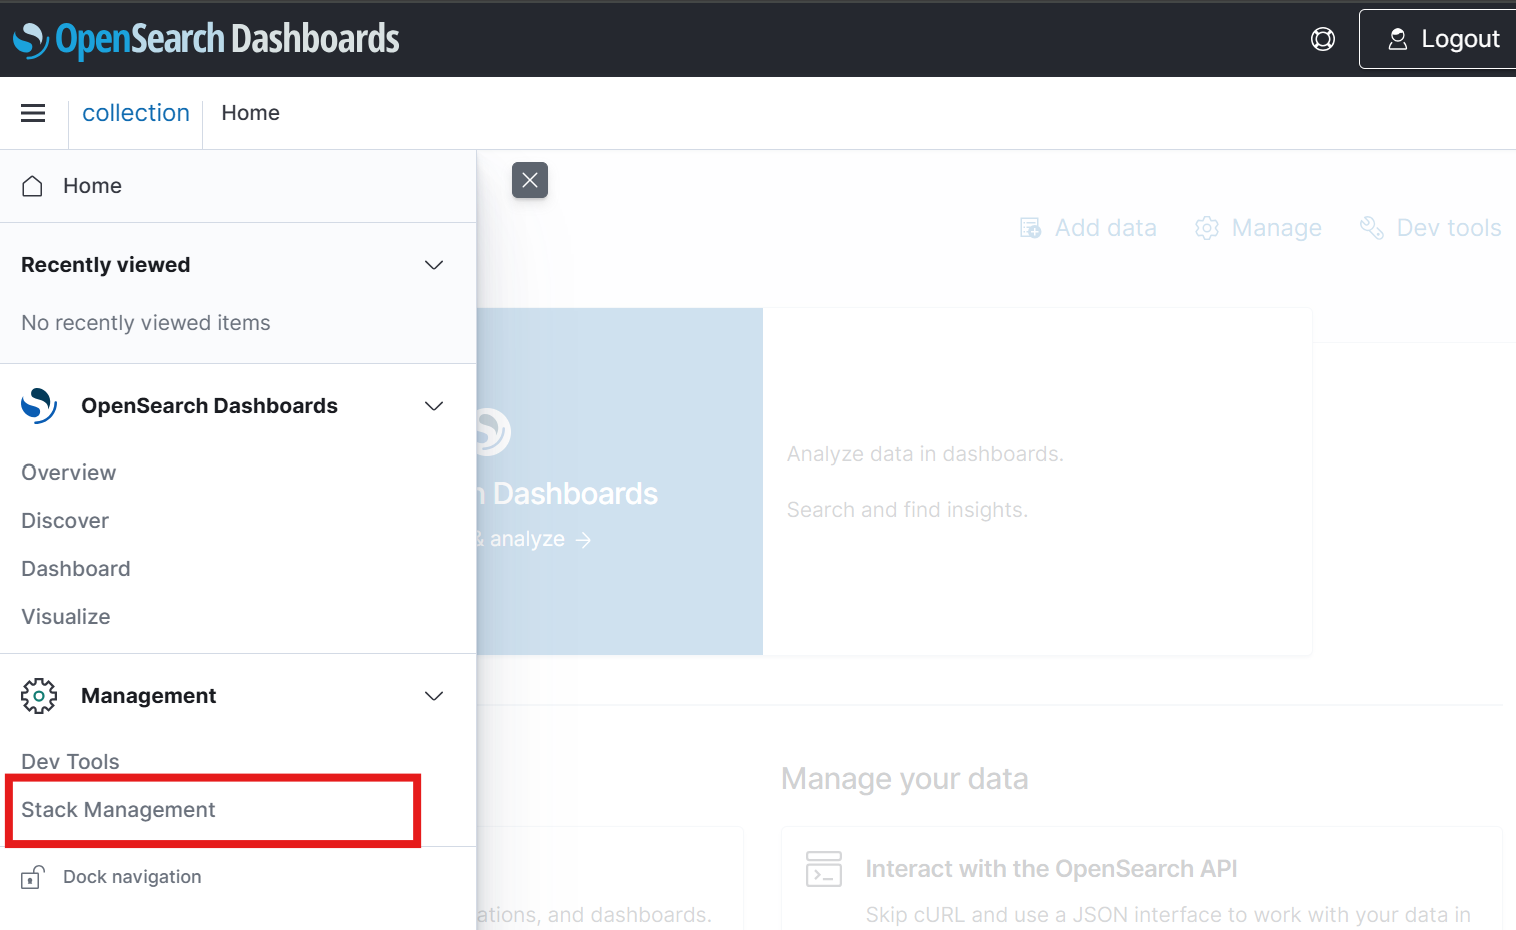
メニューを開き、Dev Tools をクリックする。
Console が表示される。左側が入力欄、右側が出力結果だ。
インデックスを作成
以下のリクエストを送信すると、「movies-index」というインデックスが作成される。
PUT movies-index
GET で確認してみる。
GET movies-index
ドキュメントをインデックス
以下のリクエストを送信すると、「movies-index」にドキュメントがインデックスされる。
PUT movies-index/_doc/1
{
  "title": "Shawshank Redemption",
  "genre": "Drama",
  "year": 1994
}
もう一度 GET movies-index する。
「movies-index」の mappings に
- properties
- title
- genre
- year
が追加されているのがわかる。
データ検索
データ検索を行うには、まずインデックスパターンを設定する必要がある。
インデックスパターンの設定
メニューの Stack Management をクリックする。
Index Patterns、Create index pattern の順にクリックする。
「movies」と入力し、Next step をクリックする。
Create index pattern をクリックする。
ドキュメントの項目を確認できるようになる。
Discover
ダッシュボードの Discover ページでは、GUI 操作で検索できる。
Search API
コンソールで、Search API を使用した検索を試すことも可能だ。
GET /movies-index/_search
{
  "query": {
    "match": {
      "genre": "Drama"
    }
  }
}
インデックスの削除
DELETE movies-index
GET movies-index すると「404 - Not Found」が返ってくる。
クリーンアップ
cdk destroy
✅ OpensearchServerlessSampleStack: destroyed
感想
CDK による作成を通して、OpenSearch Serverless を構成するリソースを知ることができた。これまで Bedrock ナレッジベース作成時に自動作成されていた各種のポリシーや設定を確認する機会となり、興味深かった。CDK の使用を通して、インフラ構築をコードベースで学べる良さを感じた。
気になったこと
Infrastructure Composer を見ても、リソース間の関連性が良くわからない。

Infrastructure Composer 上で関連性が見えにくい理由は、リソース間の依存関係を CfnResource.addDependency で定義していることにある。
Infrastructure Composer を見る機会がどれほどあるかはわからないが、CDK や CloudFormation テンプレートが長大になると、依存関係を追いにくくなるのかなと感じた。
こうした場合は、CloudFormation テンプレートの DependsOn を活用して依存関係を追う必要がありそうだ。
それにしても、映画が見たくなった。OpenSearch Serverless のチュートリアルで「ショーシャンクの空に」がサンプルデータとして登場したせいかもしれない。


