この記事は Web グラフィックス Advent Calendar 2020 の3日目の記事です。
はじめに
グラフィックス技術の情報ではないのですが、Webでグラフィックス系の開発をしているときにマウスやタッチの入力はよく使いますよね。
いまさらながらマウス、タッチ、ペン入力を扱うことのできるPointer Eventsを使ってみました。恥ずかしながら、つい最近までこのイベントの存在を知らず、マウスとタッチを統合して扱う処理を頑張って実装していました。
しかし調べてみると若干調べづらいといいますか、検索するとcssのpointer-eventsの情報が出てきたり、まさにPointer Eventsのことを扱った記事が上位に出てこなかったり(MDNがあるけど量がすごいし…)、かなり前の記事だったりしてけっこう迷いました。
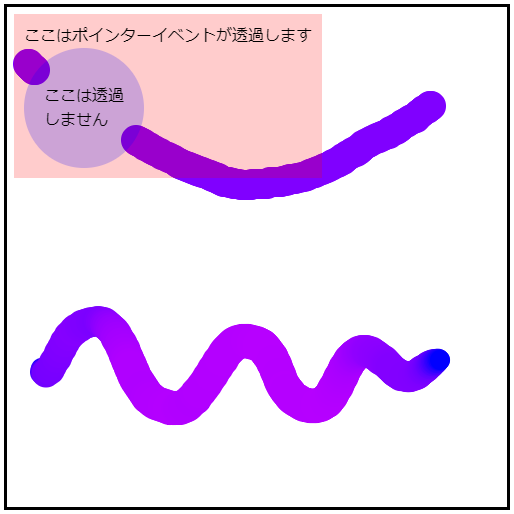
そこで簡単なサンプルを作ってみました。マウス、タッチ、ペン(筆圧あり)でcanvasに線を描画します。ついでにpointer-eventsによるイベントの透過も便利ですので使用しました。
See the Pen RwGaNWe by 柏崎ワロタロ (@warotarock) on CodePen.
※Chrome推奨。ブラウザによっては筆圧が効かない場合があります。
index.html
<!DOCTYPE html>
<html lang="ja">
<head>
    <meta charset="utf-8" />
    <title>pointerイベントのサンプル</title>
    <style>

        .container {
            position: relative;
        }

        .pointer-transparent {
            position: absolute;
            left: 10px;
            top: 10px;
            padding: 10px;
            background-color: rgba(255, 0, 0, 0.2);
            pointer-events: none;
        }

        .pointer-target {
            width: 100px;
            height: 100px;
            border-radius: 50%;
            padding: 10px;
            background-color: rgba(0, 0, 255, 0.2);
            pointer-events: auto;
            display: flex;
            align-items: center;
            justify-content: center;
        }

        #mainCanvas {
            border: solid;
            touch-action: none;
        }

    </style>
    <script>

        window.addEventListener('load', () => {

            const mainCanvas = document.getElementById('mainCanvas')

            mainCanvas.width = 500
            mainCanvas.height = 500

            const context = mainCanvas.getContext('2d')

            function log(tag, e) {

                console.log(tag, e.pointerId, e.offsetX, e.offsetY, e.buttons, e.pressure)
            }

            function drawPointer(e) {

                if (e.buttons != 0 || e.pressure > 0.0) {

                    const x = e.offsetX
                    const y = e.offsetY
                    const radius = 10.0 + e.pressure * 10.0
                    const red = e.pressure * 255
                    context.fillStyle = `rgba(${red}, 0, 255, 1.0)`
                    context.beginPath()
                    context.moveTo((x + radius) , y)
                    context.arc(x , y , radius , 0 , Math.PI * 2)
                    context.closePath()
                    context.fill()
                }

            }

            mainCanvas.addEventListener('pointerdown', (e) => {

                log('pointerdown', e)

                drawPointer(e)

                e.preventDefault()
            })

            mainCanvas.addEventListener('pointermove', (e) => {

                log('pointermove', e)

                drawPointer(e)

                e.preventDefault()
            })

            mainCanvas.addEventListener('pointerup', (e) => {

                log('pointerup', e)

                e.preventDefault()
            })
        })

    </script>
</head>
<body>
    <div class="container">
        <canvas id="mainCanvas"></canvas>
        <div class="pointer-transparent">
            ここはポインターイベントが透過します
            <div class="pointer-target"><div>ここは透過<br>しません</div></div>
        </div>
    </div>
</body>
</html>
まとめ
以上です(おい)
ちなみにCodePenも初めて使ってみました。Web界隈もどんどん便利になってますなぁ。