この記事は WebXR ( WebVR/WebAR ) Advent Calendar 2022 の5日目になります。
VR機器向けのWeb APIであるWebXRは、さまざまなモジュールが新しく登場しています。
特にMetaQuestのブラウザは新しい仕様のキャッチアップに積極的で、先行実装が進んでいます。
ここではそんな中から、パススルーと組み合わせたMRモード(immersive-ar)で威力を発揮する WebXR Plane Detection Module を試してみます。
ターゲットは2022年12月時点で、MetaQuest1/2/proのMetaQuestブラウザです。
Plane Detection Moduleとは
Plane Detection Moduleは、MRにおいてリアル世界の壁や床や机などの平面を検出するAPIです。
現状Questでは、検出といっても自動的に検出するものではなく、ガーディアンの設定でユーザが設定した部屋の壁や机を取得することができます。
W3Cではまだ Community Group Draft Reportの段階ですが、Questでは先行実装されて使えるようになっています。
仕様については以下を参照。
API概要
まず準備として、VRSessionの初期化時にオプションとして機能要求をしておく必要があります。
具体的には requestSessionでrequiredFeaturesのフラグに"requiredFeatures"を加えます。
const session = await navigator.xr.requestSession("immersive-ar", {
  requiredFeatures: ["plane-detection"]
});
この状態でVRセッションが開始されると、描画ループの XRFrame
中に detectedPlanes という属性が取得できるようになります。detectedPlanes は XRPlane のcollectionになっているので、この中に壁や床のどれかの平面が含まれることになります。
const planes = frame.detectedPlanes
XRPlaneには、メッシュの座標情報の polygon と、ワールド座標に変換するための planeSpace が含まれます。
XRPlaneをワールド座標に変換するには、referenceSpaceを使ってXRPoseを取得します。この辺りはヘッドやコントローラの座標を取得する方法と同じです。
planes.forEach(p=>{
    const polygon = p.polygon
    const pose = frame.getPose(p.planeSpace, xrReferenceSpace)
    ...
})
polygonには各面のメッシュ、pose には quaternion として面の向きが得られます。
あとはこれを描画するなり判定に使うことができます。
Questで取れるplaneに関しては、現状1つのplaneは単純な矩形のメッシュになっているようです。
注意点としては、このplanesはVRセッションが始まってすぐに有効になるものではなく、安定するまでに時間がかかるということです。なので、一定時間後に取得するか、安定するまで繰り返し取得する必要があります。
planeの種類の問題
以上のAPIでは、面のセットが取得できるだけで、それが床なのか壁なのかという種別の情報は持っていません。また、取得できる面の順番も順不同で毎回変わります。したがって面の向きや位置からどの種類の面なのかを推測する必要があります。
現状Questで取れる面は、壁か床か天井か、それ以外の机やソファで、全て水平か垂直になっているので、その情報をもとに判別するのが良さそうです。
A-Frame componentによる実装
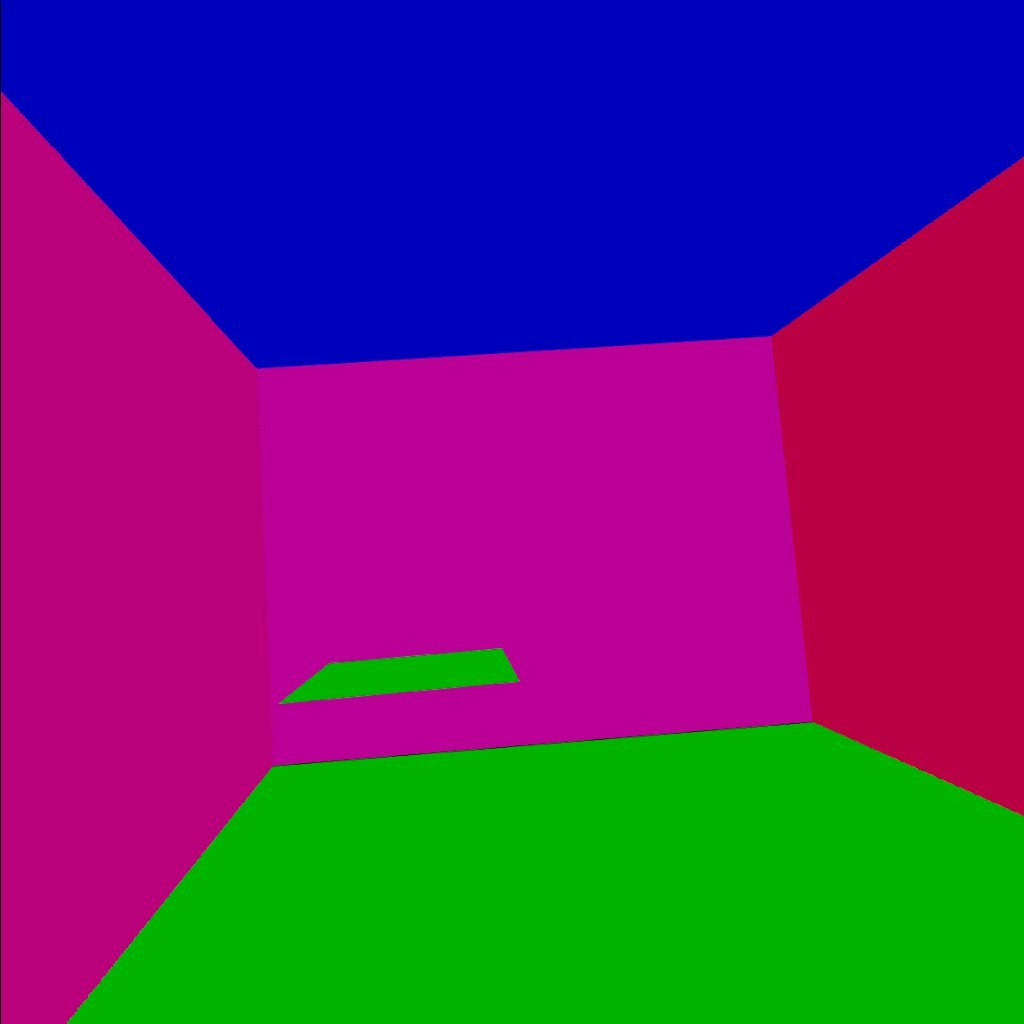
以上を踏まえて、実際にA-Frameのcompnentとして検出された面を表示するものを作ってみました。
若干手抜きで、VR session開始1秒後に1回だけplaneを取得して表示しています。
また、面の向きで色分けしています。
上のリンク先のサンプルは、ブラウザIDE Polybaasで作成されています。左のソースペインにはA-Frameのタグが表示されていますが、タブをcomponentに切り替えるとcomponentのソースを見ることができます。
componentの登録部分のソースの抜粋です。
// WebXR Plane Detection Module sample component
AFRAME.registerComponent('pdetect',{
	init:function() {
		const sc =  this.el.sceneEl
		// set option feature
		sc.setAttribute("webxr","optionalFeatures:plane-detection")
		this.start = false
		sc.addEventListener("enter-vr", ev=>{
			this.pf = 0
			setTimeout(ev=>{
				this.start = true
			},1000)
		})

	},
	update:function(old) {
	},
	tick:function(time,dur) {
		if(!this.start) return
		const fr =  this.el.sceneEl.frame
		if(!fr) return
		// 検知された面
		const p = (fr.detectedPlanes)
		if(!p) return
		if(p.size==0) return
		//最初の一回だけ(手抜き)
		if(this.pf++>0) return
		const ref =  this.el.sceneEl.renderer.xr.getReferenceSpace()
		const pl = []
		p.forEach(o=>{
			//面の向きのquaternionの取得
			const planePose = fr.getPose(o.planeSpace, ref)
			pl.push([o.polygon,planePose.transform.matrix])
		})
		setplanes(this.el.object3D,pl)
	},
})

//面の描画
let col = 0xf00000 ;
function setplanes(to,pl) {
	to.children = []
	pl.forEach(p=>{
		const poly = p[0]
		const geometry = new THREE.BufferGeometry();
		const vertices = new Float32Array( [
			poly[0].x,poly[0].y,poly[0].z,
			poly[1].x,poly[1].y,poly[1].z,
			poly[2].x,poly[2].y,poly[2].z,

			poly[2].x,poly[2].y,poly[2].z,
			poly[3].x,poly[3].y,poly[3].z,
			poly[4].x,poly[4].y,poly[4].z,
			])
		geometry.setAttribute( 'position', new THREE.BufferAttribute( vertices, 3 ) );
		const material = new THREE.MeshBasicMaterial( { color: col,opacity:0.5,side:THREE.FrontSide } );
		const mesh = new THREE.Mesh( geometry, material );
		col += 32
		mesh.matrix.elements = p[1];
    mesh.matrix.decompose(mesh.position, mesh.rotation, mesh.scale);
    to.add(mesh)
		console.log(mesh.position)
		console.log(mesh.rotation)
		//面の向きで色を変える
		if(Math.abs(mesh.rotation.x)<0.01) mesh.material.color = new THREE.Color(0x00f000)
		if(Math.abs(Math.abs(mesh.rotation.x)-Math.PI)<0.01) mesh.material.color = new THREE.Color(0x0000f0)
	})
}
実際にガーディアン設定で、部屋と机の位置が設定されてる状態で、次のようになりました。QuestのARモードでは、半透明に表示されています。