やること
APIを作成してCRUD(create,read,update,delete)を行う。
環境
Ruby on Rails 5.2.4
Ruby 2.5.1
必要なツール
POST MAN (apiにリクエストを投げた時のレスポンス検証用)
DBbrowser for SQlite (tableの内容を確認)
これらのツールの詳しい使い方は、検索すればすぐに分かるので各自で確認お願いします。どちらも無料のツールです。
実際にやってみましょう
1.下準備
まず、任意のディレクトリに移動し、API作成用のAPPを作っていきましょう。
$ rails new my_api_app --api
$ cd my_api_app
rails サーバーを起動しましょう。
$ rails s
=> Booting Puma
=> Rails 5.2.4.3 application starting in development
=> Run `rails server -h` for more startup options
Puma starting in single mode...
* Version 3.12.6 (ruby 2.5.1-p57), codename: Llamas in Pajamas
* Min threads: 5, max threads: 5
* Environment: development
* Listening on tcp://localhost:3000
モデルを作成していきます。
$ rails g model Article title:string body:text
Running via Spring preloader in process 43671
      invoke  active_record
      create    db/migrate/20200616011345_create_articles.rb
      create    app/models/article.rb
      invoke    test_unit
      create      test/models/article_test.rb
      create      test/fixtures/articles.yml
マイグレートしましょう!
$ rails db:migrate
== 20200616011345 CreateArticles: migrating ===================================
-- create_table(:articles)
   -> 0.0011s
== 20200616011345 CreateArticles: migrated (0.0012s) ==========================
データベースに検証用のデータを作成するためにFakerを使用していきます。
group :development do
  gem 'faker'
bundle install しましょう。
$ bundle install
seedファイルに以下のような感じで記載します。
5.times do
  Article.create({
    title: Faker::Book.title,
    body: Faker::Military.navy_rank
    })
end
先ほど記載したデータを実際に作成していきます。
$ rails db:seed
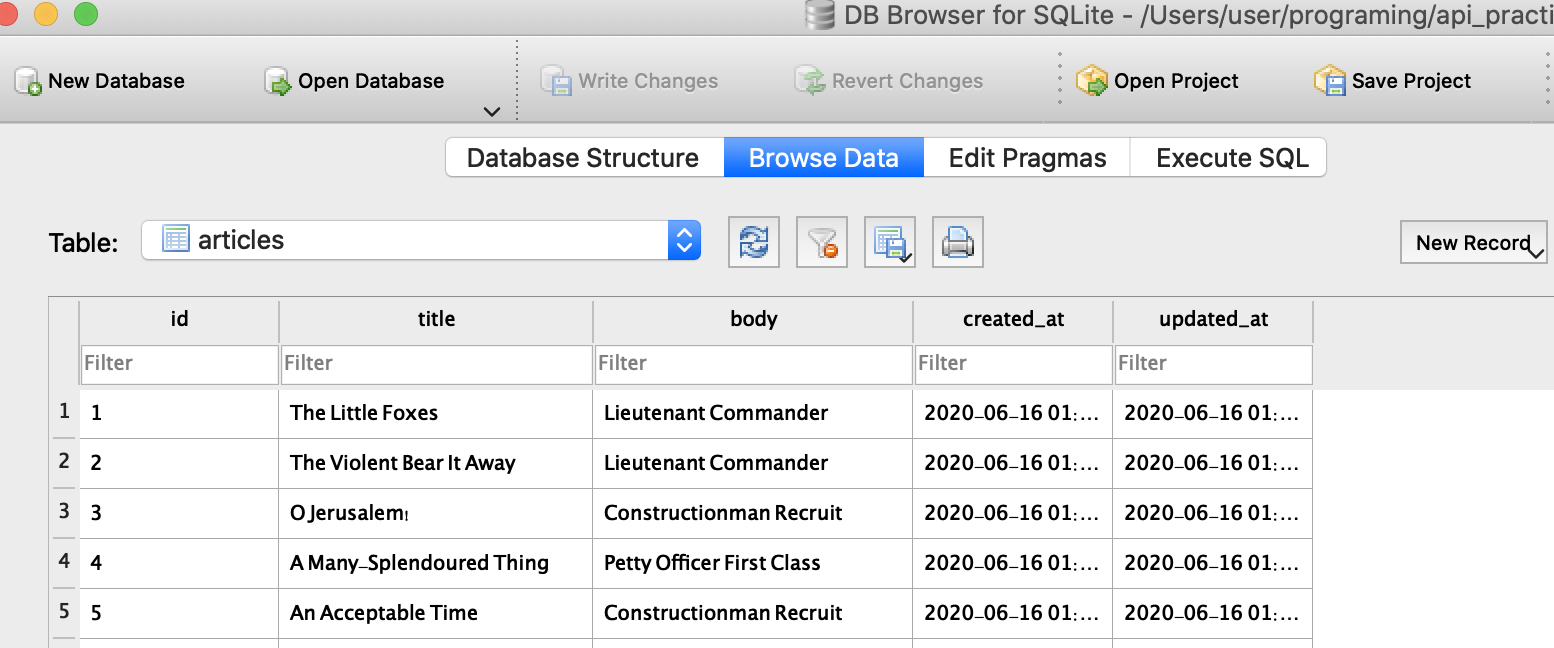
DBbrowser for SQliteで確認すると以下のように自動で検証用のデータが作成されました。
以下のような感じでコントローラを作っていきます。

これで下準備は終了です。
2. API作成
では、コードを書いていきましょう!
先ほど作ったコントローラに以下の通り記述します。
module Api
  module V1
    class ArticlesController < ApplicationController
      def index
        articles = Article.order('created_at DESC');
        render json: {status: 'SUCCESS', message: 'Loaded Article', data: articles}, status: :ok
      end
    end
  end
end
ここでは、seedで作成したデータベースの内容をjson形式で作成時間順に降順で並べていくように記載しています。
次にルーティングを作成していきます。
Rails.application.routes.draw do
  namespace 'api' do
    namespace 'v1' do
      resources :articles
    end
  end
end
ではルーティングの内容を確認しましょう。
$ rails routes
                   Prefix Verb   URI Pattern                                                                              Controller#Action
          api_v1_articles GET    /api/v1/articles(.:format)                                                               api/v1/articles#index
                          POST   /api/v1/articles(.:format)                                                               api/v1/articles#create
           api_v1_article GET    /api/v1/articles/:id(.:format)                                                           api/v1/articles#show
                          PATCH  /api/v1/articles/:id(.:format)                                                           api/v1/articles#update
                          PUT    /api/v1/articles/:id(.:format)                                                           api/v1/articles#update
                          DELETE /api/v1/articles/:id(.:format)                                                           api/v1/articles#destroy
しっかりとルーティングが作成されていますね!
次にPOST MANでリクエストを投げてみます。
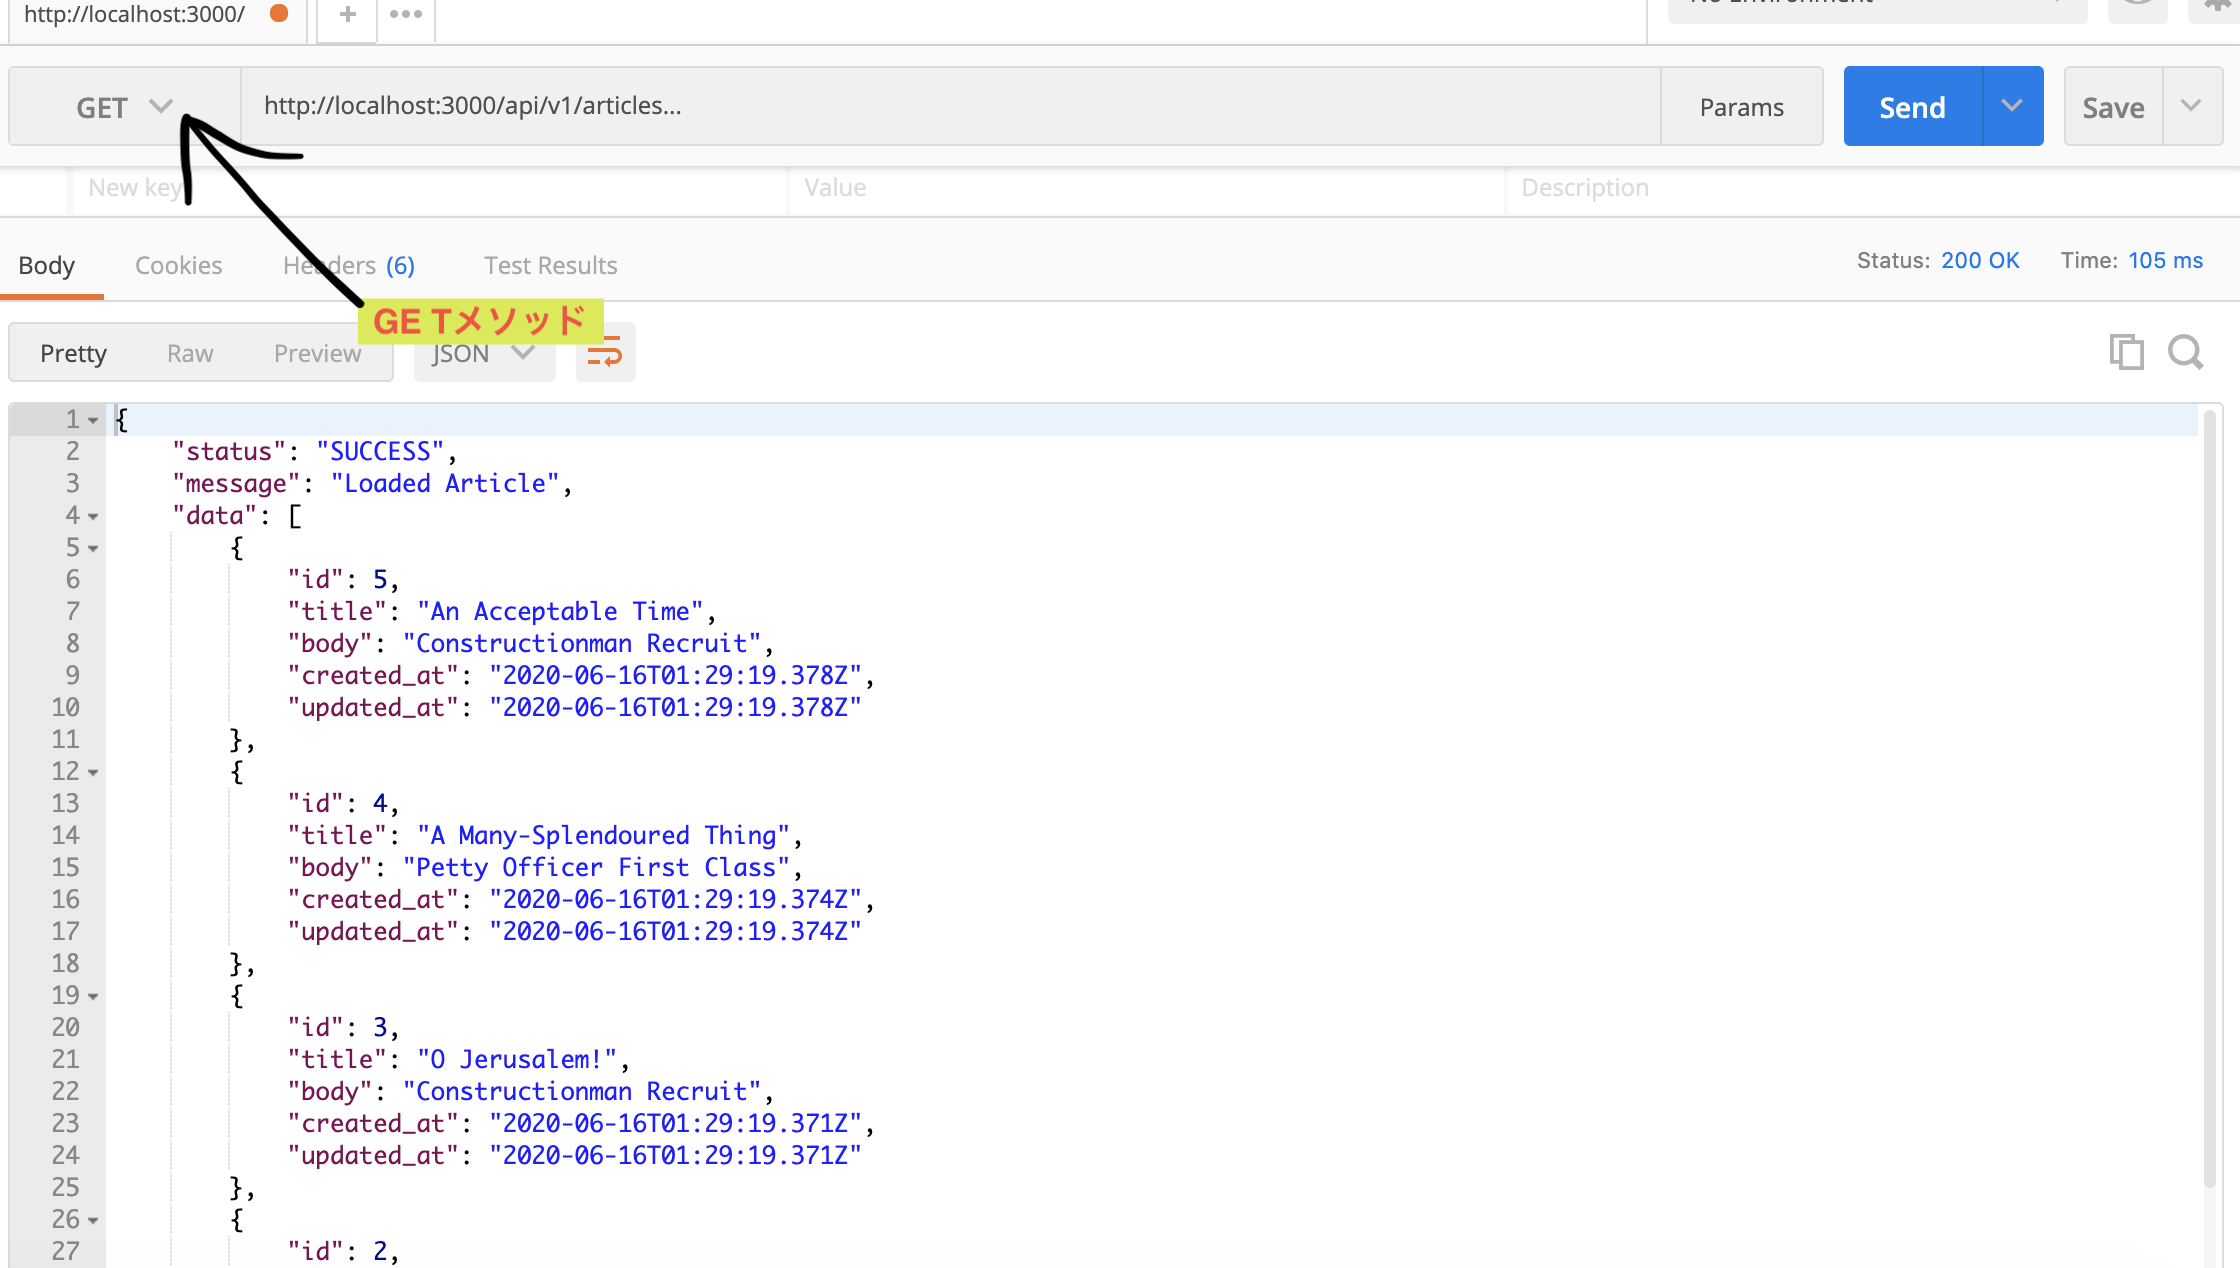
GETメソッドで
と入力し、send をクリックすると以下の通りレスポンスがrails serverから返ってきます。
次に指定したidのデータを取ってくるようにコントローラを記載していきましょう。
      def show
        article =  Article.find(params[:id])
        render json: {status: 'SUCCESS', message: 'Loaded Article', data: article}, status: :ok
      end
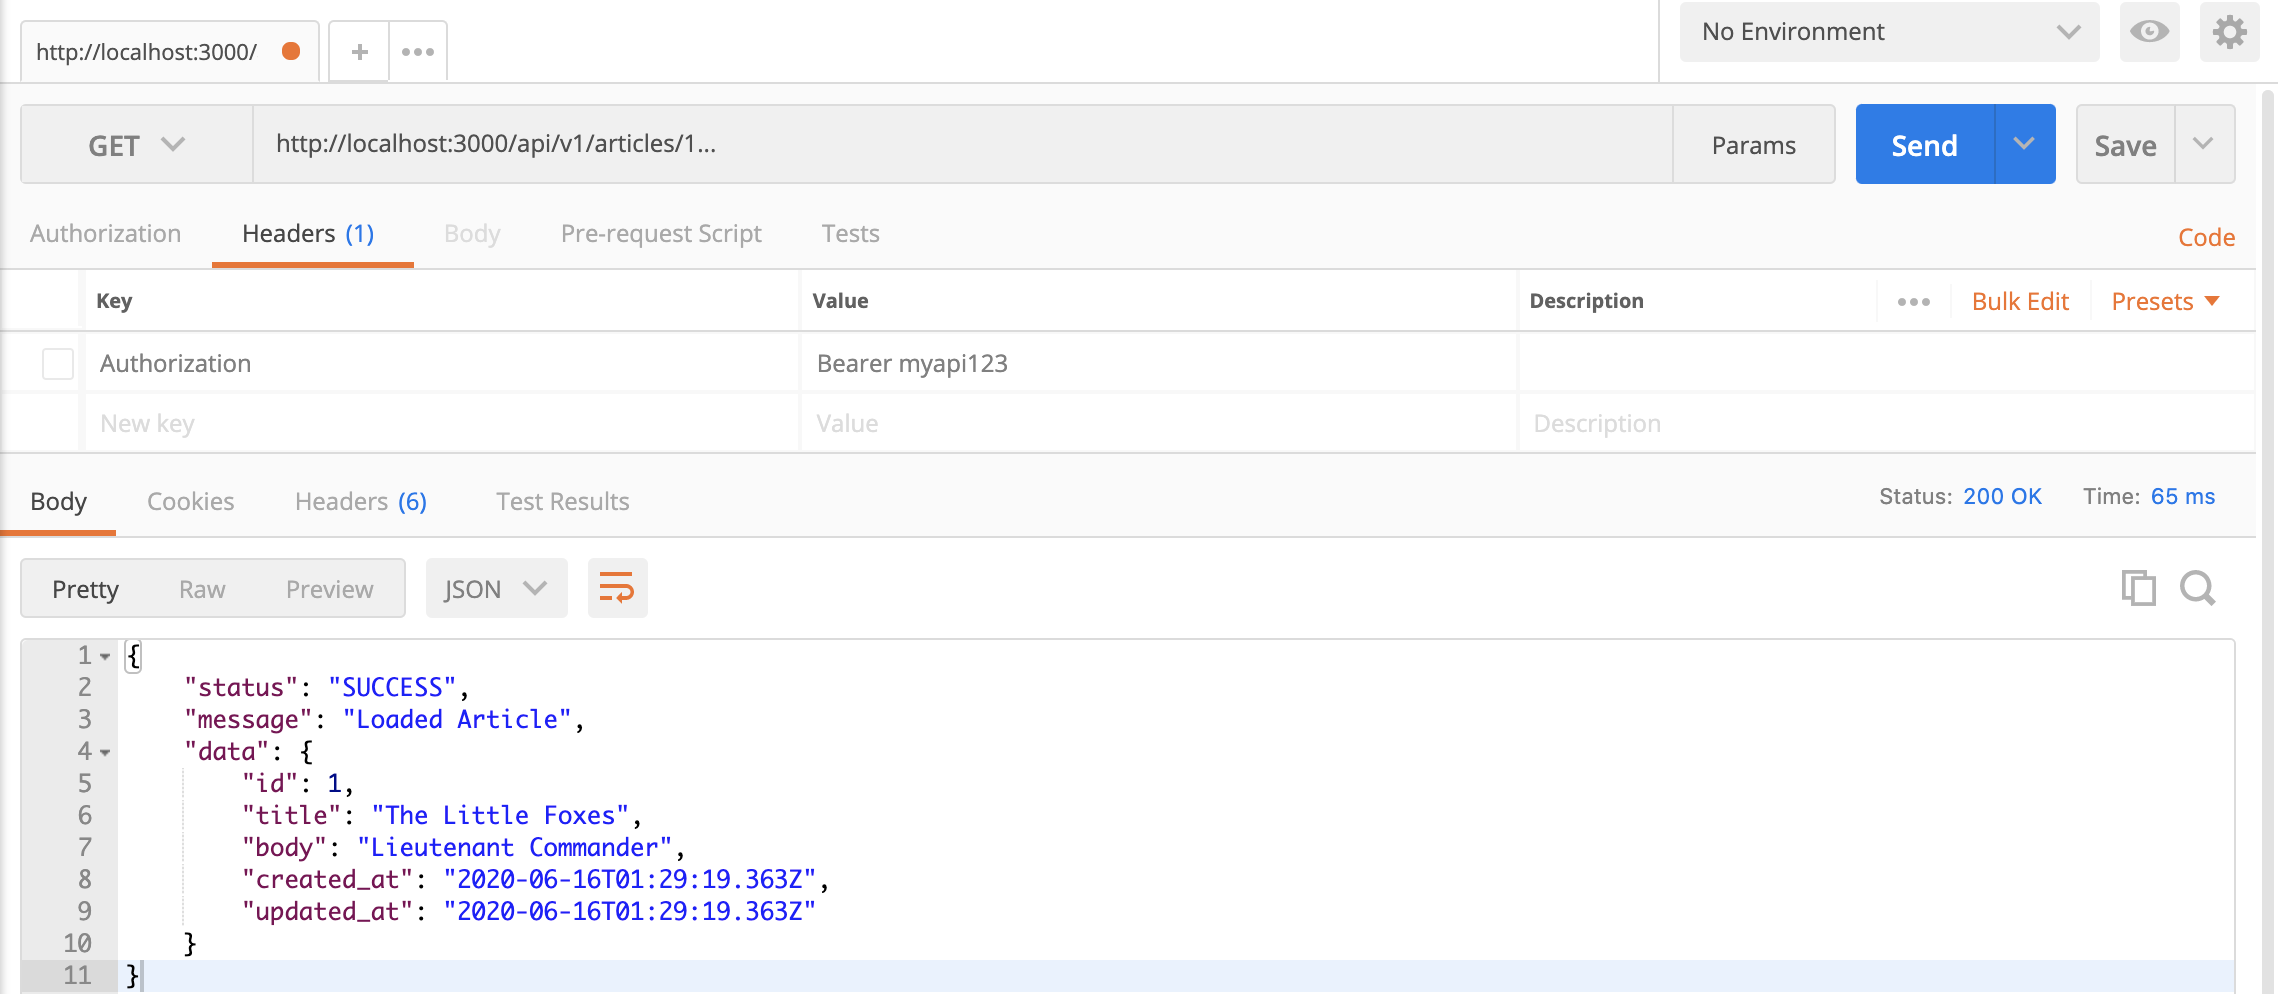
同様にPOST MANで検証しましょう。
http://localhost:3000/api/v1/articles/1
というふうに最後にidを指定します。
すると以下のようになります。
次にデータの新規作成をするコードを書いていきます。
      def create
        article = Article.new(article_params)
        if article.save
          render json: {status: 'SUCCESS', message: 'Saveed Article', data: article}, status: :ok
        else
          render json: {status: 'ERROR', message: 'Article not saved', data: article.errors}, status: :unprocessable_entity
        end
      end

      private

      def article_params
        params.permit(:title, :body)
      end
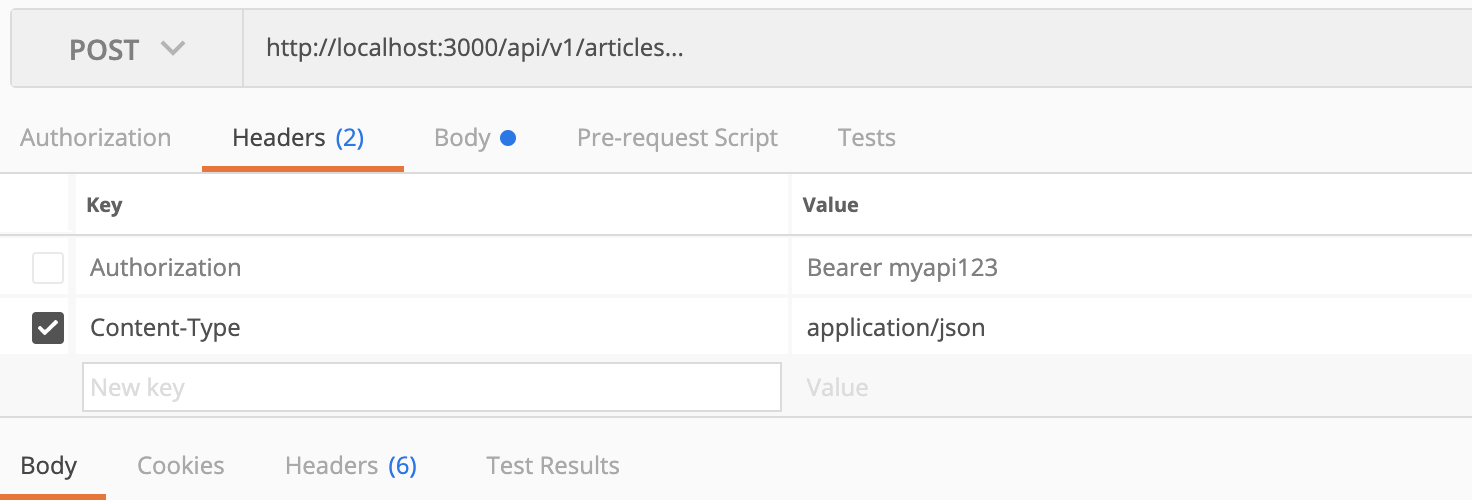
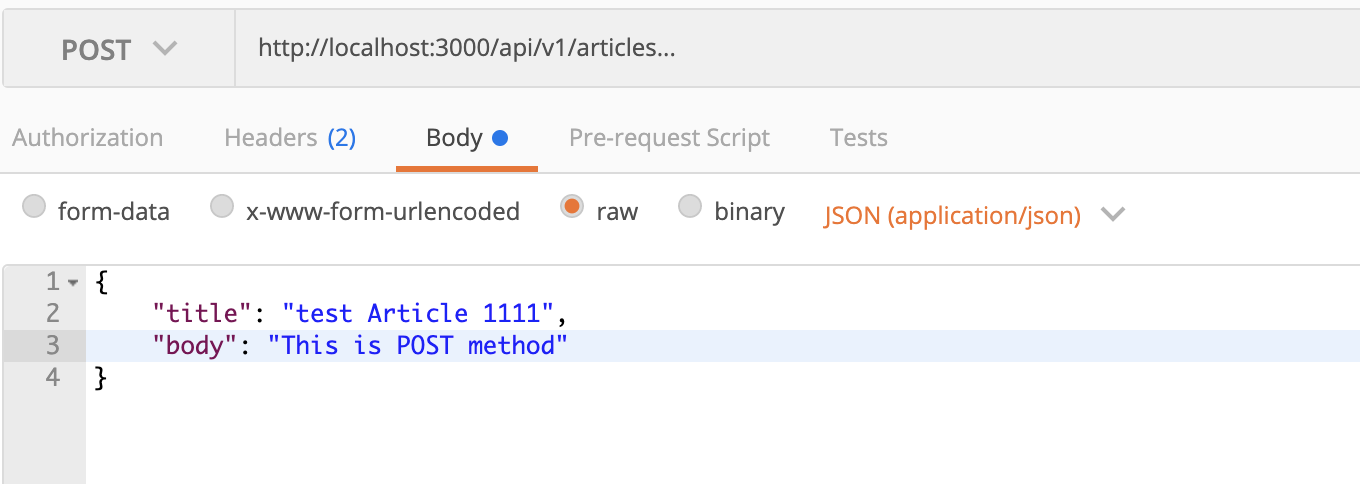
POST MANで確認です。
POSTメソッドを指定した後、HeaderにContent-type application/jsonを指定してアドレスは
http://localhost:3000/api/v1/articles
を指定しましょう。
Bodyを書いていきます。
body とtitleは各自で自由に書いてください。
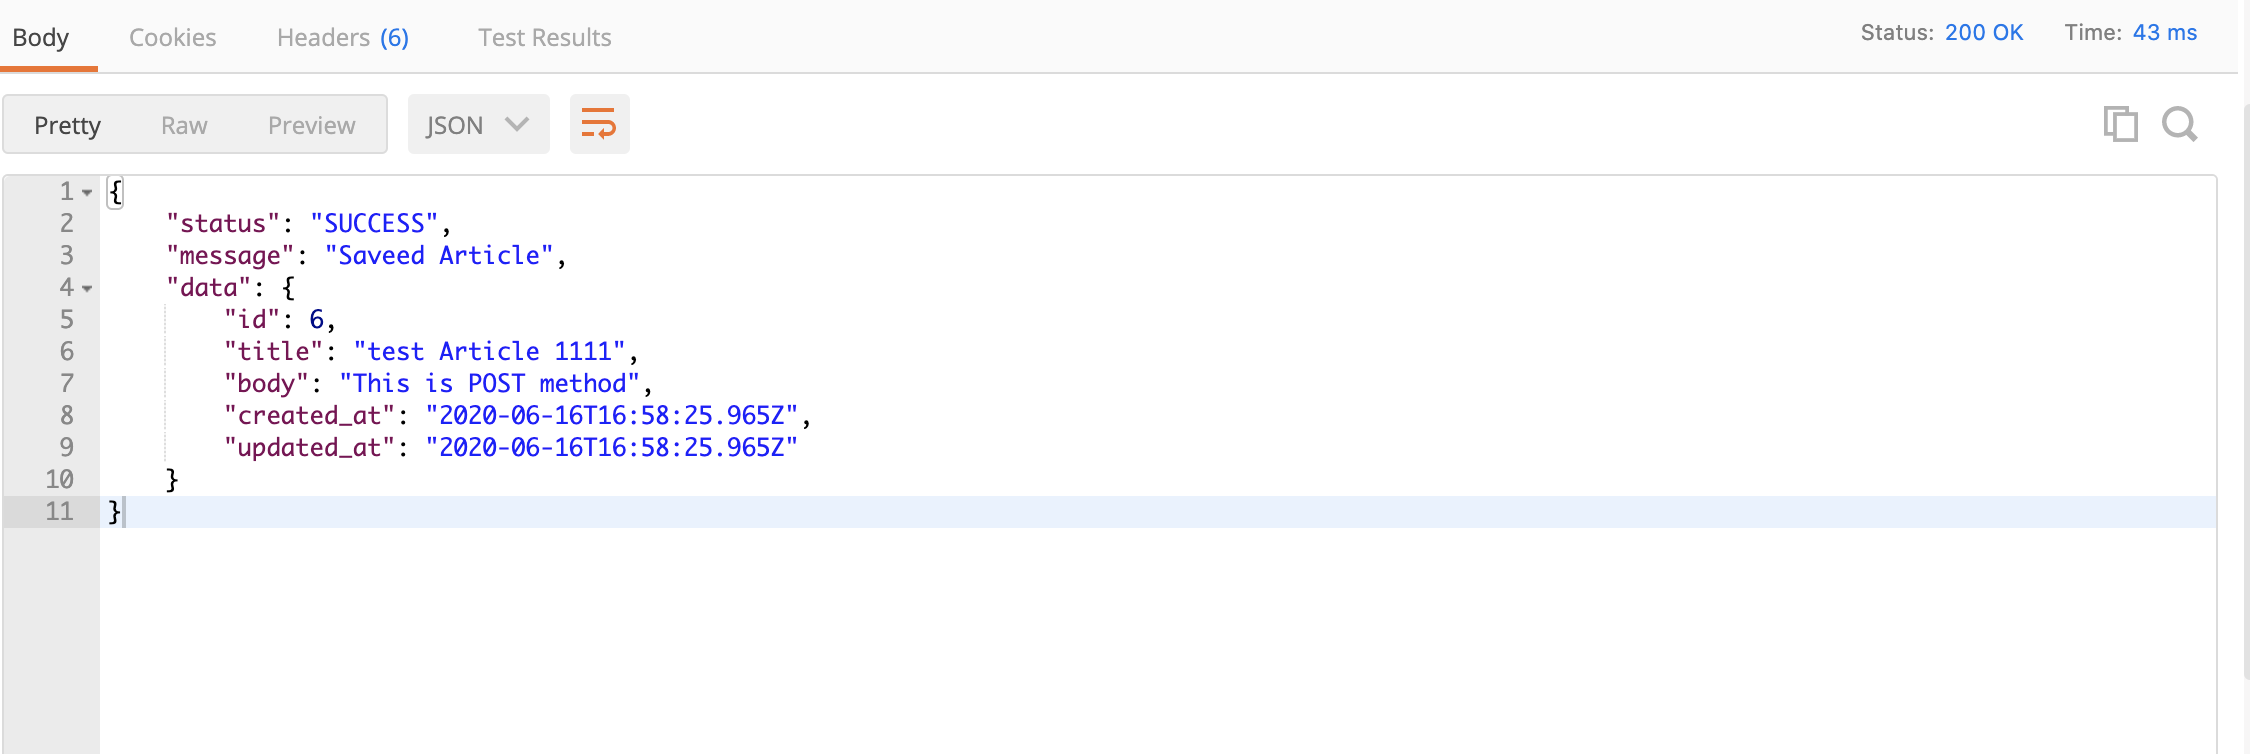
sendを押すとデータ通信が成功したことが確認できます。
テーブルの内容をDBbrowser for SQliteで確認します。

ちゃんと作られていますね。
次はデータベースのデータを削除するメソッドを組んでいきます。
      def destroy
        article = Article.find(params[:id])
        article.destroy
        render json: {status: 'SUCCESS', message: 'Deleted Article', data: article}, status: :ok
      end
例の如くPOSTMANで
http://localhost:3000/api/v1/articles/6
DELETEメソッドを指定するのを忘れないでください。

データベースを確認

id:6のデータが消えてますね。成功です。
次に更新のコードを打っていきます!
      def update
        article = Article.find(params[:id])
        if article.update_attributes(article_params)
          render json: {status: 'SUCCESS', message: 'Updated Article', data: article}, status: :ok
        else
          render json: {status: 'ERROR', message: 'Article not updated', data: article.errors}, status: :unprocessable_entity
        end
      end
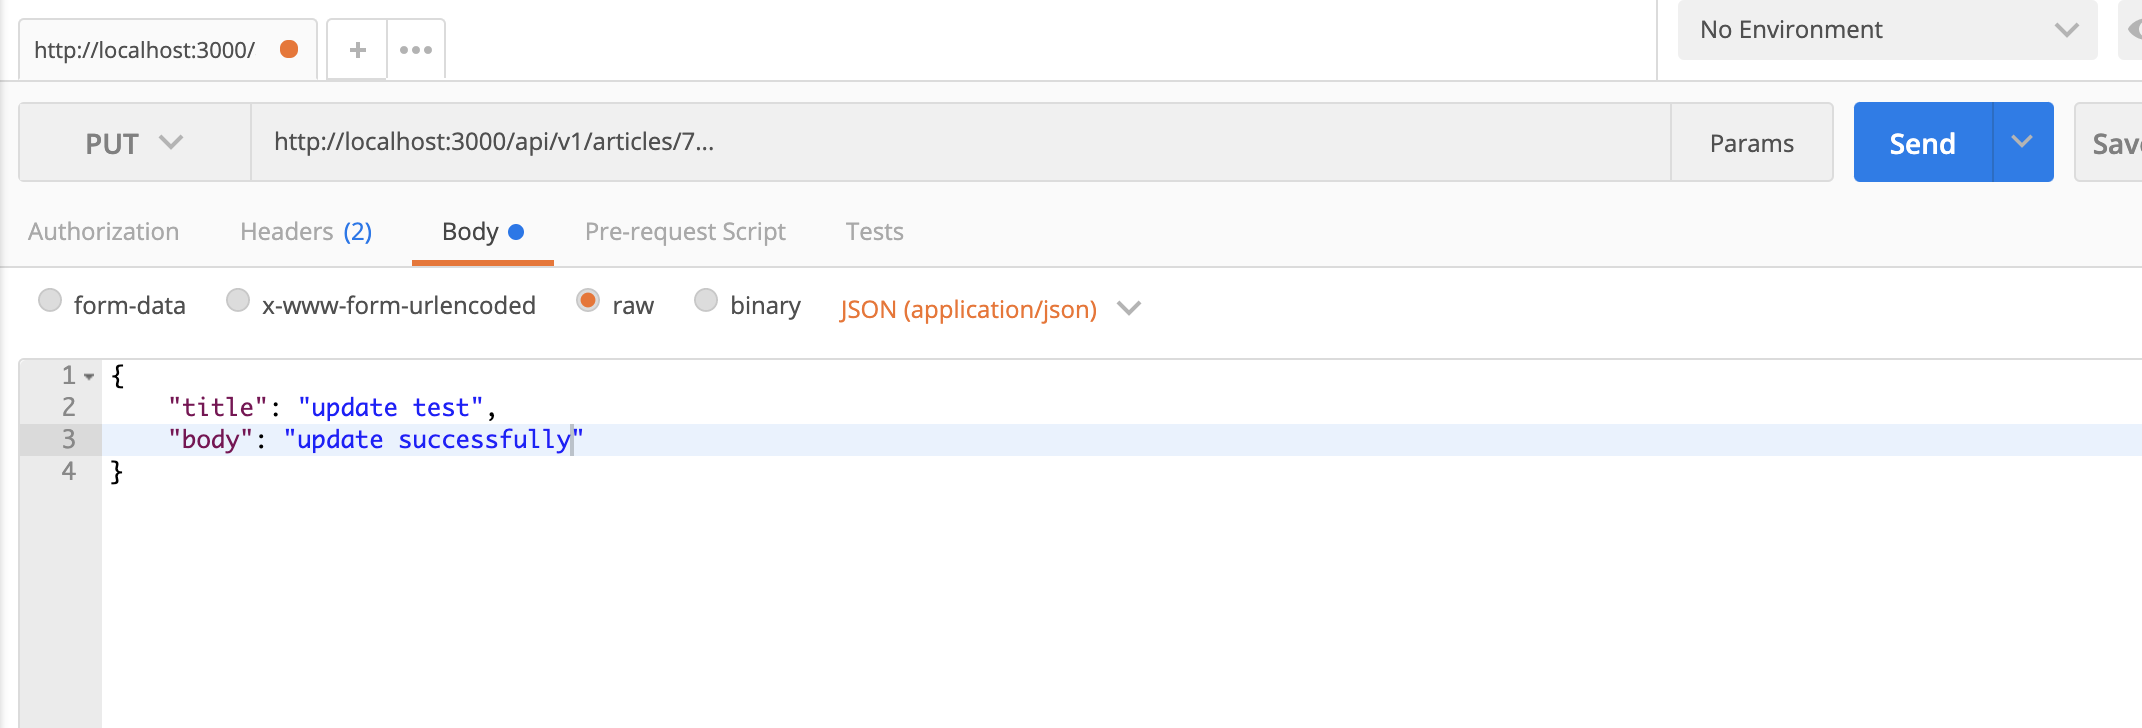
POSTMANでは・・・・
PUTメソッドでここでは、id:7を指定します。
http://localhost:3000/api/v1/articles/7
すると
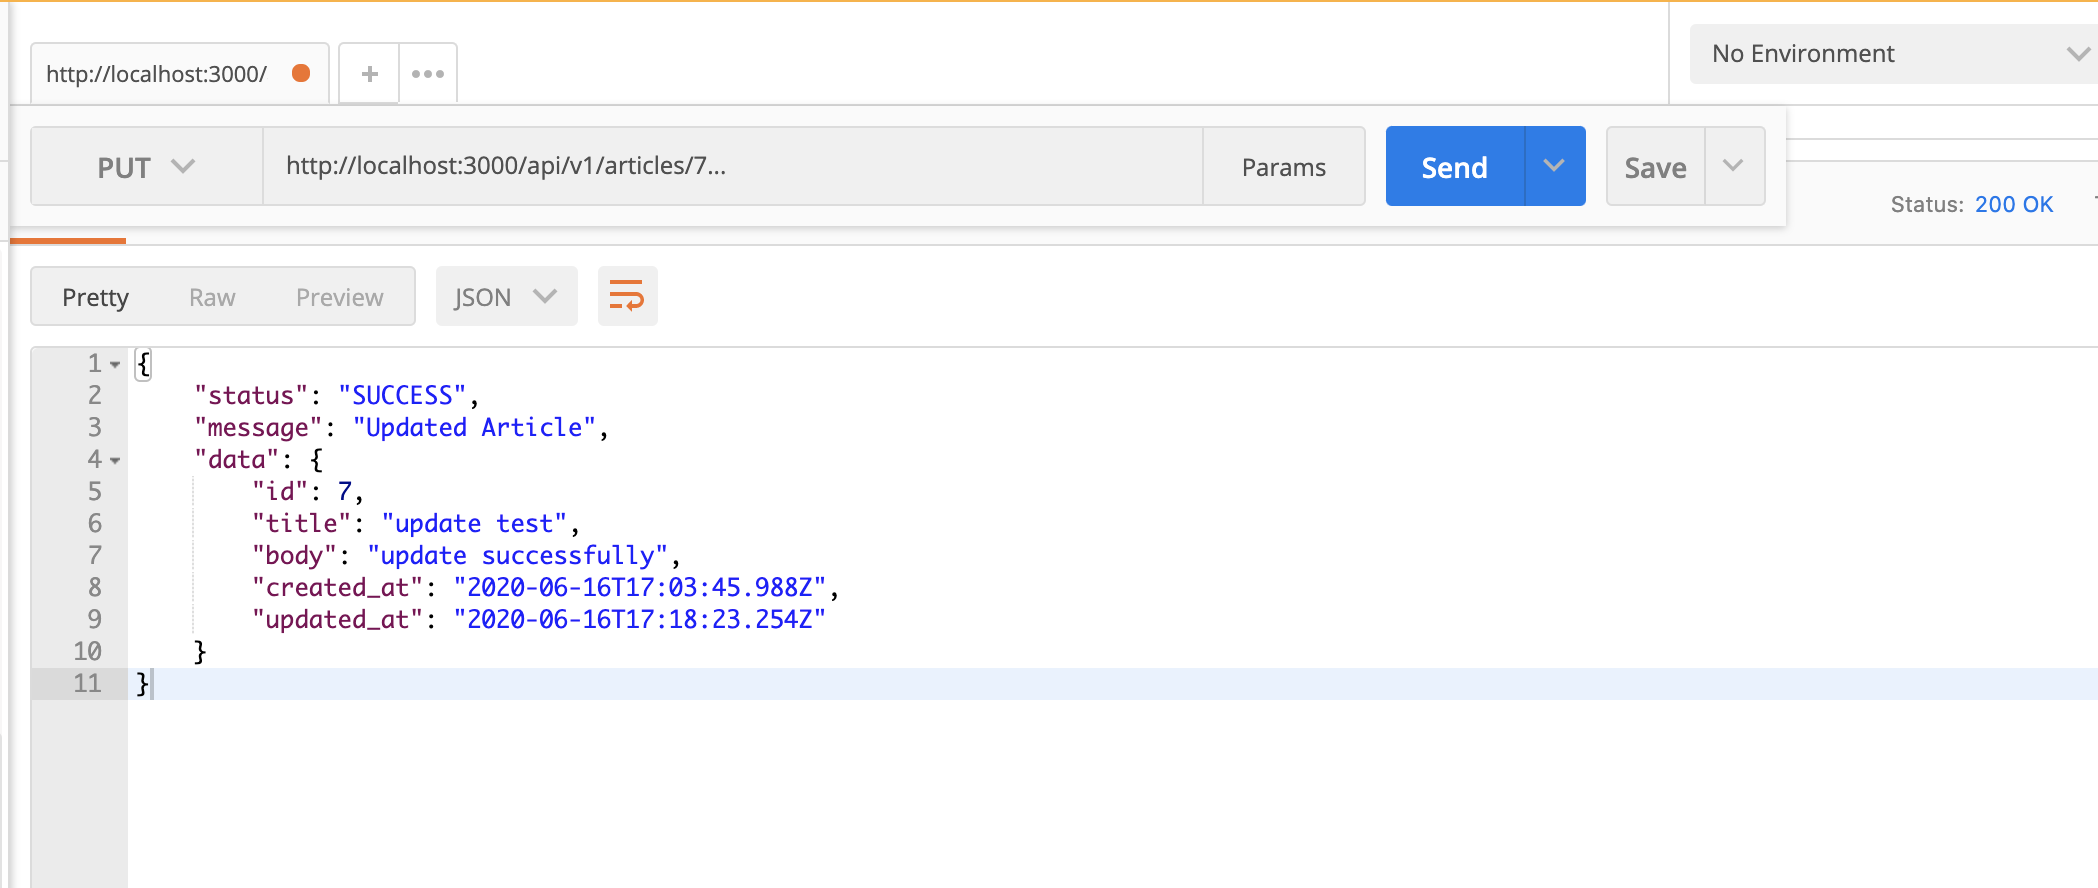
データベースを確認すると
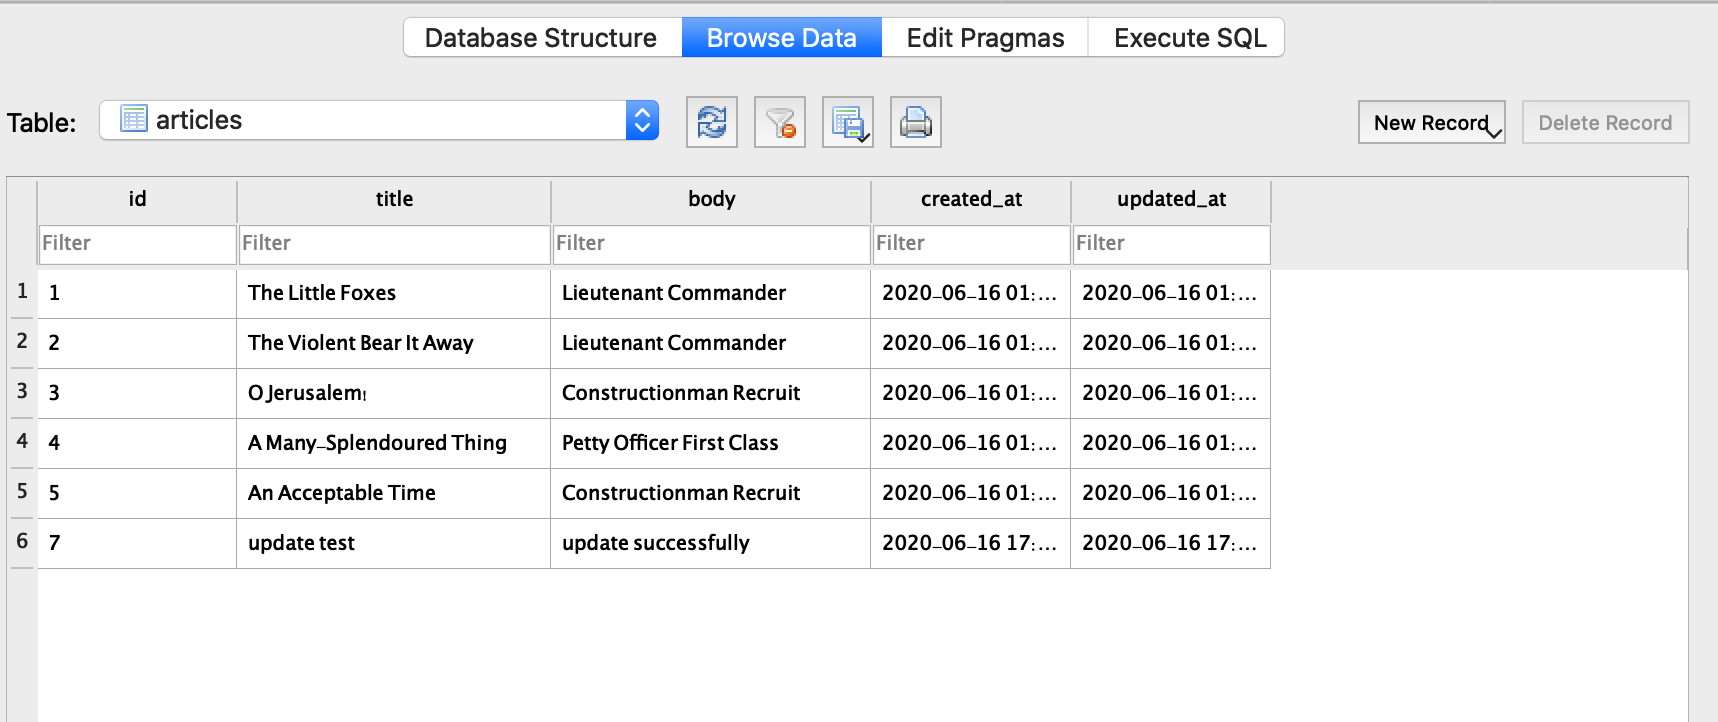
しっかり更新されています。
駆け足で進んでいきましたが、どうでしたか?
APIでリクエストを送るのもの基本はこんな感じです!
かくいう私もまだまだ初学者なので不足点、修正点などあれば遠慮なくご指摘ください!