Vuetify環境にStorybookを導入する際、vue-cli-plugin-vuetify-storybookで素直にインストールするとStorybook v5が導入されてしまいます。
「どうしてもStorybook v6が使いたい.......! (新しいもの好き)」
とチャレンジしてみたところ苦戦したのでまとめてみました。
構築した環境
| パッケージ | バージョン |
|---|---|
| @vue/cli | 4.5.11 |
| vue | 2.6.12 |
| vuetify | 2.4.5 |
| @storybook/vue | 6.1.20 |
Vue + Vuetify環境のプロジェクトの作成
Vuetifyのサイト(https://vuetifyjs.com/ja/getting-started/installation/ )を参考にVueプロジェクトを作成し、Vuetifyをインストールします。
# Vueプロジェクトの作成 (プリセットは「Default ([Vue 2] babel, eslint)」を選択しました)
$ vue create my-app
# 作成したプロジェクトへ移動
$ cd my-app
# Vuetifyをインストール (プリセットは「Default (recommended)」を選択しました)
$ vue add vuetify
現時点でVuetifyはVue 3には対応していません。
Vueプロジェクト作成の際にはVue 2を選択してください。
以下のコマンドを実行し、ブラウザで http://localhost:8080/ にアクセスし確認します。
$ npm run serve
無事Vue + Vuetifyの環境が構築できました。
Storybook v6のインストール
Storybookの公式サイト(https://storybook.js.org/docs/vue/get-started/install )を参考にStorybook v6をインストールします。
$ npx sb init
以下のコマンドを実行し、ブラウザで http://localhost:6006/ にアクセスし、Storybookが起動できることを確認します。
$ npm run storybook
Storybookの設定
まず、StorybookのWebpackを設定します。
Storybook v5ではwebpack.config.jsに設定を書いていたと思いますが、v6ではmain.jsに記載します。
const path = require('path')

module.exports = {
  "stories": [
    "../src/**/*.stories.mdx",
    "../src/**/*.stories.@(js|jsx|ts|tsx)"
  ],
  "addons": [
    "@storybook/addon-links",
    "@storybook/addon-essentials"
  ],
  // webpackの設定
  webpackFinal: async (config, { configType }) => {
    // @がsrcディレクトリをさすように設定
    config.resolve.alias['@'] = path.resolve(__dirname, '..', 'src')
    // sass-loaderを設定
    config.module.rules.push({
      test: /\.sass$/,
      use: [
        'style-loader',
        'css-loader',
        'sass-loader',
      ],
    })
    return config
  },
}
次にVuetifyプラグインファイルを少し書き換えて、optionsをexportするようにします。
(本番と同じvuetifyオプションをStorybookでも使用できるようにするためです)
import Vue from 'vue';
import Vuetify from 'vuetify/lib/framework';

Vue.use(Vuetify);

// オプションをエクスポートします。といっても、今回は特にオプション設定していないので空オブジェクトです。
export const options = {}

export default new Vuetify(options);
Storybookの設定ファイルにvuetifyの設定を記載します。
Storybook v5ではconfig.jsに設定を記載していましたが、v6からはpreview.jsに記載することになりました。
import Vue from 'vue'
import Vuetify from 'vuetify'
import 'vuetify/dist/vuetify.min.css'
import { options } from '@/plugins/vuetify.js'

// Vuetifyを設定し、vuetifyインスタンスを作成
Vue.use(Vuetify)
const vuetify = new Vuetify(options)

export const parameters = {
  actions: { argTypesRegex: "^on[A-Z].*" },
}

// decoratorsでvuetifyインスタンスをVueのオプションに登録
export const decorators = [
  (story, context) => {
    const wrapped = story(context)
    return Vue.extend({
      vuetify,
      components: { wrapped },
      template: `
        <v-app>
          <v-container fluid>
            <wrapped />
          </v-container>
        </v-app>
      `
    })
  },
]
Storyを書いてみる!
まずコンポーネントファイルを作ります。
<template>
  <v-btn color="success" @click="$emit('click')">
    {{ text }}
  </v-btn>
</template>

<script>
export default {
  name: 'MyButton',
  props: {
    text: {
      type: String,
      default: 'ボタン',
    }
  }
}
</script>
次にストーリーを書きます。
import vuetify from '@/plugins/vuetify'
import MyButton from './MyButton'

export default {
  component: MyButton,
  title: 'MyComponents/MyButton',
  argTypes: {
    click: { action: 'click '},
  }
}

const Template = (args, { argTypes }) => ({
  components: { MyButton },
  props: Object.keys(argTypes),
  // vuetifyインスタンスを登録する
  vuetify,
  template: '<my-button v-bind="$props" @click="click" />',
})

export const Default = Template.bind({})
Default.args = {
  text: 'できた!'
}
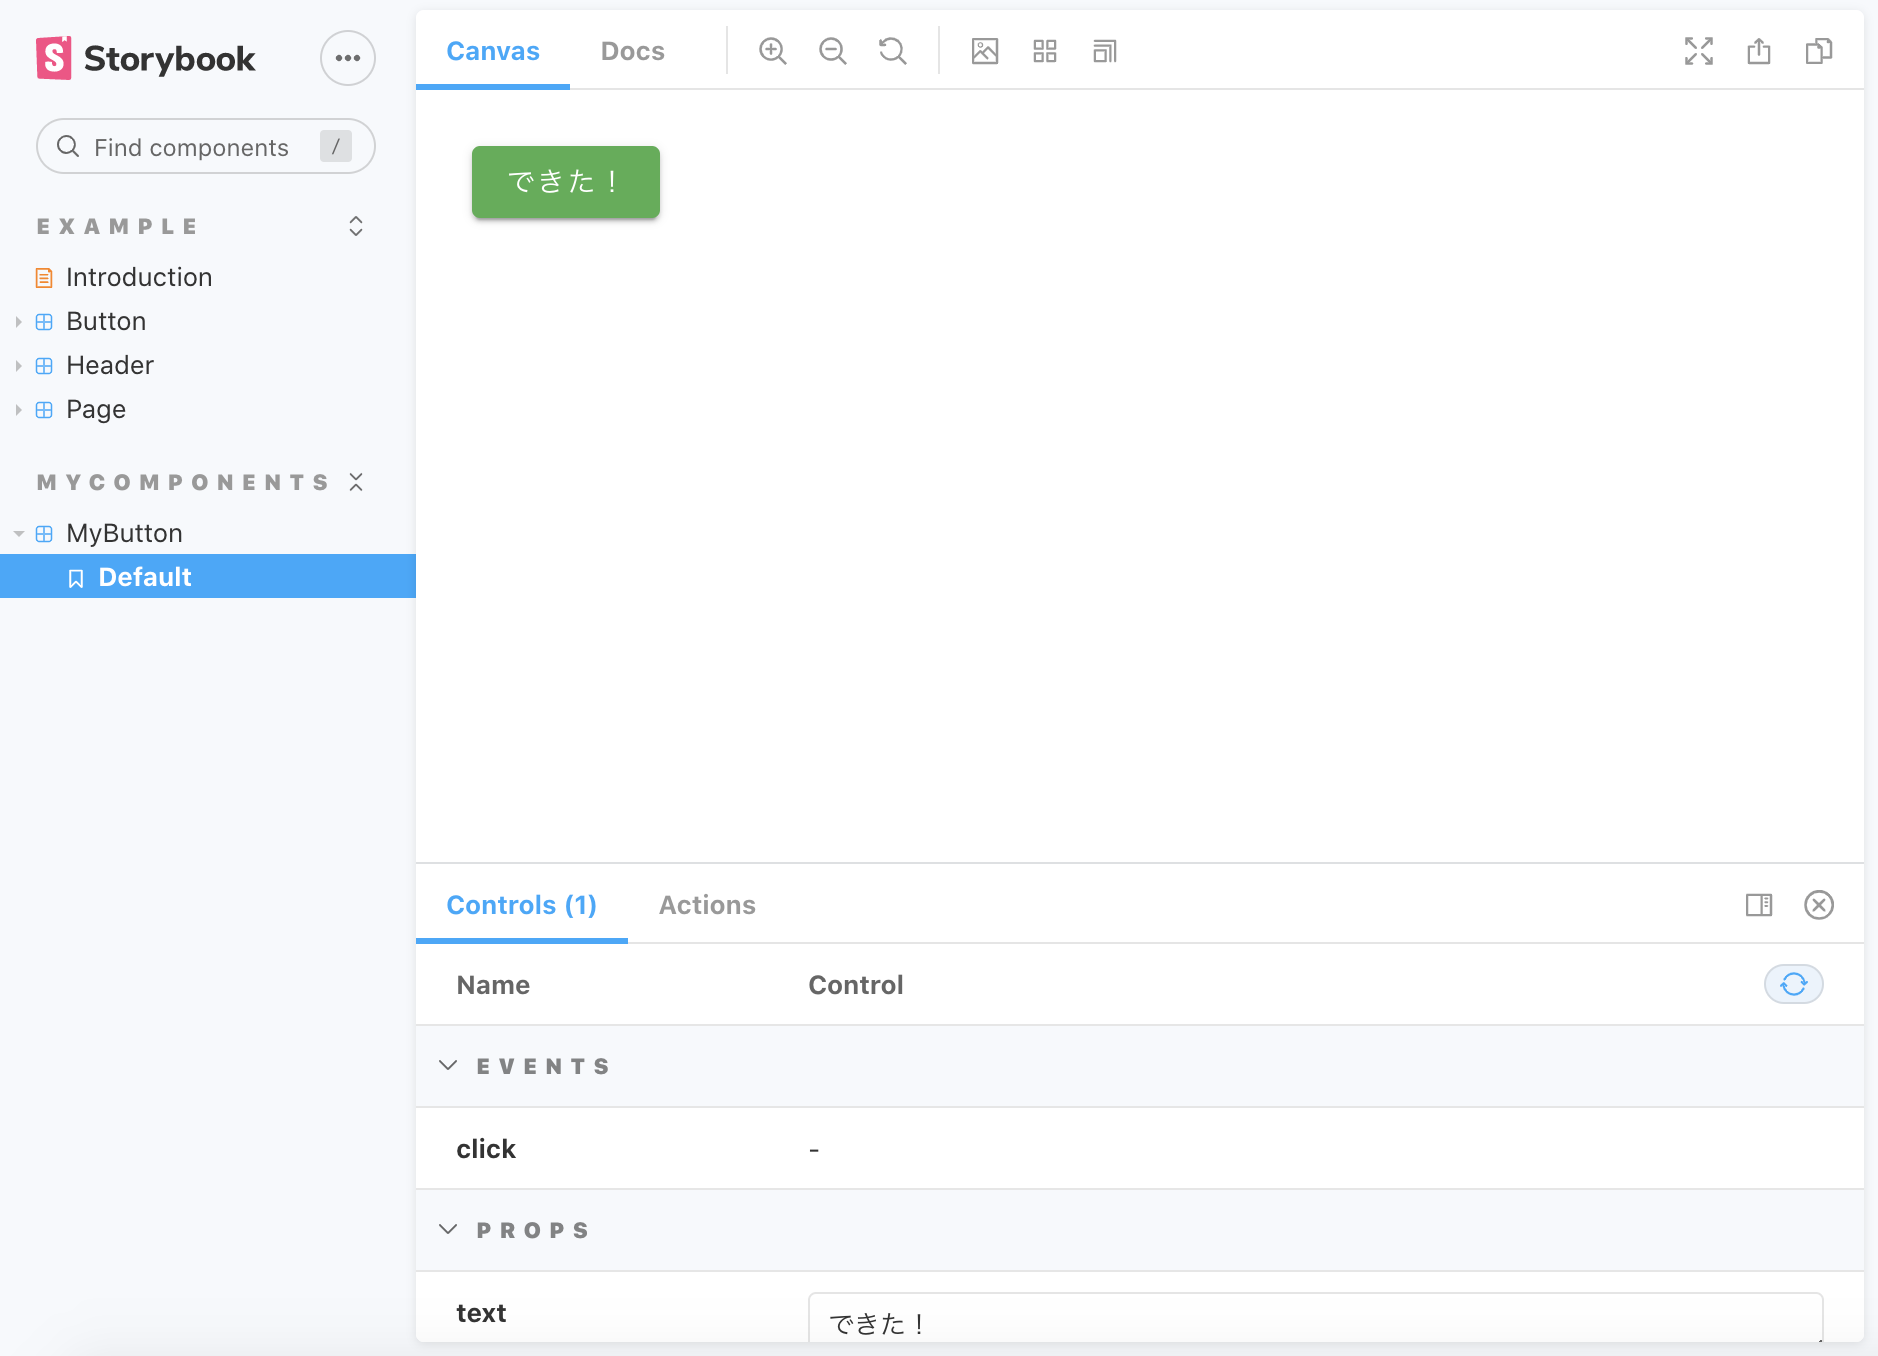
これらのファイルを作り、Storybookを起動し、http://localhost:6006/?path=/story/mycomponents-mybutton--default にアクセスすると、
できました!
参考文献
以下のWebサイトにとても助けられました。
最後に
今回.storybook/preview.jsだけでなく、MyButton.stories.jsのTemplateでもvuetifyインスタンスを与えています。
このようにしないと$vuetifyを使った際にエラーになる箇所があったためです。
もっとスマートな方法があればぜひ教えてください。
