概要
NavigationControllerが絡んでくると画面間の値の受け渡しが少し複雑になるので、この記事では様々な状況におけるViewControllerとNavigationControllerとの相互関係についてまとめてみました。
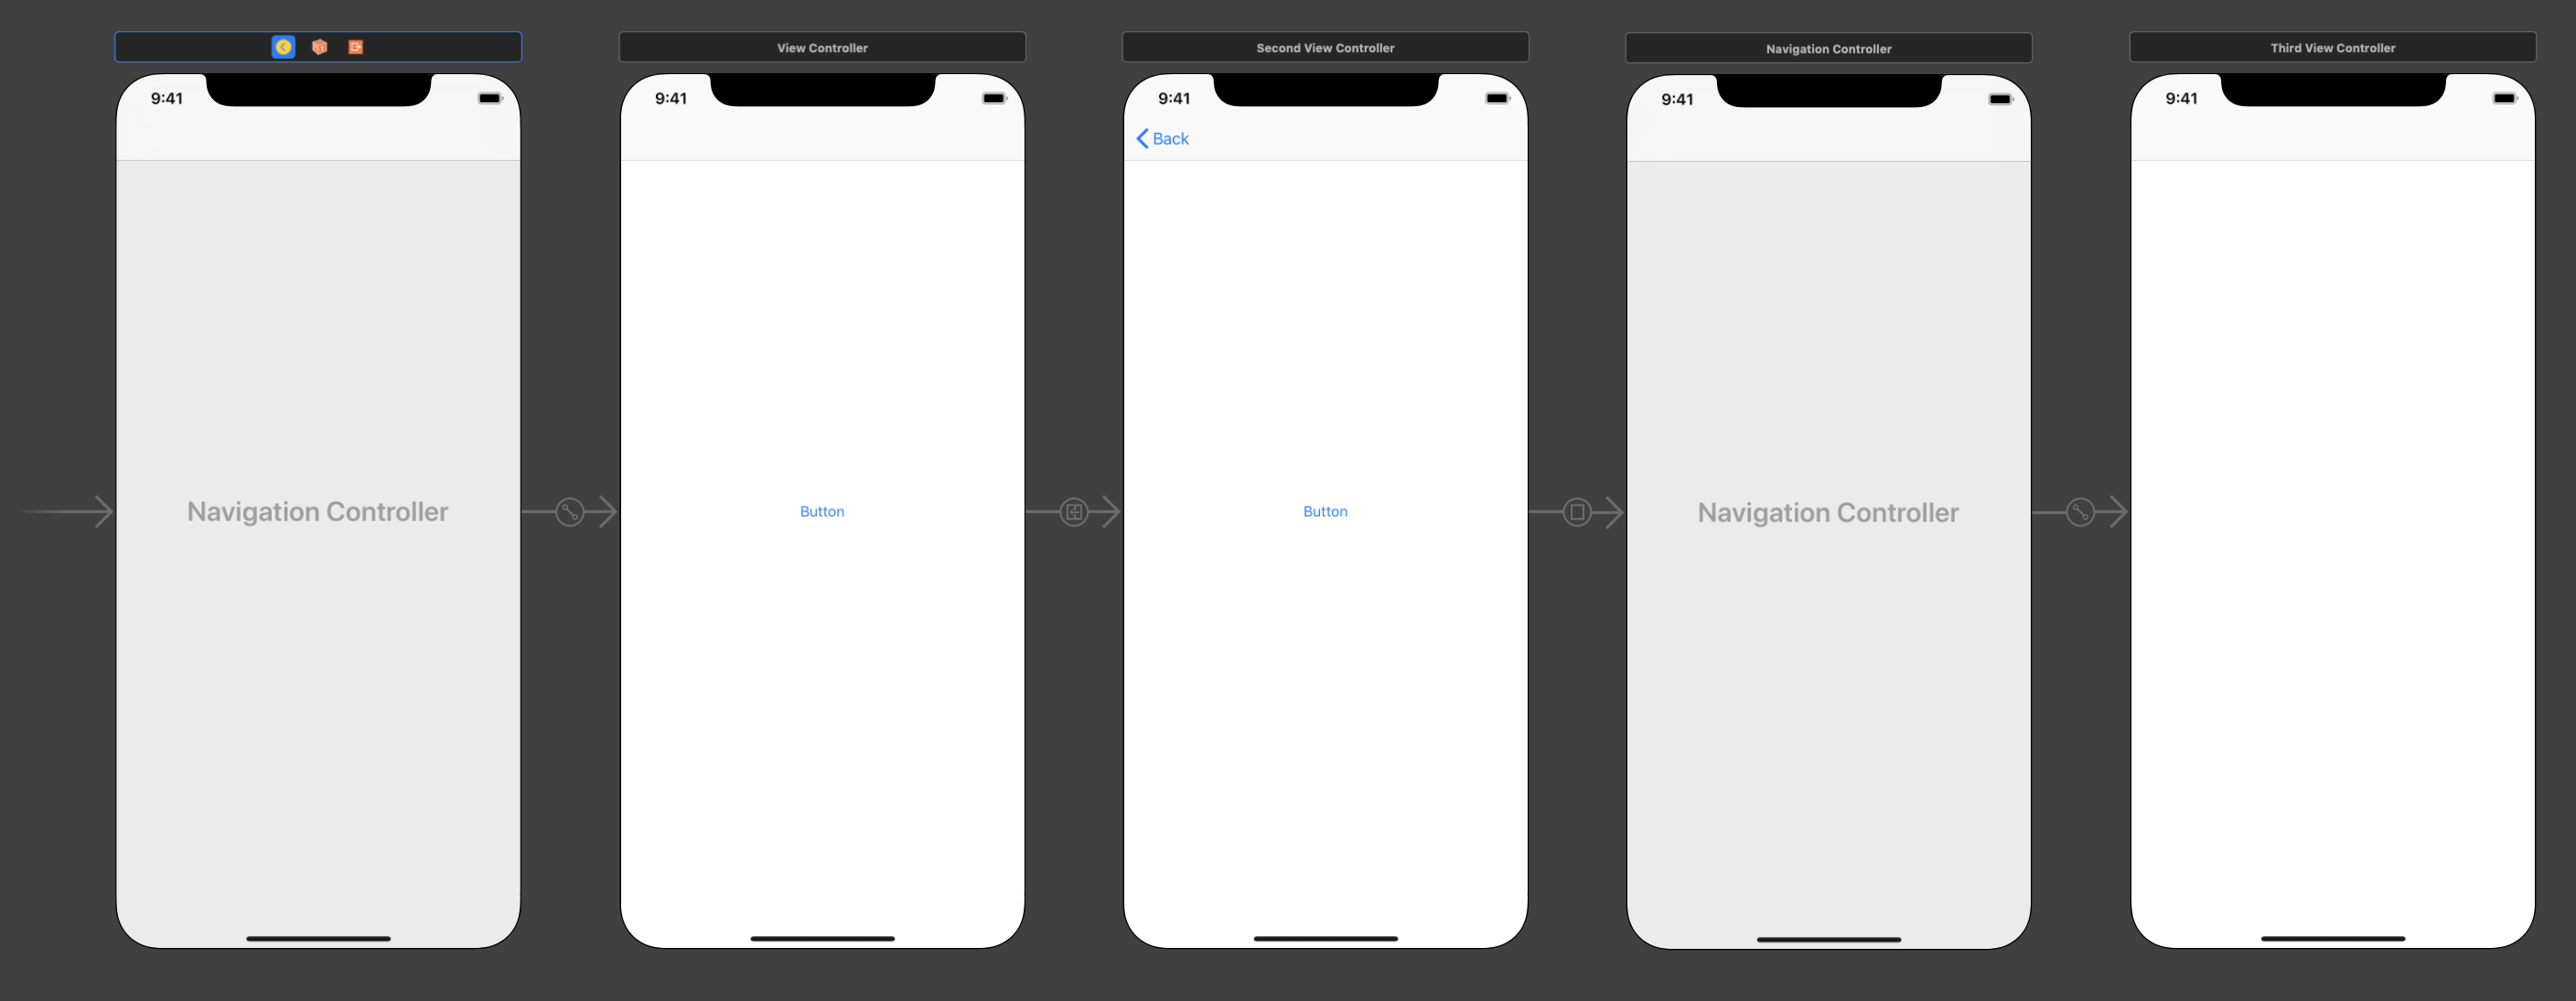
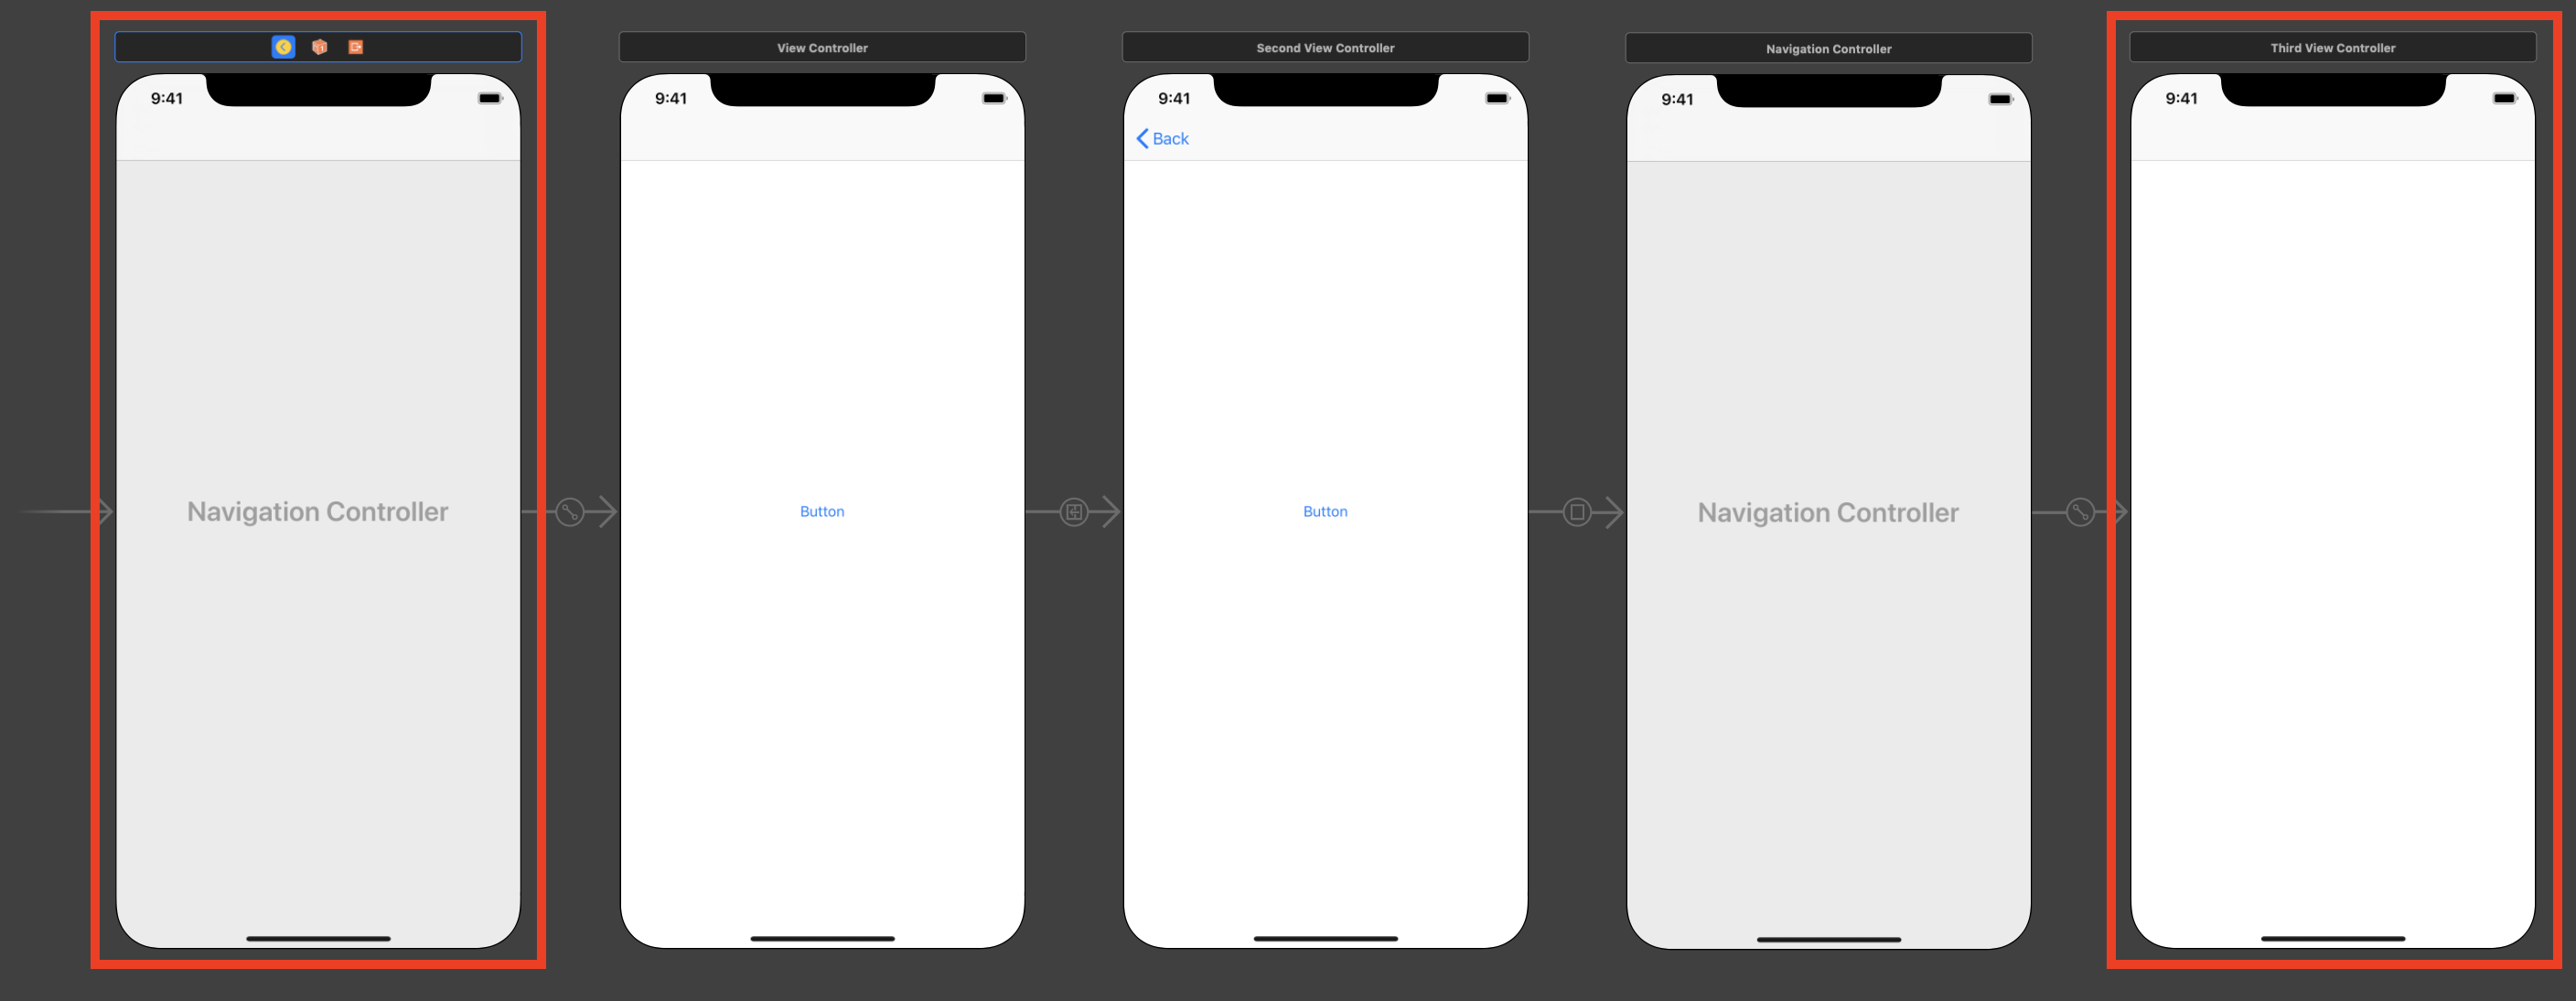
今回は画像のような
NavigationController(1) -> FirstViewController -> SecondViewController -> NavigationController(2) -> ThirdViewController
という構成を想定します。
ちなみに、FirstViewControllerからSecondViewControllerへはShow、SecondViewControllerからNavigationController(2)へはPresent ModallyのSegueが繋いであります。
以下
FirstViewController -> FirstVC
SecondViewController -> SecondVC
ThirdViewController -> ThirdVC
NavigationController(1)とFirstVC
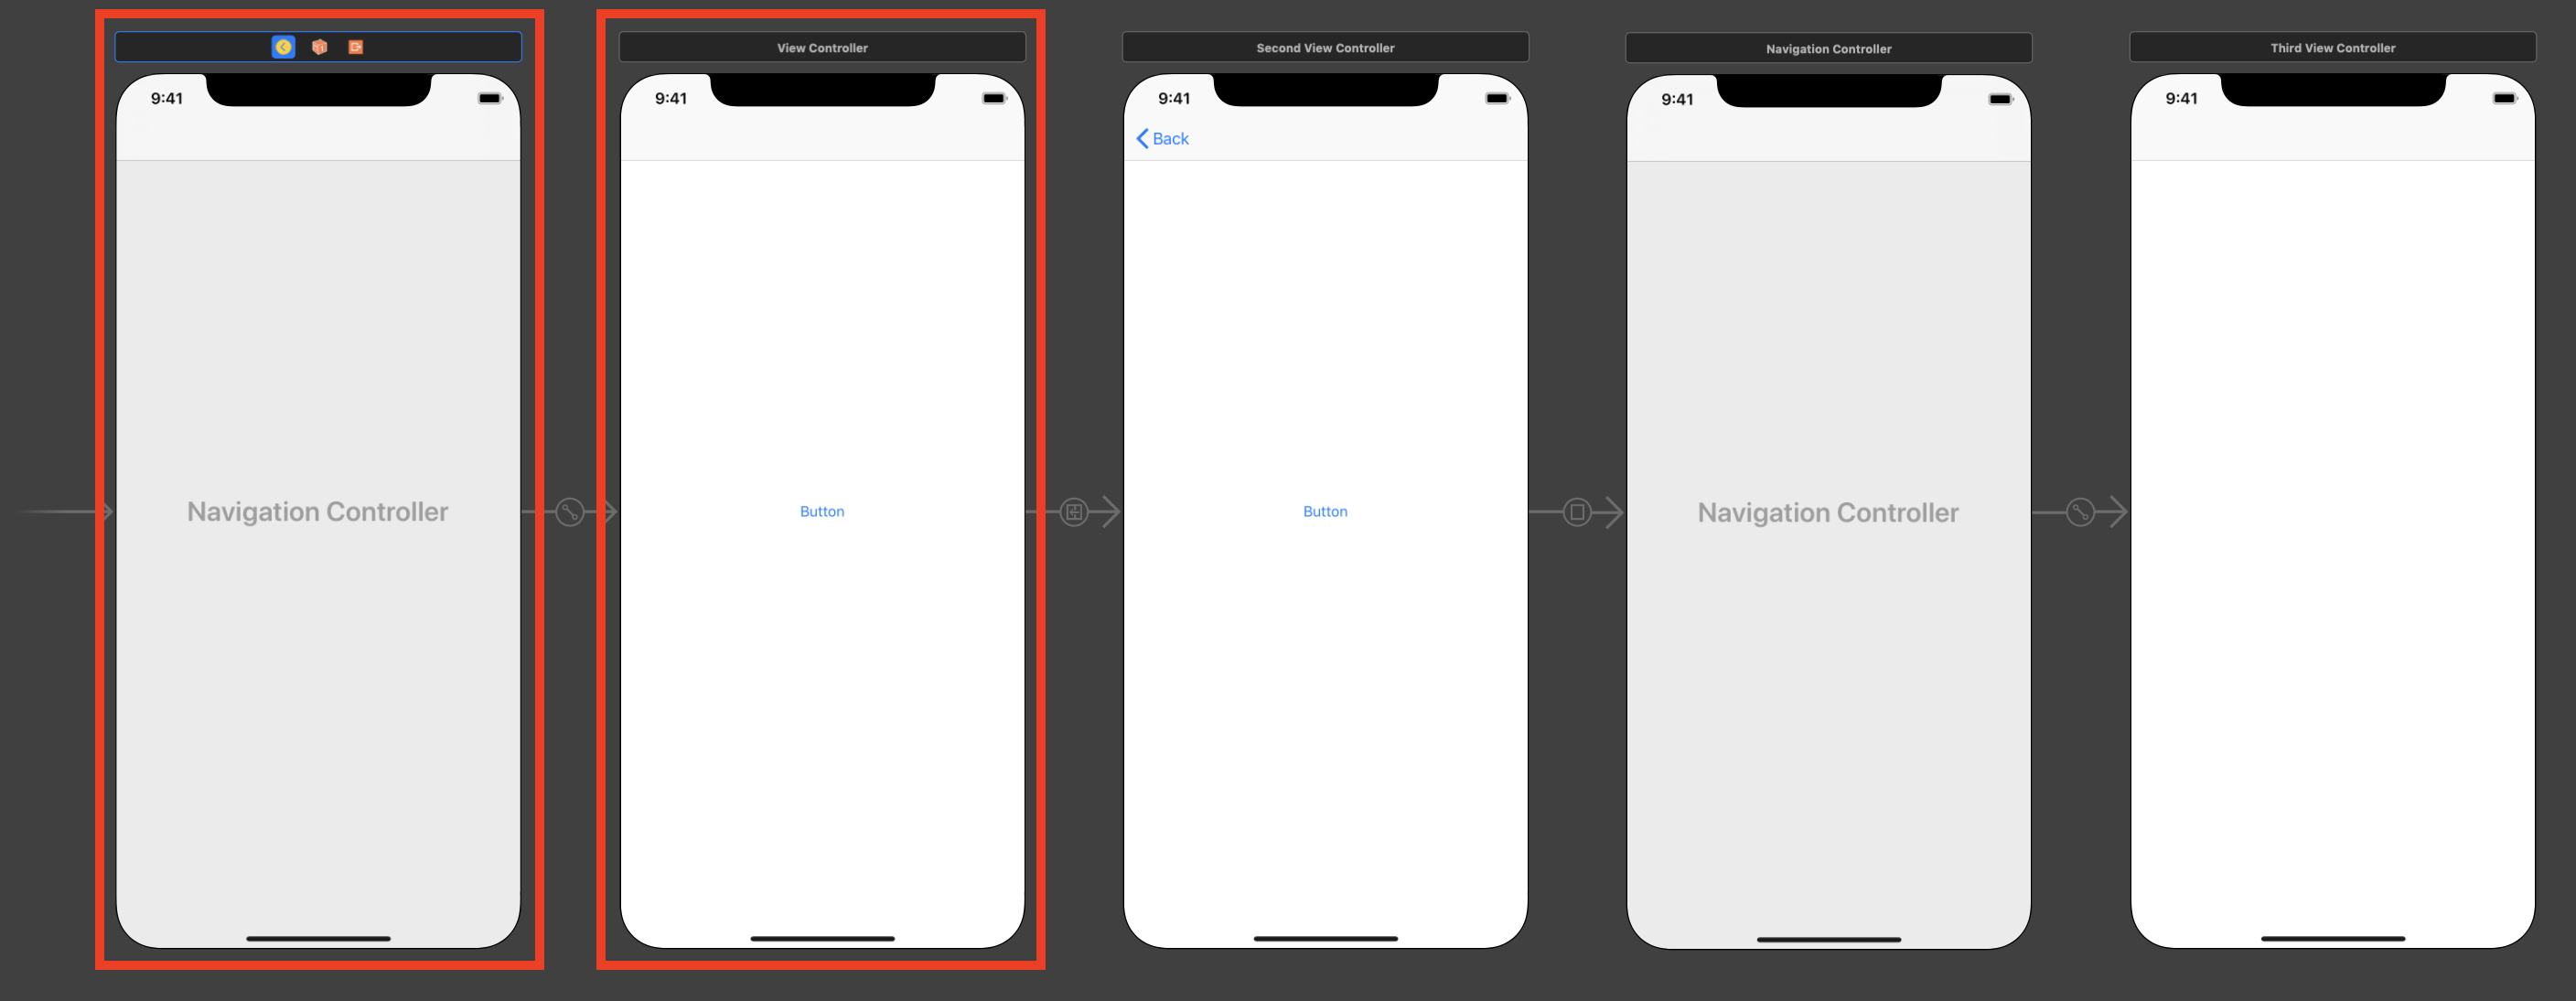
まず、アプリを立ち上げるとFirstVCが表示されます。
このとき、NavigationController(1)のviewControllersプロパティにはFirstVCが入っています。
また反対に、FirstVCのnavigationControllerプロパティにはNavigationController(1)が要素として格納されているということになります。
NavigationController(1)はFirstVCの親ViewControllerなので、FirstVCのparentプロパティにもNavigationController(1)が同様に格納されます。
NavigationController(1)からFirstVCの取得
NavigationController(1)からFirstVCを取得する手順は以下の通りです。
// NavigationController(1)を以下で取得したとする
let nc = self.navigationController

let firstVC = nc.viewControllers[0] as! FirstViewController
FirstVCはNavigationController(1)のroot view controllerになるので、viewControllersプロパティの0番目の要素に格納されています。
FirstVCからNavigationController(1)の取得
FirstVCからNavigationController(1)の取得を行う方法は以下のようになります。
ViewControllerがNavigationControllerに所有されていない場合はnavigationControllerプロパティにはnilが格納されるので注意しなければいけません。
// FirstVCクラス内で
let nc = self.navigationController
また、親のViewControllerが格納されるプロパティであるparentを用いて
// FirstVCクラス内で
let nc = self.parentViewController as! UINavigationController
のようにも取得できます。親となるViewControllerが存在しない場合にはこちらもnilが格納されているので注意してください。
NavigationController(1)とSecondVC
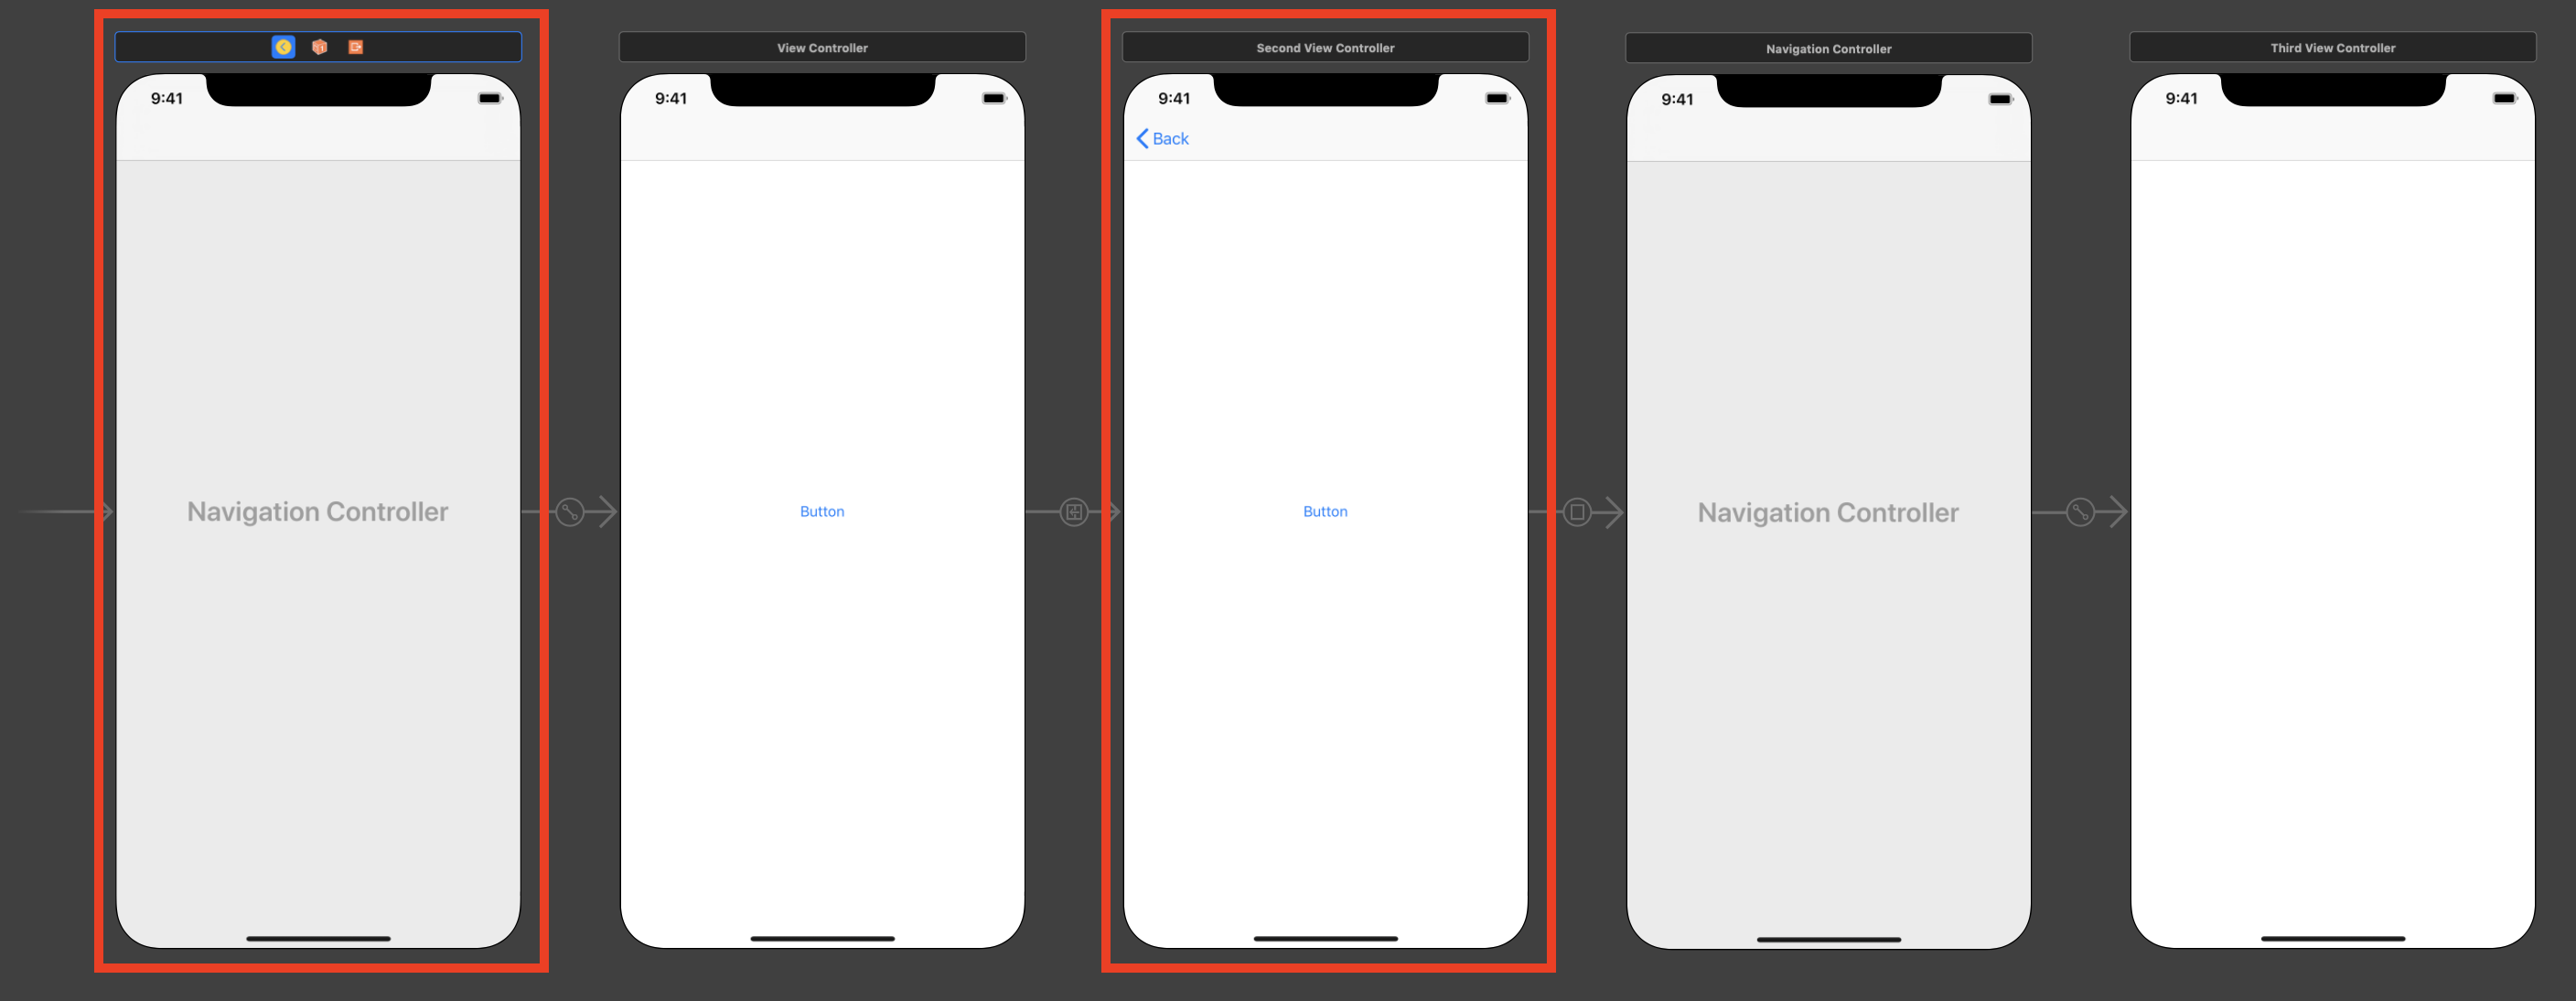
FirstVCからShowで遷移した先がSecondVCです。
Showで遷移するとNavigationController(1)のviewControllersにSecondVCが追加で格納されます。viewControllersはスタックのように利用されるため、この時点では1番最後の要素であるviewControllers[1]に格納されていることになります。
SecondVCにおいてもFirstVCの時と同様、navigationControllerプロパティとparentプロパティにNavigationController(1)が格納されます。
NavigationController(1)からSecondVCの取得
NavigationController(1)からSecondVCを取得する際もFirstVCの時と同様の手順になります.
let nc = self.navigationController

let vcNum = nc.viewControllers.count
let secondVC = nc.viewControllers[vcNum - 1] as! SecondViewController
SecondVCからNavigationController(1)の取得
FirstVCの時と同じです。
let nc = self.navigationController
または
let nc = self.parentViewController as! UINavigationController
余談1 : SecondVCからFirstVCの取得
let nc = self.navigationController

let vcNum = nc.viewControllers.count
let firstVC = nc.viewControllers[vcNum - 2] as! FirstViewController
viewControllersがスタックであることを考慮すれば1つ前の画面の取得は上記のようになります。
NavigationControllerの階層下で前の画面に値を渡す際はこの方法を使います。
余談2 : 遷移がPresent Modallyの場合
この場合は、NavigationController(1)とSecondVCの間には直接的な関係はありません。
SecondVCからNavigationController(1)を取得したい時は、
let firstVC = self.presentingViewController as! FirstViewController
let nc = firstVC.navigationController
などのように一度FirstVCを経由すれば可能です。
NavigationController(2)とThirdVC
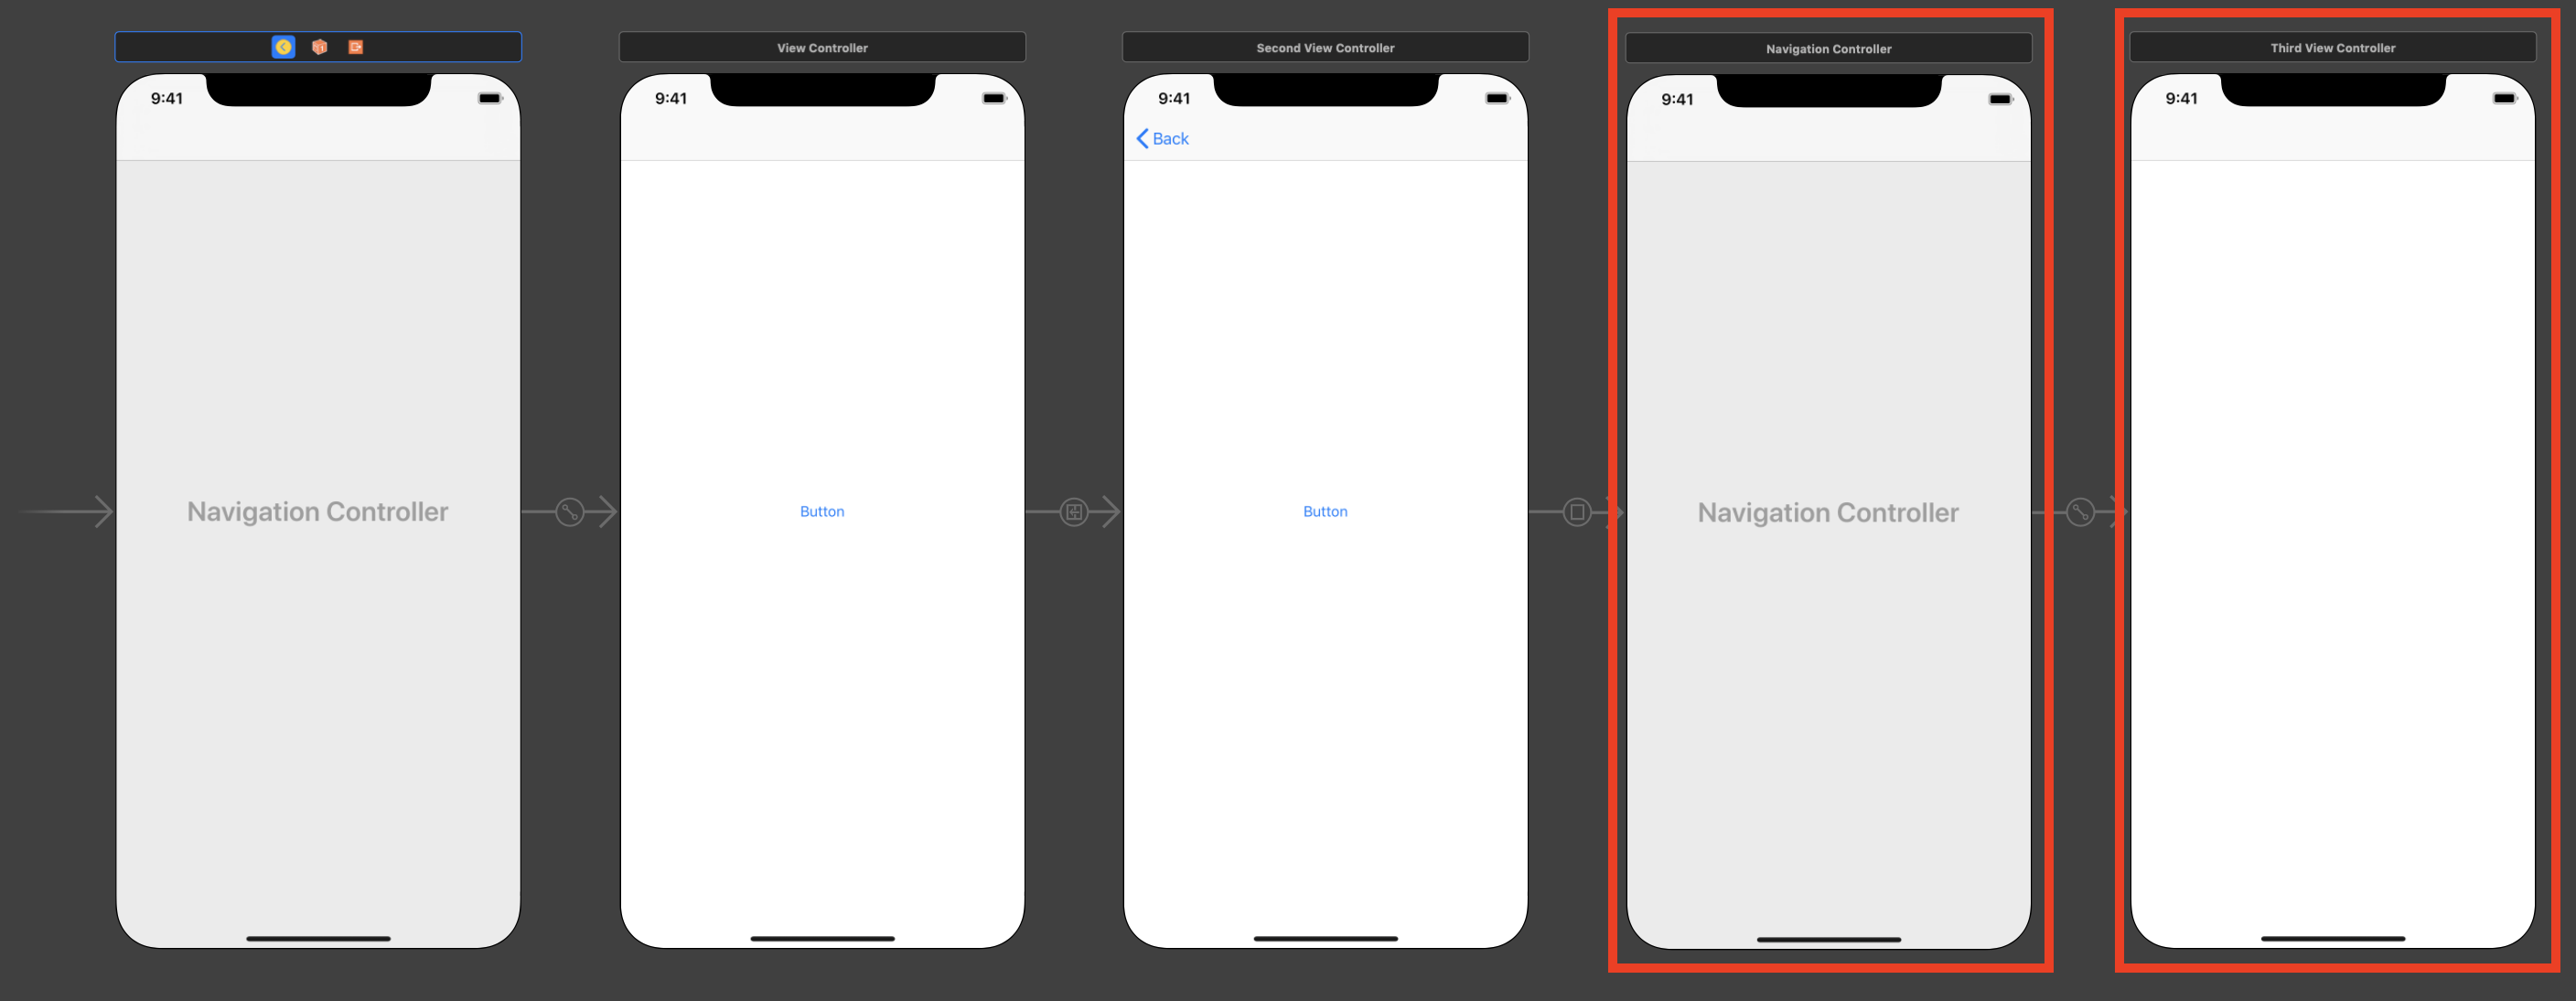
「NavigationController(1)とFirstVC」と同じです。
NavigationController(1)とThirdVC
NavigationController(1)とThirdVCの間には直接的な関係はありませんが、ThirdVCからNavigationController(1)を取得することは可能です。
ThirdVCからNavigationController(1)の取得
UIViewControllerクラスのpresentingViewControllerプロパティには、自分もしくは祖先となるViewControllerをPresent Modallyで表示したViewControllerが格納されます。
この場合、NavigationController(2)がNavigationController(1)によって表示されているため、
let nc = self.presentingViewController as! UINavigationController
でNavigationController(1)を取得することができます。
NavigationController(1)からFirstViewControllerやSecondViewControllerを取得し、画面を戻るときに値を渡すことができます。
まとめ
ViewControllerの相互関係を理解できれば画面間の値の受け渡しがスムーズにできるようになりますね。
ViewControllerのリファレンスに出てくるparentとancestorのニュアンスの違いがちょっと分かりにくかったです。
UIViewControllerクラスのpresentingViewControllerプロパティには、自分もしくは祖先となるViewControllerをPresent Modallyで表示したViewControllerが格納されます。
ここの文言に違和感があったのはそのせいですね。切実に英語力が欲しい...。