Docker Composeを使いphp+mysqlのwordpress環境をローカルに構築していきます
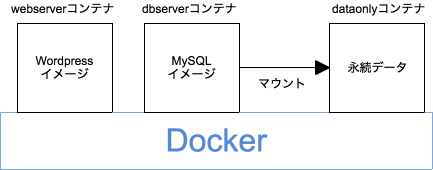
完成図
webserverコンテナ:wordpressが動作
dbserverコンテナ:MySQLが動作
dataonlyコンテナ:データ保存用
をDocker上に作成します
作業の流れ
① dataonlyコンテナを生成
② webserverコンテナ・dbserverコンテナの生成
③ Docker Composeによる複数コンテナの起動
④ データの確認
⑤ MySQL接続
① dataonlyコンテナを生成
まずはじめに、dataonlyコンテナを生成するための、イメージを作成します
wordpress/dataonly/以下に Dockerfileを作成しました
(作業ディレクトリはどこでも)
# ベースとなるイメージをDockerHubから取得
FROM busybox

# 作成者
MAINTAINER YamadaTaro yamada@testmail.com

# ボリュームの指定
VOLUME /var/lib/mysql
※ busyboxはLinuxのフォルダ構成と標準コマンドだけをバイナリにまとめた最小構成のLinux
DockerFileのビルド
Dockerfileファイルが作成できたので、イメージの作成・イメージからコンテナ起動まで一気に実行します
dataonlyというタグ名でカレントディレクトリのDockerfileをビルド
# docker build -t [イメージ名:タグ名] [Dockerfileのあるディレクトリ]
$ docker build -t dataonly .


Sending build context to Docker daemon 2.048 kB
Step 1 : FROM busybox
latest: Pulling from library/busybox

56bec22e3559: Pull complete
Digest: sha256:29f5d56d12684887bdfa50dcd29fc31eea4aaf4ad3bec43daf19026a7ce69912
Status: Downloaded newer image for busybox:latest
 ---> e02e811dd08f
Step 2 : MAINTAINER YamadaTaro yamada@testmail.com
 ---> Running in 55665148e4ee
 ---> 75145c609162
Removing intermediate container 55665148e4ee
Step 3 : VOLUME /var/lib/mysql
 ---> Running in 93ee14d417d3
 ---> 65b4db421524
Removing intermediate container 93ee14d417d3
Successfully built 65b4db421524
latest: Pulling from library/busybox
ローカルにbusyboxのイメージがないのでDockerHubから最新版をPULLしてるのがわかります
$ docker imagesでローカルのイメージを確認
$ docker images
                                                                                                                                                                          17:46:13
REPOSITORY          TAG                 IMAGE ID            CREATED              SIZE
dataonly            latest              65b4db421524        About a minute ago   1.093 MB
busybox             latest              e02e811dd08f        About a minute ago   1.093 MB
dataonlyコンテナの起動
dataonlyイメージができたので、dataonlyコンテナを起動します
ちょっとややこしいですが、コンテナ名にdataonlyという名前を指定して起動します
イメージ名 : dataonly
コンテナ名 : dataonly
# $ docker run [オプション] コンテナ名 イメージ名
$ docker run -it --name dataonly dataonly

/ #
/ # ls -la
total 44
drwxr-xr-x   20 root     root          4096 Oct 13 08:54 .
drwxr-xr-x   20 root     root          4096 Oct 13 08:54 ..
-rwxr-xr-x    1 root     root             0 Oct 13 08:54 .dockerenv
drwxr-xr-x    2 root     root         12288 Oct  7 18:18 bin
drwxr-xr-x    5 root     root           380 Oct 13 08:54 dev
drwxr-xr-x    2 root     root          4096 Oct 13 08:54 etc
drwxr-xr-x    2 nobody   nogroup       4096 Oct  7 18:18 home
dr-xr-xr-x   99 root     root             0 Oct 13 08:54 proc
drwxr-xr-x    2 root     root          4096 Oct 13 08:54 root
dr-xr-xr-x   12 root     root             0 Oct 13 08:54 sys
drwxrwxrwt    2 root     root          4096 Oct  7 18:18 tmp
drwxr-xr-x    3 root     root          4096 Oct  7 18:18 usr
drwxr-xr-x    5 root     root          4096 Oct 13 08:54 var

/ # exit で抜ける
-itオプションについて
-iは Keep STDIN open even if not attached
標準入力を開き続ける。-tは Allocate a pseudo-TTY
疑似ttyを割りあてる。
コンテナが生成されたか確認
$ docker ps -a

CONTAINER ID        IMAGE               COMMAND             CREATED             STATUS                     PORTS               NAMES
a919ca85d6a7        dataonly            "sh"                3 minutes ago       Exited (0) 2 seconds ago                       dataonly
② webserverコンテナ・dbserverコンテナの生成
Docker Composeを使用し複数コンテナを**一元管理(オーケストレーション)**します
一元管理の設定は docker-compose.ymlに記述します
# webサーバーの設定
webserver:

  # wordpressのイメージを取得。ローカルにないので、DockerHubから4.9.8-php7.0-apacheを指定して取得
  image: wordpress:4.9.8-php7.0-apache

  # 80番ポートに転送 ホストポート:コンテナポート
  ports:
   - "80:80"

  # 別コンテナのエイリアスを設定 (リンク)
  links:
   - "dbserver:mysql"


# dbサーバーの設定
dbserver:

  # mysqlのイメージを取得
  image: mysql:5.6

  # データのマウント先を指定 (先ほど作成したdataonlyコンテナ)
  volumes_from:
   - dataonly

  # 環境変数
  environment:
   MYSQL_ROOT_PASSWORD: password
③ Docker Composeによる複数コンテナの起動
webserverコンテナ・dbserverコンテナを起動
# -d でコンテナをデーモン化
$ docker-compose up -d

:
:
Status: Downloaded newer image for wordpress:latest
Creating wordpress_dbserver_1
Creating wordpress_webserver_1
確認
$ docker-compose ps

        Name                       Command               State         Ports
-----------------------------------------------------------------------------------
wordpress_dbserver_1    docker-entrypoint.sh mysqld      Up      3306/tcp
wordpress_webserver_1   docker-entrypoint.sh apach ...   Up      0.0.0.0:80->80/tcp
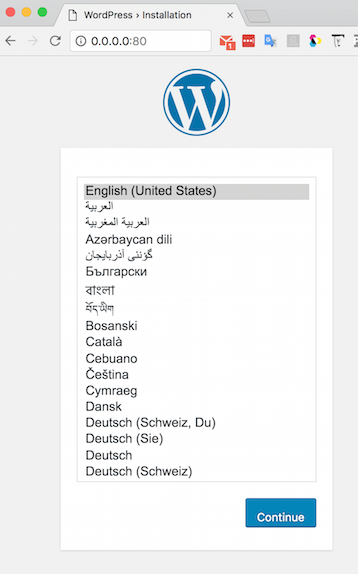
サーバーがたちました
http://0.0.0.0:80 にアクセス

④ データの確認
dataonlyにデータがマウントされているか確認します
# dataonlyコンテナにアタッチ
$ docker start -ia dataonly

# 「①dataonlyコンテナを生成」 で指定したパス
$ ls /var/lib/mysql/
ib_logfile0         ibdata1             mysql               performance_schema  wordpress
auto.cnf            ib_buffer_pool      ib_logfile1         ibtmp1              mysql.sock          sys
マウントされてますね!
そしてここで注目したいのが、dataonlyコンテナは稼働していません
通常のコンテナは削除するとデータも消えてしまいますが、
データボリュームとして指定されたコンテナはコンテナが削除されてもデータは永続化されます
また、コンテナを圧縮ファイルやイメージ化する際も実データがないので安心です
MySQL接続
Docker composeで立ち上げたコンテナを確認を確認し「dbserver」コンテナのIPを表示
# Docker composeで立ち上げたコンテナを確認
$ docker-compose ps

        Name                       Command               State         Ports
-----------------------------------------------------------------------------------
wordpress_dbserver_1    docker-entrypoint.sh mysqld      Up      3306/tcp
wordpress_webserver_1   docker-entrypoint.sh apach ...   Up      0.0.0.0:80->80/tcp


# inspectコマンドでコンテナのIPを表示
$ docker inspect wordpress_dbserver_1 | grep IPAddress

"IPAddress": "172.17.0.2",
:
Dockerで構築されているバーチャルホスト上のコンテナへ接続
# docker-compose run [オプション] [サービス] [コマンド]
$ docker-compose run dbserver mysql -h 172.17.0.2 -u root -p

# docker-compose.ymlで指定したパスワード
Enter password:password

mysql> show databases;
+--------------------+
| Database           |
+--------------------+
| information_schema |
| mysql              |
| performance_schema |
| sys                |
| wordpress          |
+--------------------+
5 rows in set (0.01 sec)

mysql>
※ dbserverはdocker-compose.ymlで指定した名称です。非常にややこしいです
また、docker-compose runコマンドで実行してから、IPアドレスを指定しているのは
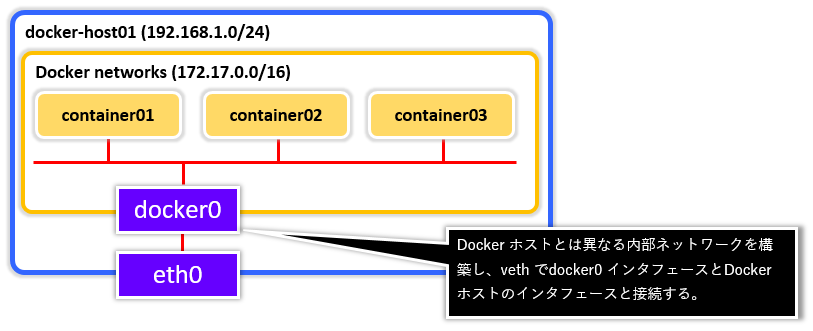
Docker内のネットワークが構築されているためです

最後に
非常に覚える用語とコマンドが多いです
地道にやっていくしかないですね
お疲れ様でした!
リンク
Docker入門 #1 【Dockerとは】
Docker入門 #2 【Dockerチュートリアル】
Docker入門 #3 【WordPress環境構築】
Docker入門 #4 【CodeIgniter環境構築】
Docker入門 #5 【Ruby on Rails5環境構築】
Docker コマンドチートシート

