これは株式会社LabBase テックカレンダー Advent Calendar 2022 8日目の記事です。昨日の記事はこちらです。
今回はutoipaを使って、Rustで実装したAPIを確認できるようにします。
TL;DR
- utoipaをcloneする。
- examplesディレクトリにある好きな環境で、
cargo run実行する。 -
http://localhost:8080/swagger-uiへアクセスする。 - Swagger UIでAPIが確認できる。
はじめに
Rustで作ったバックエンドのAPIドキュメントを作成するために、Rustだけでどうにかならないかなと検索したら、utoipaというライブラリで解決できそうだったので、組み込んでSwagger UIで確認してみました。
がんばればOpenAPI Generatorが生成したコードを使えるようです(参考記事)
utoipaとは
Want to have your API documented with OpenAPI? But you dont want to see the trouble with manual yaml or json tweaking? Would like it to be so easy that it would almost be like utopic? Don't worry utoipa is just there to fill this gap. It aims to do if not all then the most of heavy lifting for you enabling you to focus writing the actual API logic instead of documentation. It aims to be minimal, simple and fast. It uses simple proc macros which you can use to annotate your code to have items documented.
utoipaのGitHubより引用
要約するとRustだけで、いい感じにドキュメントを作れるよという感じです。今回はactix-webを使いますが、他のフレームワーク(axum、warp、tide、rocket)にも対応しているようです。
ゴール
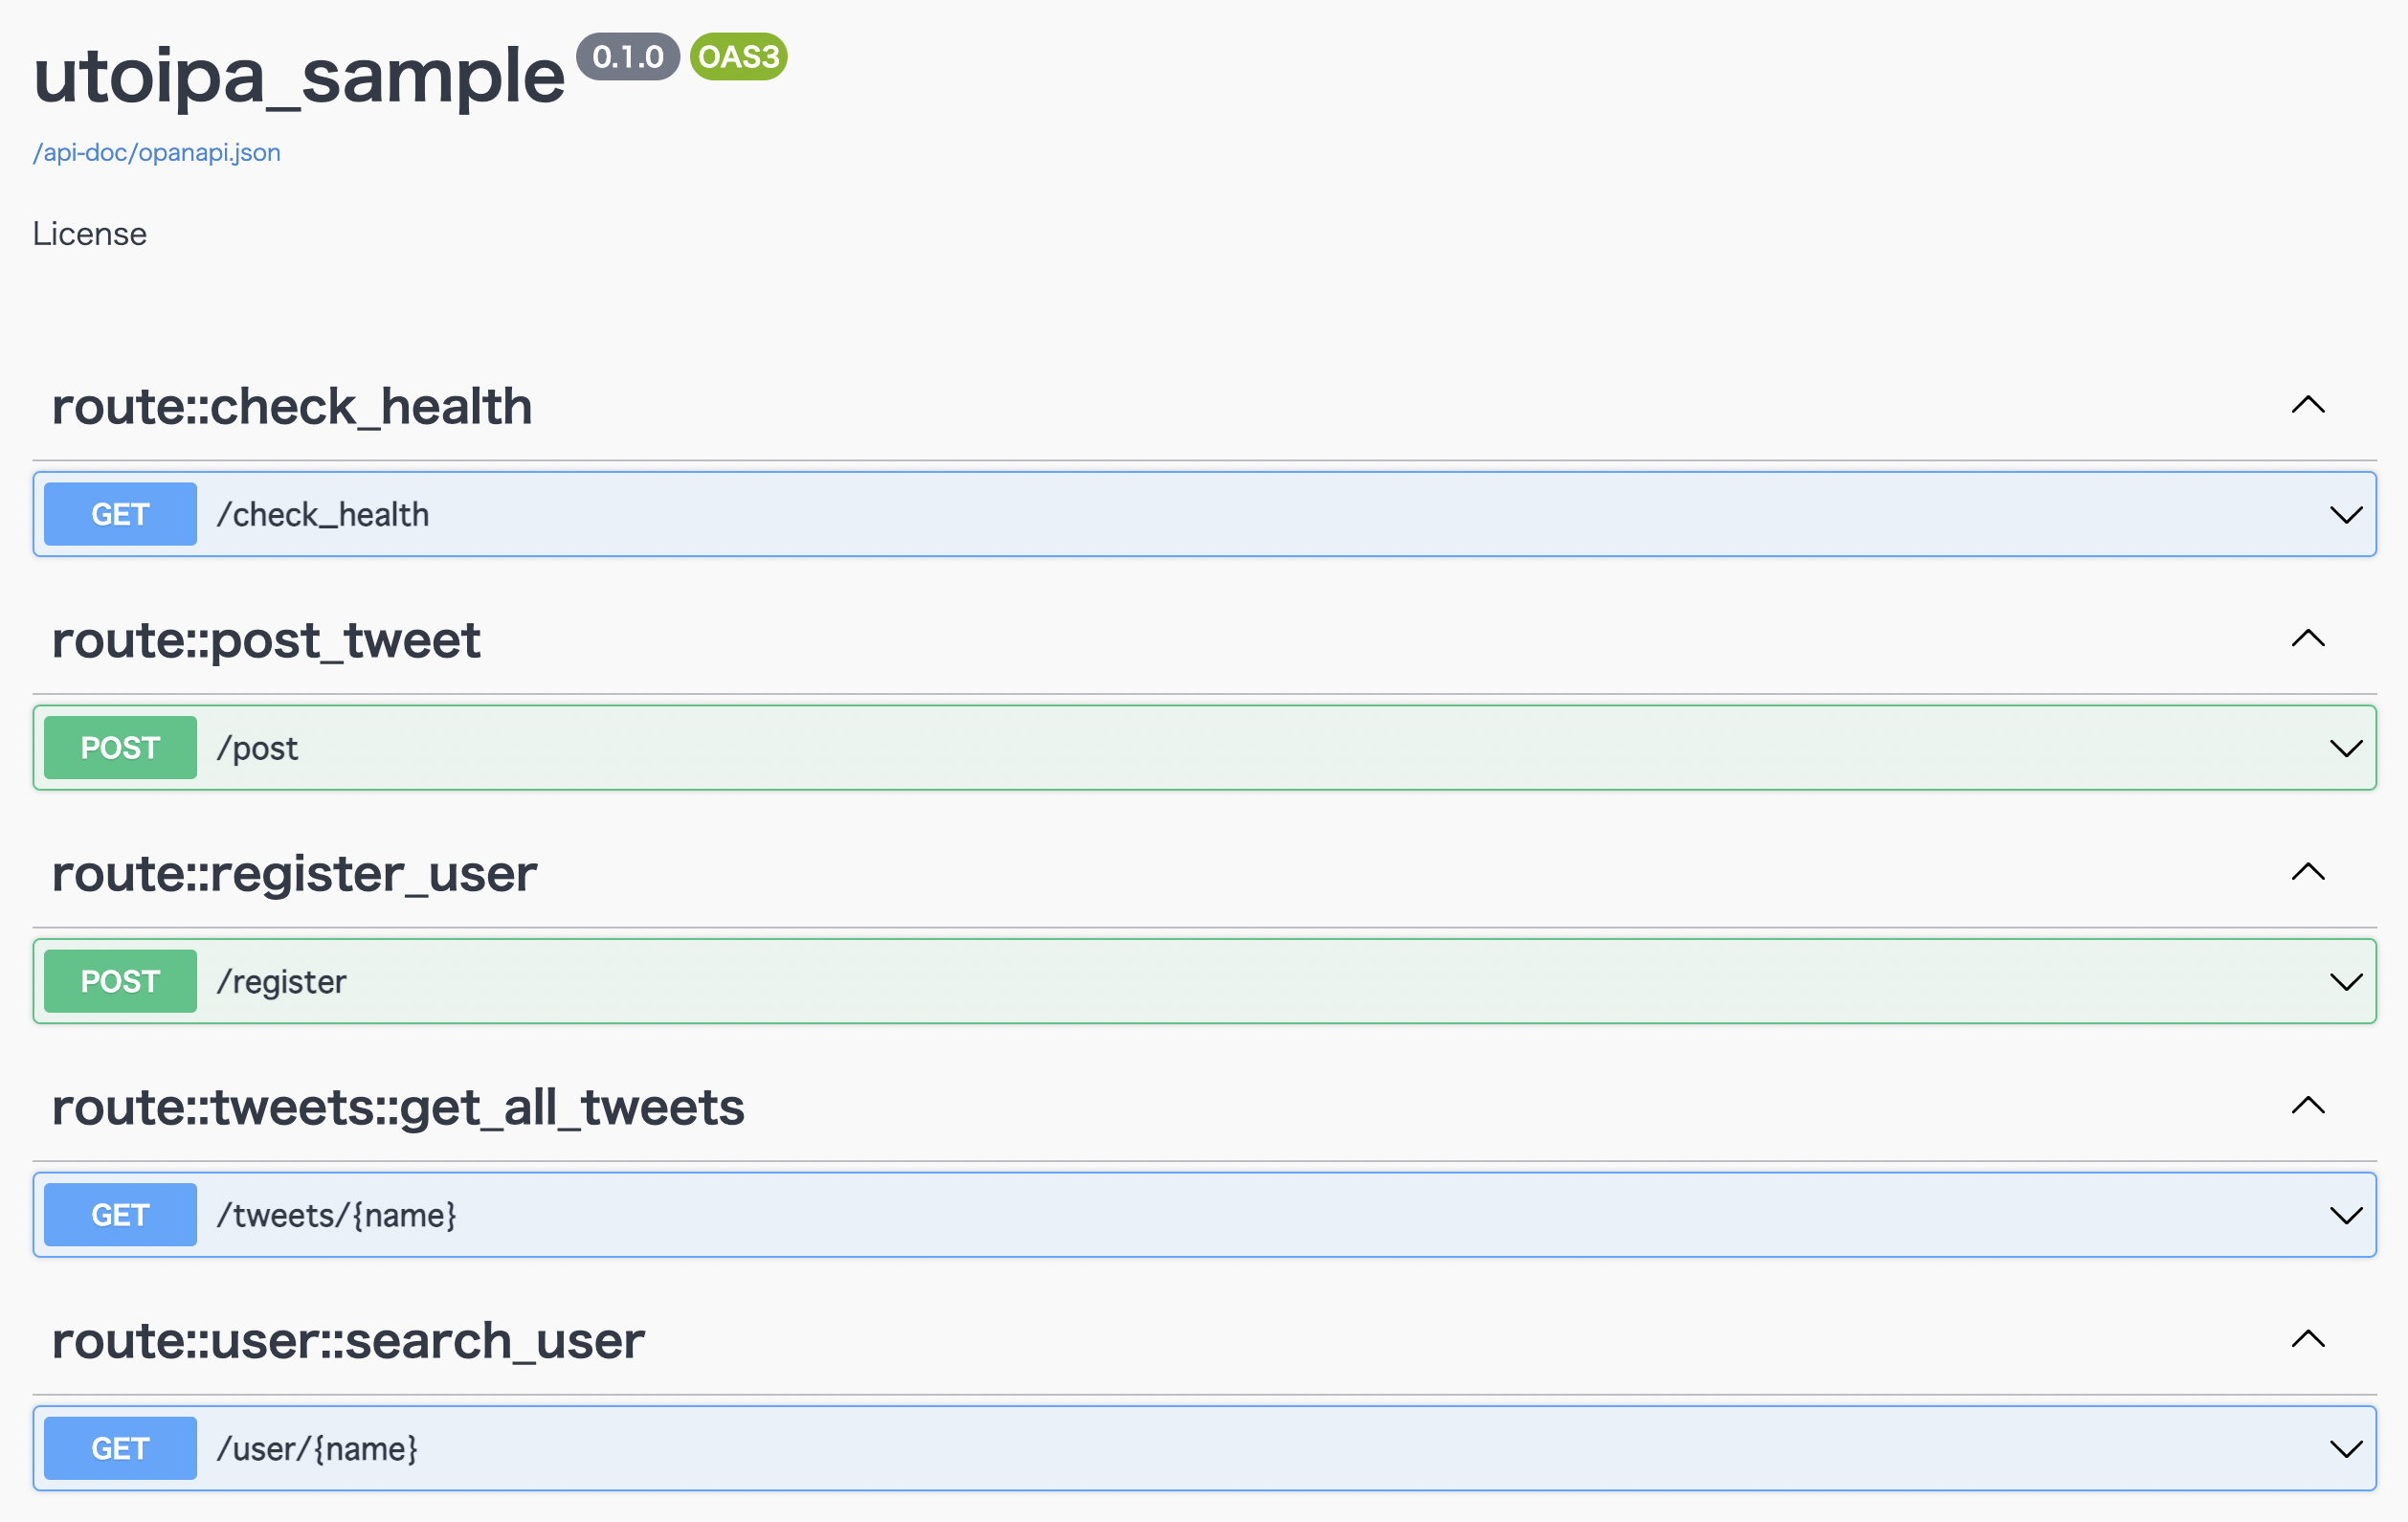
今回はactix-webでバックエンドを実装し、utoipaを使って以下のようにブラウザでAPIを確認できるようにします。

環境
今回使用するコードはこちらにあります。
利用ライブラリ
ディレクトリ
クリーンアーキテクチャでディレクトリは構成されています。パスなどはapiディレクトリに実装されています(ディレクトリ構造はもっと工夫できると思います)。
ディレクトリ構造は以下のとおりです。
./src
├── api
│   ├── composition.rs	// 依存性注入
│   ├── execute.rs		// usecase層を使た実装
│   ├── request.rs		// リクエスト用のモデル
│   ├── response.rs		// レスポインス用のモデル
│   ├── route			// executeとcompositionを使ったAPI(パス)の実装
│   └── route.rs		// OpanAPIの設定とactix-webの設定
├── api.rs
├── domaim				// ドメインの実装
├── domain.rs
├── infra				// DBモックの実装
├── infra.rs
├── main.rs				// サーバーの実装
├── usecase				// 各ユースケースの実装
└── usecase.rs
使い方
utoipaを使うためにはToSchema、IntoParams、Path、OpanAPIというDeriveをStructまたは関数に追加する必要があります(これだけでいい!)。
ToSchema
ToSchemaはrequestやresponseのStructに対して追加します。(ドキュメント)
use utoipa::ToSchema;

#[derive(Deserialize, ToSchema)]
pub struct RegisterUserRequest {
    name: String,
    email: String,
}
IntoParams
IntoParamsはパスのパラメータをStructにした場合に追加します。(ドキュメント)
example/{name}のパラメータをNameというStructで定義した場合は以下のとおりです。
use utoipa::IntoParams;

#[derive(Deserialize, IntoParams)]
pub struct Name {
    /// User name
    name: String,
}
ドキュメンテーションコメントにパラメータの説明が書けます。
Path
エンドポイントとして指定した関数に追加します。(ドキュメント)
use actix_web::error::ErrorInternalServerError;
use actix_web::error::ErrorNotFound;
use actix_web::{get, post, web, Responder, Result};

#[utoipa::path(
    post,
    request_body = RegisterUserRequest,
    responses(
        (status = 200, description = "Register User", body = RegisterUserRequest),
        (status = 500, description = "Internal error")
    ),
)]
#[post("/register")]
pub async fn register_user(req: web::Json<RegisterUserRequest>) -> Result<impl Responder> {
    let name = req.0.name();
    let email = req.0.email();
    let Ok(user) = Composition::register_user().run(name, email).await
        else {return Err(ErrorInternalServerError("InternalError"))};
    Ok(web::Json(RegisterUserResponse::from(user)))
}

#[utoipa::path(
    get,
    context_path = "/user",
    params(Name),
    responses(
        (status = 200, description = "Search User", body = SearchedUserResponse),
        (status = 404, description = "Not found")
    ),
)]
#[get("/{name}")]
pub async fn search_user(req: web::Path<Name>) -> Result<impl Responder> {
    let name = req.name();
    let Ok(user) = Composition::search_user().run(name).await
        else { return Err(ErrorNotFound("NotFound"))};
    Ok(web::Json(SearchedUserResponse::from(user)))
}
pathには以下を設定できます。
- operation
- 例:get, post, put, delete, head, options, connect, path, trace
- path
- 記述しないとactix-webで設定したエンドポイントになるようです。
- operation_id
- デフォルトは関数名になるようです。
- context_path
- スコープが指定してある場合、ドキュメントでエンドポイントの前に表示できます。
- tag
- request_body
- 定義したstructを指定できます。
- response
- 複数のレスポンスが指定できます。
- params
- IntoParamsを追加したStructを指定できます。
- security
OpenAPI
OpenApiはドキュメント化したいものをまとめます。(ドキュメント)
#[derive(OpenApi)]
#[openapi(
    paths(
        route::check_health::check_health,
        route::register_user::register_user,
        route::post_tweet::post_tweet,
        route::user::search_user::search_user,
        route::tweets::get_all_tweets::get_all_tweets,
    ),
    components(schemas(
        RegisterUserRequest,
        PostTweetRequest,
        RegisterUserResponse,
        PostTweetResponse,
        SearchedUserResponse,
        GetAllTweetResponse
    ))
)]
struct ApiDoc;
openapiには以下が指定できます。
- paths
-
#[utoipa::path]を追加した関数を追加します。
-
- components(schema, response)
- schemas
-
ToSchemaDeriveを追加したStructを追加します。
-
- response
-
ToResponseTraitを実装したStructを追加します。
-
- schemas
- modifiers
- security
- tags
- external_docs
actix-webへの組み込み
main.rsに通常のservice登録と別にswagger-uiが見れるエンドポイントを追加します。
use actix_web::{App, HttpServer};

pub fn config(cfg: &mut web::ServiceConfig) {
    cfg.service(check_health::check_health)
        .service(register_user::register_user)
        .service(post_tweet::post_tweet)
        .configure(user::config)
        .configure(tweets::config)
        .service(
            SwaggerUi::new("/swagger-ui/{_:.*}")
                .url("/api-doc/opanapi.json", ApiDoc::openapi()),
        );
}

#[actix_web::main]
async fn main() -> std::io::Result<()> {
    HttpServer::new(|| App::new().configure(config))
        .bind(("127.0.0.1", 8080))?
        .run()
        .await
}
cargo runでサーバーを起動することで、http://localhost:8080/swagger-ui/へアクセスすると上記のようにドキュメントが見れるようになります。
おわりに
特段難しいことはせずにRustのコードだけでAPIドキュメントが公開できます。ディレクトリ構造を工夫することでOpenAPIっぽくなるのではないかと。ここでは紹介していない機能もあるようなので、もっと活用できると思います。
次回の記事は@HHajimeWさんです。よろしくお願いいたします。