概要
CoreLocationで緯度・経度を取得して位置情報を表示する方法を説明します。
確認バージョン
Xcode 11.2.1
Swift 5.1.2
iOS 13.2.3
CoreLocation
ライブラリ
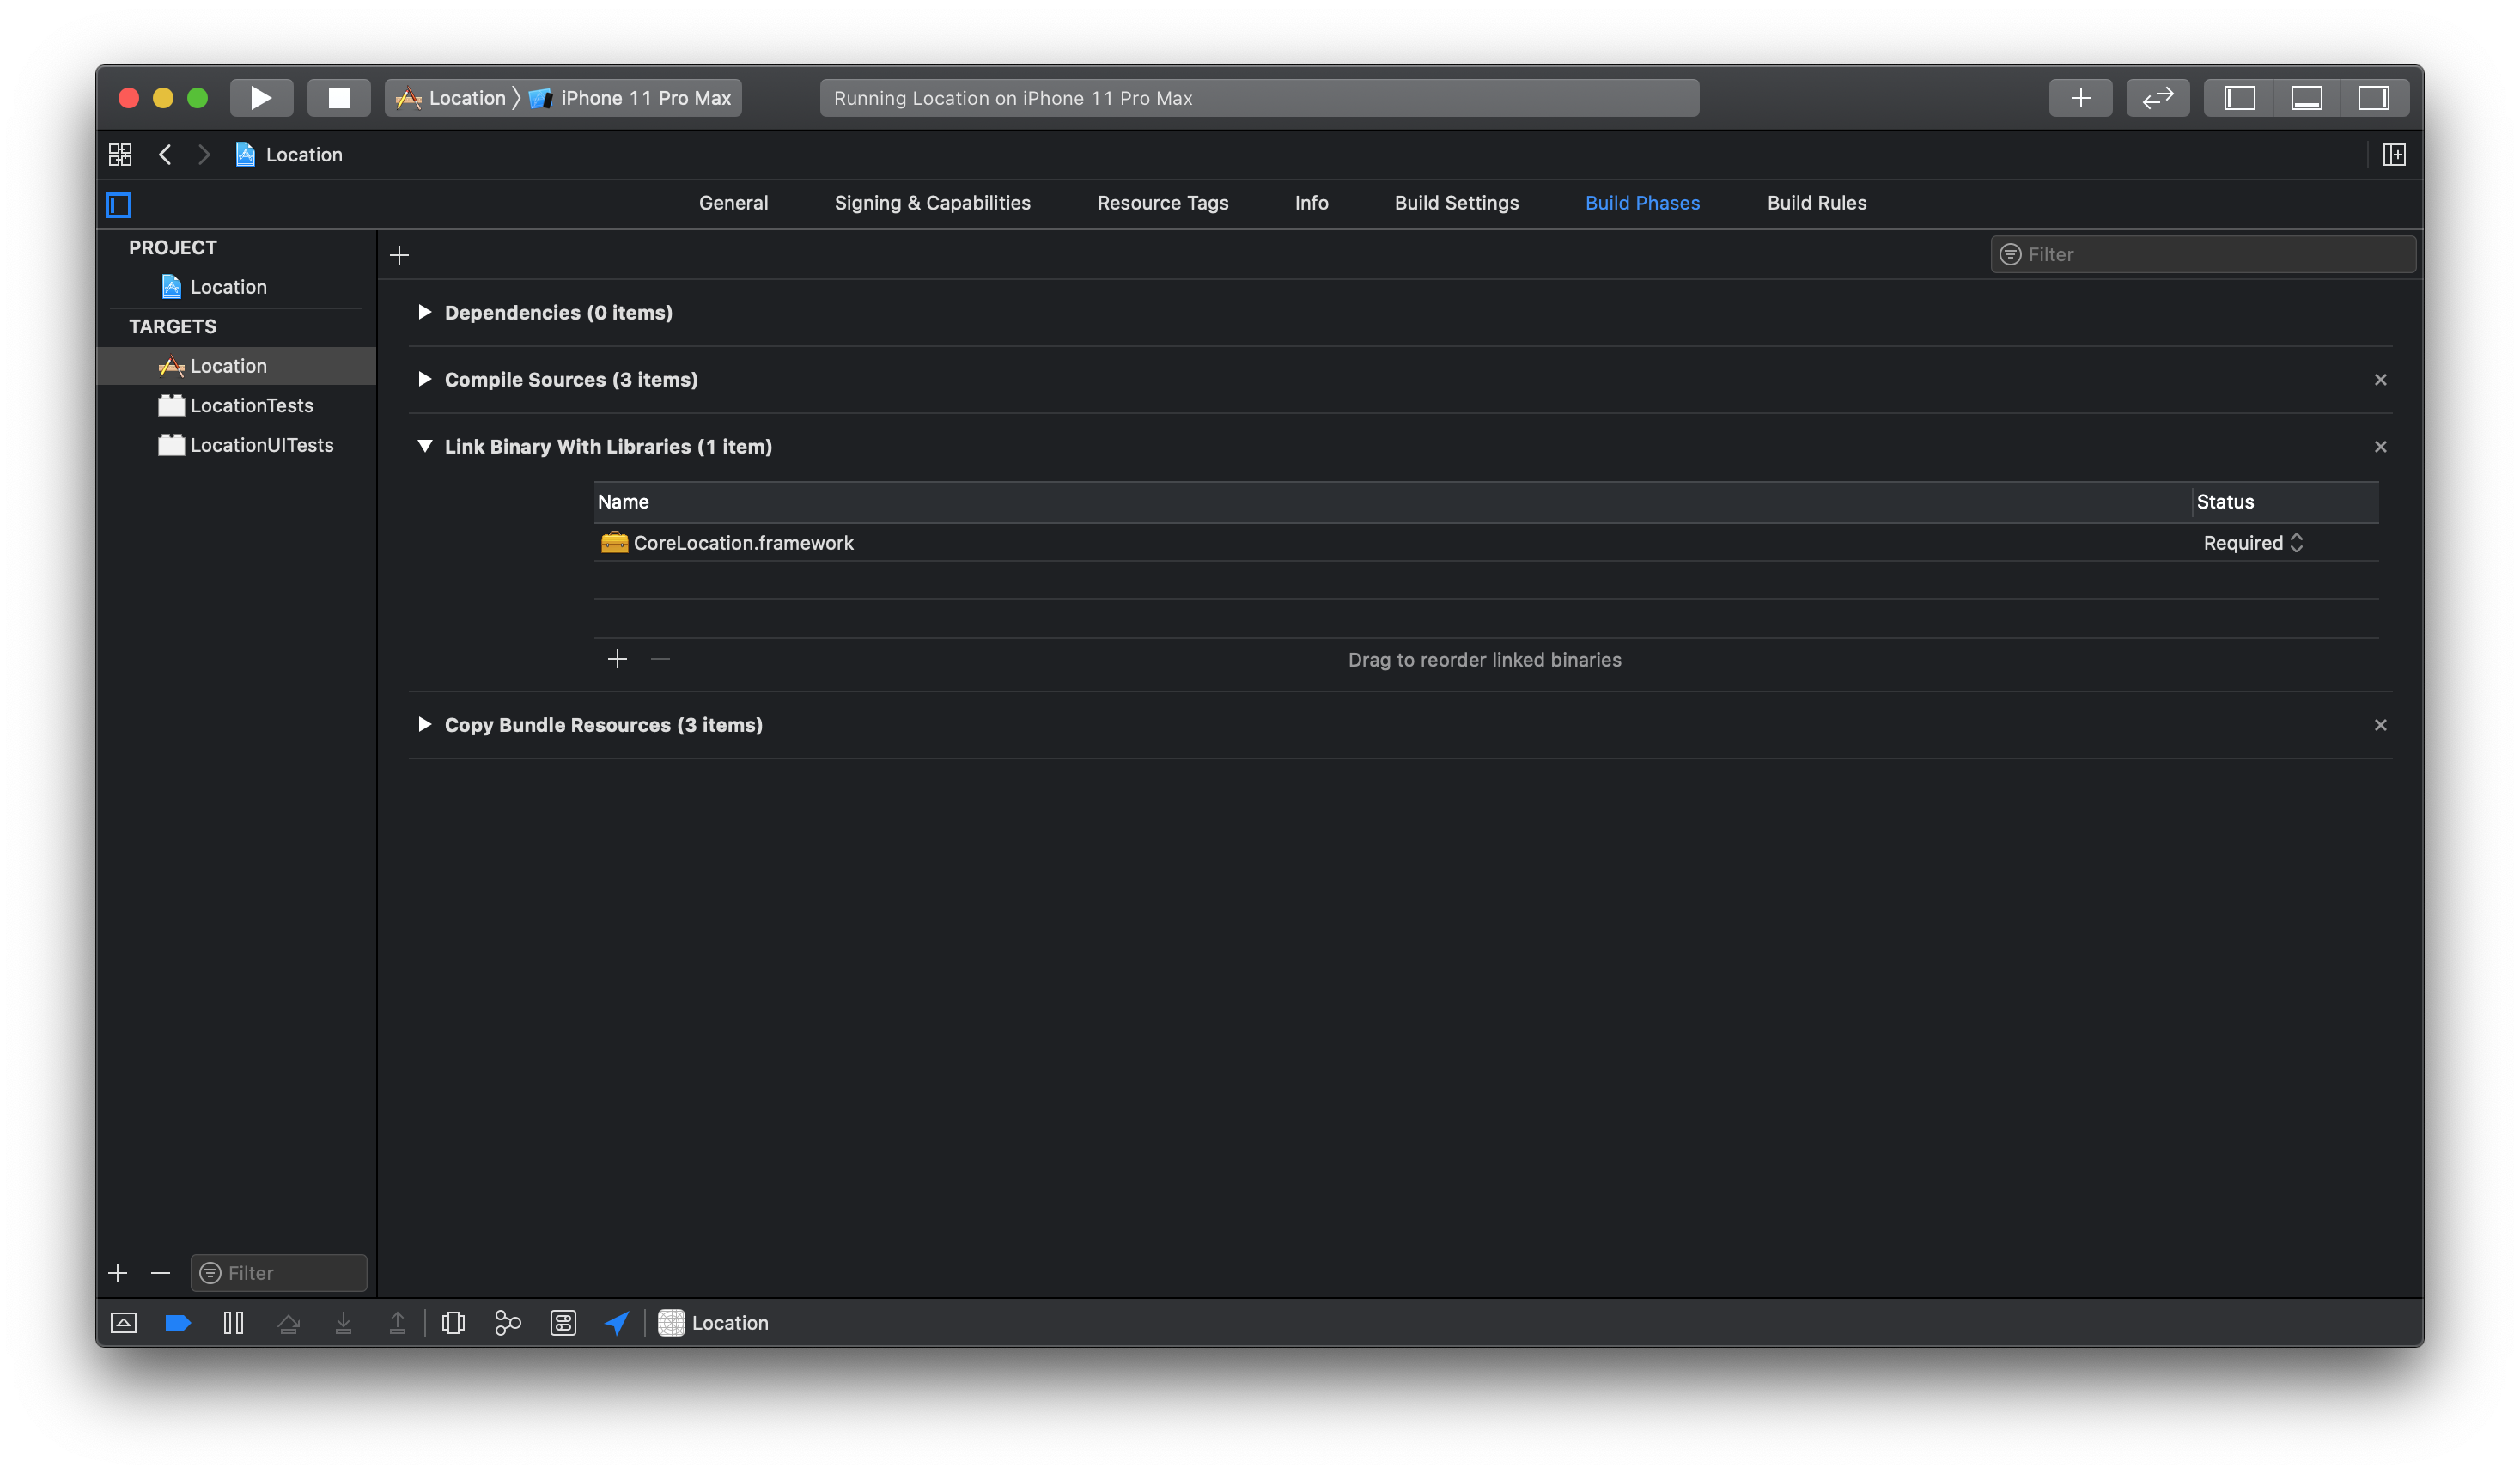
TARGET -> Build Phase -> Link Binary With Libraries
CoreLocation.frameworkを追加
Info.plist
Privacy - Location When In Use Usage Description
位置情報許可のアラート画面に表示される説明を追加します。
実装
- 情報表示用のUILabelを追加
- 位置情報を利用許可状態を判定
- 位置情報の更新開始
- CLLocationデータを逆ジオコーディングして位置情報を取得
- 位置情報が更新されるとUILabelに設定
import UIKit
import CoreLocation

class ViewController: UIViewController, CLLocationManagerDelegate {
    let locationManager = CLLocationManager()
    let geocoder = CLGeocoder()
    let text = [ "緯度", "経度", "国名", "郵便番号", "都道府県", "郡", "市区町村", "丁番なしの地名", "地名", "番地" ]
    var item: [ UILabel ] = []
    var location: [ UILabel ] = []

    override func viewDidLoad() {
        super.viewDidLoad()

        //サイズ
        let width = self.view.frame.width / 2
        let height = self.view.frame.height / CGFloat( self.text.count + 1 )

        //ラベル
        for ( i, text ) in text.enumerated() {
            //項目
            self.item.append( UILabel() )
            self.item.last!.frame.size = CGSize( width: width, height: height )
            self.item.last!.frame.origin = CGPoint( x: 0, y: height * CGFloat( i + 1 ) )
            self.item.last!.textAlignment = .center
            self.item.last!.text = text
            self.view.addSubview( self.item.last! )

            //データ
            self.location.append( UILabel() )
            self.location.last!.frame.size = CGSize( width: width, height: height )
            self.location.last!.frame.origin = CGPoint( x: width, y: height * CGFloat( i + 1 ) )
            self.location.last!.textAlignment = .center
            self.view.addSubview( self.location.last! )
        }

        //ロケーションマネージャ
        self.locationManager.requestWhenInUseAuthorization()
        let status = CLLocationManager.authorizationStatus()
        if status == .authorizedWhenInUse {
            self.locationManager.delegate = self
            self.locationManager.distanceFilter = 10
            self.locationManager.startUpdatingLocation()
        }
    }

    func locationManager( _ manager: CLLocationManager, didUpdateLocations locations: [ CLLocation ] ) {
        //表示更新
        if let location = locations.first {
            //緯度・経度
            self.location[0].text = location.coordinate.latitude.description
            self.location[1].text = location.coordinate.longitude.description

            //逆ジオコーディング
            self.geocoder.reverseGeocodeLocation( location, completionHandler: { ( placemarks, error ) in
                if let placemark = placemarks?.first {
                    //位置情報
                    self.location[2].text = placemark.country
                    self.location[3].text = placemark.postalCode
                    self.location[4].text = placemark.administrativeArea
                    self.location[5].text = placemark.subAdministrativeArea
                    self.location[6].text = placemark.locality
                    self.location[7].text = placemark.subLocality
                    self.location[8].text = placemark.thoroughfare
                    self.location[9].text = placemark.subThoroughfare
                }
            } )
        }
    }
}
Githubのソースコードはこちら
※最新のコミットは下記の記事で説明するソースコードに更新しました。
【Swift/iOS】CoreLocationで取得した位置情報を住所に変換する
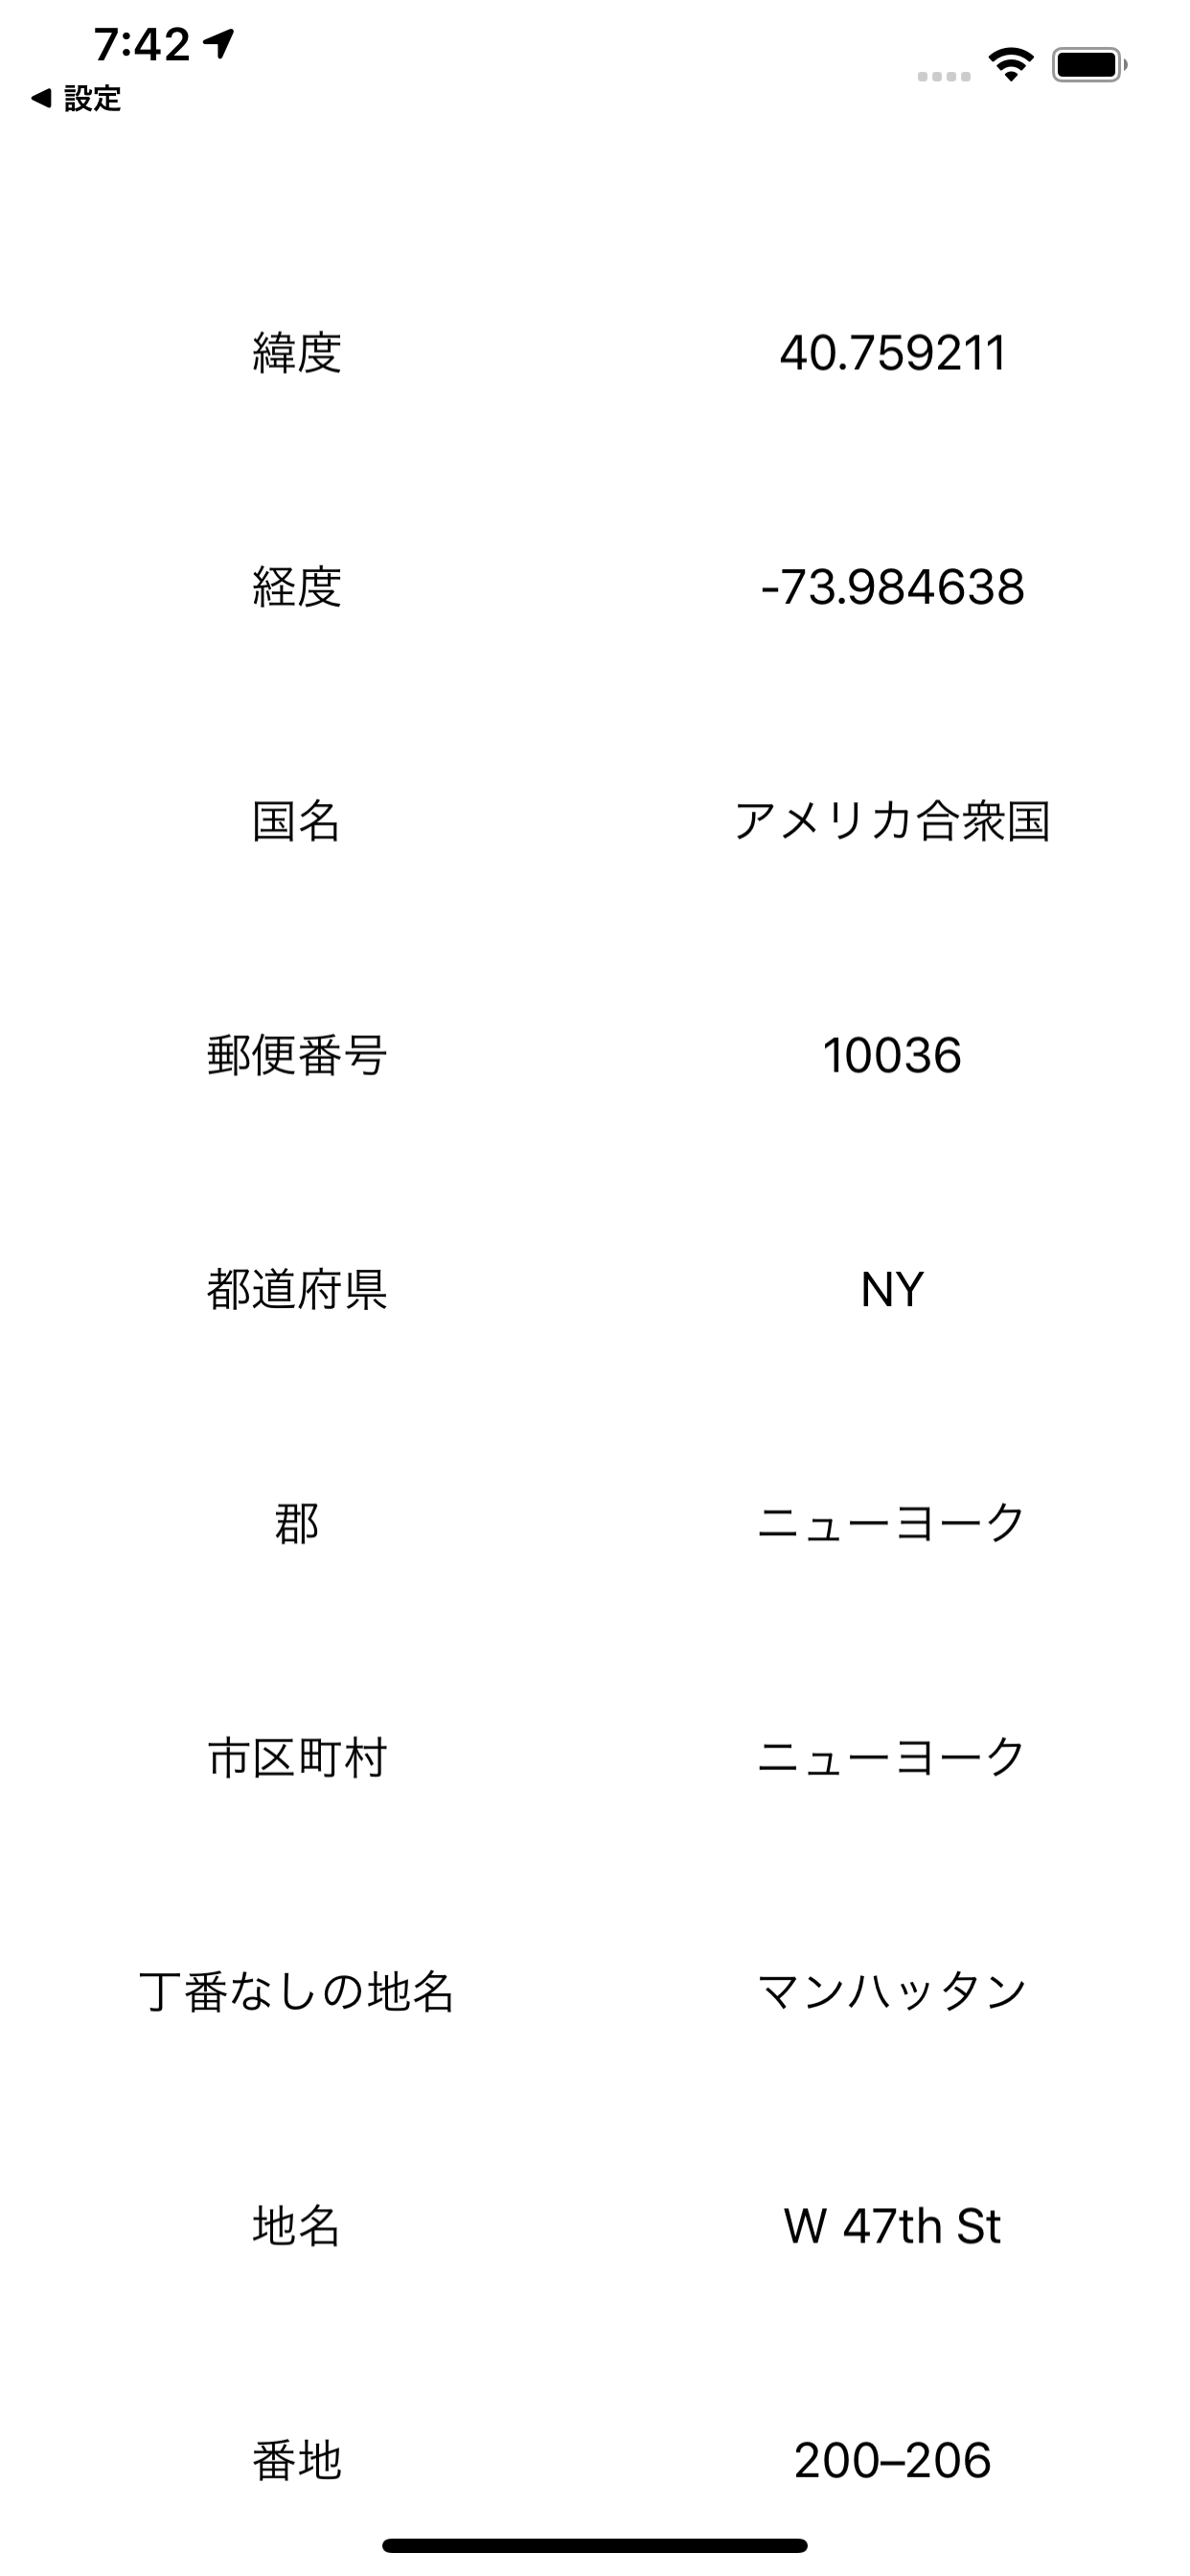
実行
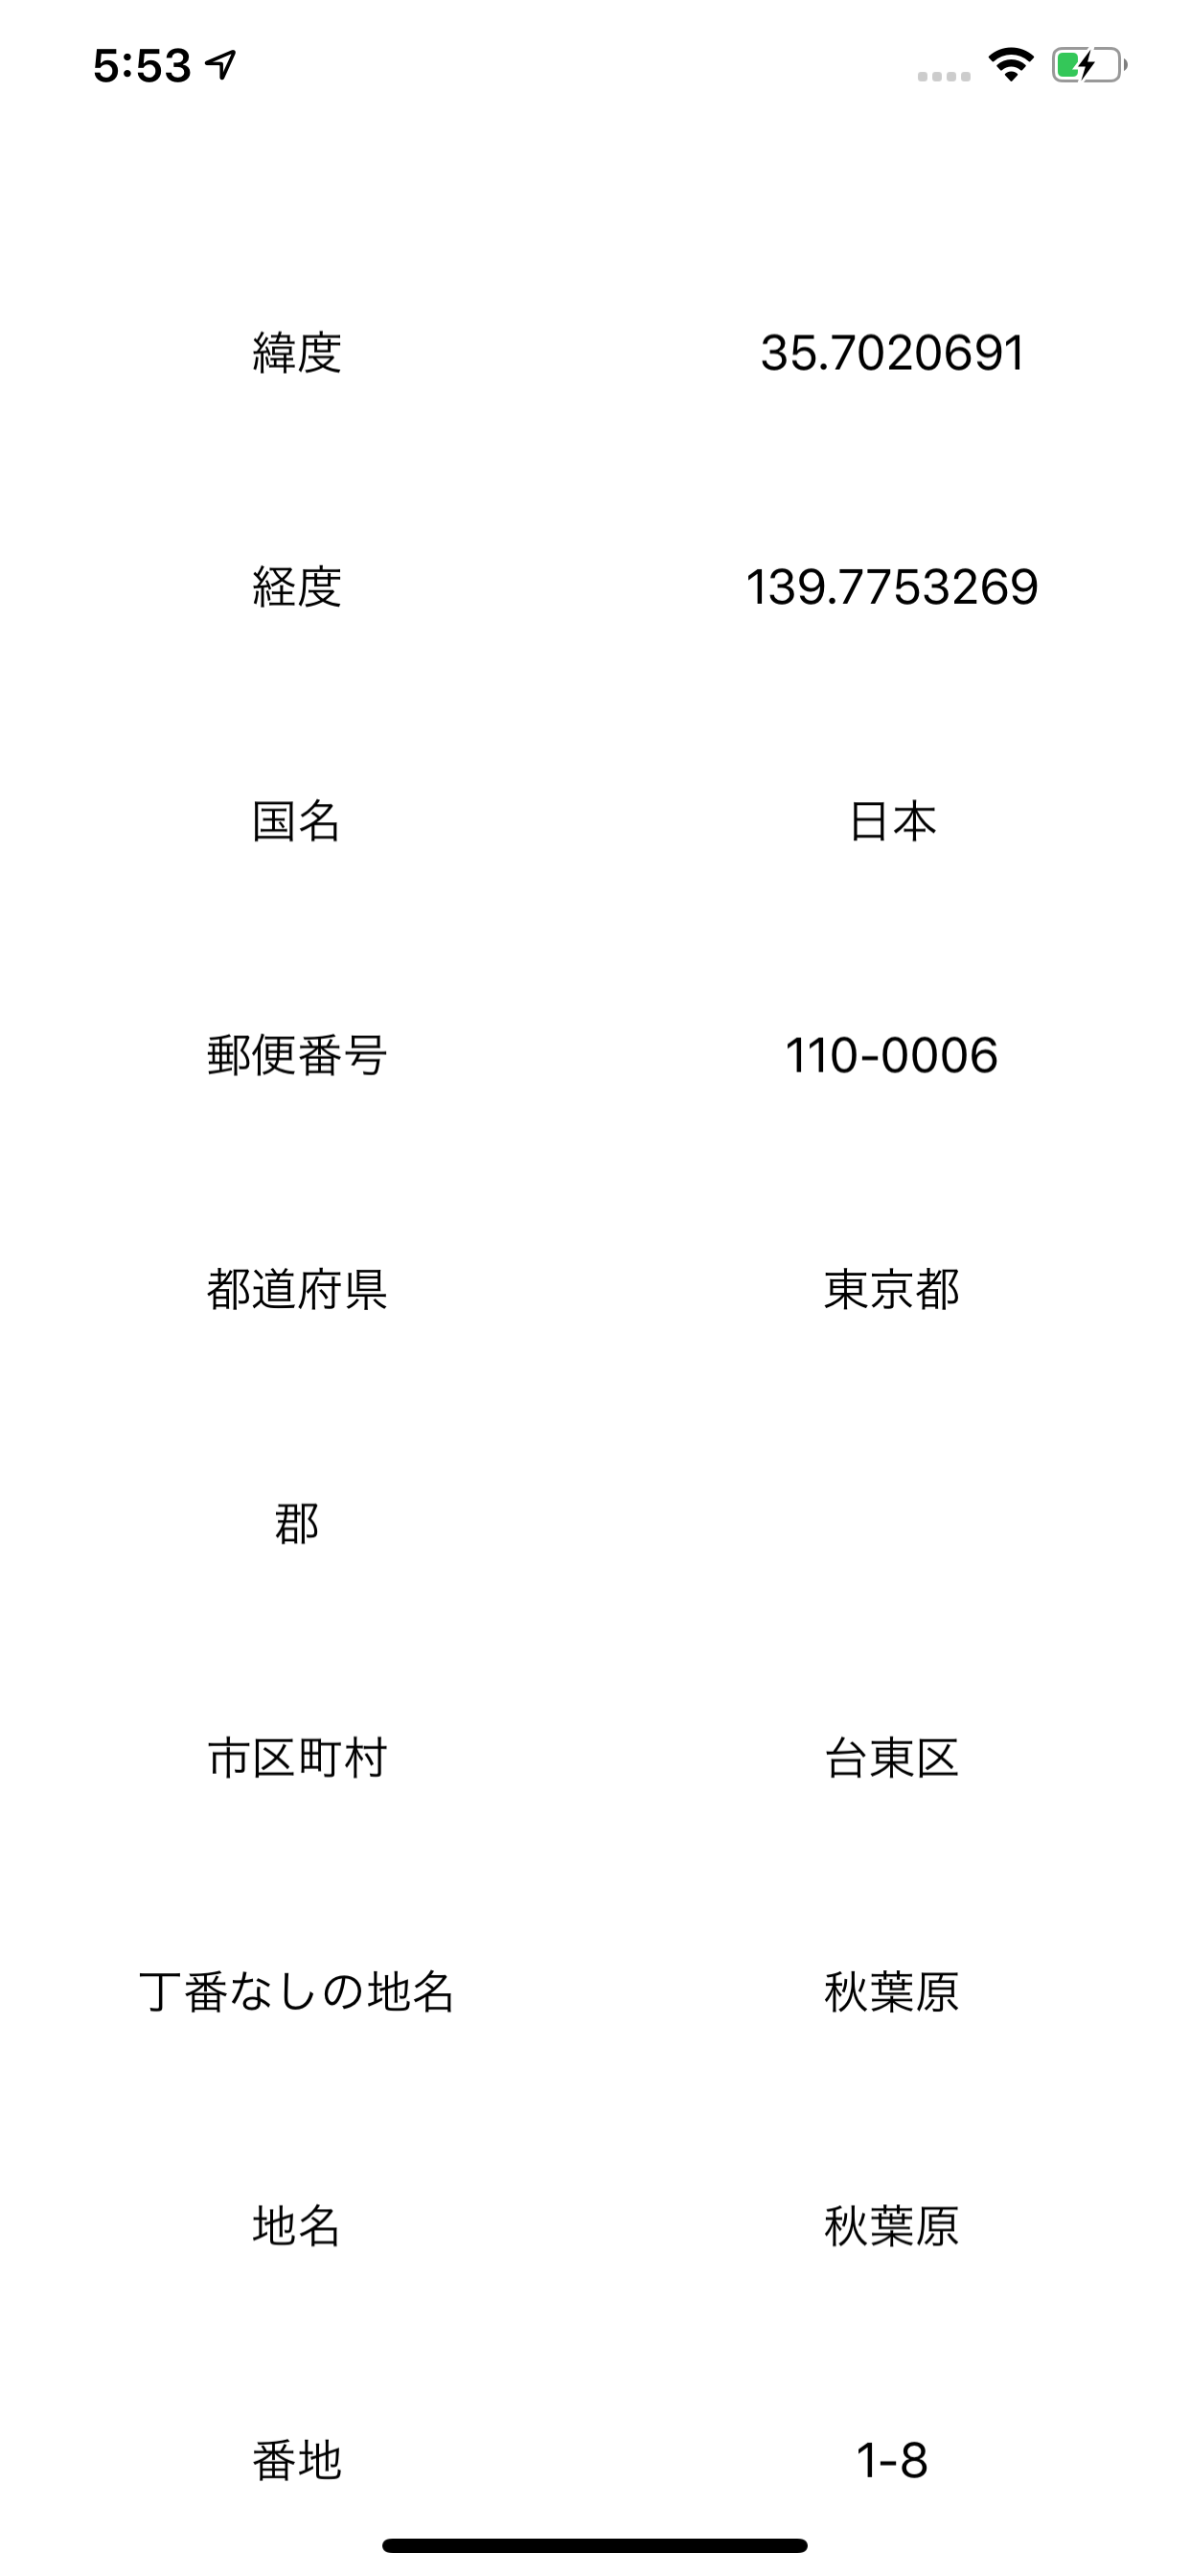
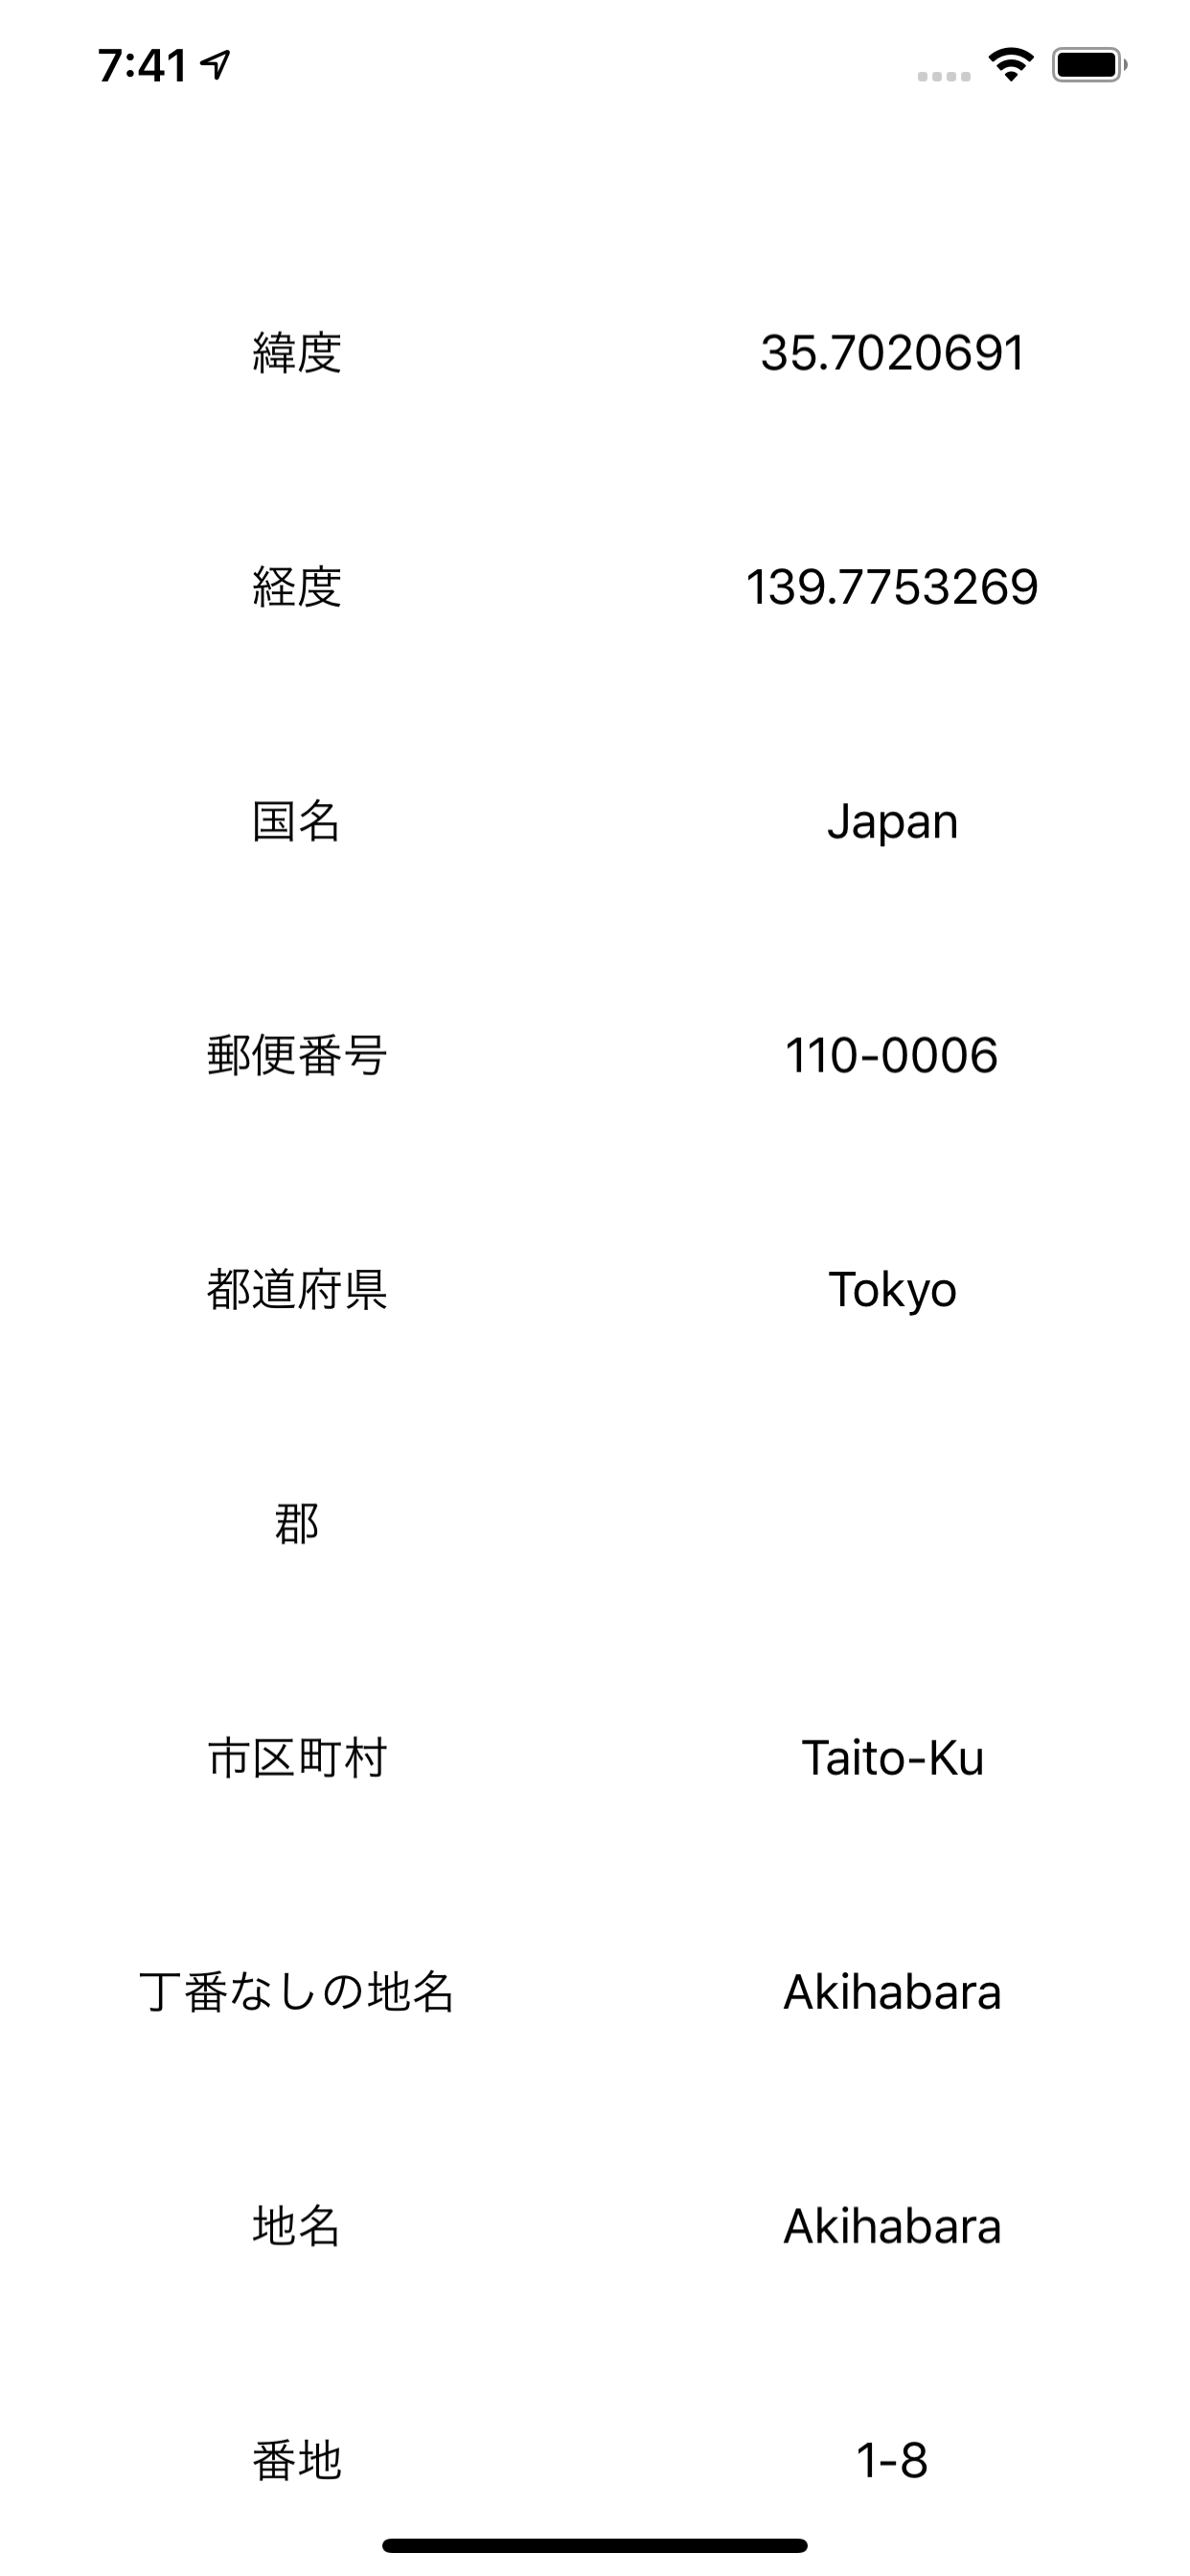
実行すると位置情報が表示されます。
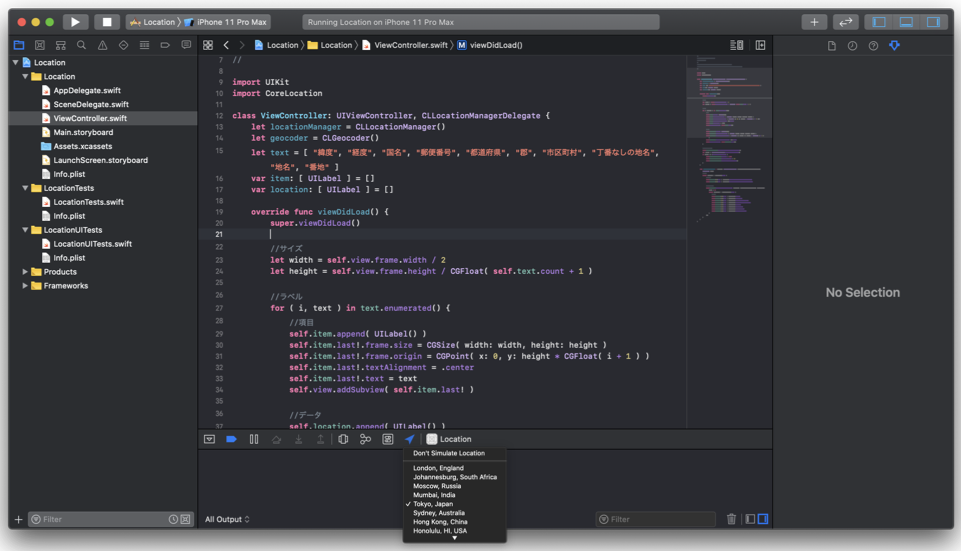
シミュレータで実行する場合には場所を指定して下さい。
取得できる情報は言語設定にしたがってローカライズされています。
| 日本 | JAPAN | アメリカ合衆国 | USA |
|---|---|---|---|
 |
 |
 |
 |
参考
【CoreLocation】位置情報を取得する
[iOS] MapKitを使って”ジオコーディング・逆ジオコーディング”をやってみる
開発アプリ
この記事で紹介した位置情報の取得処理を適用したアプリです。
Go Back Home - 自宅に帰るためのポータルアプリ