はじめに
2020年7月頃よりβ版だったAlexa-hostedスキルが正式公開となりました。※なったはず。
ここでは新しく実装されたAlexa-hostedスキルを使ってスキルを作っていきます。
Amazon開発者ポータルを使用するためにAmazonデベロッパーアカウントが必要です。
あらかじめ環境を整えてから読んでください。
Alexa-hostedスキル以前の方法
Alexa-hostedスキルが正式に公開されるまではAlexaとのインターフェイスはAlexaスキル、そのプログラムの実装はAWSにて行われていました。
| 手段 | コンソール | アカウント |
|---|---|---|
| Alexaにスキルを用意する | Amazon開発者ポータル | Amazonデベロッパー |
| Alexaにプログラムを用意する | AWSコンソール | AWSアカウント |
そのためAmazon開発者ポータルとAWSコンソールを行き来して開発する必要があります。
そしてAmazonデベロッパーアカウントのほかにAWSアカウントも必要になります。
さらにこの2つのサーバー?でデータをやりとりするためのインターフェイスを作る必要があります。
| データの方向 | 必要な情報 |
|---|---|
| Alexaスキル→AWS | Amazon開発者ポータルにて取得するスキルID |
| AWS→Alexaスキル | AWSのLambdaにて取得するARN |
現状ではこの方法でないと出来ない事もあるのですが、ちょっとAlexaのスキルを作ってみたいという人には壁が高すぎます。
Alexa-hostedスキルを使う
Alexa-hostedスキルを使ってスキルを作ると簡単にスキルを作ることができますが、そのための準備が必要なのでは結局ハードルが高くなっていまいます。
Alexa-hostedスキルはAmzaon開発者ポータルでスキルを作成すると自動的に使えるようになっています!!
早速使ってみましょう。
Amazon開発者ポータル
Amazon開発者ポータルからAlexa SkillsKit を選択して Alexa Developer consle を開きます。
今後このページを頻繁に開くのでブックマークにしておきましょう。
Alexa Developer consle
ページを開くと下記のような画面が表示されます。

書籍やネットの情報と見比べるとわかりますが上部のメニューに「コードエディタ」と表示されていますが、これがAlexa-hostedスキルを使ったやり方となるページです。
後の操作説明にも出てくると思いますが、このやり方にAWSが全く関係しないのではなく、Alexa Developer consleにてコードを記述した後デプロイという機能を利用してコードがAWSに送られています。
AWSでのソースコード記述をAlexa Developer consleから送信することでリモートで行っているようなイメージになります。
AWSのアカウントがなくてもAlexa Developer consleと紐付けされたプライベートアカウントとして動作するのでAWSアカウントがなくても動作するようです。本来のAWSアカウントではないのでいくつか出来ないことも存在します。
スキルを作成する
スキル一覧からスキル作成を選択します。

スキル名を入力します。スキル名=スキル呼び出し名ではありませんが、呼び出し名の初期値はスキル名になります。スキル呼び出し名とは「Alexa xxx」の xxx部分になります。
下の方にスクロールすると

作るスキルは「カスタム」そして「Alexa-Hosted(Node.jp)」が選択されています。Alexa-hostedスキルとしてNode.jpを使うという意味になります。
これまでのようにAlexa-hostedスキルを使わない場合は「ユーザー定義のプロビジョニング」を使います。
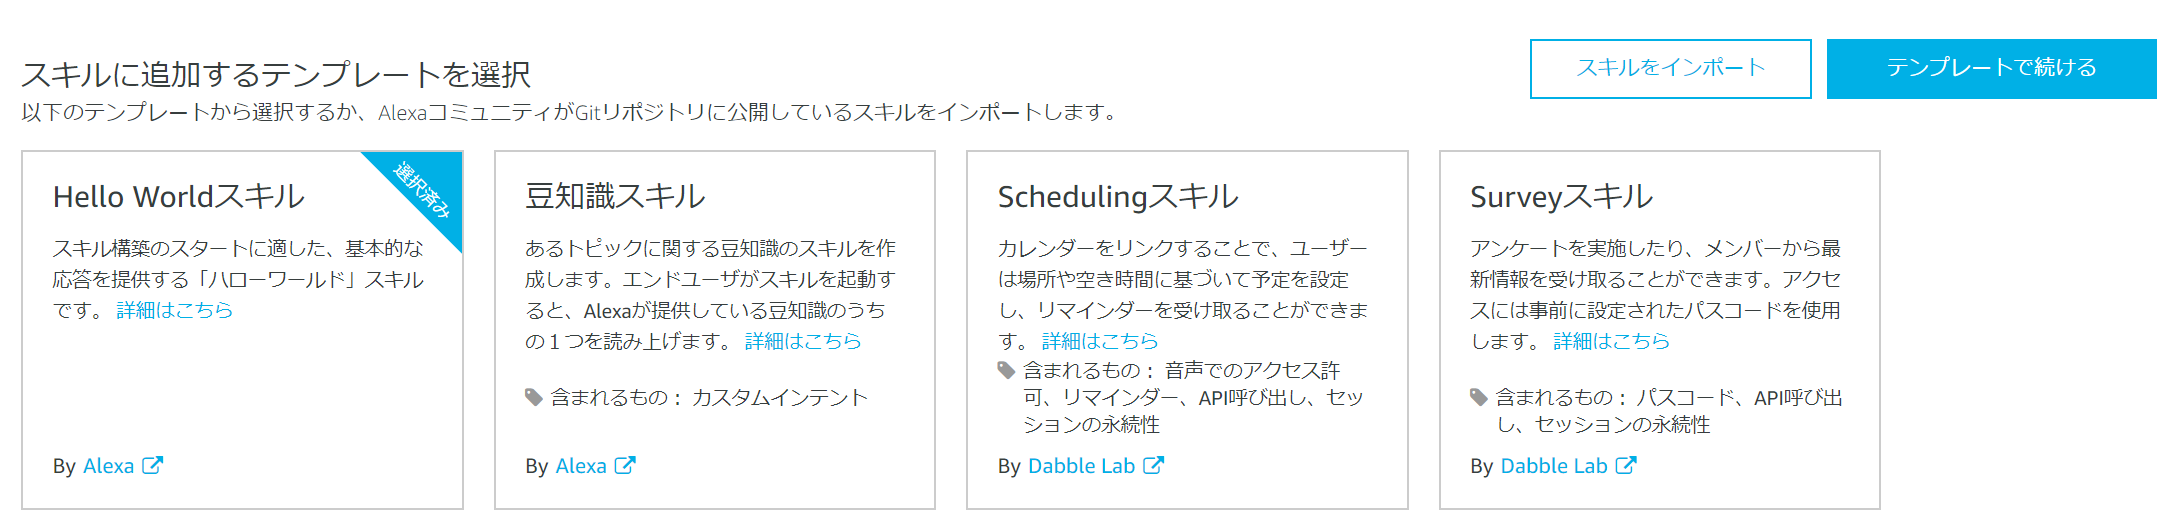
HelloWorldをテンプレートとして使用します。

スキル作成には1分かかります。サーバー側の処理のためユーザー環境で速度は変わらないものと思われます。
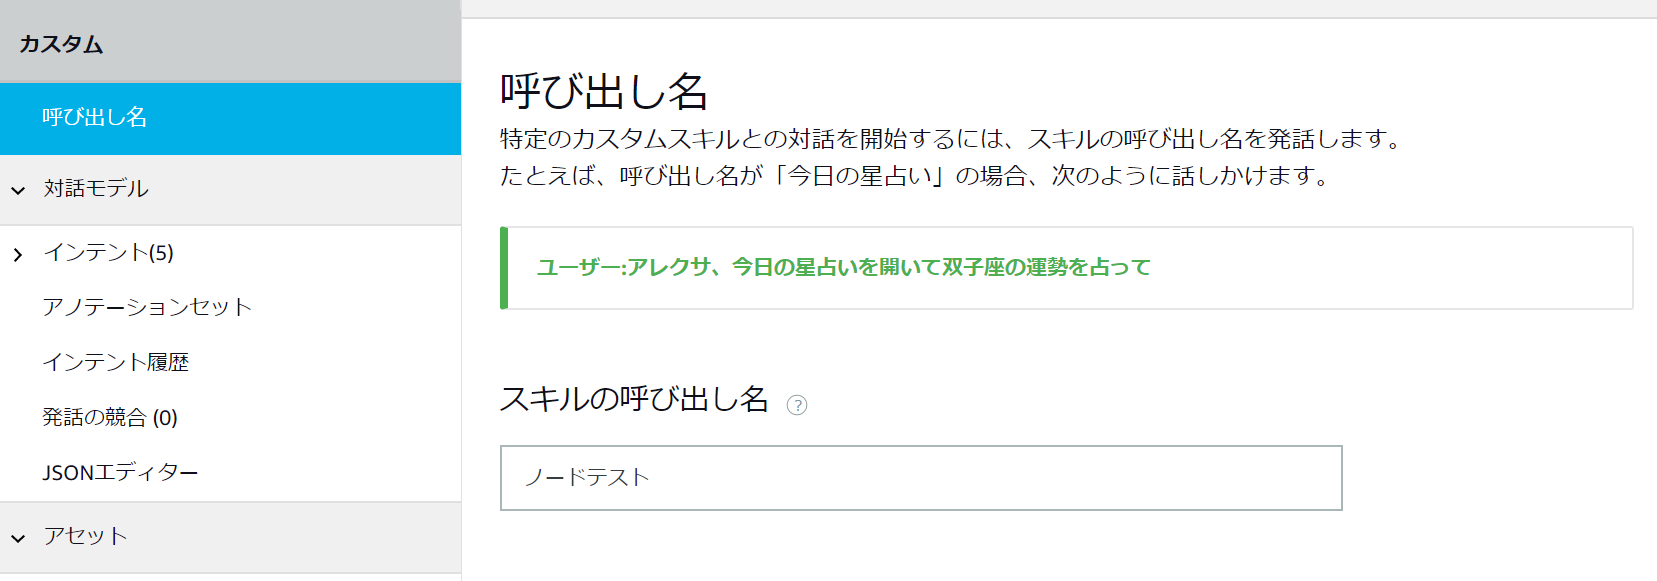
スキルメニューから呼び出し名を確認します。
次にインテントを確認します。
インテントとは
「Alexa xxx で yyy して」
というときに xxx がスキル呼び出し名で yyy がインテントになります。

テンプレートを使ったのでインテント名が自動的に作られています。
対話するプログラムを作るときに様々な言い回しがプログラムを複雑にします。
たとえば「おはよう」「こんにちは」「こんばんは」と挨拶がありますが
これをプログラムで直接比較しようとすると
if(say == 'おはよう' || say == 'こんにちは' || say == 'こんばんは'){処理}
のように書く必要がありますが曖昧な言い回しが増えるたびにプログラムを変更していくと効率が悪くなります。
そのためインテントを使用して言い回しをここで吸収するようになっています。
言い回しをまとめるグループ名がインテント、その中の1つ1つの要素が発話となります。
| インテント名 | 発話 |
|---|---|
| hello | おはよう こんにちは こんばんは |
| eat | みかん リンゴ ステーキ 寿司 |
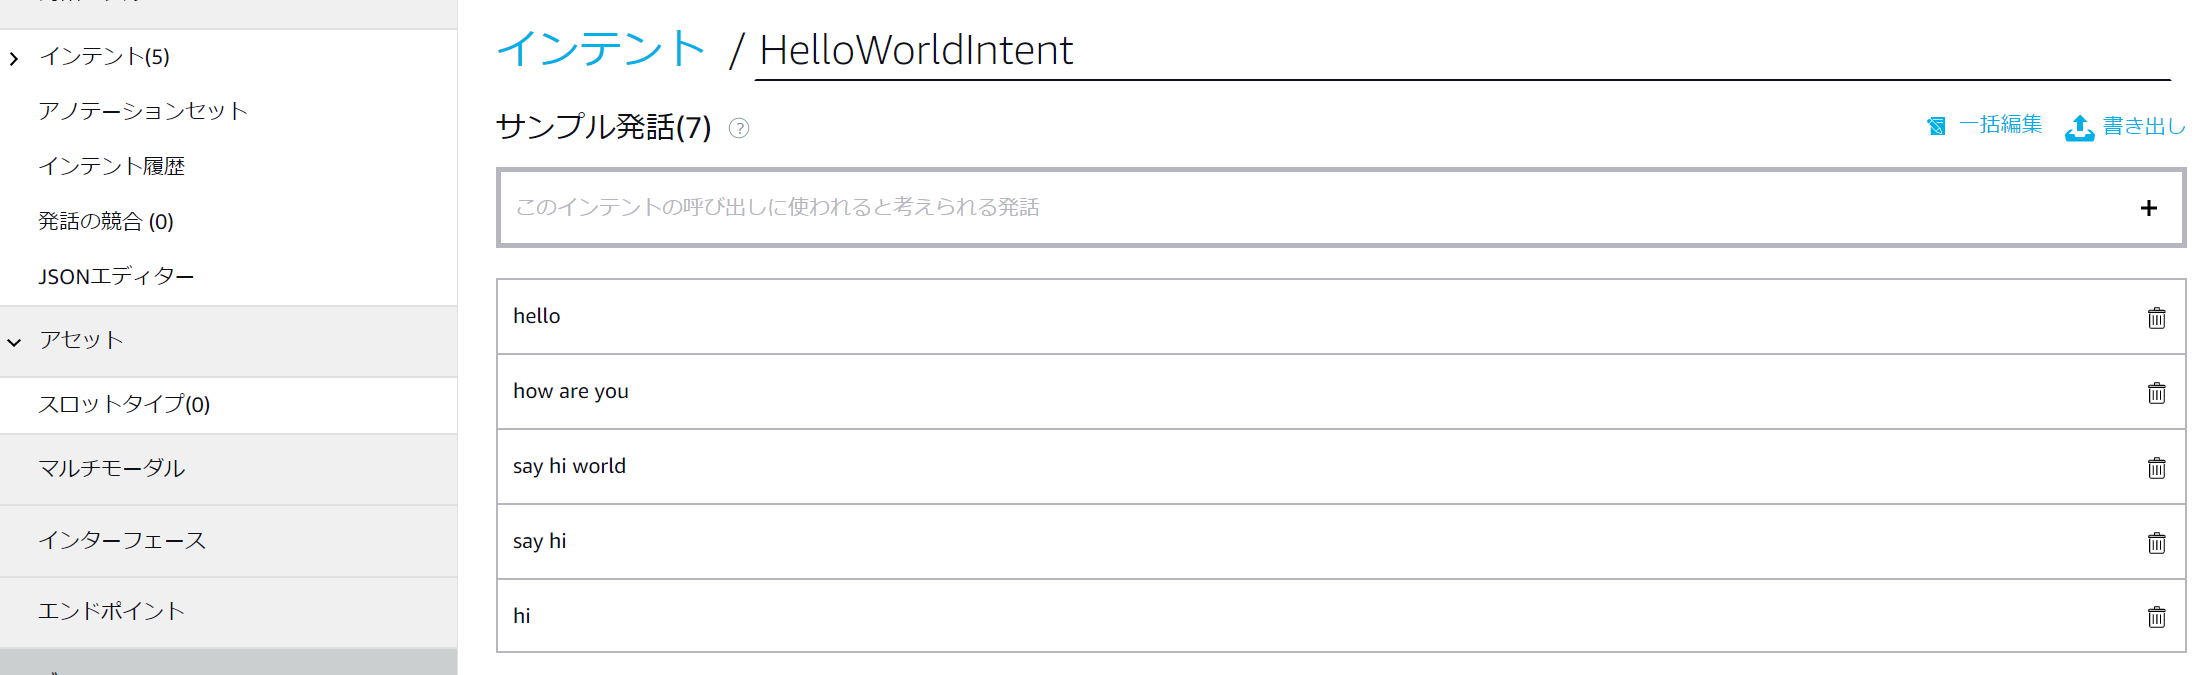
では実際にインテントと発話の関係を見てみましょう
HelloWorldIntentが用意されていますのでこれをクリックして設定を見てみましょう。
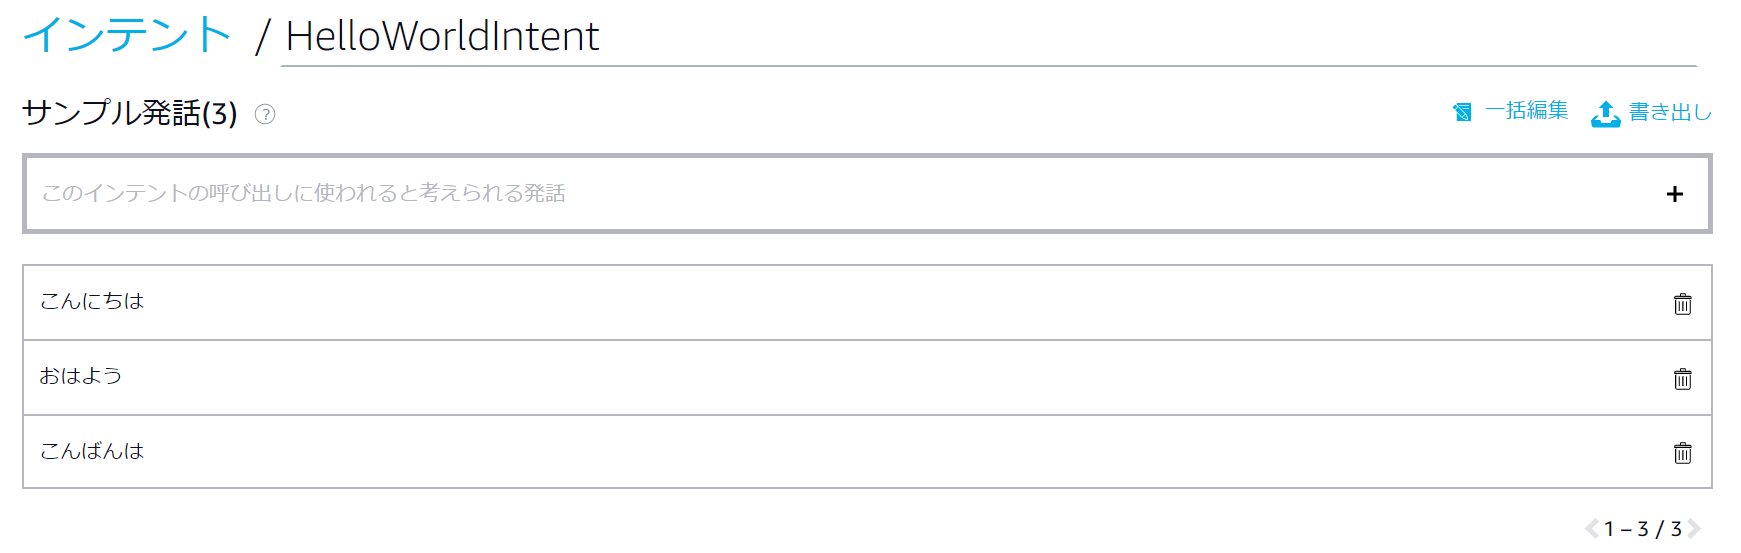
さすがにテンプレートは日本語になっていません。手動で日本語にしましょう。
この設定方法、毎回行うのは手間ですね。左側のメニューでJSONエディターがあるので見てみましょう。
{
    "interactionModel": {
        "languageModel": {
            "invocationName": "ノードテスト",
            "intents": [
                {
                    "name": "AMAZON.CancelIntent",
                    "samples": [
                        "キャンセル"
                    ]
                },
                {
                    "name": "AMAZON.HelpIntent",
                    "samples": [
                        "説明"
                    ]
                },
                {
                    "name": "AMAZON.StopIntent",
                    "samples": [
                        "終了"
                    ]
                },
                {
                    "name": "HelloWorldIntent",
                    "slots": [],
                    "samples": [
                        "おはよう",
                        "こんにちは",
                        "こんばんは"
                    ]
                },
                {
                    "name": "AMAZON.NavigateHomeIntent",
                    "samples": [
                        "ホームへ"
                    ]
                }
            ],
            "types": []
        }
    }
}
今まで設定した内容がそのまま反映されていることがわかります。つまりこのJSONを保存しておけば、ほかのスキルを作ったときにインテントを使い回すことができます。
AMAZON.CancelIntentやAMAZON.StopIntent、AMAZON.HelpIntent、AMAZON.NavigateHomeIntentは必須のインテントですが発音はテンプレートに無いようですので適当に入れました。
コードエディタ
コードエディタにはHelloWorldのサンプルコードが入っています。
サンプルコードの英語発音部分を日本語に書き換えたのものが下記になります。
// This sample demonstrates handling intents from an Alexa skill using the Alexa Skills Kit SDK (v2).
// Please visit https://alexa.design/cookbook for additional examples on implementing slots, dialog management,
// session persistence, api calls, and more.
const Alexa = require('ask-sdk-core');

const LaunchRequestHandler = {
    canHandle(handlerInput) {
        return Alexa.getRequestType(handlerInput.requestEnvelope) === 'LaunchRequest';
    },
    handle(handlerInput) {
        const speakOutput = 'ようこそ、こんにちは、または説明と言ってください。 どれにしますか?';
        return handlerInput.responseBuilder
            .speak(speakOutput)
            .reprompt(speakOutput)
            .getResponse();
    }
};
const HelloWorldIntentHandler = {
    canHandle(handlerInput) {
        return Alexa.getRequestType(handlerInput.requestEnvelope) === 'IntentRequest'
            && Alexa.getIntentName(handlerInput.requestEnvelope) === 'HelloWorldIntent';
    },
    handle(handlerInput) {
        const speakOutput = 'こんにちは、アレクサスキルの世界へようこそ!';
        return handlerInput.responseBuilder
            .speak(speakOutput)
            //.reprompt('add a reprompt if you want to keep the session open for the user to respond')
            .getResponse();
    }
};
const HelpIntentHandler = {
    canHandle(handlerInput) {
        return Alexa.getRequestType(handlerInput.requestEnvelope) === 'IntentRequest'
            && Alexa.getIntentName(handlerInput.requestEnvelope) === 'AMAZON.HelpIntent';
    },
    handle(handlerInput) {
        const speakOutput = 'これはあなたが作ったアレクサのスキルです。。';

        return handlerInput.responseBuilder
            .speak(speakOutput)
            .reprompt(speakOutput)
            .getResponse();
    }
};
const CancelAndStopIntentHandler = {
    canHandle(handlerInput) {
        return Alexa.getRequestType(handlerInput.requestEnvelope) === 'IntentRequest'
            && (Alexa.getIntentName(handlerInput.requestEnvelope) === 'AMAZON.CancelIntent'
                || Alexa.getIntentName(handlerInput.requestEnvelope) === 'AMAZON.StopIntent');
    },
    handle(handlerInput) {
        const speakOutput = 'さようなら';
        return handlerInput.responseBuilder
            .speak(speakOutput)
            .getResponse();
    }
};
const SessionEndedRequestHandler = {
    canHandle(handlerInput) {
        return Alexa.getRequestType(handlerInput.requestEnvelope) === 'SessionEndedRequest';
    },
    handle(handlerInput) {
        // Any cleanup logic goes here.
        return handlerInput.responseBuilder.getResponse();
    }
};

// The intent reflector is used for interaction model testing and debugging.
// It will simply repeat the intent the user said. You can create custom handlers
// for your intents by defining them above, then also adding them to the request
// handler chain below.
const IntentReflectorHandler = {
    canHandle(handlerInput) {
        return Alexa.getRequestType(handlerInput.requestEnvelope) === 'IntentRequest';
    },
    handle(handlerInput) {
        const intentName = Alexa.getIntentName(handlerInput.requestEnvelope);
        const speakOutput = `あなたが言ったのは ${intentName} ですね`;

        return handlerInput.responseBuilder
            .speak(speakOutput)
            //.reprompt('add a reprompt if you want to keep the session open for the user to respond')
            .getResponse();
    }
};

// Generic error handling to capture any syntax or routing errors. If you receive an error
// stating the request handler chain is not found, you have not implemented a handler for
// the intent being invoked or included it in the skill builder below.
const ErrorHandler = {
    canHandle() {
        return true;
    },
    handle(handlerInput, error) {
        console.log(`~~~~ Error handled: ${error.stack}`);
        const speakOutput = `すみません、よく聞き取れませんでした。`;

        return handlerInput.responseBuilder
            .speak(speakOutput)
            .reprompt(speakOutput)
            .getResponse();
    }
};

// The SkillBuilder acts as the entry point for your skill, routing all request and response
// payloads to the handlers above. Make sure any new handlers or interceptors you've
// defined are included below. The order matters - they're processed top to bottom.
exports.handler = Alexa.SkillBuilders.custom()
    .addRequestHandlers(
        LaunchRequestHandler,
        HelloWorldIntentHandler,
        HelpIntentHandler,
        CancelAndStopIntentHandler,
        SessionEndedRequestHandler,
        IntentReflectorHandler, // make sure IntentReflectorHandler is last so it doesn't override your custom intent handlers
    )
    .addErrorHandlers(
        ErrorHandler,
    )
    .lambda();
この後コードエディタから保存、デプロイと操作すれば反映されます。
テスト
上部のメニューから「テスト」を選んでいくとAlexaエミュレータからテストを行うことが出来ます。
テストをする前に「非公開」から「開発中」に変更する必要があります。
その後テキスト入力欄に
「ノードテストを開く」
など入力すると返事が返ってきます。
エミュレータからテストする場合は最初にAlexaを呼ぶ名称がなくても大丈夫です。
1.「ノードテストを開く」と発音
2.「こんにちは」または「説明」と発音
3.アレクサが返答を返して終了します。状態は1に戻ります。
※2が聞き取れない場合「聞き取れませんでした」と返答を返した後終了し状態は1に戻ります。
実機テスト
Alexaを持っている人ならテストしたいと思うのが当たり前ですが・・・なぜか説明がありません。
それもそのはずです、テストが問題なく行えたのであれば、そのままAlexaを呼んでスキルを実行すれば良いわけです。
うーん、まるでVisualBasicを実行したら実はexeファイルも出来てました!ぐらいの感動ですね。
最後に
Alexa-hostedスキルを使ってみていかがだったでしょうか?
このページ公開の1週間前に書籍を買いそろえていざアレクサスキルを学習しようとしたら、画面に表示される内容と書籍の内容がまったく異なることにショックを受けて書いたページです。
自身が初心者のため、今後も初心者をターゲットにしたものを記載していきます。