expo-stable-diffusionの登場
Apple Neural Engineを使用してStable Diffusionによる画像生成を行うExpoモジュールが公開されました。
この記事ではモジュールの作者による記事を参考にしてExpoの開発クライアントで画像生成を実行する方法を紹介します。iOSシミュレーターを使います。
完成形
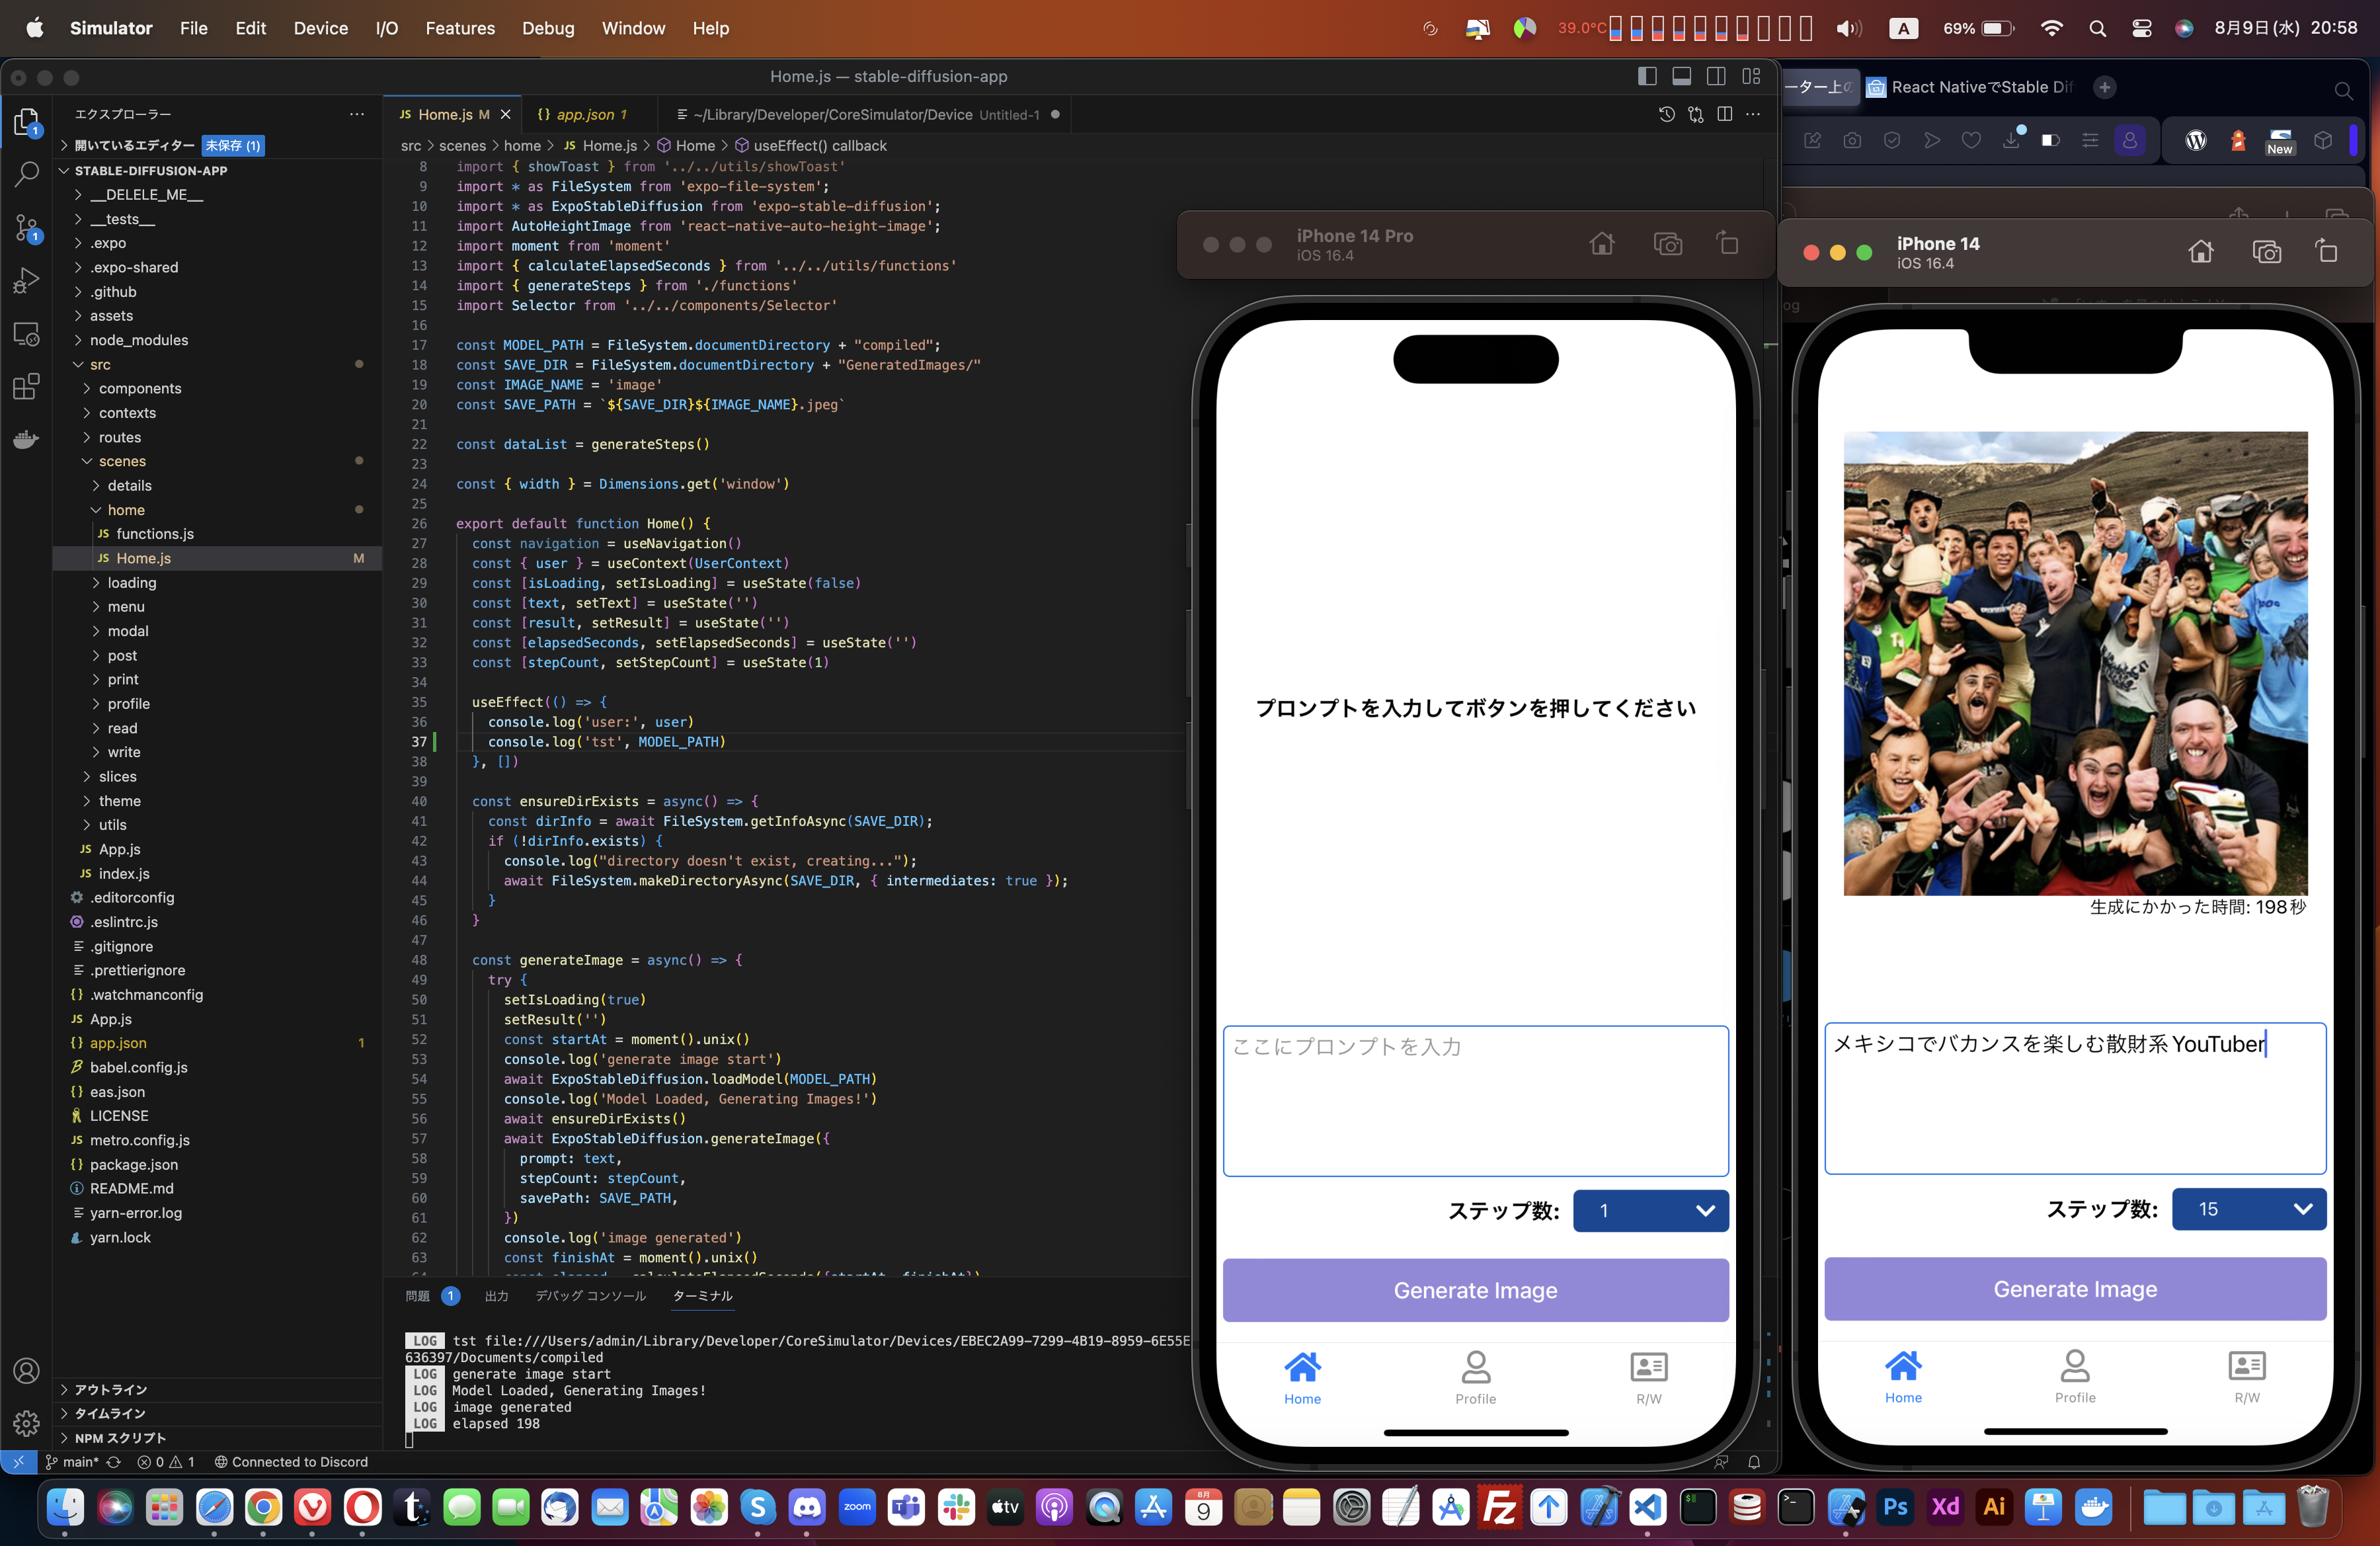
プロンプトとステップ数を入力してGenerate Imageボタンを押すと生成した画像をアプリ上に表示します。

生成した画像はiPhoneのファイルアプリ内に保存されます。
大まかな手順
- ベースとなるプロジェクトの作成
- 必要なパッケージのインストール
-
app.jsonの編集 - Develop Clientのビルド
- Stable Diffusion Modelをシミュレーターにコピー
- UIやパッケージを使用するためのコードを書く
以上です。
なお、Develop Clientをビルドするのでeas-cliとExpoアカウントは必須となります。
1. ベースとなるプロジェクトの作成
まずはベースとなるExpoプロジェクトを作成します。
expo init
で最初から始めてもいいのですが、今回は自作ボイラープレートを使用しました。
GitHubからボイラープレートをダウンロードしてきて依存関係をインストールします。
yarn install
アプリを起動してみます。
expo start

起動しない場合は、app.jsonのupdates.urlとextraを削除します。
2. 必要なパッケージのインストール
- expo-dev-client
- expo-build-properties
- expo-file-system
- expo-stable-diffusion
インストールします。
npx expo install expo-dev-client expo-build-properties expo-file-system expo-stable-diffusion
expo-dev-client
expo-stable-diffusionはネイティブコードを含むのでExpo Goでは動きません。Develop Clientをビルドするために使用します。
expo-build-properties
モジュール作者のブログ記事にある通りiOS Deployment Targetを16.2に設定するために使用します。
expo-file-system
Stable Diffusion Modelの配置や、生成した画像の保存先としてアプリのドキュメントディレクトリを使用するので、パスを取得するために使用します。
expo-stable-diffusion
CoreMLを使用してStable Diffusionを実行するために使用します。
Optional
UIの作成のために以下のライブラリもインストールしました。メインテーマとはあまり関係ありません。
- react-native-auto-height-image
- react-native-material-menu
3. app.jsonの編集
expo-build-properties
deploymentTargetを16.2に設定します。
"plugins": [
  [
    "expo-build-properties",
    {
      "ios": {
        "deploymentTarget": "16.2"
      }
    }
  ]
],
info.plist
ios.infoPlistにUIFileSharingEnabledとLSSupportsOpeningDocumentsInPlaceとUISupportsDocumentBrowserを追記します。
これはiPhoneのファイルアプリからもドキュメントディレクトリにアクセスできるようにするためです。
"ios": {
  "supportsTablet": true,
  "bundleIdentifier": "net.votepurchase.stablediffusion",
  "buildNumber": "1.0.0",
  "infoPlist": {
    "NSPhotoLibraryUsageDescription": "Use the photo library to change your avatar.",
    "CFBundleDevelopmentRegion": "ja_JP",
    "UIFileSharingEnabled": true,
    "LSSupportsOpeningDocumentsInPlace": true,
    "UISupportsDocumentBrowser": true
  },
  "userInterfaceStyle": "automatic"
},
4. Develop Clientのビルド
準備ができたのでDevelop Clientをビルドします。
eas build:configure
を実行して。eas.jsonを作成します。
作成したeas.jsonを編集します。iOSシミュレーターを使用するのでsimulatorをtrueにしておきます。
{
  "cli": {
    "version": ">= 3.17.1"
  },
  "build": {
    "development": {
      "developmentClient": true,
      "distribution": "internal",
      "channel": "development",
      "ios": {
        "simulator": true
      }
    },
    "preview": {
      "distribution": "internal",
      "channel": "internal"
    },
    "production": {
      "channel": "production"
    }
  },
  "submit": {
    "production": {}
  }
}
iOS用のDevelop Clientをビルドします。
eas build --profile development --platform ios
ビルドが完了したらExpoのダッシュボードからダウンロードします。

ダウンロードしてきたapplication-*******.tar.gzファイルを展開します。展開した.appファイルをシミュレーターにドラッグアンドドロップでインストールします。

ファイルアプリからドキュメントディレクトリにアクセスできるようにします。
設定アプリを開き今回インストールしたアプリの設定を開きます。

書類ストレージを開きます。
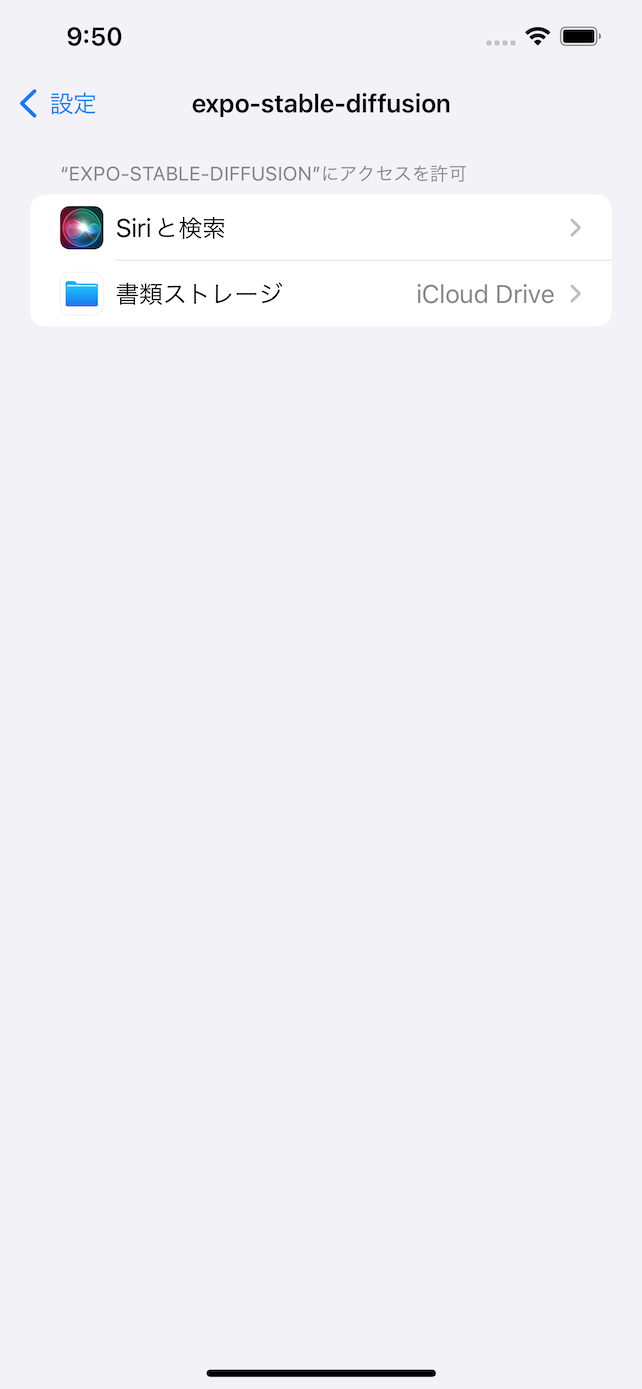
iCloud Driveが選択されている場合はこのiPhone内に変更しておきます。

5. Stable Diffusion Modelをシミュレーターにコピー
Stable Diffusion Modelを用意します。今回はパッケージ作者が用意したモデルを使用します。
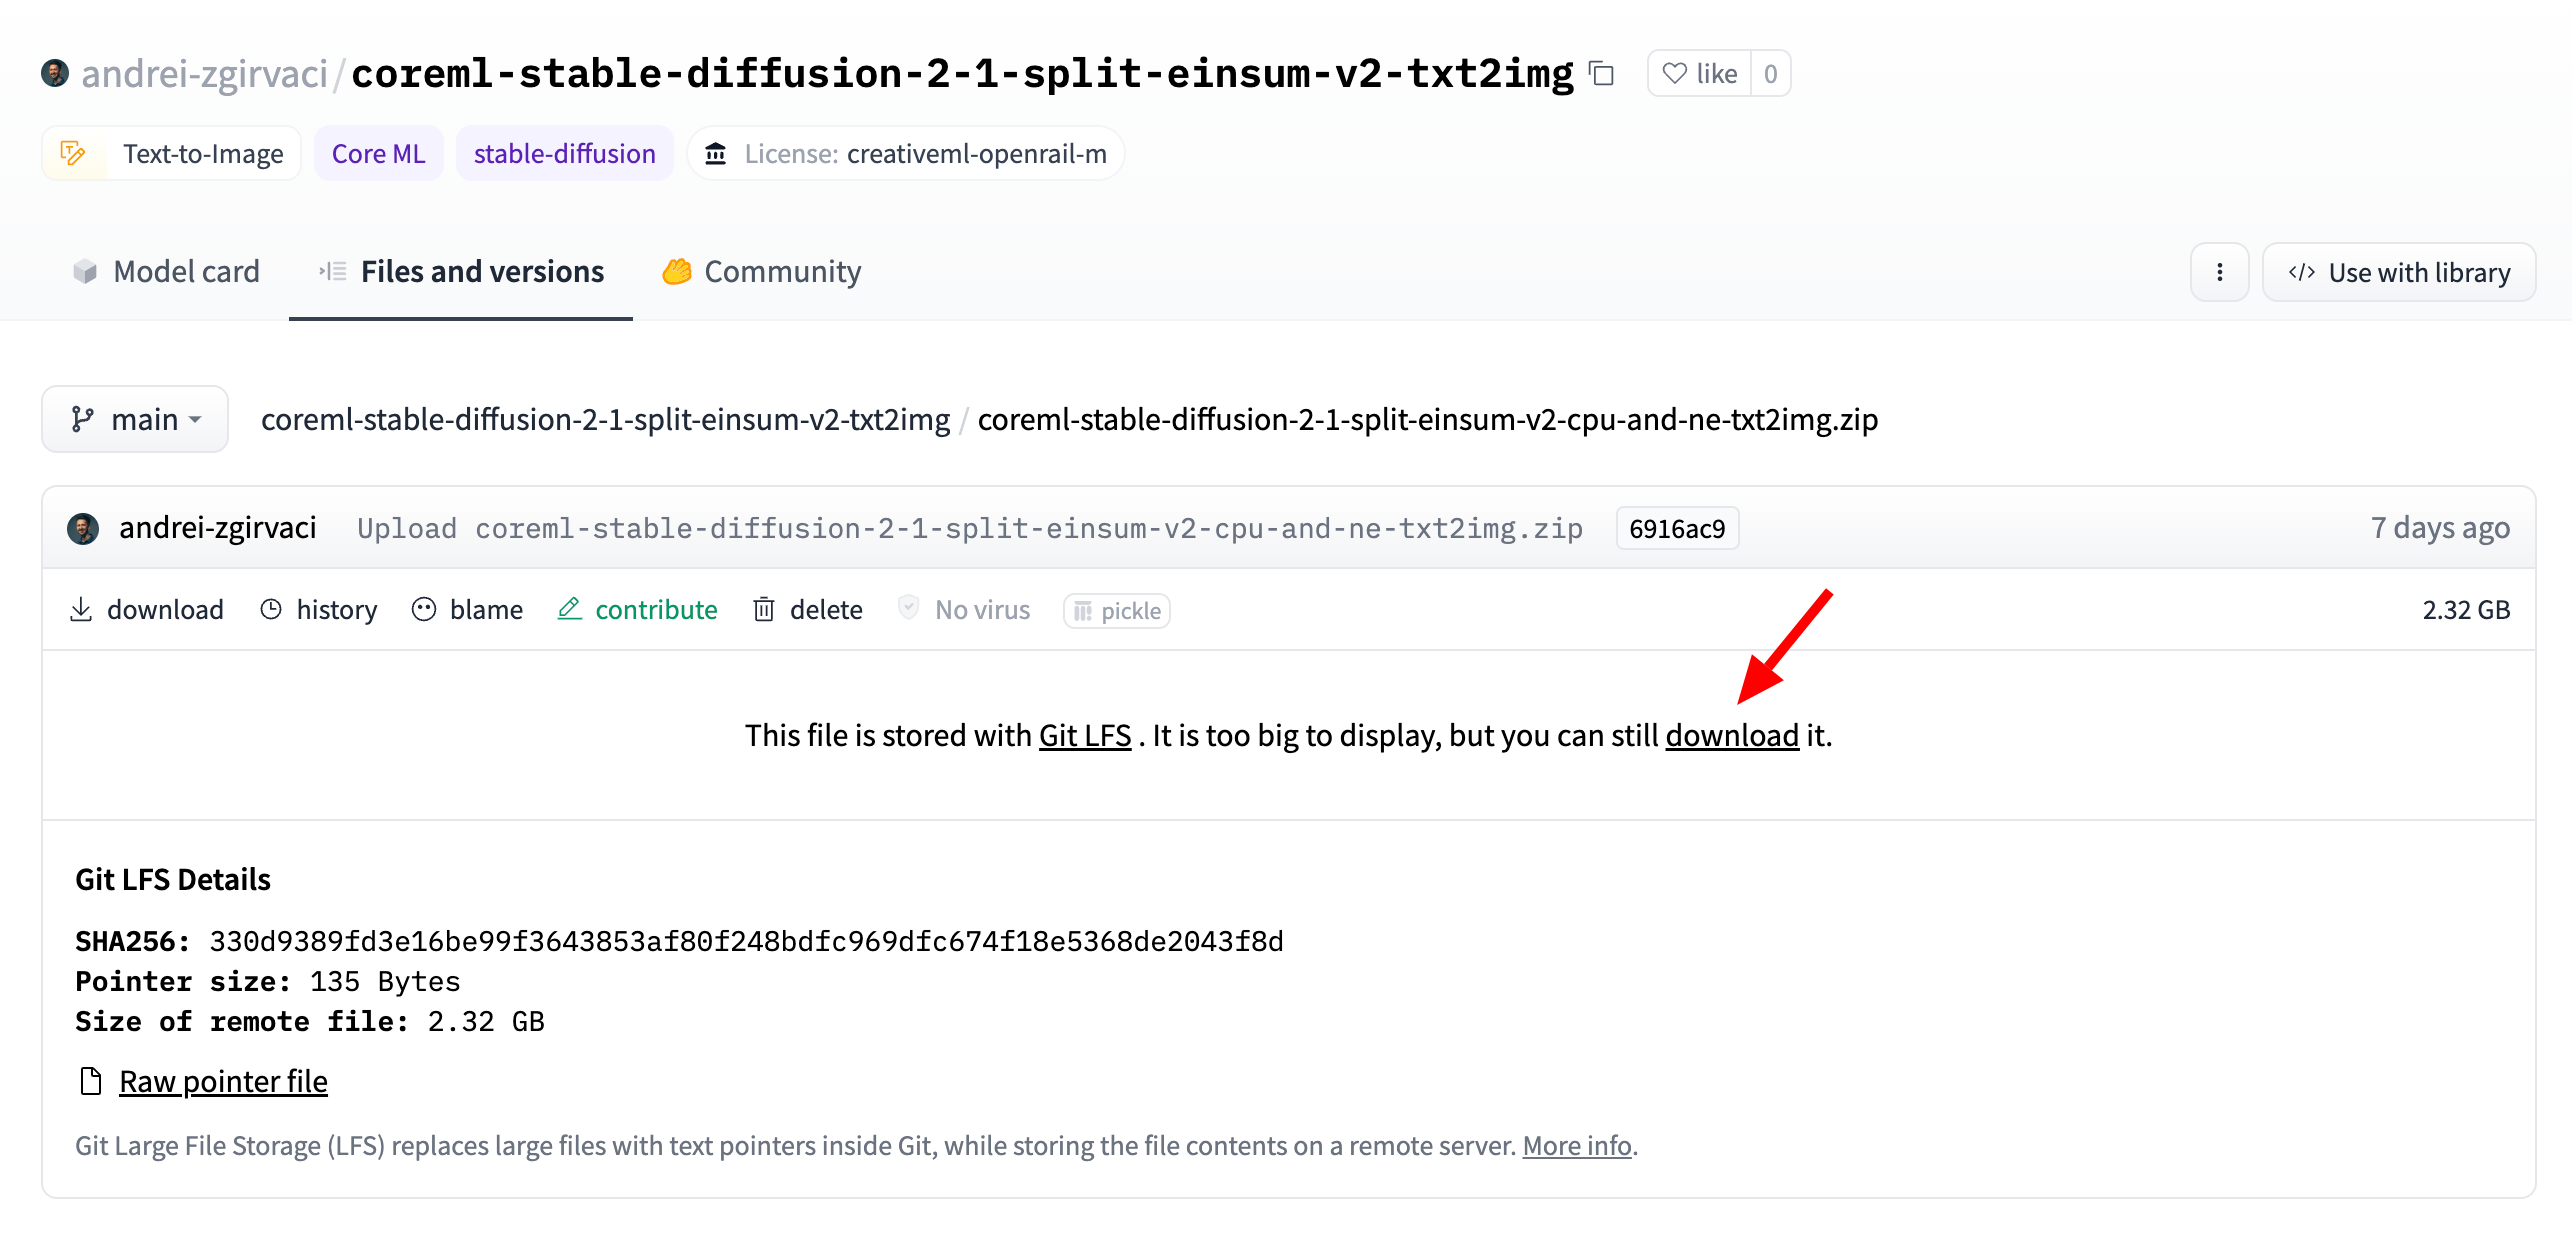
ダウンロードしたzipを展開して中身を確認します。決まりはないのですがフォルダ名をcompiledに変更しました。

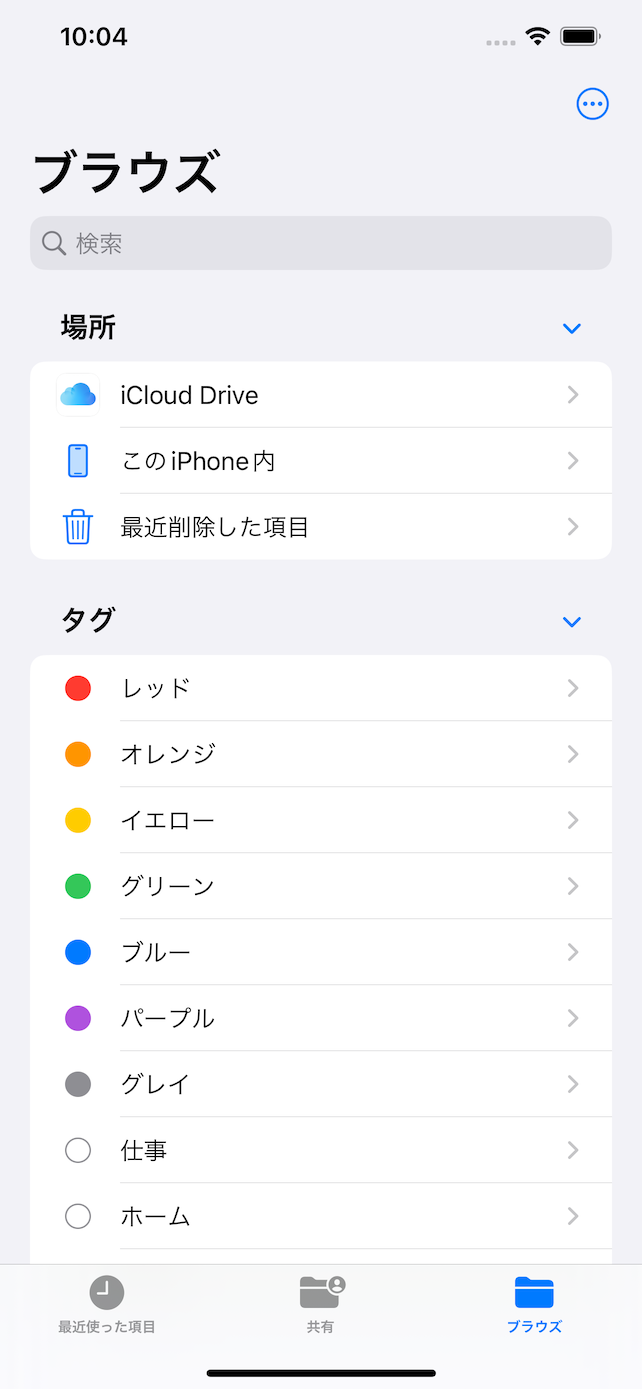
compiledフォルダをシミュレーター内のアプリのドキュメントディレクトリにコピーします。ファイルアプリを開いてもこの時点ではまだ空です。


作者のブログ記事ではidbコマンドを使ってコピーしていますが、今回はFinderを使用します。
シミュレーターのデータは~/Library/Developer/CoreSimulator/Devices/内にあります。
open ~/Library/Developer/CoreSimulator/Devices/
ディレクトリ名がシミュレーターIDとなっています。

更にdata→Containers→Data→Applicationと進んで行くとアプリケーションIDが並んでいます。この中にモデルデータをコピーします。
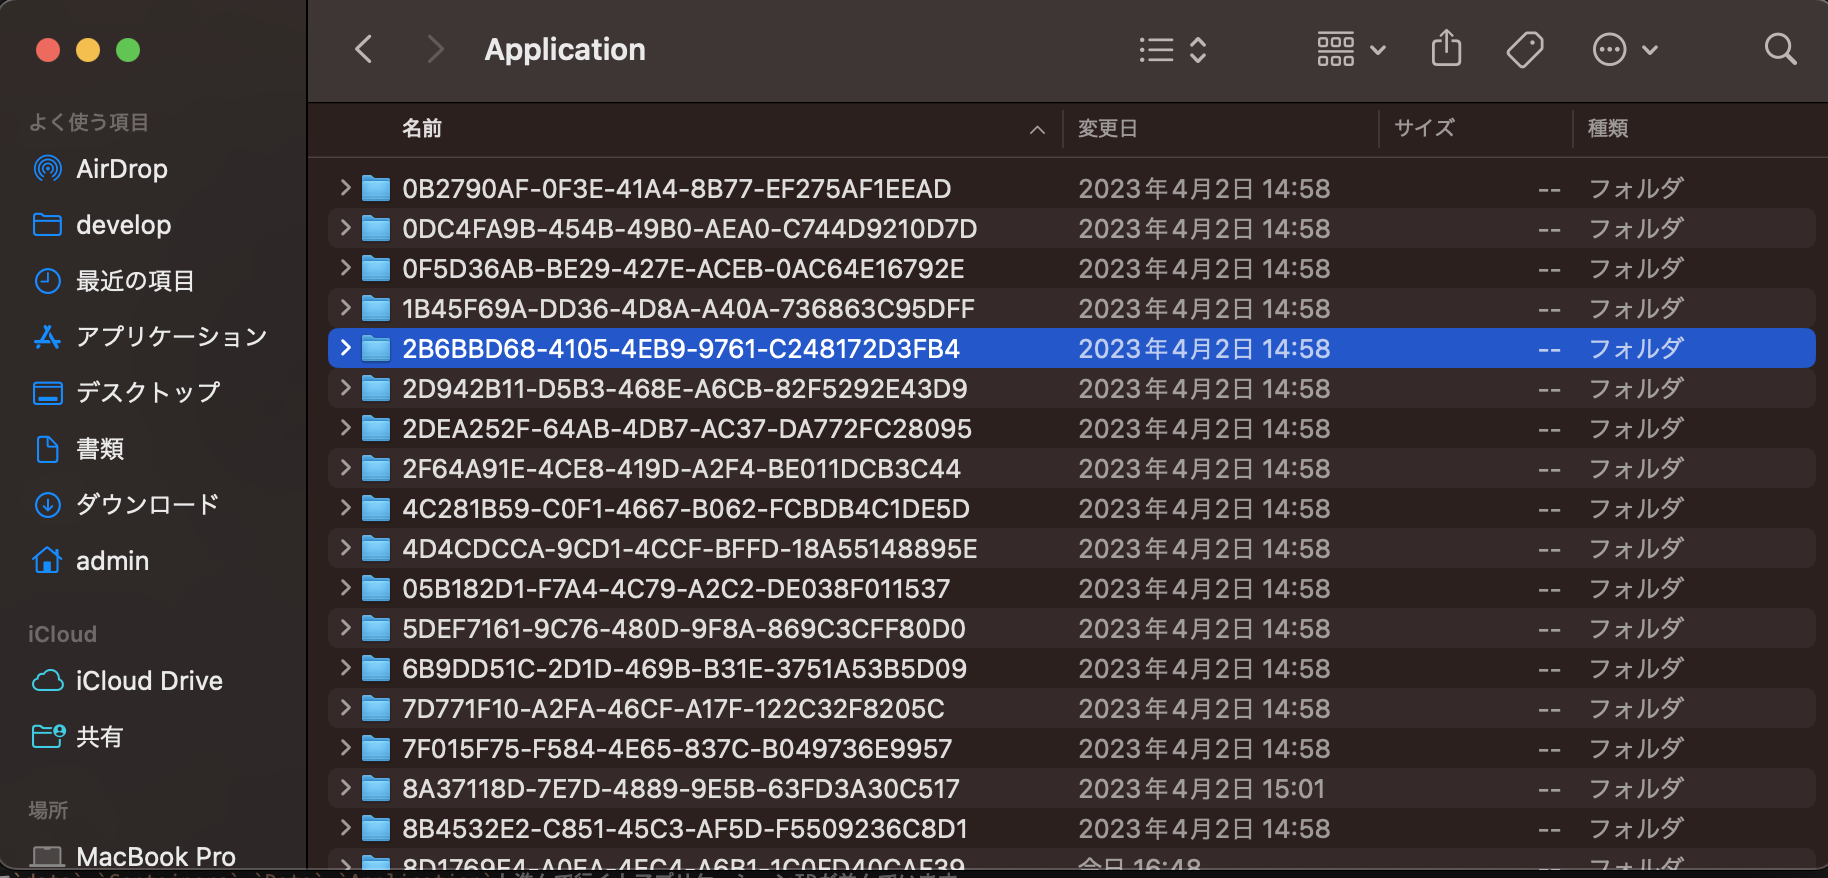
が、この手順は使いません。アプリのドキュメントディレクトリをアプリから直接調べます。
アプリの適当なコンポーネントでFileSystem.documentDirectoryを実行して直接パスを調べます。
src/App.js
import React, { useState, useEffect } from 'react'
import { View } from 'react-native'
import { Provider } from 'react-redux'
import store from 'utils/store'
import 'utils/ignore'
import { UserContextProvider } from './contexts/UserContext'
import * as FileSystem from 'expo-file-system'; // expo-file-systemをインポート

// assets
import { imageAssets } from 'theme/images'
import { fontAssets } from 'theme/fonts'
import Router from './routes'

export default function App() {
  // state
  const [didLoad, setDidLoad] = useState(false)

  // handler
  const handleLoadAssets = async () => {
    // assets preloading
    await Promise.all([...imageAssets, ...fontAssets])
    setDidLoad(true)
  }

  // lifecycle
  useEffect(() => {
    handleLoadAssets()
    const path = FileSystem.documentDirectory // このアプリのドキュメントディレクトリのパスを取得する
    console.log('path:', path) // コンソールに取得したパスを表示する
  }, [])

  // rendering
  if (!didLoad) return <View />
  return (
    <Provider store={store}>
      <UserContextProvider>
        <Router />
      </UserContextProvider>
    </Provider>
  )
}
アプリを実行します。
yarn start
コンソールにドキュメントディレクトリのパスが表示されました。
path: file:///Users/admin/Library/Developer/CoreSimulator/Devices/3108E660-F4C8-4181-ACAF-AF9BBD33D6AD/data/Containers/Data/Application/01CEF53F-2EB4-4E46-BBE2-0EA39BF161B4/Documents/

取得したパスを開きます。
open ~/Library/Developer/CoreSimulator/Devices/3108E660-F4C8-4181-ACAF-AF9BBD33D6AD/data/Containers/Data/Application/01CEF53F-2EB4-4E46-BBE2-0EA39BF161B4/Documents/

このディレクトリにダウンロードしたモデルデータをコピーします。普通にドラッグアンドドロップやコピーペーストしてあげます。シミュレーターのファイルアプリからもコピーできたことが確認できます。

6. UIやパッケージを使用するためのコードを書く
expo-stable-diffusionの使い方は非常にシンプルです。
下のようにモデルデータと生成した画像のパスを記述します。
const MODEL_PATH = FileSystem.documentDirectory + "compiled";
const SAVE_DIR = FileSystem.documentDirectory + "GeneratedImages/"
const IMAGE_NAME = 'image'
const SAVE_PATH = `${SAVE_DIR}${IMAGE_NAME}.jpeg`
その後、モデルをロードして、プロンプトとステップ数と保存先のパスを指定して生成用のメソッドを呼び出すだけです。
await ExpoStableDiffusion.loadModel(MODEL_PATH)
await ExpoStableDiffusion.generateImage({
  prompt: text,
  stepCount: stepCount,
  savePath: SAVE_PATH,
})
以下は実際のコードです。ポイントだけ抜き出します。
必要なライブラリをインポート
import * as FileSystem from 'expo-file-system';
import * as ExpoStableDiffusion from 'expo-stable-diffusion';
パスを設定
モデルと生成した画像のパスを記述します。
const MODEL_PATH = FileSystem.documentDirectory + "compiled";
const SAVE_DIR = FileSystem.documentDirectory + "GeneratedImages/"
const IMAGE_NAME = 'image'
const SAVE_PATH = `${SAVE_DIR}${IMAGE_NAME}.jpeg`
コンソールでパスを確認すると以下のようになっています。
useEffect(() => {
  console.log({MODEL_PATH, SAVE_PATH})
}, [])
{
  "MODEL_PATH": "file:///Users/admin/Library/Developer/CoreSimulator/Devices/3108E660-F4C8-4181-ACAF-AF9BBD33D6AD/data/Containers/Data/Application/01CEF53F-2EB4-4E46-BBE2-0EA39BF161B4/Documents/compiled",
  "SAVE_PATH": "file:///Users/admin/Library/Developer/CoreSimulator/Devices/3108E660-F4C8-4181-ACAF-AF9BBD33D6AD/data/Containers/Data/Application/01CEF53F-2EB4-4E46-BBE2-0EA39BF161B4/Documents/GeneratedImages/image.jpeg"
}
ディレクトリ確認用の関数
画像の保存先ディレクトリGeneratedImages/が存在するか確認して、なければ作成する関数を作成します。
const ensureDirExists = async() => {
  const dirInfo = await FileSystem.getInfoAsync(SAVE_DIR);
  if (!dirInfo.exists) {
    console.log("directory doesn't exist, creating...");
    await FileSystem.makeDirectoryAsync(SAVE_DIR, { intermediates: true });
  }
}
画像生成用の関数
モデルをロードして画像を生成する関数です。生成にかかった時間も取得したかったので開始時と終了時にUNIXタイムスタンプを取得して経過時間を計算しています。
SAVE_PATHは固定値ですが、生成前と生成後で画面の表示を分けたかったのでsetResultでstateとして処理しています。
画像の生成前に、上述したensureDirExistsを実行してディレクトリの存在確認を行っています。
const generateImage = async() => {
  try {
    setIsLoading(true)
    setResult('')
    const startAt = moment().unix()
    console.log('generate image start')
    await ExpoStableDiffusion.loadModel(MODEL_PATH)
    console.log('Model Loaded, Generating Images!')
    await ensureDirExists()
    await ExpoStableDiffusion.generateImage({
      prompt: text,
      stepCount: stepCount,
      savePath: SAVE_PATH,
    })
    console.log('image generated')
    const finishAt = moment().unix()
    const elapsed = calculateElapsedSeconds({startAt, finishAt})
    console.log('elapsed', elapsed)
    setElapsedSeconds(elapsed)
    setResult(SAVE_PATH)
  } catch(e) {
    console.log('error', e)
  } finally {
    setIsLoading(false)
  }
}
画像表示部
画像のsourceはローカルのイメージなのでrequire()としたいところですが、画像のパスはuriなのでsource={{ uri: result }}とします。
uri = 画像のURLという先入観があったので最初はrequire()と書いてしまいました。
<View style={{flex: 1, alignItems: 'center', justifyContent: 'center'}}>
{result?
  <View style={{flex: 1, justifyContent: 'center'}}>
    <AutoHeightImage
      width={width * 0.9}
      source={{ uri: result }}
      defaultSource={require('../../../assets/images/logo-lg.png')}
    />
    <View style={{flex: 0.5, alignItems: 'flex-end'}}>
      <Text>生成にかかった時間: {elapsedSeconds}秒</Text>
    </View>
  </View>
  :
  <Text style={styles.text}>プロンプトを入力してボタンを押してください</Text>
  }
</View>
まとめ
iPhoneだけですが、ついにReact NativeのExpoでStable Diffusionを使用できるようになりました。
モデルをiPhoneにコピーする手順が面倒だったり、生成速度が非常に遅いですが大きな一歩ではないでしょうか。