概要
M5StickC PlusでM5Stack用環境センサユニット ver.2(ENV II)の値を取得しようとしたところ、
ちょっと嵌ったので忘備録代わりにセットアップ方法を記載します。
参考URL
下記URLを参考にさせていただきました。
M5StickCで小型環境センサ端末を作る: https://ambidata.io/samples/m5stack/m5sitckc/
使用デバイス
まとめ
| デバイス | 型番 | 備考 |
|---|---|---|
| ボード | M5Stick-C | M5StickC Plus互換のようです。 ライブラリは別途インストールが必要です リポジトリ: https://github.com/m5stack/M5StickC-Plus |
| 温湿度センサ | SHT30 | 参考URLと異なります リポジトリ: https://github.com/Risele/SHT3x |
| 気圧センサ | BMP280 | 参考URLと同じです |
手順
- FTDI VCP Driverをインストールする。
- Arduino IDEの「ファイル>環境設定>追加のボードマネージャーのURL」に
https://dl.espressif.com/dl/package_esp32_index.jsonを追加する - 参考URLを参照し、ボードマネージャで「
esp32」と検索して、「esp32 by Espressif Systems」をインストールする - Arduino IDEで
Ctrl+Shift+Iを押し、ライブラリマネージャに「M5StickCPlus」と検索して、「M5StickCPlus」をインストールする - ライブラリマネージャで「
bmp280 adafruit」と検索して、「adafruit BMP280 Library」をインストールする - 温湿度センサのリポジトリからZIPファイルをダウンロードする
- https://github.com/m5stack/M5StickC-Plus のリポジトリからZIPファイルをダウンロードする
- 上記2つのZIPファイルをArduino IDEの「スケッチ>ライブラリをインクルード>ZIP形式のライブラリをインストール」する
※PC、Arduino IDEは適宜再起動してください。
Arduinoスケッチ
参考URLから温湿度センサをSHT30に変更しています。
# include <M5StickCPlus.h>
# include <SHT3x.h>
# include <Wire.h>
# include "Adafruit_Sensor.h"
# include <Adafruit_BMP280.h>

SHT3x sht30;
Adafruit_BMP280 bme;

void setup() {
    M5.begin();
    M5.Axp.ScreenBreath(10);    // 画面の輝度を少し下げる ----B
    M5.Lcd.setRotation(3);      // 左を上にする         ----C
    M5.Lcd.setTextSize(2);      // 文字サイズを2にする
    M5.Lcd.fillScreen(BLACK);   // 背景を黒にする

    Wire.begin();               // I2Cを初期化する
    while (!bme.begin(0x76)) {  // BMP280を初期化する
        M5.Lcd.println("BMP280 init fail");
    }

    sht30.Begin();
}

void loop() {
    sht30.UpdateData();
    float tmp = sht30.GetTemperature();
    float hum = sht30.GetRelHumidity();
    float pressure = bme.readPressure();
    double vbat = M5.Axp.GetVbatData() * 1.1 / 1000;  // バッテリー電圧を取得 ----D

    M5.Lcd.setCursor(0, 0, 1);
    M5.Lcd.printf("temp: %4.1f'C\r\n", tmp);
    M5.Lcd.printf("humid:%4.1f%%\r\n", hum);
    M5.Lcd.printf("press:%4.0fhPa\r\n", pressure / 100);
    M5.Lcd.printf("vbat: %4.2fV\r\n", vbat);
    delay(1000);
}
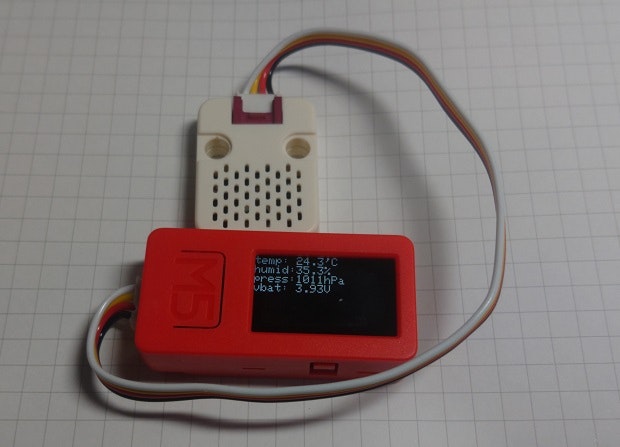
実際の出力
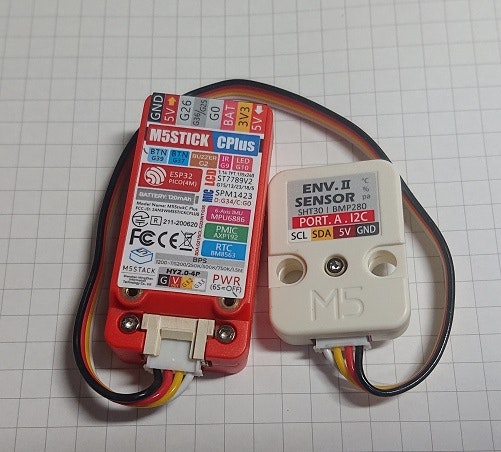
背面
免責
本記事によって起こる如何なる事象についても執筆者は一切の責任を負いません。
間違い等あるかもしれませんがご了承願います。

