この記事は下のラスター画像フォントを作る記事の続きです。
https://qiita.com/vipper36/items/22169594f6546a9c01b9
下の記事でu+さんが端末上の大きな画像の表示を試していて面白いなぁと思ったので比較元画像をお借りして1ラスター画像フォント法で試してみました。
https://u10e10.hatenablog.com/entry/2016/12/14/033342
以下のスクリプトはmate-terminalを全てkillしてmate-terminalを立ち上げるのでmate-terminalをインストールしてmate-terminal以外からお使いください。
python|images2font.py
from fontTools.ttLib import TTFont
from fontTools.fontBuilder import FontBuilder
from fontTools.ttLib.ttFont import newTable
from fontTools.ttLib.tables._s_b_i_x import table__s_b_i_x
from fontTools.ttLib.tables import sbixGlyph, sbixStrike
from fontTools.pens.t2CharStringPen import T2CharStringPen

def images2font(font_images={}, familyName_en = "Image2Font", familyName_ja = "Image2Font",
               font_path="./my_font.otf", styleName = "Monospace", version = "0.1", install=True, img_width=1000, img_height=1000, ppem=256):
    fb = FontBuilder(unitsPerEm = 1000, isTTF=False)
    imgglyph_ids =  [hex(i) for i in font_images.keys()]
    glyphs = [".notdef", ".null", ".CR"] + imgglyph_ids
    fb.setupGlyphOrder(glyphs)
    fb.setupCharacterMap({k: hex(k) for k in font_images.keys()})
    advanceWidths = {".notdef": img_width, ".null": 0, ".CR": 0} | {i: img_width for i in imgglyph_ids}

    nameStrings = dict(
        familyName=dict(en=familyName_en, ja=familyName_ja),
        styleName=dict(en=styleName, ja="Mono"),
        uniqueFontIdentifier="fontBuilder: " + familyName_en + "." + styleName,
        fullName=familyName_en + "-" + styleName,
        psName=familyName_en + "-" + styleName,
        version="Version " + version,
    )


    # Create an sbix table
    sbix = newTable("sibx")
    sbix_table = table__s_b_i_x()

    #ppem = 12
    #ppem = 256
    sbix_strike = sbixStrike.Strike(ppem=ppem, resolution=72)

    for glyph_name, image in zip(imgglyph_ids, list(font_images.values())):
        image_data = None
        if type(image) is str:
            with open(image, "rb") as image_file:
                image_data = image_file.read()
        else:
            image_data = image
        sbix_glyph = sbixGlyph.Glyph(glyphName=glyph_name, graphicType="png ", imageData=image_data) # referenceGlyphName=glyph_name,
        sbix_strike.glyphs[glyph_name] = sbix_glyph

    sbix_table.numStrikes += 1
    sbix_table.strikes[ppem] = sbix_strike

    fb.font["sbix"] = sbix_table


    pen = T2CharStringPen(1000, None)
    pen.moveTo((0, 0))
    pen.lineTo((0, img_height))
    pen.lineTo((img_width, img_height))
    pen.lineTo((img_width, 0))
    pen.closePath()

    charString = pen.getCharString()
    charStrings = {
        ".notdef": charString,
        ".null": charString,
        ".CR": charString,
        } | {i: charString for i in imgglyph_ids}


    fb.setupCFF(nameStrings["psName"], {"FullName": nameStrings["psName"]}, charStrings, {})
#    lsb = {gn: cs.calcBounds(None)[0] for gn, cs in charStrings.items()}
#    lsb2 = {gn: cs.calcBounds(None)[1] for gn, cs in charStrings.items()}

    h_metrics = {}
    for gn, advanceWidth in advanceWidths.items():
    #    metrics[gn] = (0, 0)
    #    h_metrics[gn] = (advanceWidth, lsb[gn])
        h_metrics[gn] = (advanceWidth, 0)
    fb.setupHorizontalMetrics(h_metrics)

    v_metrics = {}
    for gn, advanceWidth in advanceWidths.items():
    #    v_metrics[gn] = (1000, lsb2[gn])
        v_metrics[gn] = (1000, 0)
    fb.setupVerticalMetrics(v_metrics)

    fb.setupHorizontalHeader(ascent=img_height, descent=0) # ascent=824, descent=200
    fb.setupVerticalHeader(ascent=img_width, descent=0) # ascent=824, descent=200
    fb.setupNameTable(nameStrings)
    fb.setupOS2(sTypoAscender=img_height, sTypoDescender=0, usWinAscent=img_height, usWinDescent=0)
    fb.setupPost()
    #fb.setupDummyDSIG()

    fb.save(font_path)

    if install == True:
        import os
        os.system("cp %s ~/.local/share/fonts/" % font_path)
        os.system("fc-cache -f")
python|big_image_to_font.py
from PIL import Image
import io
from images2font import images2font

def split_and_compress_image(input_image_path, output_image_format):
    input_image = Image.open(input_image_path)

    width, height = input_image.size

    fragment_images = []

    for y in range(0, height, 32):
        for x in range(0, width, 1000):
            fragment = input_image.crop((x, y, x + 1000, y + 32))
            fragment_images.append(fragment)

    font_images = {}

    i = 0x00100000 # 外字コード
    for fragment in fragment_images:
        output_buffer = io.BytesIO()
        fragment.save(output_buffer, format=output_image_format)
        font_images[i] = output_buffer.getvalue()
        i += 1
    images2font(font_images, "BigImageTestFont", "大きな画像のテストフォント", "./mytest_big_image.otf", img_width = 10000, ppem=32)

    i = 0x00100000
    with open("/tmp/test.sh", "w") as test_sh:
        for fragment in fragment_images:
            test_sh.write("echo " + chr(i) + "\n")
            i += 1
        test_sh.write("sleep infinity\n")
    import os
    os.system("chmod +x /tmp/test.sh")
    os.system("killall mate-terminal") # restart for font-cache update
    os.system("mate-terminal -e /tmp/test.sh&")

input_image_path = '20161213214732.png'
output_image_format = 'PNG'

split_and_compress_image(input_image_path, fragment_size, output_image_format)
結果はこんな感じです。横幅はいくらでもオーバーできるので割り当てはたった\U00100000から\U0010000Cの13文字で済んでたりします。
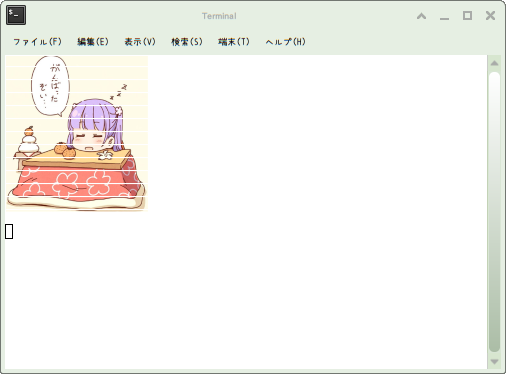
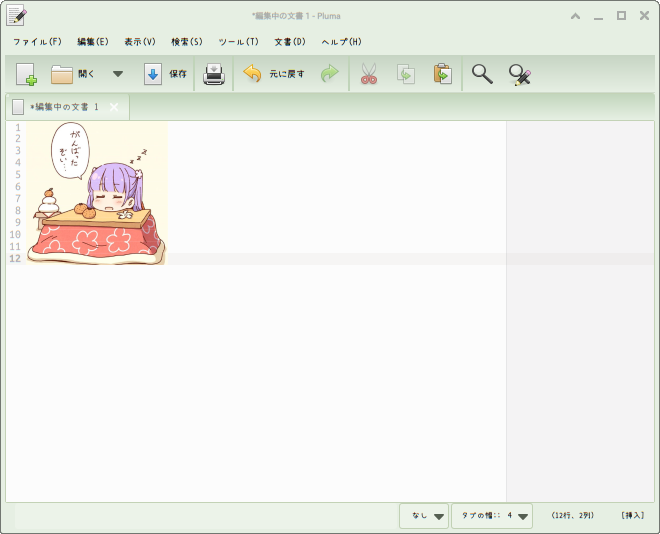
…端末上ではちょっと線が出ちゃってますね…。テキストエディタ上では下のように線が出なかったのですが…。
その他の問題としてフォールバックで外字を使うには比較的重いフォントキャッシュの更新が必要ということがあります。そのため用途が限定されますが、コマンドプログラムで画像を出したい時には重宝しそうな技術です。
-
研究目的での利用 ↩