Apache Velocityのサンプルコードを動かすまで
自分用のメモとして記載します。
公式サイトを読みながらVelocityの挙動の確認する環境が欲しかったので作りました。
※「Velocityが動けばOK」という感じで環境構築したので、誤りなどがあれば指摘してくださると嬉しいです。
必要なもの
- Tomcat 9(サーブレットコンテナ)
- Eclipse(統合開発環境)
ソースコード一式
下記の手順で作成したソースコード一式のGitリポジトリです。
https://github.com/vicboss1002/velocity_sample
手順
- Tomcatをインストールする
- TomcatをEclipseにサーバとして設定する
- EclipseでMaevnプロジェクトを作成する
- Mavenで依存ライブラリをダウンロードする
- Velocityのテンプレートファイルをブラウザに表示する
- JavaからVelocityコンテキストに変数を渡して表示する
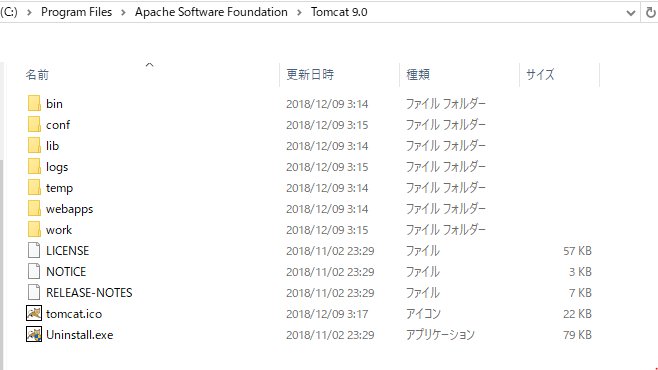
Tomcatをインストールする
以下のサイトから32-bit/64-bit Windows Service Installerをダウンロードしてインストールしました。
https://tomcat.apache.org/download-90.cgi
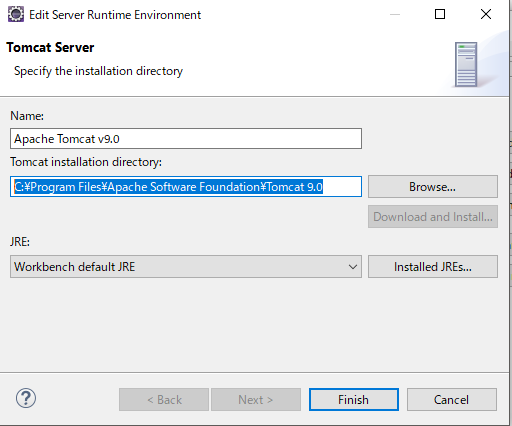
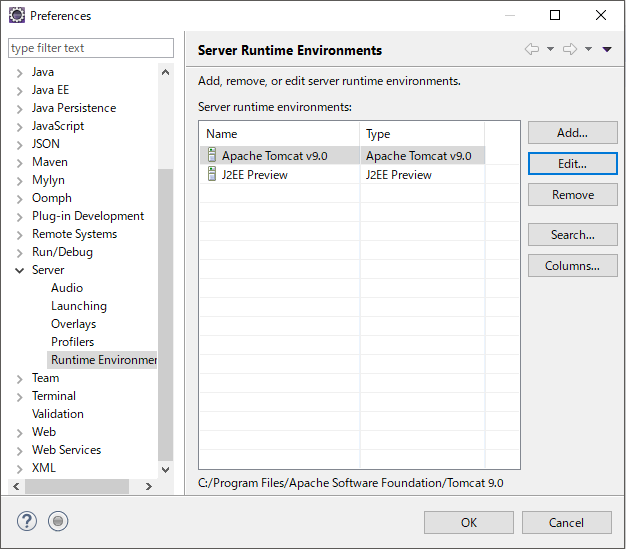
TomcatをEclipseにサーバとして設定する
-
Window > Preferences > Server > Runtime Environmentを開く
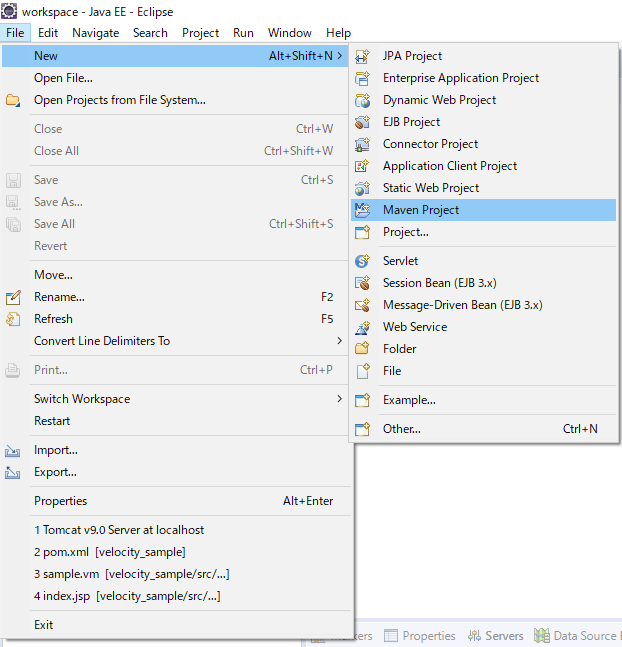
EclipseでMavenプロジェクトを作成する
-
File > New > Maven Projectを選択する
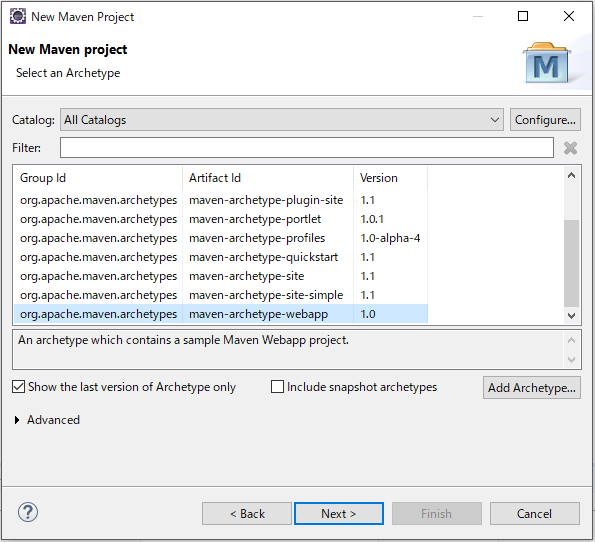
-
Select an Archetypeで
maven-archetype-webappを選択する
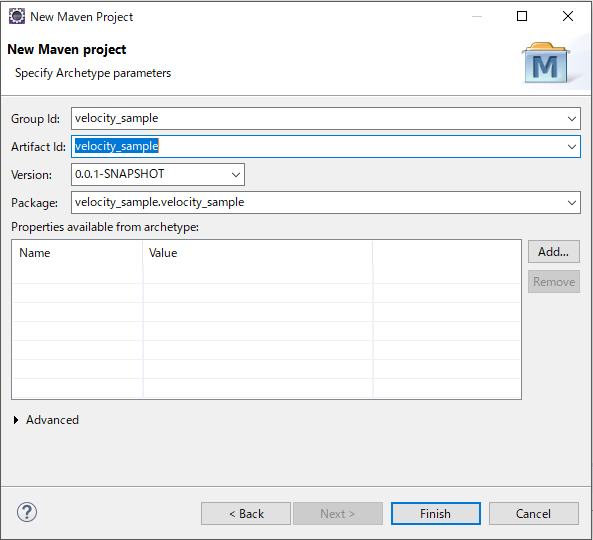
-
GroupId, ArtifactIdを指定し、Mavenプロジェクトを作成する
Mavenで依存ライブラリをダウンロードする
- pom.xmlにて、依存ライブラリに以下を指定する
pom.xml
<dependency>
	<groupId>javax.servlet</groupId>
	<artifactId>javax.servlet-api</artifactId>
	<version>4.0.0</version>
</dependency>
<dependency>
	<groupId>org.apache.velocity.tools</groupId>
	<artifactId>velocity-tools-generic</artifactId>
	<version>3.0</version>
</dependency>
<dependency>
	<groupId>org.apache.velocity.tools</groupId>
	<artifactId>velocity-tools-view</artifactId>
	<version>3.0</version>
</dependency>
<dependency>
	<groupId>org.apache.velocity.tools</groupId>
	<artifactId>velocity-tools-view-jsp</artifactId>
	<version>3.0</version>
</dependency>
<dependency>
	<groupId>com.republicate</groupId>
	<artifactId>webapp-slf4j-logger</artifactId>
	<version>1.3</version>
</dependency>
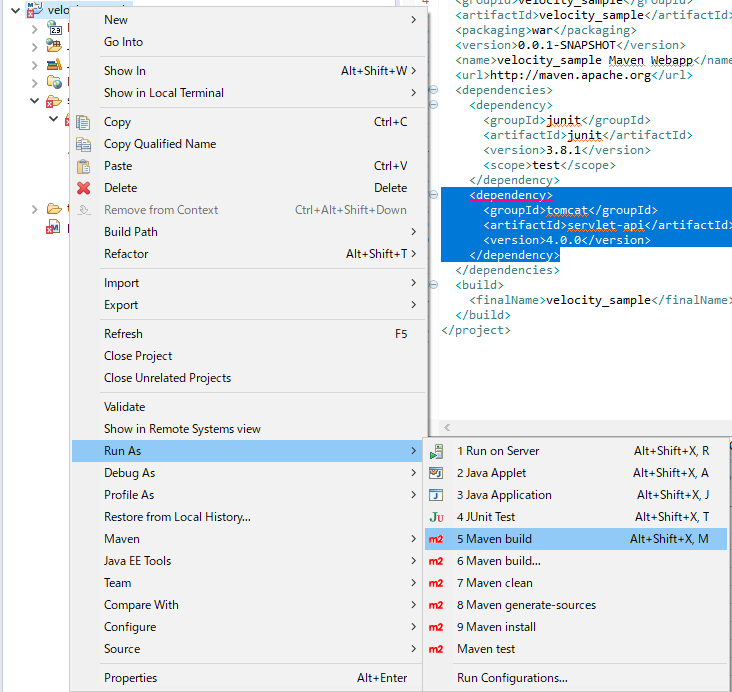
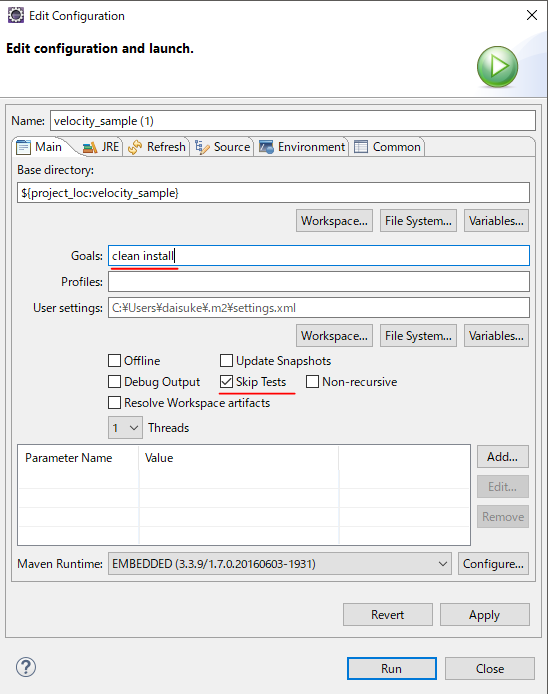
-
プロジェクト > Run As > Maven buildを実行する
Velocityのテンプレートファイルをブラウザに表示する
- web.xmlにVelocityViewServletの設定を追記する
こちらの記述に基づいてweb.xmlにVelocityViewServletの設定を追記します。
web.xml
<!-- ログ出力の設定 -->
<context-param>
	<param-name>webapp-slf4j-logger.level</param-name>
	<param-value>debug</param-value>
</context-param>
<context-param>
	<param-name>webapp-slf4j-logger.format</param-name>
	<param-value>%logger [%level] [%ip] %message</param-value>
</context-param>
<servlet>
	<servlet-name>velocity</servlet-name>
	<servlet-class>
		org.apache.velocity.tools.view.VelocityViewServlet
	</servlet-class>

	<!-- Unless you plan to put your tools.xml and velocity.properties under
		different folders or give them different names, then these two init-params
		are unnecessary. The VelocityViewServlet will automatically look for these
		files in the following locations. -->
	<init-param>
		<param-name>org.apache.velocity.toolbox</param-name>
		<param-value>/WEB-INF/tools.xml</param-value>
	</init-param>
	<init-param>
		<param-name>org.apache.velocity.properties</param-name>
		<param-value>/WEB-INF/velocity.properties</param-value>
	</init-param>
</servlet>

<!-- Map *.vm files to Velocity -->
<servlet-mapping>
	<servlet-name>velocity</servlet-name>
	<url-pattern>*.vm</url-pattern>
</servlet-mapping>
-
プロジェクトルート > src直下に、テンプレートファイルを作成する
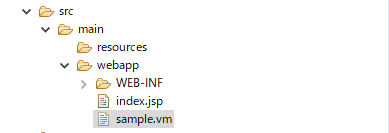
sample.vm
# set($text = "Velocity World!")
Hello $text
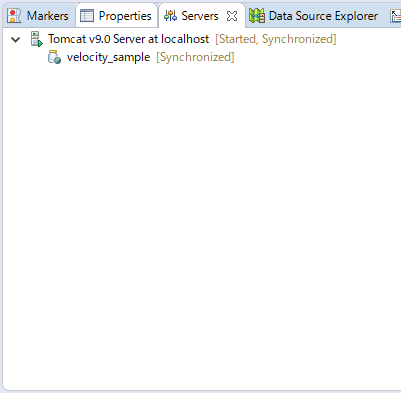
-
EclipseのServersビューからTomcatを起動する
-
ブラウザ経由でsample.vmを表示確認する
ブラウザのURLにhttp://localhost:8080/velocity_sample/sample.vmを入力し、表示する

これで完了です。
sample.vmに記述したVelocityの処理が実行され内容が表示されていることが確認できました。
JavaからVelocityコンテキストに変数を渡して表示する
-
VelictyViewServletのサブクラスを作成します。
MyVelocityViewServlet.java
public class MyVelocityViewServlet extends VelocityViewServlet {
	private static final long serialVersionUID = 1L;
    protected Template handleRequest(HttpServletRequest request,
            HttpServletResponse response,
            Context ctx)
	{

    	ctx.put("boolTrue", true);
    	ctx.put("boolFalse", false);
    	ctx.put("number", 1234);
    	ctx.put("string", "abcd");
    	ctx.put("list", Arrays.asList("a", "b", "c", "d"));

    	Map<String, String> map = new HashMap<>();
    	map.put("key1", "value1");
    	map.put("key2", "value2");
    	ctx.put("map", map);
    	return super.handleRequest(request, response, ctx);
	}
}
- web.xmlを以下のように
VelictyViewServletのサブクラス用に書き換えます。
web.xml
<servlet>
	<servlet-name>velocity</servlet-name>
<!-- 		<servlet-class> -->
<!-- 			org.apache.velocity.tools.view.VelocityViewServlet -->
<!-- 		</servlet-class> -->
	<servlet-class>velocity_sample.MyVelocityViewServlet</servlet-class>

	<!-- Unless you plan to put your tools.xml and velocity.properties under
		different folders or give them different names, then these two init-params
		are unnecessary. The VelocityViewServlet will automatically look for these
		files in the following locations. -->
	<init-param>
		<param-name>org.apache.velocity.toolbox</param-name>
		<param-value>/WEB-INF/tools.xml</param-value>
	</init-param>
	<init-param>
		<param-name>org.apache.velocity.properties</param-name>
		<param-value>/WEB-INF/velocity.properties</param-value>
	</init-param>
</servlet>
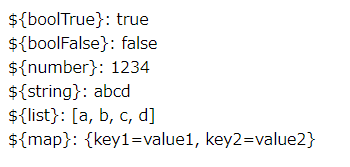
- Javaから設定された変数を呼び出すテンプレートファイルを作成する
sample_of_context.vm
\${boolTrue}: ${boolTrue}<br/>
\${boolFalse}: ${boolFalse}<br/>
\${number}: ${number}<br/>
\${string}: ${string}<br/>
\${list}: ${list}<br/>
\${map}: ${map}<br/>
以下のように出力される。