はじめに
CloudbeaverとはWeb版のDbeaverです。Dockerイメージがあり簡単に構築できます。
利用に辺り、Reverse proxy header authenticationを試します。
CloudBeaver offers a feature for authorization and authentication using reverse proxy headers. This method allows to authenticate users via specific HTTP header fields.
Cloudbeaverの注意点等
Cloudbeaverには匿名認証が用意されていますが、この場合DBへの接続情報を永続化できないという特徴があります。
Private connections: When enabled, this feature lets anonymous users configure their private connections from the main page. These connections are temporary and expire with the session.
このため、接続情報を永続化するには、何らかの方法でログインする必要があるようです。
また、デフォルトのままだと、独自の管理者アカウントのユーザーとパスワードの設定を行わなければならないので、既存の認証基盤との連携やSSOなどを実現したい際にやや使いづらさを感じます。
組織よっては、統一的なユーザーが用意されていて、それを利用して様々なアプリケーションへSSOすることも多いのではないでしょうか。
ただ、今回はあまり複雑なことはせず、基本認証でログインしたユーザーでCloudbeaverにログインする方法を今回は試してみます。
ソース
Quick Start
git clone https://github.com/v1tam1nb2/openresty-cloudbeaver-ce.git
cd openresty-cloudbeaver-ce
docker compose up -d
以下にアクセスします。
-
http://localhost:8888/
- 基本認証情報
- User:
cbuser - Password:
password
- User:
- 基本認証情報
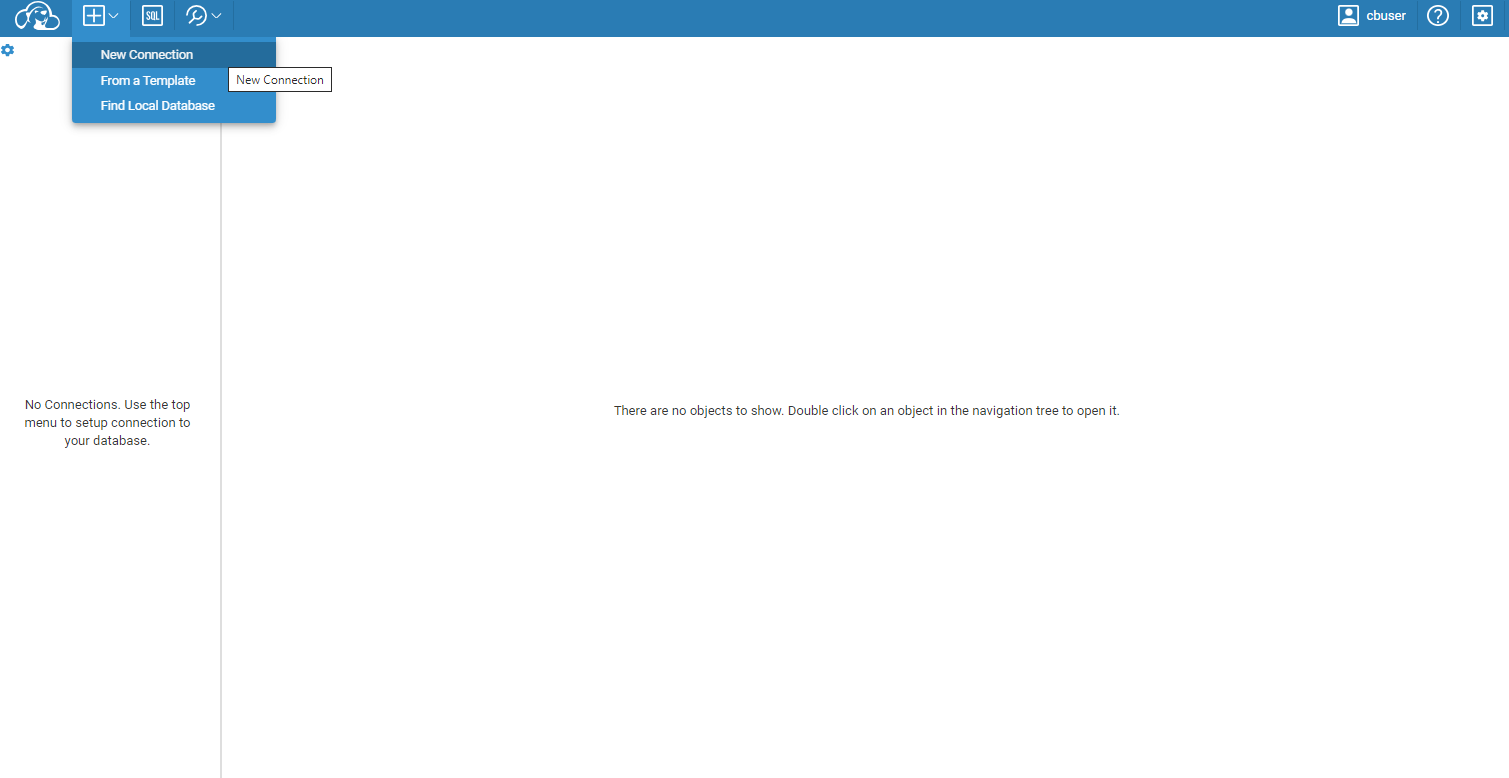
New Connectionを選択する。
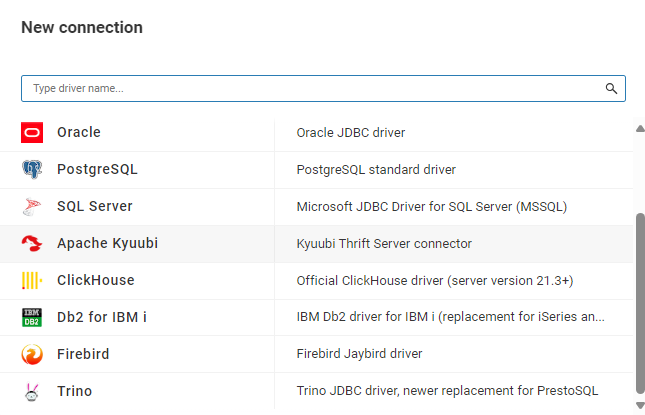
ClickHouseの例を示します。
ClickHouseを選択する。
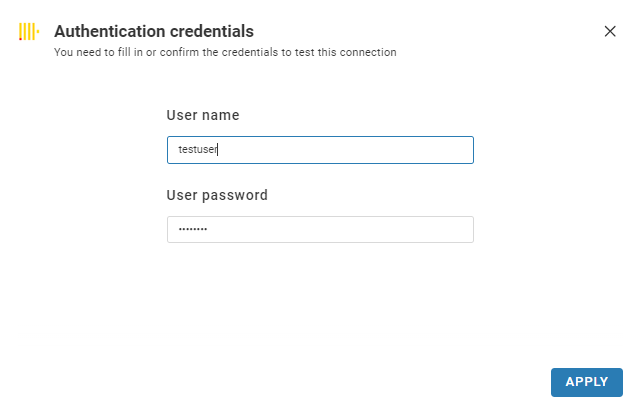
以下の情報を入力する。
- Host
clickhouse
- Port
8123
- User name
testuser
- User password
password
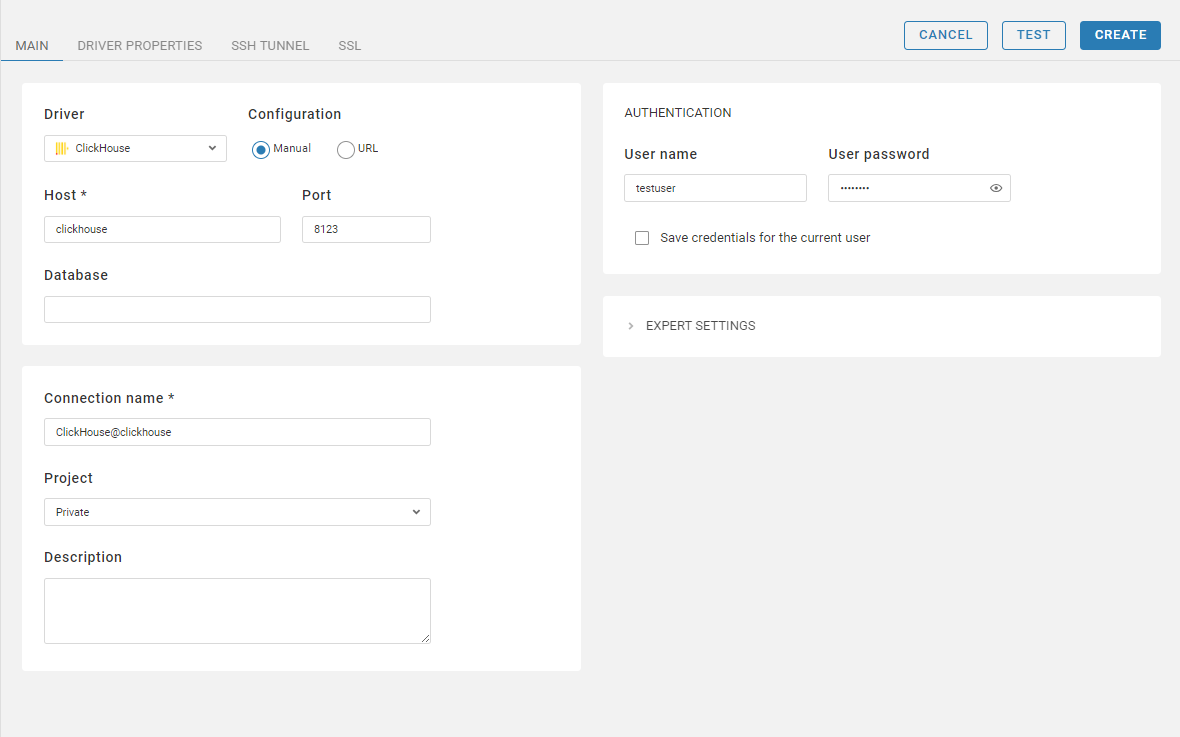
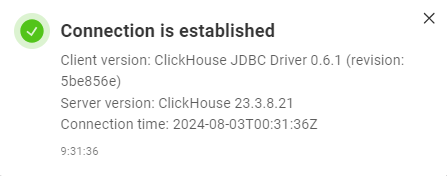
TESTを選択して、接続情報が問題ないか確認する。
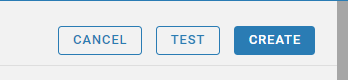
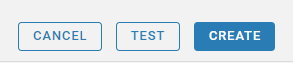
Applyを選択する。
以下の表示が出れば問題ない。
その後、CREATEを選択する。
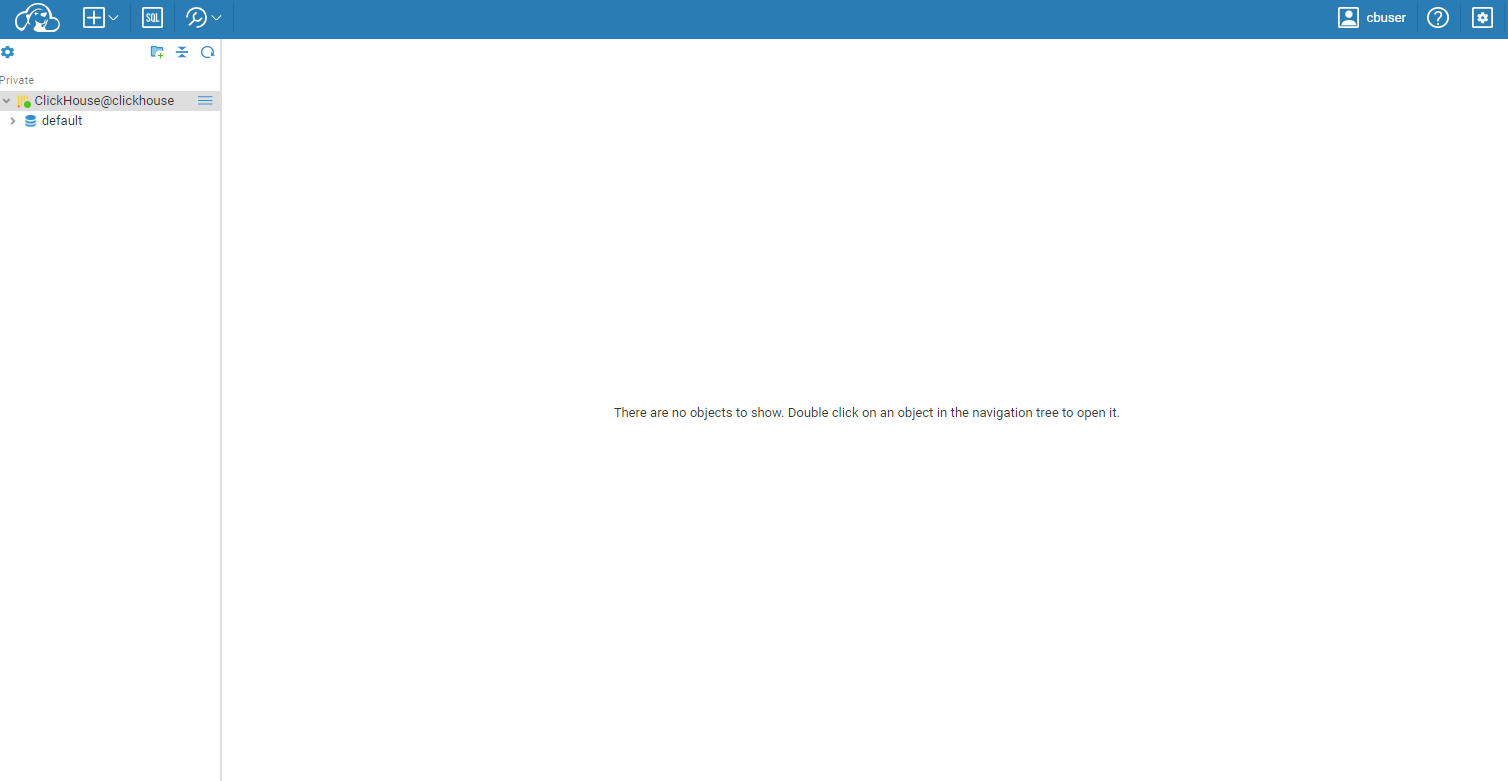
CREATE後、DBの中身を確認するときに再度認証を求められるので、DBのユーザーとパスワードを入力する。以下のようになればOK。
右上にcbuserと表示されていれば、基本認証でログインしたユーザーでCloudbeaverが利用できるようになっています。
compose.yaml
- プロキシの役割としてOpenrestyを用意(Openresty側で基本認証を行う)
- 接続するDBの例としてClickHouseを用意
services:
  openresty:
    container_name: openresty
    hostname: openresty
    image: bitnami/openresty:latest
    restart: always
    ports:
      - 8888:80
    volumes:
     - ./src/openresty/nginx.conf:/opt/bitnami/openresty/nginx/conf/nginx.conf
     - ./src/openresty/.htpasswd:/etc/nginx/.htpasswd

  cloudbeaver:
    container_name: cloudbeaver
    hostname: cloudbeaver
    image: dbeaver/cloudbeaver:24.1.3
    restart: always
    volumes:
      - ./src/cloudbeaver/cloudbeaver.conf:/opt/cloudbeaver/conf/cloudbeaver.conf
      - ./cb_data/cloudbeaver/workspace:/opt/cloudbeaver/workspace

  clickhouse:
    image: clickhouse/clickhouse-server:23.3.8.21
    container_name: clickhouse
    hostname: clickhouse
    restart: always
    volumes:
    - ./ch_data/var/lib/clickhouse:/var/lib/clickhouse
    - ./ch_data/var/log/clickhouse-server:/var/log/clickhouse-server
    - ./src/clickhouse/data/etc/clickhouse-server/users.d:/etc/clickhouse-server/users.d
    - ./src/clickhouse/data/etc/clickhouse-server/config.d:/etc/clickhouse-server/config.d
Cloudbeaverの設定
Cloudbeaverの構成情報のドキュメントは以下になります。
{
    server: {
        serverPort: 8978,
        serverName: "CloudBeaver Sample Server",
        workspaceLocation: "workspace",
        contentRoot: "web",
        driversLocation: "drivers",

        sslConfigurationPath:"${CLOUDBEAVER_SSL_CONF_PATH:workspace/.data/ssl-config.xml}",

        rootURI: "/",
        serviceURI: "/api/",

        productSettings: {
            # Global properties
            core.theming.theme: 'light',
            core.localization.localization: 'en',
            plugin.sql-editor.autoSave: true,
            plugin.sql-editor.disabled: false,
            # max size of the file that can be uploaded to the editor (in kilobytes)
            plugin.sql-editor.maxFileSize: 10240,
            plugin.log-viewer.disabled: false,
            plugin.log-viewer.logBatchSize: 1000,
            plugin.log-viewer.maxFailedRequests: 3,
            plugin.log-viewer.maxLogRecords: 2000,
            plugin.log-viewer.refreshTimeout: 3000,
            sql.proposals.insert.table.alias: PLAIN
        },

        expireSessionAfterPeriod: 1800000,

        develMode: false,

        enableSecurityManager: false,

        sm: {
            enableBruteForceProtection: "${CLOUDBEAVER_BRUTE_FORCE_PROTECTION_ENABLED:true}",
            maxFailedLogin: "${CLOUDBEAVER_MAX_FAILED_LOGINS:10}",
            minimumLoginTimeout: "${CLOUDBEAVER_MINIMUM_LOGIN_TIMEOUT:1}",
            blockLoginPeriod: "${CLOUDBEAVER_BLOCK_PERIOD:300}",
            passwordPolicy: {
                minLength: "${CLOUDBEAVER_POLICY_MIN_LENGTH:8}",
                requireMixedCase: "${CLOUDBEAVER_POLICY_REQUIRE_MIXED_CASE:true}",
                minNumberCount: "${CLOUDBEAVER_POLICY_MIN_NUMBER_COUNT:1}",
                minSymbolCount: "${CLOUDBEAVER_POLICY_MIN_SYMBOL_COUNT:0}"
            }
        },

        database: {
            driver: "${CLOUDBEAVER_DB_DRIVER:h2_embedded_v2}",
            url: "${CLOUDBEAVER_DB_URL:jdbc:h2:${workspace}/.data/cb.h2v2.dat}",
            schema: "${CLOUDBEAVER_DB_SCHEMA:''}",
            user: "${CLOUDBEAVER_DB_USER:''}",
            password: "${CLOUDBEAVER_DB_PASSWORD:''}",
            initialDataConfiguration: "${CLOUDBEAVER_DB_INITIAL_DATA:conf/initial-data.conf}",
            pool: {
                minIdleConnections: "${CLOUDBEAVER_DB_MIN_IDLE_CONNECTIONS:4}",
                maxIdleConnections: "${CLOUDBEAVER_DB_MAX_IDLE_CONNECTIONS:10}",
                maxConnections: "${CLOUDBEAVER_DB_MAX_CONNECTIONS:100}",
                validationQuery: "${CLOUDBEAVER_DB_VALIDATION_QUERY:SELECT 1}"
            },
            backupEnabled: "${CLOUDBEAVER_DB_BACKUP_ENABLED:true}"
        }

    },
    app: {
        anonymousAccessEnabled: true,
        anonymousUserRole: "user",
        defaultUserTeam: "user",
        grantConnectionsAccessToAnonymousTeam: false,
        supportsCustomConnections: true,
        showReadOnlyConnectionInfo: false,
        systemVariablesResolvingEnabled: "${CLOUDBEAVER_SYSTEM_VARIABLES_RESOLVING_ENABLED:false}",

        forwardProxy: true,

        publicCredentialsSaveEnabled: true,
        adminCredentialsSaveEnabled: true,

        resourceManagerEnabled: true,

        resourceQuotas: {
            dataExportFileSizeLimit: 10000000,
            resourceManagerFileSizeLimit: 500000,
            sqlMaxRunningQueries: 100,
            sqlResultSetRowsLimit: 100000,
            sqlResultSetMemoryLimit: 2000000,
            sqlTextPreviewMaxLength: 4096,
            sqlBinaryPreviewMaxLength: 261120
        },
        defaultAuthProvider: "reverseProxy",
        enableReverseProxyAuth: true,
        enabledAuthProviders: [
            "reverseProxy"
        ],

        disabledDrivers: [
            "sqlite:sqlite_jdbc",
            "h2:h2_embedded",
            "h2:h2_embedded_v2",
            "clickhouse:yandex_clickhouse"
        ],
        disabledBetaFeatures: [

        ],
        authConfigurations: [
            {
                "id": "reverseProxy",
                "provider": "reverseProxy",
                "displayName": "Reverse Proxy",
                "disabled": false,
                "iconURL": "",
                "description": "",
                "parameters": {
                    "logout-url": "",
                    "user-header": "",
                    "team-header": "",
                    #"team-delimiter": "",
                    "first-name-header": "",
                    "last-name-header": ""
                }
            }
        ]

    }

}
以下の箇所でAuthProvidersを指定します。今回はreverseProxyです。
実は、LDAPなどもサポートされていて、ldapとすることで、ldap認証も可能です。
        enabledAuthProviders: [
            "reverseProxy"
        ]
リバプロ認証を行うために以下の設定も必要です。providerはreverseProxyを指定します。
Important: Ensure you include the mandatory fields id, provider, and displayName. The provider name must be set to reverseProxy.
        authConfigurations: [
            {
                "id": "reverseProxy",
                "provider": "reverseProxy",
                "displayName": "Reverse Proxy",
                "disabled": false,
                "iconURL": "",
                "description": "",
                "parameters": {
                    "logout-url": "",
                    "user-header": "",
                    "team-header": "",
                    #"team-delimiter": "",
                    "first-name-header": "",
                    "last-name-header": ""
                }
            }
        ]
team-delimiterをコメントアウトしている理由は、以下のIssueをご確認ください。
Openrestyの設定
基本認証の方法については、巷に記事が溢れているので詳細は省略します。
Openresty to Cloudbeaverの部分について解説します。
大事なのは以下のlocation部分です。
		location / {
			proxy_pass       http://cloudbeaver:8978;
            proxy_set_header X-Real-IP $remote_addr;
            proxy_set_header X-Forwarded-For $proxy_add_x_forwarded_for;
            proxy_set_header Host $http_host;
            proxy_http_version 1.1;
            proxy_set_header Upgrade $http_upgrade;
            proxy_set_header Connection "upgrade";
			proxy_set_header X-User $remote_user;
            proxy_set_header X-Team 'user|admin';

            auth_basic "Restricted";
            auth_basic_user_file /etc/nginx/.htpasswd;

		}
-
proxy_pass http://cloudbeaver:8978;- Docker composeで構築しているので、サービス名で名前解決ができます。
- Cloudbeaverのデフォルトポートは8978です。
-
proxy_set_header X-User $remote_user;-
$remote_userで基本認証でログインしたユーザー名を取得します。
-
-
proxy_set_header X-Team 'user|admin';- ユーザーのチーム(ロール?)を指定します。
-
userは一般ユーザー、adminは管理者ユーザーの権限が与えられます。 - 実は、前述した
team-delimiterでチームの区切り文字を指定できます。デフォルトは|です。 - 管理者権限を与えたくない場合は、
proxy_set_header X-Team userとすればOKです。
HTTPヘッダーの詳細については以下のドキュメントを参照してください。
まとめ
CloudbeaverでReverse proxy header authenticationを実現することができました。
今回は基本認証で試しましたが、Keycloakなどと連携してSSOを実現することも可能です。