今回実施する構成
環境
- WSL Ubuntu 20.04
- Docker version 20.10.14
Keycloakとは
KeycloakとはOSS製品で、
- シングルサインオン
- アイデンティティ管理
- アクセス管理の機能
などを提供します。
OAuth2 Proxyとは?
認証と認可を外部の認証基盤に委譲するためのリバースプロキシサーバです。(参考:OAuth2 Proxyとは)
OIDC プロバイダーを利用して認証を提供し、アカウント検証を行います。OIDCとは「OpenID Connect」の略で、認証を行うプロトコルの一つです。(参考:OAuthとOpenID Connectについて~仕組みや特徴など解説~)
KeycloakをDockerコンテナとして構築
利用するソースはGitHubに置いています。
公式のQuickStartもあります。
Docker ネットワークを作成
今回の検証で利用するコンテナネットワークを作成する。
docker network create oauth_network
Keycloakのhttps化
cd keycloak
mkdir certs
openssl req -x509 -sha256 -nodes -days 3650 -newkey rsa:2048 -subj /CN=localhost -keyout server.key -out server.crt
一部省略していますが、フォルダ構成は以下の状態から構築します。
.
├── docker-compose.yaml
├── .env
├── keycloak
│   ├── certs
│   │   ├── server.crt
│   │   └── server.key
│   └── keycloak.yaml
├── openldap
│   └──  testuser.ldif
└── openresty
    └── nginx.conf
Keycloakのコンテナ構築
version: '3'
services:
  keycloak:
    image: quay.io/keycloak/keycloak:latest
    container_name: keycloak
    tty: true
    ports:
      - "18080:8080"
      - "8443:8443"
    volumes:
      - ./keycloak/data:/opt/keycloak/data
      - ./keycloak/certs:/etc/x509/https
    environment:
      KEYCLOAK_ADMIN: admin
      KEYCLOAK_ADMIN_PASSWORD: passwd
      KC_HOSTNAME_STRICT_HTTPS: 'false'
      KC_HTTPS_CERTIFICATE_FILE: /etc/x509/https/server.crt
      KC_HTTPS_CERTIFICATE_KEY_FILE: /etc/x509/https/server.key
    command:
      - start-dev
    networks:
    - oauth_network

networks:
  oauth_network:
    external: true
コンテナを起動する。
docker-compose -f keycloak.yaml up -d
しかし、このままだとボリュームマント設定のパーミッションの問題で起動に失敗するので以下を実行する。
docker-compose -f keycloak.yaml down
chown -R 1000:0 data/
chown -R 1000:0 certs/
再度コンテナを起動する。
docker-compose -f keycloak.yaml up -d
以下にアクセスする。
Keycloakの画面が表示される。
Administration Console を選択する。
ログイン画面に遷移するので、keycloak.yaml に設定した以下のログイン情報を入力する。
- admin
- passwd
realmの作成
Clientsの作成
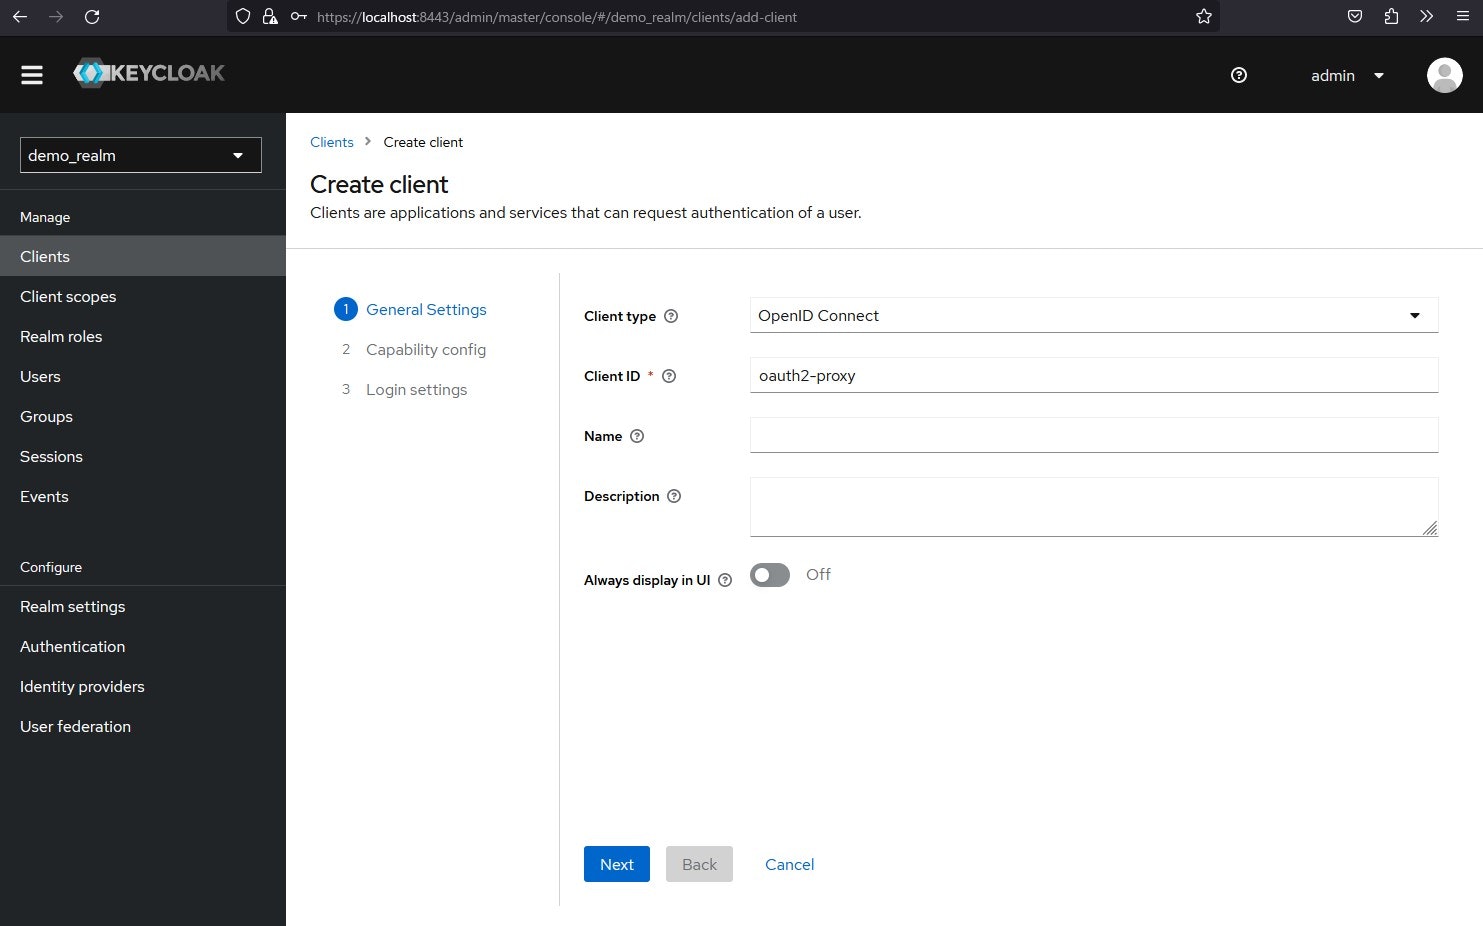
Clients >> Create client を選択する。
Client ID をoauth2-proxy と入力し、Nextを選択する。
Client authentication をONにし、Nextを選択する。
Valid redirect URIs と Web origins に*を入力し、Saveを選択する。
Credentialsをコピー
後ほど、OAuth2 Proxy で利用するので控えておく。
OAuth2 Proxy/OpenLDAP/Openresty コンテナの構築
version: '3'
services:
  webapp:
    image: openresty/openresty:latest
    container_name: webapp
    hostname: webapp
    networks:
    - oauth_network

  openresty:
    image: openresty/openresty:latest
    container_name: openresty
    hostname: openresty
    ports:
    - '${HTTP_PORT}:80'
    env_file:
    - ./.env
    volumes:
    - ./openresty/nginx.conf:/usr/local/openresty/nginx/conf/nginx.conf
    # - ./openresty/conf.d:/usr/local/openresty/nginx/conf/conf.d
    # - ./openresty/default.d:/usr/local/openresty/nginx/conf/default.d
    networks:
    - oauth_network

  oauth2-proxy:
    container_name: oauth2-proxy
    hostname: oauth2-proxy
    image: quay.io/oauth2-proxy/oauth2-proxy:latest
    ports:
      - 4180:4180
    environment:
      OAUTH2_PROXY_PROVIDER: oidc
      OAUTH2_PROXY_OIDC_EMAIL_CLAIM: sub
      OAUTH2_PROXY_SCOPE: "openid"
      # keycloakで設定したClient IDと同じ
      OAUTH2_PROXY_CLIENT_ID: oauth2-proxy
      # keycloakで取得したCredentials
      OAUTH2_PROXY_CLIENT_SECRET: "taAhCUFAemBr3Q0pnTESj6Y2V0JBi6yo"
      OAUTH2_PROXY_OIDC_ISSUER_URL: https://keycloak:8443/realms/demo_realm
      # OAUTH2_PROXY_COOKIE_SECRETは「python -c 'import os,base64; print(base64.urlsafe_b64encode(os.urandom(32)).decode())'」で生成可。
      OAUTH2_PROXY_COOKIE_SECRET: "5JEx-EnDmjnlN-1wd2EQDMrLLEly5NOUUSYsZCiy3Tc="
      # keycloakで設定したRealmの名前
      OAUTH2_PROXY_COOKIE_NAME: "auth_demo"
      OAUTH2_PROXY_EMAIL_DOMAINS: "*"
      OAUTH2_PROXY_HTTP_ADDRESS: 0.0.0.0:4180
      OAUTH2_PROXY_PASS_AUTHORIZATION_HEADER: "true"
      OAUTH2_PROXY_PASS_ACCESS_TOKEN: "true"
      OAUTH2_PROXY_PASS_USER_HEADERS: "true"
      OAUTH2_PROXY_PASS_AUTHORIZATION_HEADER: "true"
      OAUTH2_PROXY_SSL_INSECURE_SKIP_VERIFY: "true"
      OAUTH2_PROXY_INSECURE_OIDC_ALLOW_UNVERIFIED_EMAIL: "true"
      # 以下、HTTPS ではなく HTTP で動かすための設定
      OAUTH2_PROXY_REDIRECT_URL: ""
      OAUTH2_PROXY_COOKIE_SECURE: "false"
      # OAUTH2_PROXY_COOKIE_EXPIRE: "12h"
      # OAUTH2_PROXY_COOKIE_SECURE: "true"
      # OAUTH2_PROXY_SET_XAUTHREQUEST: "true"
      # OAUTH2_PROXY_REVERSE_PROXY: "true"
      # OAUTH2_PROXY_SKIP_PROVIDER_BUTTON: "true"
    networks:
    - oauth_network

  ldap-server:
    image: osixia/openldap:latest
    restart: always
    container_name: ldap-server
    environment:
      LDAP_ORGANISATION: "My Company"
      LDAP_DOMAIN: "my-company.com"
      LDAP_ADMIN_PASSWORD: "admin"
      LDAP_READONLY_USER: "true"
      LDAP_READONLY_USER_USERNAME: "readonly"
      LDAP_READONLY_USER_PASSWORD: "readonly_password"
      LDAP_TLS_VERIFY_CLIENT: "never"
    ports:
      - "389:389"
    volumes:
      - ./openldap/var/lib/ldap:/var/lib/ldap
      - ./openldap/etc/ldap/slapd.d:/etc/ldap/slapd.d
      - ./openldap/testuser.ldif:/slapd/assets/custome/testuser.ldif
    networks:
    - oauth_network

  # ログイン情報
  # Login DN: cn=admin,dc=my-company,dc=com
  # Password: admin
  ldap-admin:
    image: osixia/phpldapadmin:latest
    container_name: ldap-admin
    restart: always
    environment:
      PHPLDAPADMIN_LDAP_HOSTS: "ldap"
      PHPLDAPADMIN_HTTPS: "false"
    ports:
      - "8080:80"
    links:
      - "ldap-server:ldap"
    networks:
    - oauth_network

networks:
  oauth_network:
    external: true
openrestyのポートはenvで指定しています。今回はあまり意味がないですが、もしopenrestyから環境変数へアクセスしたいケースなどが出てきたときに役立ちます。
HTTP_PORT = "80"
docker-compose up -d
hosts の設定
OAUTH2_PROXY_OIDC_ISSUER_URL: https://keycloak:8443/realms/demo_realm はDocker ネットワークによりサービス名で名前解決させているが、以下の設定が無いとアクセス確認の際に上手くいかない。
127.0.0.1 keycloak
OpenLDAP にユーザー登録
OpenLDAPに登録するテストユーザーの設定ファイルです。
test001ユーザーのパスワードはtest001です。
dn: cn=test001,dc=my-company,dc=com
givenName:test001
sn:test001
cn:test001
mail:test001@my-company.com
userPassword::dGVzdDAwMQ==
objectClass: inetOrgPerson
objectClass: top
docker exec ldap-server ldapadd -x -D "cn=admin,dc=my-company,dc=com" -w admin -f /slapd/assets/custome/testuser.ldif -ZZ
KeycloakでLdapの設定
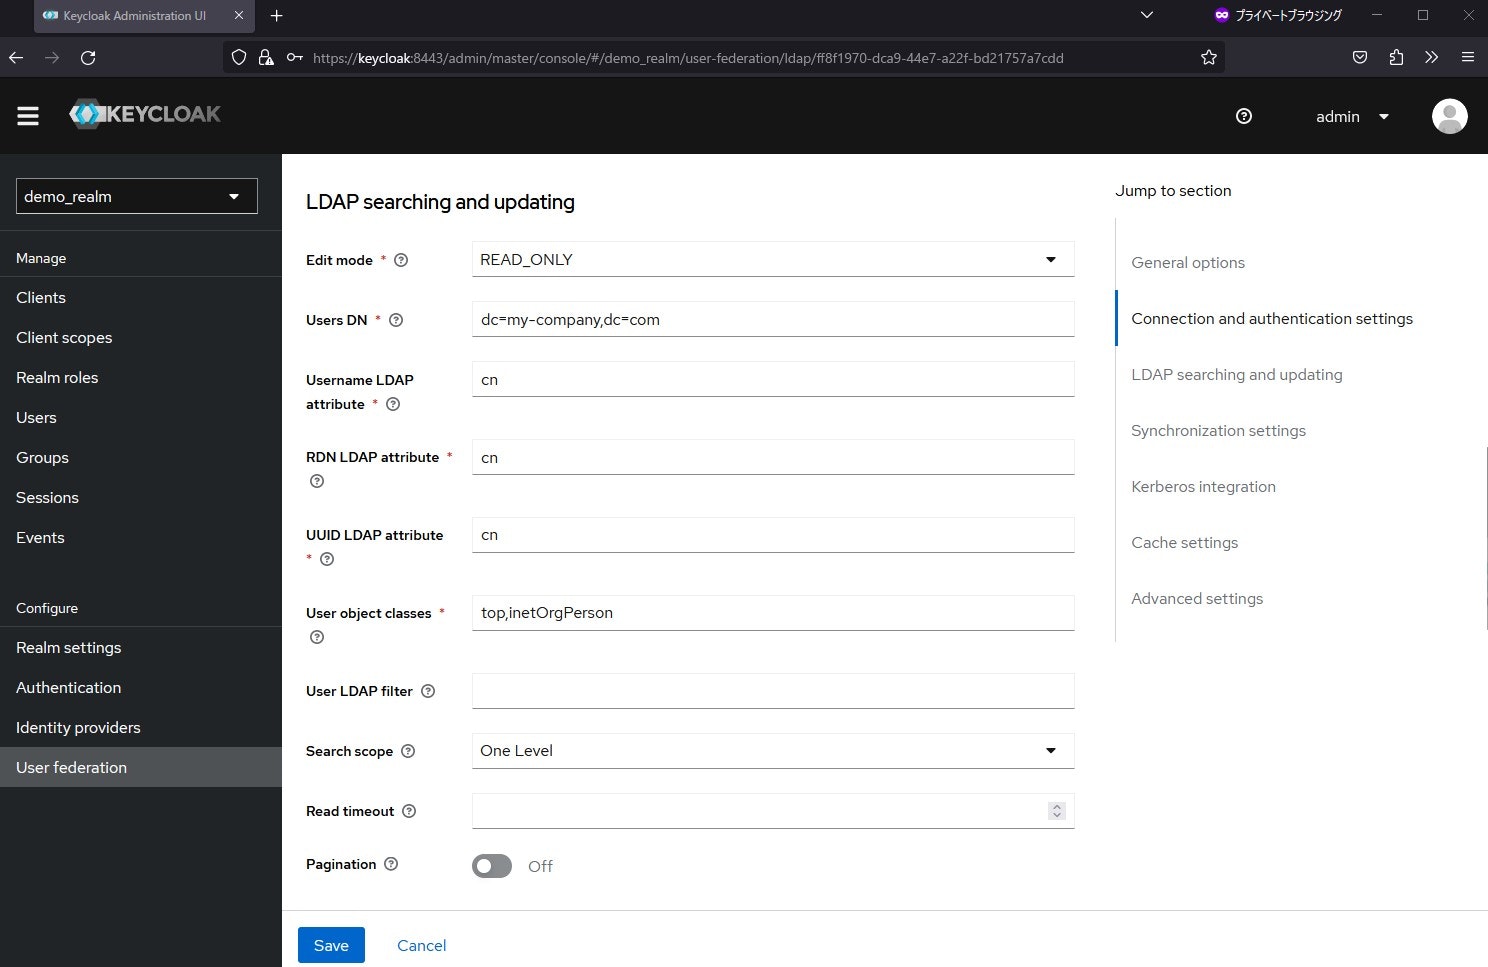
User federation >> Add Ldap providers を選択する。
以下の通り設定する。最後にSaveを押す。
Openrestyの設定
ほぼほぼ以下のコピペです。
# nginx.conf  --  docker-openresty
#
# This file is installed to:
#   `/usr/local/openresty/nginx/conf/nginx.conf`
# and is the file loaded by nginx at startup,
# unless the user specifies otherwise.
#
# It tracks the upstream OpenResty's `nginx.conf`, but removes the `server`
# section and adds this directive:
#     `include /etc/nginx/conf.d/*.conf;`
#
# The `docker-openresty` file `nginx.vh.default.conf` is copied to
# `/etc/nginx/conf.d/default.conf`.  It contains the `server section
# of the upstream `nginx.conf`.
#
# See https://github.com/openresty/docker-openresty/blob/master/README.md#nginx-config-files
#

# 環境変数(envに設定したポート番号を取得したい場合は利用する)
# env HTTP_PORT;

#user  nobody;
worker_processes 1;

# Enables the use of JIT for regular expressions to speed-up their processing.
pcre_jit on;


# error_log  /etc/nginx/lua/error.log;
#error_log  logs/error.log;
#error_log  logs/error.log  notice;
#error_log  logs/error.log  info;

#pid        logs/nginx.pid;

events {
    worker_connections  1024;
}


http {
    include       mime.types;
    default_type  application/octet-stream;
    charset UTF-8;

    # Enables or disables the use of underscores in client request header fields.
    # When the use of underscores is disabled, request header fields whose names contain underscores are marked as invalid and become subject to the ignore_invalid_headers directive.
    # underscores_in_headers off;

    #log_format  main  '$remote_addr - $remote_user [$time_local] "$request" '
    #                  '$status $body_bytes_sent "$http_referer" '
    #                  '"$http_user_agent" "$http_x_forwarded_for"';

    #access_log  logs/access.log  main;


    log_format  main  '$remote_addr - $remote_user [$time_local] "$request" '
                  '$status $body_bytes_sent "$http_referer" '
                  '"$http_user_agent" "$http_x_forwarded_for"';

    #access_log  /var/log/nginx/access.log  main;
    access_log  /dev/stdout;

        # Log in JSON Format
        # log_format nginxlog_json escape=json '{ "timestamp": "$time_iso8601", '
        # '"remote_addr": "$remote_addr", '
        #  '"body_bytes_sent": $body_bytes_sent, '
        #  '"request_time": $request_time, '
        #  '"response_status": $status, '
        #  '"request": "$request", '
        #  '"request_method": "$request_method", '
        #  '"host": "$host",'
        #  '"upstream_addr": "$upstream_addr",'
        #  '"http_x_forwarded_for": "$http_x_forwarded_for",'
        #  '"http_referrer": "$http_referer", '
        #  '"http_user_agent": "$http_user_agent", '
        #  '"http_version": "$server_protocol", '
        #  '"nginx_access": true }';
        # access_log /dev/stdout nginxlog_json;

    # See Move default writable paths to a dedicated directory (#119)
    # https://github.com/openresty/docker-openresty/issues/119
    client_body_temp_path /var/run/openresty/nginx-client-body;
    proxy_temp_path       /var/run/openresty/nginx-proxy;
    fastcgi_temp_path     /var/run/openresty/nginx-fastcgi;
    uwsgi_temp_path       /var/run/openresty/nginx-uwsgi;
    scgi_temp_path        /var/run/openresty/nginx-scgi;


    sendfile        on;
    #tcp_nopush     on;

    #keepalive_timeout  0;
    #keepalive_timeout  65;
    client_max_body_size 0;

    #gzip  on;


    include /usr/local/openresty/nginx/conf/conf.d/*.conf;

    # Don't reveal OpenResty version to clients.
    # server_tokens off;

    server {
      # http

        autoindex off;
        server_tokens off;

        resolver local=on ipv6=off;

        listen 80;

        location /oauth2/ {
            proxy_pass       http://oauth2-proxy:4180;
            proxy_set_header Host                    $host;
            proxy_set_header X-Real-IP               $remote_addr;
            proxy_set_header X-Scheme                $scheme;
            proxy_set_header X-Auth-Request-Redirect $request_uri;
            # or, if you are handling multiple domains:
            # proxy_set_header X-Auth-Request-Redirect $scheme://$host$request_uri;
        }
        location = /oauth2/auth {
            proxy_pass       http://oauth2-proxy:4180;
            proxy_set_header Host             $host;
            proxy_set_header X-Real-IP        $remote_addr;
            proxy_set_header X-Scheme         $scheme;
            # nginx auth_request includes headers but not body
            proxy_set_header Content-Length   "";
            proxy_pass_request_body           off;
        }

        location / {
            auth_request /oauth2/auth;
            error_page 401 = /oauth2/sign_in;

            # pass information via X-User and X-Email headers to backend,
            # requires running with --set-xauthrequest flag
            auth_request_set $user   $upstream_http_x_auth_request_user;
            auth_request_set $email  $upstream_http_x_auth_request_email;
            proxy_set_header X-User  $user;
            proxy_set_header X-Email $email;

            # if you enabled --pass-access-token, this will pass the token to the backend
            auth_request_set $token  $upstream_http_x_auth_request_access_token;
            proxy_set_header X-Access-Token $token;

            # if you enabled --cookie-refresh, this is needed for it to work with auth_request
            auth_request_set $auth_cookie $upstream_http_set_cookie;
            add_header Set-Cookie $auth_cookie;

            # When using the --set-authorization-header flag, some provider's cookies can exceed the 4kb
            # limit and so the OAuth2 Proxy splits these into multiple parts.
            # Nginx normally only copies the first `Set-Cookie` header from the auth_request to the response,
            # so if your cookies are larger than 4kb, you will need to extract additional cookies manually.
            auth_request_set $auth_cookie_name_upstream_1 $upstream_cookie_auth_cookie_name_1;

            # Extract the Cookie attributes from the first Set-Cookie header and append them
            # to the second part ($upstream_cookie_* variables only contain the raw cookie content)
            if ($auth_cookie ~* "(; .*)") {
                set $auth_cookie_name_0 $auth_cookie;
                set $auth_cookie_name_1 "auth_cookie_name_1=$auth_cookie_name_upstream_1$1";
            }

            # Send both Set-Cookie headers now if there was a second part
            if ($auth_cookie_name_upstream_1) {
                add_header Set-Cookie $auth_cookie_name_0;
                add_header Set-Cookie $auth_cookie_name_1;
            }

            # コンテナサービス名で指定
            proxy_pass http://webapp/;
            # or "root /path/to/site;" or "fastcgi_pass ..." etc
        }

        error_page   500 502 503 504  /50x.html;
        location = /50x.html {
            root   /usr/local/openresty/nginx/nginx/html;
        }

        # Load configuration files for the default server block.
        include /usr/local/openresty/nginx/conf/default.d/*.conf;

    }
}
アクセス確認
以下へアクセスする。
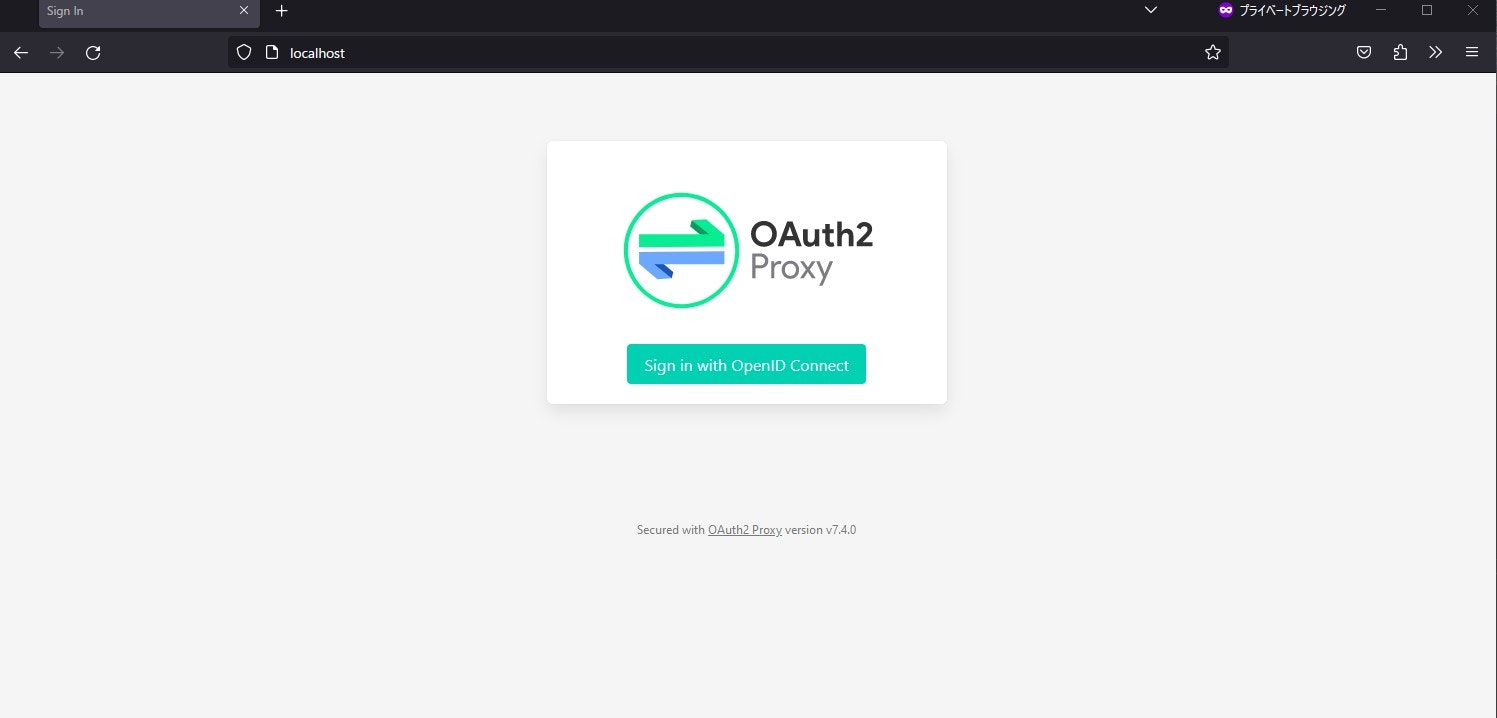
OAuth2 Proxy の認証画面が表示される。OAUTH2_PROXY_SKIP_PROVIDER_BUTTON というパラメータでこの認証画面をスキップするかどうか設定できる。
Sign in with OpenID Connect を選択する。
Keycloakの認証画面に遷移するので、Ldapに登録したユーザー名とパスワード(今回は、test001ユーザー)を入力する。
以下のようにopenresty(webapp)のWelcomeページが表示されたらOK。
まとめ
Keycloak+OAuth2 Proxy+OpenLDAP でLdap認証を試してみました。
少々煩雑ですが、ローカルで検証できる環境ができたためここまでにします。


