環境
- Ubuntu 20.04
- Docker version 20.10.14
- Docker Compose version v2.4.1
- Python 3.8.16
- Traefik v2.9.8
- code-server 4.11.0
Traefikとは
TraefikはGo言語で作られた、リバースプロキシおよびロードバランサーです。
公式ドキュメントから引用すると、コンテナのラベルにルーティングの設定を定義することでリバプロなどの機能を実現するようです。
By default, Traefik watches for container level labels on a standalone Docker Engine.
When using Docker Compose, labels are specified by the directive labels from the "services" objects.
引用:Routing Configuration
コンテナのラベルでルーティングの設定??
最初はピンときませんでしたが、実際に設定してみるとなるほどとなります。
詳細は実際に構築する際に見ていきます。
リバプロを導入する利点
コンテナでサービスを沢山構築すると、
などというように、どのサービスがどのポートが分けわからんことになります。
リバプロを導入すると、
というように、サブドメインを利用することで、1つのIPアドレスだけでリバプロが各サービスに振り分けてくれるようになります。Traefikを利用することで、実質ポート80番だけを開放するだけで良くなるのでセキュリティ的にも安心です。
Nginxとの違い
似たようなことができるツールとして、Nginxがあります。NginxとTraefikでは、リバプロとしてどのような違いがあるのでしょうか?
Nginxでは、nginx.confに振り分けの設定などを書いていくわけですが、新規に新しいサービスを追加したら、confを書き換えてNginxをリロードする必要があります。
一方で、Traefikは追加されたサービスを自動的に検知してくれるので、一度Traefikを構築してしまえば、設定ファイルを更新してリロードする手間がなくなります。
Nginxは高機能すぎて使いづらいという方は、Traefikの方が慣れると使いやすいと思います。
今回Nginxではなく、Traefikを採用したのは完全に私の趣味なので、Nginxで作り変えても同じようなことができると思います。
ソースのディレクトリ構成
ソースをGithubにアップロードしました。
.
├── Dockerfile
├── docker-compose.yaml
├── src
│   ├── code-server
│   │   └── User
│   │       ├── argv.json
│   │       └── settings.json
│   ├── python
│   │   └── requirements.txt
│   ├── start-scripts
│   │   ├── code-start.sh
│   │   └── supervisor.sh
│   ├── supervisor
│   │   └── code.ini
│   └── traefik
│       └── traefik.yml
└── volumes
    └── code-data
Ubuntu 20.04のベースイメージ上にcode-serverとPythonをインストールする
Dockerfile
FROM ubuntu:20.04


ARG PYTHON_VERSION=3.8.16 \
    CODE_SERVER_VERSION=4.11.0

ENV DEBIAN_FRONTEND="noninteractive"

RUN apt-get update && apt-get upgrade -y && \
    apt-get install -y wget curl vim openssl git zip jq gettext-base && \
    # code-server
    curl -fsSL https://code-server.dev/install.sh | sh -s -- --version ${CODE_SERVER_VERSION} && \
    # Python
    apt-get install -y build-essential libbz2-dev libdb-dev libreadline-dev libffi-dev libgdbm-dev liblzma-dev libncursesw5-dev libsqlite3-dev libssl-dev zlib1g-dev uuid-dev && \
    cd && git clone https://github.com/pyenv/pyenv.git -b master --depth 1 && \
    pyenv/plugins/python-build/bin/python-build ${PYTHON_VERSION} /usr/local && \
    pip install -U pip  && pip install wheel && \
    rm -rf pyenv && \
    # supervisord
    pip install supervisor && \
    echo_supervisord_conf > /etc/supervisord.conf && \
    mkdir /etc/supervisord.d && \
    sed -i 's/nodaemon=false/nodaemon=true/' /etc/supervisord.conf && \
    sed -i "s/;\[include\]/\[include\]/" /etc/supervisord.conf && \
    sed -i "s/;files = relative\/directory\/\*\.ini/files = supervisord.d\/*.ini/" /etc/supervisord.conf && \
    # 日本語対応
    apt-get install -y language-pack-ja-base language-pack-ja locales && \
    localedef -f UTF-8 -i ja_JP ja_JP.UTF-8 && \
    # クリーニング
    rm -rf /root/.cache && \
    apt-get autoremove && apt-get autoclean && apt-get clean && rm -fr /var/lib/apt/lists/*

# インストールするPythonモジュールの一覧
COPY ./src/python/requirements.txt /tmp/requirements.txt

# Pythonモジュール
RUN pip install -r /tmp/requirements.txt  && \
    rm -rf /root/.cache && rm -rf /tmp/*


# 必須ファイルコピー
COPY ./src/code-server/User /root/.local/share/code-server/User
COPY ./src/supervisor /etc/supervisord.d
COPY ./src/start-scripts /dockerstartscript

# 権限設定
RUN chmod -R 755 /dockerstartscript

ENV DEBIAN_FRONTEND=""

# コンテナ起動時の実行コマンド設定
ENTRYPOINT [ "/dockerstartscript/supervisor.sh" ]
code-serverの環境設定
{
    // Defines VS Code's display language.
    // See https://go.microsoft.com/fwlink/?LinkId=761051 for a list of supported languages.
    "locale":"ja" // Changes will not take effect until VS Code has been restarted.
}
{
    "terminal.integrated.shell.linux": "/bin/bash",
    "workbench.colorTheme": "Default Dark+",
    "terminal.integrated.allowChords": false,
    "workbench.enableExperiments": false,
    "workbench.settings.enableNaturalLanguageSearch": false,
    "update.mode": "none",
    "update.showReleaseNotes": false,
    "extensions.autoCheckUpdates": false,
    "extensions.autoUpdate": false,
    "npm.fetchOnlinePackageInfo": false,
    "workbench.editor.enablePreview": false,
    "workbench.tree.expandMode": "doubleClick",
    "workbench.list.openMode": "doubleClick",
    "workbench.iconTheme": "material-icon-theme",
    "python.linting.flake8Enabled": true,
    "python.linting.pylintEnabled": false,
    "explorer.autoReveal": false,
    "python.defaultInterpreterPath": "/usr/local/bin/python",
    "python.pythonPath": "/usr/local/bin/python",
    "files.insertFinalNewline": true,
    "files.trimFinalNewlines": true,
    "files.trimTrailingWhitespace": true,
    "python.linting.flake8CategorySeverity.E": "Warning",
    "python.linting.flake8CategorySeverity.F": "Warning",
    "python.linting.flake8Args": [
        "--max-line-length=100"
    ]
}
supervisorの設定
今回コンテ内のプロセス管理として、supervisorを利用しました。今回はcode-serverのみですが、後々複数サービス入れたい要件が出るかもと思い、導入してみました。
supervisordの起動スクリプト。
#!/bin/bash

# supervisordを起動
/usr/local/bin/supervisord
code-serverの起動スクリプト。
#!/bin/bash

/usr/bin/code-server --bind-addr 0.0.0.0:8888 --auth none
以下の設定で、supervisordにcode-serverのプロセスを起動してもらいます。
[program:code]
command=/dockerstartscript/code-start.sh
autostart=true
autorestart=true
stdout_logfile=/dev/stdout
stdout_logfile_maxbytes=0
stderr_logfile=/dev/stderr
stderr_logfile_maxbytes=0
インストールするPythonモジュール
好みで変えてもらっても良いです。
plotly
matplotlib
clickhouse-driver
numpy
pandas
fastapi
uvicorn[standard]
gunicorn
flake8
autopep8
Traefikの設定
# Provider
providers:
  docker:
    exposedByDefault: false

# エントリーポイント
entryPoints:
  http:
    address: ":80"
  # clickhouse:
  #   address: ":9000"
  # udp-test:
  #   address: ":3179/udp"

api:
  # Dashboard有効化
  dashboard: true
  insecure: true

# ログレベル
log:
  level: DEBUG
イメージのビルド
docker build -t code-server-python .
docker-compose.yaml
docker-compose.yamlという名前にしていますが、最近はcompose.yamlなどが主流になりつつあるみたいです。
SQLPadとClickHouseも使いたかったので、サービスに追加しています。
SQLPadとClickHouseについては、以下の記事を書きましたので参考になれば幸いです。
version: "3.3"
services:
  traefik:
    image: traefik:latest
    container_name: "traefik"
    ports:
      - "80:80"
      - "18000:8080"
    volumes:
      - "/var/run/docker.sock:/var/run/docker.sock:ro"
      - ./src/traefik/traefik.yml:/etc/traefik/traefik.yml

  code-server-python:
    image: code-server-python
    container_name: code-server-python
    hostname: code-server-python
    restart: always
    volumes:
      - ./volumes/code-data:/code-data
    labels:
      # traefik でのルーティング対象とする
      - traefik.enable=true
      #------------------------------
      # code.localhostでcode-serverにアクセスするための設定
      # code-server という名前のルーターを定義し、
      # エントリーポイント http (traefik.ymlで設定した任意の名前) と関連付け
      - traefik.http.routers.code-server.entrypoints=http
      # ルーター code-server のホスト名を "code.localhost" に設定
      - traefik.http.routers.code-server.rule=Host(`code.localhost`)
      # code-server-service という名前のサービスを定義し、ルーター code-server と関連付け
      - traefik.http.routers.code-server.service=code-server-service
      # code-server-serviceへのアクセスをポート3000 へ飛ばす
      - traefik.http.services.code-server-service.loadbalancer.server.port=8888
      #------------------------------
      # # Fastapiにアクセスするための設定
      - traefik.http.routers.fastapi.rule=Host(`fastapi.localhost`)
      - traefik.http.routers.fastapi.entrypoints=http
      - traefik.http.routers.fastapi.service=fastapi-service
      - traefik.http.services.fastapi-service.loadbalancer.server.port=8000

  sqlpad:
    image: sqlpad/sqlpad:latest
    container_name: sqlpad
    hostname: sqlpad
    restart: always
    environment:
      # 認証を無効化する
      SQLPAD_AUTH_DISABLED: true
      # ユーザーのロールを定める(admin or editor)
      SQLPAD_AUTH_DISABLED_DEFAULT_ROLE: admin
      # ログレベルの定義
      SQLPAD_APP_LOG_LEVEL: info
      SQLPAD_WEB_LOG_LEVEL: warn
    volumes:
      - ./volumes/sqlpad:/var/lib/sqlpad
    labels:
      - traefik.enable=true
      - traefik.http.routers.sqlpad.rule=Host(`sqlpad.localhost`)
      - traefik.http.routers.sqlpad.entrypoints=http
      - traefik.http.services.sqlpad.loadbalancer.server.port=3000

  clickhouse:
    image: yandex/clickhouse-server:22.1.3.7
    container_name: clickhouse
    hostname: clickhouse
    tty: true
    volumes:
      - ./volumes/click-data/var/lib/clickhouse:/var/lib/clickhouse
      - ./volumes/click-data/var/log/clickhouse-server:/var/log/clickhouse-server
    # labels:
    #   # traefik でのルーティング対象とする
    #   - 'traefik.enable=true'
    #   # TCPルータを追加
    #   # Traefikがこのコンテナにプロキシする条件を設定
    #   - 'traefik.tcp.routers.clickhouse.rule=HostSNI(`*`)'
    #   # エントリーポイントの設定
    #   - 'traefik.tcp.routers.clickhouse.entrypoints=clickhouse'
    #   # このサービスが9000番ポートを通して外部と通信することを宣言
    #   - 'traefik.tcp.services.clickhouse.loadbalancer.server.port=9000'
参考:Docker + Traefik で複数のポートを公開しているコンテナのルーティングを行う
コンテナ起動
docker-compose up -d
アクセス確認
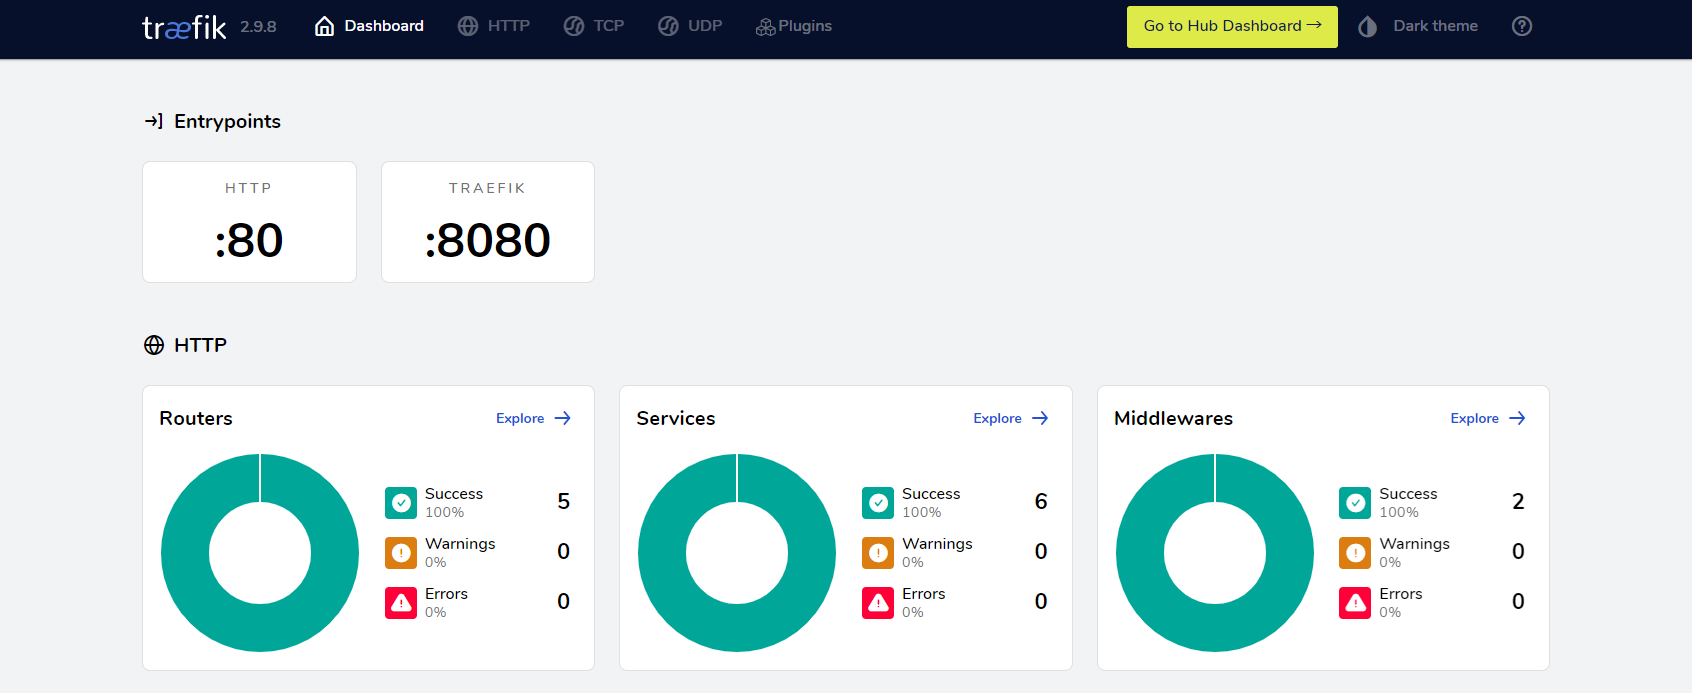
TraefikのDashboard
tarefik.ymlの以下の設定で、DashboardDを有効にしています。
api:
  # Dashboard有効化
  dashboard: true
  insecure: true
ルーティング情報などが確認できます。
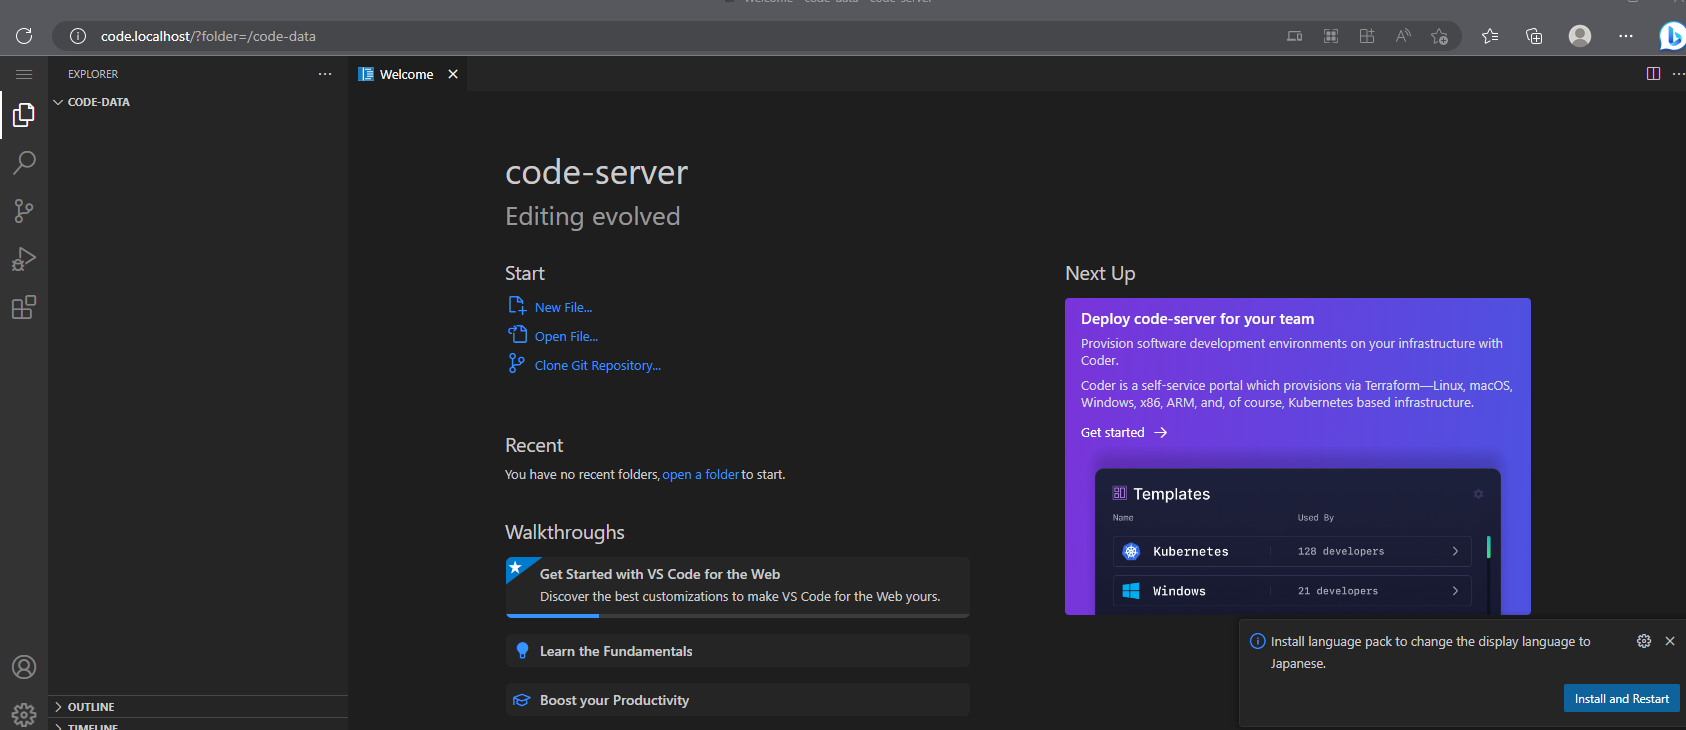
code-server
-
http://code.localhost/?folder=/code-data
code-serverのcode-dataディレクトリを開きます。./volumes/code-dataをコンテナ内の/code-dataにマウントしているのでデータが永続化されています。成果物はこのディレクトリに保管するようにします。
以下のように開ければOKです。
Labelで定義している以下の設定がcode-serverへのルーティング設定です。
      # traefik でのルーティング対象とする
      - traefik.enable=true
      #------------------------------
      # code.localhostでcode-serverにアクセスするための設定
      # code-server という名前のルーターを定義し、
      # エントリーポイント http (traefik.ymlで設定した任意の名前) と関連付け
      - traefik.http.routers.code-server.entrypoints=http
      # ルーター code-server のホスト名を "code.localhost" に設定
      - traefik.http.routers.code-server.rule=Host(`code.localhost`)
      # code-server-service という名前のサービスを定義し、ルーター code-server と関連付け
      - traefik.http.routers.code-server.service=code-server-service
      # code-server-serviceへのアクセスをポート3000 へ飛ばす
      - traefik.http.services.code-server-service.loadbalancer.server.port=8888
traefik.enable=trueはこのコンテナをTraefikでルーティング対象にするよという設定です。
Traefik.ymlに以下の設定をしておくと、traefik.enable=trueのLabel設定があるコンテナしかTraefikのスコープになりません。
providers:
  docker:
    exposedByDefault: false
SQLPad
以下のように開ければOKです。
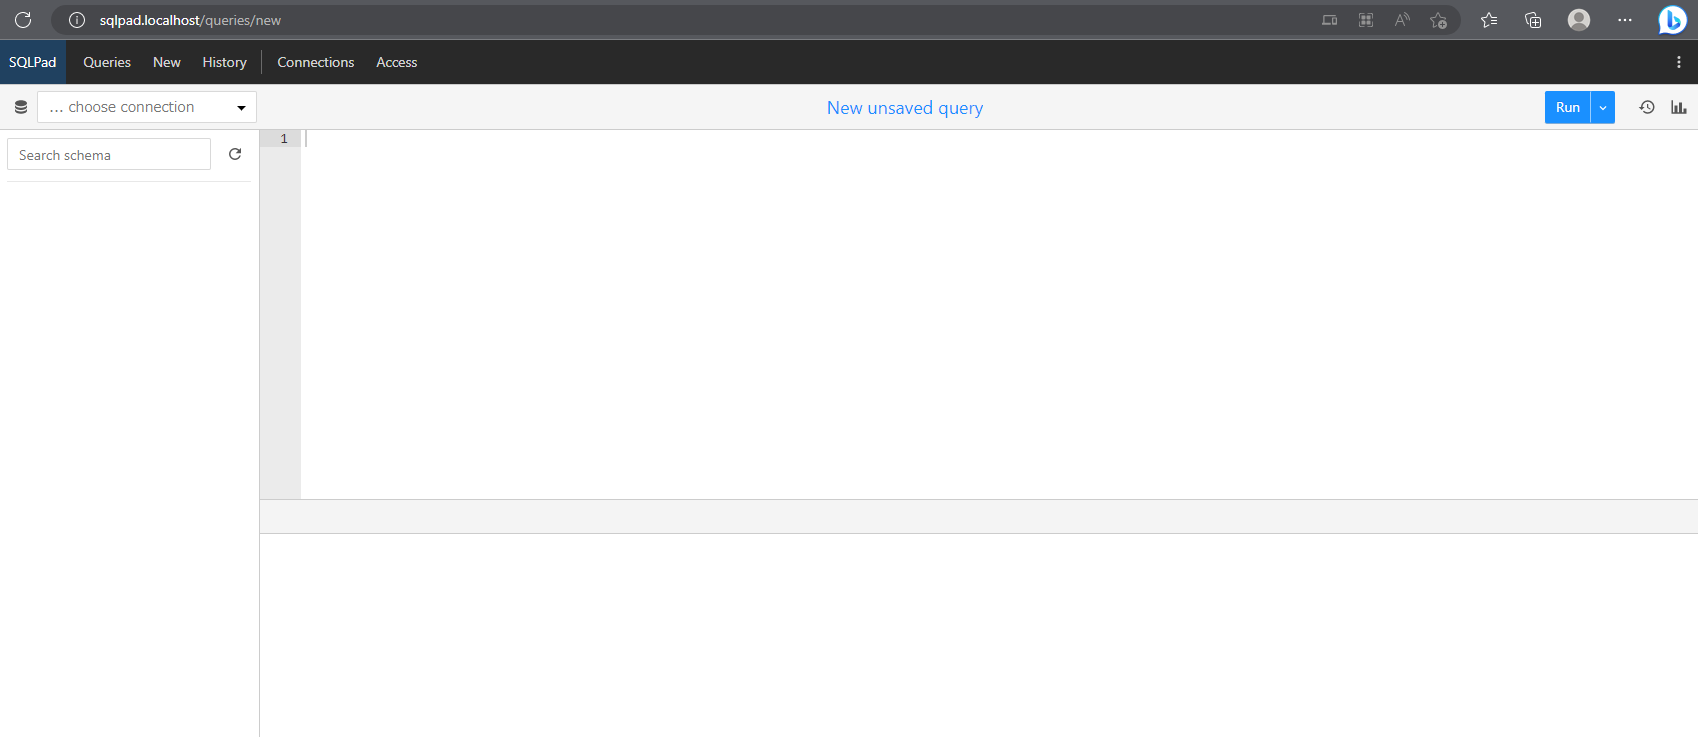
DBとの接続方法は以下の記事に記載しています。
FastAPI
code-server上でFastAPIのサンプルを作成して、実行してみます。
from fastapi import FastAPI

app = FastAPI()

@app.get("/")
def read_root():
    return {"Hello": "World"}


@app.get("/items/{item_id}")
def read_item(item_id: int, q: str = None):
    return {"item_id": item_id, "q": q}
code-server内でFastAPIを実行します。--host 0.0.0.0がないとアクセスできません。
uvicorn main:app --reload --host 0.0.0.0 --port 8000
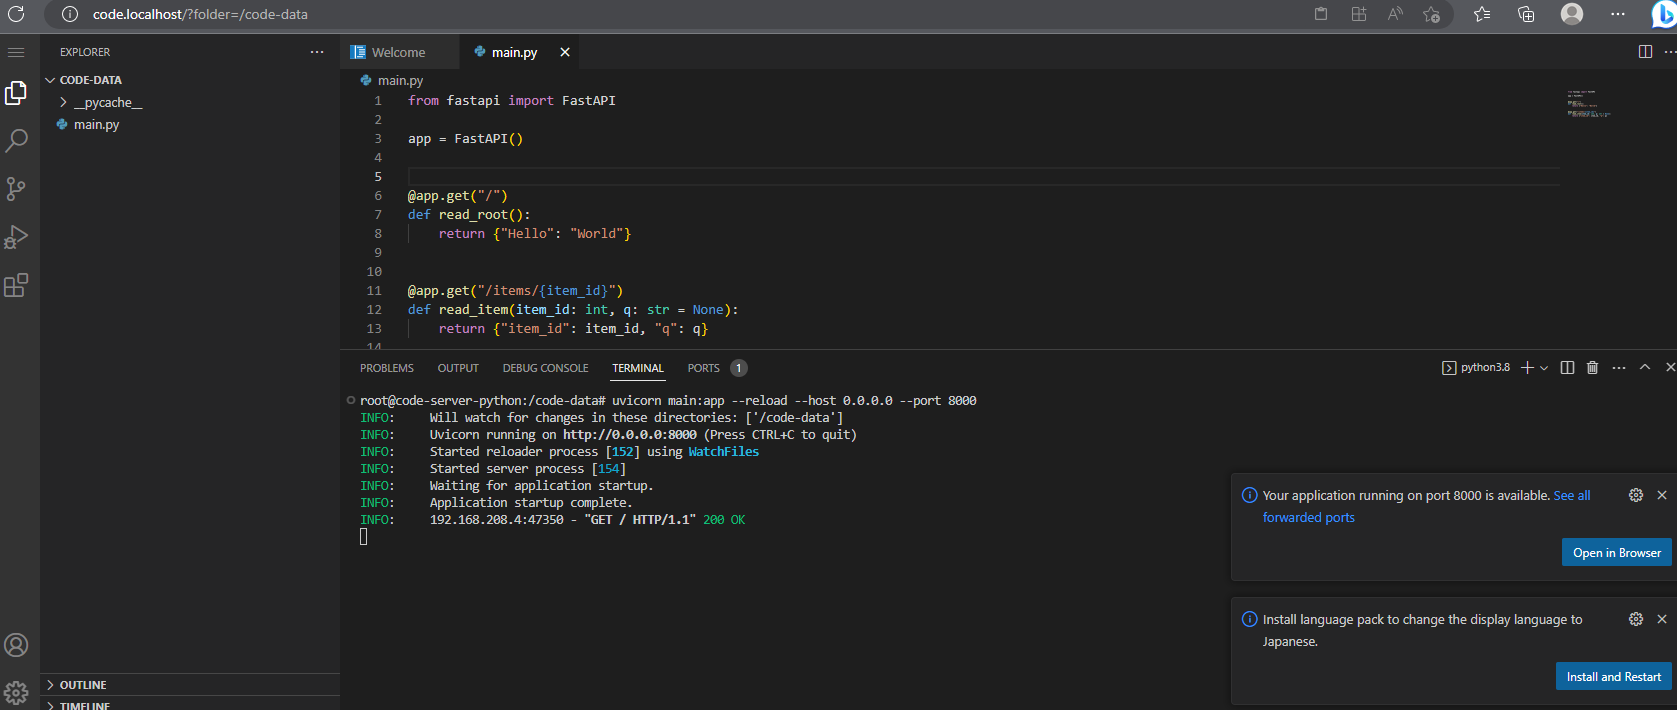
この状態で以下にアクセスします。
Hello Worldが表示できました。
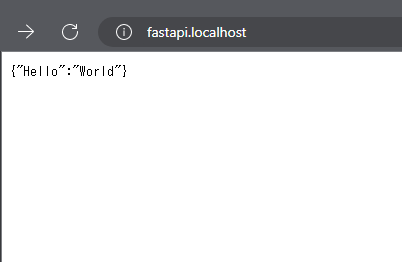
別のAPIも問題なさそうです。

まとめ
とりあえず実用的なレベルまでできたのでここまでにします。
code-serverの拡張機能などもう少し掘り下げても良かったです。日本語化も真面目にしても良かったですが、個人的に気にならなかったので放置しました。日本語化したい方はJapanese Language Pack for Visual Studio Codeなどの拡張機能でできるはず?
Traefikを使ったリバプロ環境下に開発に必要なサービスを導入する事ができました。
SQLPadとClickHouseと連携した環境にもできたため、DBと連携したAPIの開発もできそうです。
実際に利用してみて、改善点などがあればアップデートしていきたいと思います。